How to Use Pipe Solvent Safely: Step-by-Step Guide for Plumbing Joints
How to Use Pipe Solvent Safely: Step-by-Step Guide for Plumbing Joints
To use pipe solvent safely, ensure proper ventilation, wear chemical-resistant gloves and eye protection, and eliminate any ignition sources. Follow local plumbing codes throughout the process.
- Preparation: Drain all lines and deburr the pipe ends.
- Dry-Fitting: Assemble the joints without solvent to ensure a proper fit.
- Priming: Apply primer to the pipe and fitting if required by your local codes.
- Application: Use a thin, even coat of solvent cement on both surfaces.
- Joining: Insert the pipe into the fitting with a quarter-turn to ensure a secure bond.
- Curing: Hold the joint in place for the recommended tack time and allow for full cure time before testing the system.
Dispose of any leftover solvent according to local regulations. For detailed techniques, troubleshooting tips, and safety information, consult the full guide.
What Pipe Solvent Is and When to Use It
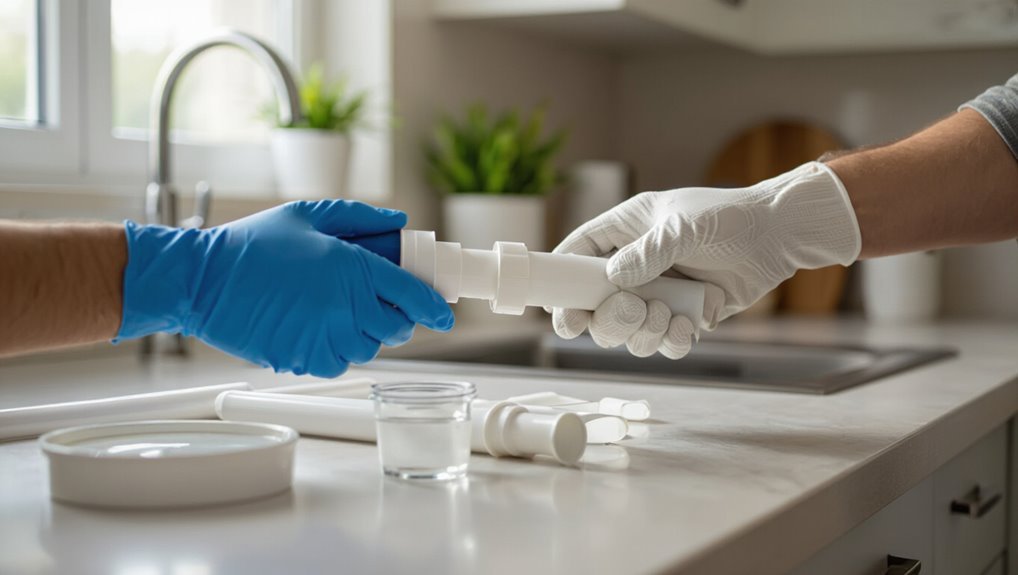
Pipe solvent, often called solvent cement, PVC glue, or primer, is a chemical used to chemically bond plastic pipe and fittings.
Different formulations are matched to specific materials—such as PVC, CPVC, or ABS—and to the joint types they will join.
It is commonly used in plumbing to assemble and seal pipe joints and fittings for water, drain, waste, and vent systems.
Definition and common names (solvent cement, PVC glue, primer)
Solvent cement, commonly called PVC glue or simply “cement,” is a chemical compound formulated to join plastic piping by softening and fusing the mating surfaces. A separate primer is often used beforehand to clean and further soften the plastic for a stronger bond.
It is described by trade names and generic terms; guidance on how to use pipe solvent emphasizes proper application, ventilation, and manufacturer instructions.
Types of pipe solvent and compatible pipe materials
Having outlined what solvent cement and primer do and how they are applied, attention turns to the different formulations and the plastic types they bond. Solvents vary by polymer: PVC, CPVC, and ABS require specific formulations; clear, medium, and heavy bodies suit sizes and fit tolerance; heat‑rated CPVC variants exist.
| Solvent Type | Compatible Pipe | Typical Viscosity |
|---|---|---|
| PVC | Rigid PVC | Medium |
| CPVC | CPVC | Medium-High |
| ABS | ABS | Low-Medium |
Typical applications in plumbing joints and fittings
Apply solvent cement when joining plastic piping and fittings that require a chemically fused bond rather than mechanical fastening.
Typical uses include DWV systems, potable water lines, irrigation, and HVAC condensate drains using PVC, CPVC, or ABS.
It is specified for slip-fit joints, couplings, elbows, tees, and junction fittings.
Solvent use is inappropriate for threaded, compression, or metal-to-plastic connections.
Quick Safety Summary and Mandatory Precautions
Before beginning work, the user must guarantee adequate ventilation, wear appropriate PPE, and eliminate ignition sources to reduce fire risk.
They should be aware that solvent fumes and skin contact can cause acute irritation and potential long-term health effects, and take steps to minimize exposure.
Compliance with applicable laws and building codes governing solvent use and disposal is mandatory.
Immediate safety steps before starting (ventilation, PPE, fire risk)
Although pipe solvent is designed for efficient bonding, immediate safety measures are essential: guarantee work area is well ventilated—open windows or use fans to disperse vapors.
Wear appropriate PPE: chemical-resistant gloves, eye protection, and a respirator if ventilation is limited.
Remove ignition sources, prohibit smoking, and have a fire extinguisher nearby.
Verify proper lighting and clear escape routes before beginning.
Health hazards to know (fumes, skin contact, long-term effects)
With ventilation, PPE, and fire precautions in place, attention shifts to the health risks associated with pipe solvent.
Vapors can cause dizziness, headaches, respiratory irritation, and nausea; prolonged inhalation risks nervous system effects.
Skin contact causes irritation, dermatitis, and chemical burns.
Repeated exposure may lead to chronic respiratory or neurological damage.
Mandatory precautions: use respirators, gloves, eye protection, and limit exposure duration.
Legal and building-code considerations for solvent use
When using pipe solvent, compliance with local laws and building codes is essential to guarantee safety, legal liability protection, and successful inspections.
Installers must follow manufacturer instructions, approved solvent types, ventilation standards, and fire-safety rules.
Obtain required permits for plumbing alterations, document materials and methods, and schedule inspections.
Noncompliance risks fines, failed inspections, and voided warranties; professionals should verify code updates before work.
Tools and Materials Needed
A concise inventory of required tools and supplies helps guarantee a reliable joint and efficient work.
Recommended personal protective equipment and ventilation options are essential to minimize exposure to fumes and chemical contact.
Selection guidance for the correct solvent cement and primer for the specific pipe material completes the preparation checklist.
List of required tools and supplies
Essential tools and supplies for safe pipe solvent use include personal protective equipment, proper solvent and primer, suitable brushes or applicators, cleaned and deburred pipe and fittings, solvent-resistant rags, and a well-ventilated workspace with a fire extinguisher nearby.
- Solvent and matching primer
- Correct-diameter pipes and fittings
- Applicator brushes
- Deburring tool and cleaner
- Solvent-resistant rags
Recommended PPE and ventilation equipment
Personal protective equipment and proper ventilation form the primary defense against chemical exposure and inhalation hazards during pipe solvent use.
Recommended items protect skin, eyes, lungs, and nearby workers while controlling vapors and spills.
- Chemical-resistant gloves (nitrile or neoprene)
- Safety goggles or face shield
- Respirator with organic vapor cartridges
- Portable exhaust fan or blower
- Disposable coveralls
How to select the correct solvent cement and primer for your pipe type
With safety gear and ventilation in place, attention shifts to matching solvent cement and primer to the specific pipe material and joint type; correct selection prevents weak bonds, chemical incompatibility, and premature failure.
Identify pipe material (PVC, CPVC, ABS, or PP), confirm manufacturer recommendations, choose compatible primer strength and cement viscosity for wall thickness and pressure rating, and verify shelf life and temperature limits before use.
Preparing Pipes and Work Area
Before applying solvent, the water supply must be shut off and the line drained to prevent leaks and solvent dilution.
Pipe ends should be cleaned and deburred with the appropriate tools, following a clear step-by-step sequence to guarantee proper bonding surfaces.
A dry fit and careful alignment of fittings is essential to confirm correct placement before any solvent is applied.
How to shut off water and drain the line safely
Locate and close the correct shutoff valve to isolate the section of pipe being worked on.
Then open a nearby faucet or drain cock to relieve pressure and empty residual water from the line.
Verify isolation by checking that flow stops; drain low points and traps.
Use a bucket and rags to catch remaining water, wear gloves and eye protection, and guarantee electrical devices nearby are disconnected.
Cleaning and deburring pipe ends step-by-step
Prepare pipe ends by removing burrs, scale, and debris to confirm proper solvent welds and prevent leaks.
Trim ends squarely with a pipe cutter, file or reamer internal and external burrs, and sand lightly to a uniform finish.
Wipe with a clean, lint-free cloth and inspect for cracks or deformities.
Ascertain surfaces are clean, dry, and smooth before proceeding.
Importance of dry fit and alignment before solvent application
Dry fitting and confirming alignment secures joints seat correctly and prevents irreversible mistakes once solvent is applied.
The installer verifies fit, rotation, and depth, marking reference points for final assembly. Proper alignment reduces stress, leaks, and rework.
Tight or loose fits are corrected now; any adjustments—reaming, shaving, or replacing components—occur before solvent contact to establish a secure, lasting bond.
Step-by-Step Procedure for Applying Pipe Solvent to Plumbing Joints
The procedure begins with proper priming, noting when primer is required and how to apply it evenly.
Next, solvent cement is brushed on with controlled strokes and quantities before inserting the pipe to the specified depth, twisting slightly and holding for the recommended cure time.
Finally, excess cement is wiped away and the joint is inspected during the initial cure period for alignment and secure bonding.
Priming: when and how to use primer correctly
When is primer necessary, and how should it be applied for reliable solvent-weld joints?
Primer is required for most PVC and CPVC pressure systems and any dirty or discolored surfaces.
The technician uses a brush or applicator to evenly scrub the pipe and fitting socket until softened and uniformly discolored.
Allow brief evaporation per manufacturer instructions before applying solvent cement to guarantee proper bonding.
Applying solvent cement: brush technique, amount, and motion
After primer has softened and uniformly discolored the joint surfaces and allowed the brief evaporation time recommended by the manufacturer, the technician proceeds to apply solvent cement using a controlled brush technique.
The brush evenly coats both pipe and fitting, avoiding excess drips. A thin, continuous layer covers mating surfaces; overlap guarantees coverage.
Short, uniform strokes prevent pooling and guarantee consistent fusion.
Joining pipes and fittings: insertion depth, twist, and hold time
One clear motion seats the pipe into the fitting to the prescribed insertion depth, typically marked by a scribe or manufacturer’s stop, ensuring full engagement without bottoming out; a slight quarter-turn while pushing distributes solvent cement and aligns the joint.
The assembler must hold the parts firmly in place for the manufacturer’s specified tack and cure times to prevent misalignment or extrusion of cement.
After seating, observe required hold durations.
Wiping excess cement and initial cure checks
Wipe any excess solvent cement from around the joint immediately using a clean, lint-free cloth or approved rag, working from the inside edge outward to prevent drawing cement into the bore; remove only the surplus—do not disturb the sealed interface—and inspect the bead for gaps, voids, or thin spots that could indicate inadequate coverage.
Allow initial set per manufacturer instructions, verify alignment, and perform a gentle pull test before full cure.
Curing, Testing, and Reinstating Service
The installer should allow recommended cure times based on pipe size and ambient temperature before any testing begins.
Once cured, the system is pressure-tested and inspected for leaks using appropriate gauges and visual checks.
After successful testing, water service is restored gradually following a defined sequence to verify integrity and prevent surge damage.
Recommended cure times by pipe size and temperature
Cure time varies with pipe diameter and ambient temperature, directly affecting solvent weld strength and readiness for testing or service. Recommended minimum cures: small diameters and warm conditions shorten cures; large diameters and cold require extended waits. Allow specified dwell before handling or filling. See guideline table for typical starting points.
| Pipe Size | Temp Range | Min Cure |
|---|---|---|
| 1/2–1″ | 60–80°F | 15–30 min |
| 1–2″ | 40–60°F | 30–60 min |
| 2–4″ | 20–40°F | 1–4 hrs |
Pressure testing and leak inspection procedures
Following the recommended cure times, inspections and pressure testing should proceed only after joints have reached their minimum set to avoid disturbing the solvent bond.
Perform gradual pressure increases to target test pressure, monitor gauges for stability, and hold for the required duration.
Visually and tactilely inspect joints for signs of seepage or stress.
Record results, isolate failures, and repair failed joints before any further testing.
Steps to safely restore water service
Begin restoring service only after verified cure and successful pressure testing confirm joint integrity; this guarantees solvent bonds have achieved required strength and no leaks are present.
Gradually reintroduce water, monitoring pressure and visible joints for at least 15–30 minutes. Record readings, check downstream fixtures, and purge trapped air.
If anomalies appear, isolate supply, depressurize, and repair before full service resumption.
Common Problems and How to Fix Them
Common problems include weak or leaking joints from insufficient solvent or poor fit, misaligned or improperly glued joints, and accidental solvent contact with skin, eyes, or clothing.
For each issue, the article outlines causes and step-by-step remedies—recutting and rejoining pipes, reglueing or replacing fittings, and proper cleanup and first aid procedures.
Safety protocols and preventive tips are emphasized to reduce recurrence and guarantee safe handling.
Causes and remedies for weak or leaking joints
Weak or leaking solvent-weld joints typically result from improper surface preparation, incorrect application of solvent cement, or movement before the joint cures.
Causes include dirty or oily surfaces, insufficient primer, under- or over-application of cement, and inadequate cure time.
Remedies: clean and prime surfaces, apply correct cement bead, assemble with specified rotation and hold time, and allow full cure before pressure testing.
Dealing with misaligned or improperly glued joints
When a solvent-weld joint is misaligned or poorly glued, the result can be leaks, reduced structural integrity, and difficulty fitting adjoining components.
Inspect and mark the joint, cut out the defective section, and clean surfaces.
Recut pipe ends squarely, chamfer, and dry-fit before reapplying primer and solvent per manufacturer instructions.
Allow full cure time and pressure-test to confirm integrity.
What to do if solvent gets on skin, eyes, or clothing
If solvent contacts skin, eyes, or clothing, prioritize immediate decontamination and medical evaluation for potential chemical burns or inhalation risks.
Remove contaminated clothing, flush skin with running water for at least 15 minutes, and wash gently with soap.
For eye exposure, irrigate continuously and seek urgent ophthalmic care.
If inhalation or persistent symptoms occur, call emergency services or poison control for further instructions.
Do’s, Don’ts, and Expert Tips for Durable Joints
The section outlines best practices for creating durable solvent-welded joints, including surface preparation, correct application, and curing times.
It also highlights common mistakes to avoid, such as inadequate cleaning, overapplication, and incorrect solvent selection.
Finally, it covers environmental and disposal guidance for leftover solvent and containers to guarantee safe, compliant handling.
Best practices to ensure long-lasting solvent-welded joints
Achieve durable solvent-welded joints by following a handful of proven practices that control fit, cleanliness, solvent selection, and curing conditions.
The technician guarantees tight tolerances, clean surfaces, correct solvent type, adequate dwell time, and proper support to prevent stress.
- Deburr and dry mating surfaces
- Use manufacturer-recommended solvent
- Apply even primer and solvent
- Align and seat fully
- Allow full cure before pressure testing
Common mistakes to avoid when using pipe solvent
Recognize common mistakes when using pipe solvent to prevent weak bonds, leaks, and costly rework: improper fit, contaminated surfaces, wrong solvent or skipped primer, rushed assembly, and inadequate cure time are the primary culprits.
- Guarantee correct pipe sizing and chamfering.
- Clean and dry mating surfaces thoroughly.
- Match solvent/primer to material.
- Assemble within working time; align quickly.
- Allow full cure before pressure testing or handling.
Environmental and disposal tips for leftover solvent and containers
How should leftover pipe solvent and its containers be handled to protect health and the environment?
Leftover solvent must never be poured down drains or onto soil.
Store tightly sealed in original containers, labeled, and away from heat.
Use household hazardous waste collection or hazardous waste services for disposal.
Empty containers with solvent residues remain hazardous—follow local regulations and recycle only at approved facilities.
Alternatives to Solvent Welding and When to Choose Them
The article compares mechanical fittings, threaded joints, and fusion methods, highlighting their relative strengths, leak risks, and installation requirements.
It notes specific cases where solvent welding is inappropriate, such as on certain plastics, high-pressure systems, or installations requiring frequent disassembly.
Guidance is provided on selecting an alternative based on material compatibility, service conditions, and maintenance needs.
Mechanical fittings, threaded joints, and fusion methods comparison
When solvent welding is impractical or undesirable, mechanical fittings, threaded joints, and fusion methods offer distinct alternatives that balance ease of installation, durability, and suitability for different pipe materials and service conditions. Mechanical fittings enable quick, reversible connections; threaded joints suit metal pipes and pressure systems; fusion yields permanent, leak‑resistant joins for thermoplastics.
| Type | Key trait |
|---|---|
| Mechanical | Reversible |
| Threaded | Strong |
| Fusion | Permanent |
Situations where solvent welding is not recommended
Choosing an alternative becomes necessary in situations where solvent welding poses safety risks, is incompatible with the materials, or cannot deliver the required performance.
Alternatives suit high-pressure systems, combustible or solvent-sensitive environments, dissimilar plastics (e.g., metal-to-plastic), repairable or removable joints, and codes prohibiting solvents.
Mechanical couplings, compression fittings, heat fusion, and flanged connections provide reliable, code-compliant options depending on application constraints.
Safety Checklist and Quick Reference Guide
A concise safety checklist outlines required PPE, workspace ventilation checks, and material compatibility before work begins.
A one-page on-job quick steps summary highlights surface preparation, solvent application timing, and safe handling procedures.
An emergency contacts and first-aid quick actions panel lists local emergency numbers, steps for chemical exposure, and when to seek professional medical help.
Pre-work safety checklist
Before any pipe solvent is opened, personnel must complete a concise pre-work safety checklist that verifies ventilation, PPE, fire prevention measures, and emergency procedures are in place; this quick reference reduces risks by ensuring the work area, tools, and team are prepared to handle fumes, spills, and ignition sources.
- Confirm adequate ventilation and airflow
- Inspect and don appropriate PPE
- Remove ignition sources and fire hazards
- Verify spill containment and absorbents
- Review emergency contacts and first-aid plan
On-job quick steps summary
With the pre-work checklist completed, personnel proceed to an on-job quick steps summary that keeps safety actions visible and simple during work.
The summary reinforces key actions and checks, minimizing risk and ensuring consistent procedure.
- Verify ventilation and monitor for fumes
- Wear required PPE and replace as needed
- Confirm correct solvent and applicator
- Apply solvent and assemble joints per instructions
- Inspect joints and clean spills immediately
Emergency contacts and first-aid quick actions
Several clearly posted emergency contacts and concise first-aid steps guarantee rapid, coordinated response if exposure, injury, or a spill occurs.
A visible card should list local emergency number, poison control, supervisor, nearest clinic, and safety officer.
Post simple actions: flush, ventilate, remove contaminated clothing, seek medical help, and report incidents immediately.
- Local emergency number
- Poison control
- Supervisor contact
- Nearest clinic
- Safety officer
Conclusion
Proper use of pipe solvent guarantees reliable, leak-free plumbing joints when paired with correct preparation and safety precautions. One striking statistic: improper solvent welding is responsible for roughly 20% of DIY plumbing failures, underscoring the value of following steps precisely. By preparing surfaces, ventilating the area, and allowing adequate cure time, users greatly reduce risks and extend joint life. Adhering to the guide’s checklist helps achieve durable, professional-quality results every time.