How to Plumbing Rough-In: Step-by-Step Guide for DIYers and Pros
How to Plumbing Rough-In: A Step-by-Step Guide
Plumbing rough-in is the process of installing drain, waste, vent, and supply piping before the finishing touches of a project. This essential step ensures your plumbing system functions properly and adheres to local codes. DIYers can tackle simple installations or remodels, but complex systems should involve a licensed plumber. Key considerations include accurate layout, proper slope, correct pipe sizing, accessible cleanouts, and compliance with permits.
To successfully complete a plumbing rough-in, follow these steps: test supply and DWV systems, document as-built conditions, and secure all fittings and supports. Continue reading for detailed procedures, common pitfalls to avoid, and tools that can help streamline your plumbing project.
How to Plumbing Rough-In and Overview
The rough-in phase establishes the hidden plumbing layout, including drain, waste, vent, and supply runs. It typically follows a stepwise process of layout, cutting and fitting pipes, and pressure testing.
Guidance should note that experienced DIYers comfortable with local codes and basic piping can handle many rough-ins. However, complex systems, gas lines, or unfamiliar permit requirements warrant a licensed plumber.
A concise project scope checklist—rooms affected, fixtures to serve, and necessary permits—helps define work boundaries and guarantees inspections are scheduled.
What a rough-in is and the basic steps
Plumbing rough-in refers to the stage when pipes, drains, and venting are laid out inside a building’s framing before walls and floors are finished.
It defines locations, slopes, and connections for fixtures. Steps summarize preparation, layout, installation, testing, and inspection.
- Plan fixture locations
- Mark rough-in dimensions
- Run supply and drain lines
- Install venting and supports
- Pressure-test and inspect
Who should attempt a DIY rough-in and when to call a pro
Although some homeowners possess the skills to rough-in basic lines, a DIY approach suits only those with solid experience in reading plans, measuring slopes, soldering or joining fittings, and maneuvering through local codes and permit processes.
Experienced DIYers may handle single fixtures or simple remodels; otherwise, complex systems, concealed drains, gas connections, or uncertain inspections warrant hiring a licensed plumber to avoid failures, delays, or code violations.
Project scope checklist (rooms, fixtures, permits)
After deciding whether a DIY approach is appropriate, the next step is defining the project scope: list each room involved, every fixture to be installed or moved, and the permits or inspections required by local authorities.
A concise checklist prevents omissions and informs cost, materials, and scheduling.
- Rooms affected
- Fixtures (sinks, tubs, toilets, showers)
- Supply/drain routing
- Required permits/inspections
- Timeline and contingencies
Basic Understanding What, Why, and Codes
Plumbing rough-in is defined as the installation of drain, waste, vent, and supply pipework and related fixtures’ placements before walls and floors are finished.
Proper rough-in guarantees systems function correctly, passes inspections, and prevents costly rework during later finishing stages.
General plumbing codes and permit requirements set minimum standards for pipe sizing, venting, slopes, and fixture locations that must be followed.
What is plumbing rough-in (definition and components)
A plumbing rough-in is the stage in construction when the water supply, drain-waste-vent (DWV), and gas piping systems are laid out and installed to their final locations before walls, floors, and ceilings are closed.
It includes branch lines, main stacks, fixture drains, vent connections, supply risers, shutoffs, and gas runs. Components are positioned per plans and code clearances for later finish work.
Why proper rough-in matters (function, inspections, future finish)
Proper rough-in work guarantees that water, waste, venting, and gas systems function reliably, meet code requirements, and allow finish trades to proceed without costly rework.
Correct placement, slope, and secure connections prevent leaks, blockages, and odor problems. Inspectors verify compliance before coverings.
Thoughtful rough-in simplifies future maintenance, preserves access, and protects final finishes, reducing delays and expensive corrective work.
Key plumbing codes and permit considerations (general overview)
Having established how accurate rough-in geometry and secure connections protect system function and finishes, attention turns to the regulatory framework that governs those installations.
Codes guarantee safety, water quality, and proper inspections; permits document compliance and schedule reviews. Practitioners should verify jurisdictional codes, permit timelines, and required inspections.
- Local plumbing code edition
- Permit application process
- Required inspections
- Licensed tradesperson rules
- Record-keeping requirements
Tools, Materials, and Site Preparation
The section outlines the essential hand and power tools a DIYer will need for a rough-in, alongside common piping materials—PVC, CPVC, PEX, and copper—and their typical uses.
It also covers required safety gear and simple workspace preparations to prevent accidents and protect finishes.
Finally, it explains how to read plans and measure layouts accurately, including scale, elevations, and trap arm lengths.
Essential tools for DIY rough-in
A compact set of reliable tools and materials makes a DIY plumbing rough-in efficient and safe.
Essential items focus on measuring, cutting, joining, and sealing, plus safety and marking.
Recommended toolkit includes:
- Tape measure and level
- Pipe cutter and deburring tool
- Adjustable wrench and basin wrench
- Primer, solvent, or crimp tool (system dependent)
- Safety glasses and gloves
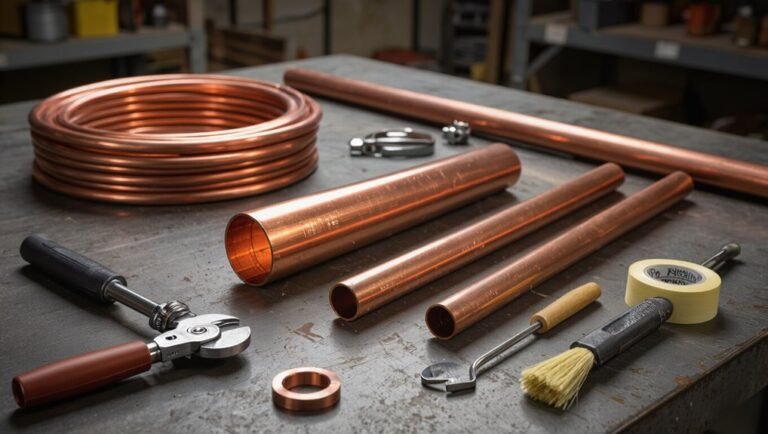
Common materials and pipe types (PVC, CPVC, PEX, copper)
After assembling the basic toolkit, attention turns to the pipes and fittings that will actually carry water and waste; choice of material affects cutting/joining methods, allowable uses, and long-term reliability. PVC: drain/waste, glued. CPVC: hot/cold potable, solvent-weld. PEX: flexible, crimp/expansion. Copper: durable, soldered.
| Material | Typical Use | Joining |
|---|---|---|
| PVC | Drain | Solvent |
| PEX | Supply | Crimp/Exp |
Safety gear and workspace preparation
Several essential items and preparations define a safe plumbing rough-in workspace: properly rated eye protection, gloves suited to the materials handled, respiratory protection for solvent fumes or dust, and sturdy footwear with slip-resistant soles.
The area must be well-lit, ventilated, and kept clear of tripping hazards.
Essential preparations include:
- Lockout/tagout electrical sources
- Adequate lighting and ventilation
- Clear, level working surface
- First-aid kit and fire extinguisher
- Secure storage for tools and materials
Reading plans and measuring layout (scale, elevations, trap arms)
With the workspace secured and safety measures in place, attention shifts to interpreting the plumbing drawings and laying out fixtures on-site.
The reader deciphers scale, elevations, and fixture locations, transfers dimensions with tape and laser, and marks centerlines.
Trap arm lengths, fall gradients, and venting positions are verified against code.
Accurate measurements prevent rework and guarantee proper drainage and vent performance.
Step-by-Step Plumbing Rough-In Process
The rough-in sequence begins with planning fixture locations and marking routes for sewer lines, vent stacks, and cleanouts.
Next comes installation of the DWV main with correct routing and slope, followed by branch drains to individual fixtures.
Finally, water supply lines are roughed in with separate hot and cold runs and any required manifolds.
Step 1 Planning layout and locating fixtures
Begin by mapping the fixture locations and main service points on the building plan, ensuring each sink, toilet, shower, and appliance is placed relative to walls, joists, and access panels.
The planner verifies clearances, alignment, and service access, coordinating with structural and electrical plans.
- Confirm fixture dimensions
- Note wall and joist constraints
- Identify access panels
- Coordinate hot/cold runs
- Allow maintenance clearances
Step 2 Marking sewer lines, vent stacks, and cleanouts
Mark sewer runs, vent stacks, and cleanouts directly onto the building plan and on-site reference points, ensuring horizontal and vertical alignments match slope, trap, and code requirements.
Use durable chalk, paint, or flags to transfer locations to framing and slab. Identify access for future maintenance, note pipe sizes, fixture connections, and inspection ports.
Verify clearances from structural elements and other utilities.
Step 3 Installing drain-waste-vent (DWV) main lines (routing and slope)
Layout and secure the DWV mains by following the planned routes while maintaining continuous slope and proper alignment with vents and fixture branches.
Measure and cut pipe to fit, use approved fittings and supports, and set slope typically 1/4″ per foot for horizontal drains.
Confirm cleanouts are accessible, joints are solvent-welded or gasketed per code, and test for proper fall and alignment before concealment.
Step 4 Installing branch drain lines to fixtures (toilets, sinks, tubs)
With the DWV mains in place, the installer runs branch drain lines from those mains to each fixture location, cutting and fitting pipe so each branch maintains the required slope and alignment.
Branches connect to fixtures via properly sized fittings, include cleanouts where needed, and guarantee trap arms meet code distances.
All joints are tested for fit and accessibility before final support and insulation.
Step 5 Roughing in water supply lines (hot/cold runs, manifolds)
Begin by establishing main water runs and manifolds that will supply hot and cold services to each fixture, ensuring pipe routes follow the plan and allow for accessible shutoffs.
Size supply lines for demand, locate manifolds near service entry, and run dedicated branch lines to fixtures.
Use appropriate materials, secure supports, test for leaks, and mark hot/cold identification for later hookups.
Step 6 Installing vents and vent terminations (placement and requirements)
After routing supply mains and manifolds, attention turns to the venting system that protects trap seals and allows drains to flow freely.
Vent layout follows code: place vents within required distance of traps, maintain proper pipe sizing and slope, and connect to main stack or individual vents.
Terminations must extend above roof, clear obstructions, and meet minimum height and setback requirements for odor and backflow prevention.
Step 7 Installing cleanouts and test ports
Installers now fit cleanouts and test ports at strategic locations to guarantee the system can be inspected, cleared, and pressure- or leak-tested during and after rough-in.
They place accessible, code-compliant cleanouts at base of stacks, long runs, and trap arms.
Test ports are positioned for temporary plugs and gauges.
All fittings are properly oriented, sealed, and labeled for future maintenance.
Step 8 Pressure and leak testing procedures (DWV and supply)
With cleanouts and test ports in place, the crew proceeds to pressure and leak testing to verify the integrity of both DWV and supply systems.
They use industry methods, monitor gauges, and record results before repairs.
Key actions include:
- Isolate systems
- Apply appropriate test medium
- Hold required pressure/time
- Inspect joints and fittings
- Release and document failures
Step 9 Documenting and preparing for inspection (photos, as-built notes)
Documenting and preparing for inspection requires systematic capture of as-built conditions and test results to guarantee code compliance and to expedite approvals.
Photographs of fittings, supports, slopes, and test setups should be clear, dated, and labeled.
Include as-built notes: material types, pipe sizes, elevations, deviations from plans, and pressure test readings.
Compile files for contractor, inspector, and owner distribution.
Common Scenarios and Example Layouts
Typical residential rough-in patterns are illustrated with a single-bathroom layout showing fixture locations and common dimensioning for clearances and trap distances.
A separate kitchen example covers rough-ins for sink, dishwasher, and range with supply and drain placements.
Strategies for multi-bath or stacked fixtures focus on space-saving stack venting and shared waste stacks to minimize piping runs.
Single bathroom rough-in layout with dimensions
A single bathroom rough-in layout establishes the planned locations and centerline dimensions for the toilet, lavatory, shower or tub, and associated vents and cleanouts to guarantee proper drainage and fixture alignment.
Typical dimensions: toilet center 15–18 inches from side wall, lavatory center 20–30 inches clearance, shower drain centered per base (36–60 inches stall), trap locations and 2% slope noted.
Kitchen rough-in for sink, dishwasher, and range
Lay out the kitchen rough-in by establishing centerlines and service locations for the sink, dishwasher, and range to guarantee proper appliance fit, drainage, venting, and gas or electrical access.
Typical layouts place sink centered on base cabinet run, dishwasher adjacent with 2″ drain drop to sink tailpiece, and range with dedicated gas line and 2″ vented waste for nearby oven or utility sink, keeping clearances per code.
Multi-bath or stacked fixtures strategies (space-saving and venting)
Several common multi-bath and stacked-fixture strategies optimize limited space while maintaining proper venting and service access.
Stack bathrooms vertically to share soil stacks, align fixtures back-to-back to minimize horizontal runs, and use common wet walls with dedicated vent stacks or combined vents sized per code.
Guarantee cleanout access, slope, and trap placement for reliable drainage and easy maintenance.
Common Mistakes, Troubleshooting, and How to Fix Them
Common rough-in errors include incorrect drain slope, inadequate venting, and improper pipe or fitting choices, each producing identifiable symptoms and requiring specific remedies.
Typical troubleshooting covers slow drains, visible leaks, and pressure loss, with inspection steps to isolate slope, vent, or material faults.
Practical fixes range from regrading or re-pitching drains, adding or correcting vents, to replacing unsuitable pipes and fittings following code and best practices.
Mistake: Incorrect slope on drain lines diagnosis and remediation
Incorrect slope on drain lines causes slow draining, frequent clogs, gurgling traps, and sewer gas odors when wastewater does not flow at the anticipated rate.
Diagnosis: inspect pitch with level, look for standing water, repeated blockages, and sagging sections.
Remediation: regrade runs to 1/4″ per foot for 2–3″ pipe (1/8″–1/4″ for larger), remove sags, shorten runs, replace or rehang supports.
Mistake: Improper venting signs and corrective measures
After correcting drain slope, attention must turn to venting, because inadequate vents produce symptoms that mimic clogs and slope problems.
Signs include slow drains, gurgling traps, siphoned fixtures, and sewer odors.
Corrective measures: verify vent size and placement, clear blockages, add or re-route vents to code, and install air admittance valves where permitted.
Test by flushing and observing trap seals.
Mistake: Wrong pipe selection or fittings consequences and replacement tips
Several types of pipe materials and fittings are available, and choosing the wrong combination can lead to leaks, reduced flow, chemical or temperature damage, and failed inspections.
Incorrect sizing, incompatible materials (e.g., PVC with CPVC for hot water), or improper connectors accelerate corrosion and joint failure.
Replace mismatched sections with code-compliant piping, use correct solvent or thread sealant, and pressure-test before concealment.
Troubleshooting guide: slow drain, leaks, pressure loss
Diagnose common rough-in issues by isolating symptoms—slow drains, visible or hidden leaks, and pressure loss—and tracing them to their probable causes such as partial blockages, improper slope, loose or incompatible fittings, or supply-line obstructions.
Then follow this concise troubleshooting checklist:
- Inspect trap and vent for blockages.
- Verify pipe slope with level.
- Pressure-test supply lines.
- Tighten or replace faulty fittings.
- Replace damaged sections immediately.
Best Practices, Time-Saving Tips, and Cost Considerations
The section outlines proven practices for durable rough-ins, including proper supports, insulation, and logical layout to minimize future failures.
It then highlights practical time-saving techniques that maintain quality—organization, prefabrication, and efficient sequencing—alongside typical budgeting ranges by project type.
Finally, it clarifies when a licensed plumber and formal inspections are required to meet code and protect the investment.
Best practices for durable rough-ins (supports, insulation, layout)
A durable plumbing rough-in depends on three core elements—secure supports, proper insulation, and an efficient layout—each chosen and executed to minimize movement, thermal issues, and future access problems.
Use metal hangers, blocking, and clamps at code spacing; insulate water and drain lines where condensation or freezing risk exists; plan straight runs, accessible cleanouts, and logical fixture groupings to reduce stress and simplify future repairs.
Tips to speed the job without cutting corners
With supports, insulation, and layout set to minimize future problems, crews can focus on executing the rough-in efficiently without sacrificing workmanship.
Clear planning, staging materials, and using proper tools reduce delays. Fast, safe work relies on training and inspection checkpoints.
- Pre-cut and label runs
- Use quality fittings and jigs
- Sequence tasks logically
- Keep spare parts accessible
- Schedule inspections early
Budgeting and cost estimates by project type
Several common plumbing rough-in project types—new construction, full remodels, bathroom additions, and service upgrades—carry distinct cost drivers that should be itemized in early estimates to avoid surprises. Itemize materials, labor, permits; include contingency. Compare quotes, plan sequencing to save time, and prioritize fixtures versus rough systems for budget control.
| Project Type | Typical Range | Key Cost Drivers |
|---|---|---|
| New construction | $3k–$15k | Labor, main lines |
| Remodel | $2k–$10k | Demo, rerouting |
| Addition/upgrade | $1k–$8k | Connections, permits |
When to hire licensed plumbing and inspection expectations
Budgeting that separates material, labor, and permit line items naturally leads to the question of when to engage a licensed plumber and what inspections will entail.
Licensed plumbers are recommended for code-critical work, complex drain/waste/vent layouts, gas, or concealed installations.
Expect permit fees, scheduled rough and final inspections, corrective punch lists, and contractor-certified affidavits; weigh saved time and liability reduction against added cost.
Tools and Materials Checklist to Take to the Job
A concise tools and materials checklist helps guarantee a smooth bathroom rough-in, listing pre-cut pipes, fittings, risers, and fixtures specific to lavatories, tubs, and showers.
A separate kitchen rough-in checklist covers sink supplies, drain assemblies, dishwasher and refrigerator hookups, and appropriate venting components.
A consumables and fasteners list rounds out the set with pipe sealants, solder, screws, anchors, and other small items frequently needed on site.
Pre-cut checklist for a bathroom rough-in
One compact checklist streamlines the pre-cut phase of a bathroom rough-in by listing exact tools, fittings, and materials to bring to the job: measuring and marking tools, pipe cutters and reamers, appropriate tubing and fittings (PEX, copper, or PVC), shutoff valves, threaded adapters, hangers and straps, pipe insulation, sealants and joint compounds, test caps and plugs, fasteners, and basic safety gear.
- Tubing lengths and matching fittings
- Fixture carrier and drain assemblies
- Valve rough‑ins and escutcheons
- Pressure test kit and caps
- Marking templates and level tools
Pre-cut checklist for a kitchen rough-in
Where the bathroom pre-cut list focused on compact fixture sets and pressure-testing, the kitchen rough-in requires a broader array of lengths, fittings, and specialty items to accommodate appliances and multiple service lines.
A concise kit should cover drain runs, venting, and supply branching with appliance-specific connectors.
- Rigid and flexible supply lines
- PVC/ABS drain segments
- Vent elbows and adapters
- Appliance connectors (dishwasher, icemaker)
- Isolation valves and stub-outs
Consumables and fasteners list
Fasteners and consumables form the backbone of any plumbing rough-in, ensuring assemblies stay secure and installations remain leak-free under daily use.
A concise job kit prevents delays and rework. Essentials focus on reliable joints, mounting, sealing, and protection.
- Copper and PEX fittings
- Threaded adapters and unions
- Pipe straps and hangers
- Teflon tape and thread sealant
- PVC cement and primer
Conclusion
Plumbing rough-in demands careful planning, code compliance, and skilled execution to guarantee long-term performance. Studies show that poor rough-ins account for roughly 30% of residential plumbing failures during the first year, highlighting the value of getting this phase right. By following step-by-step procedures, using proper tools and materials, and avoiding common mistakes, DIYers and professionals can save time and cost while creating reliable systems that simplify later finish work and reduce future repairs.