
How to Fix a Leaking Flapper on Your Toilet Quickly (Step-by-Step Guide)
To quickly fix a leaking toilet flapper, start by shutting off the water supply and flushing the toilet to empty the tank. Next, inspect the flapper for leaks by pressing it down. Adjust the chain to ensure the flapper seals completely, clean any mineral buildup from the valve seat, and replace the flapper if it’s cracked. After making these adjustments, perform a few test flushes to confirm the leak is resolved. For additional troubleshooting steps, refer to the detailed guide below.
How to Fix a Leaking Flapper on Your Toilet Quickly
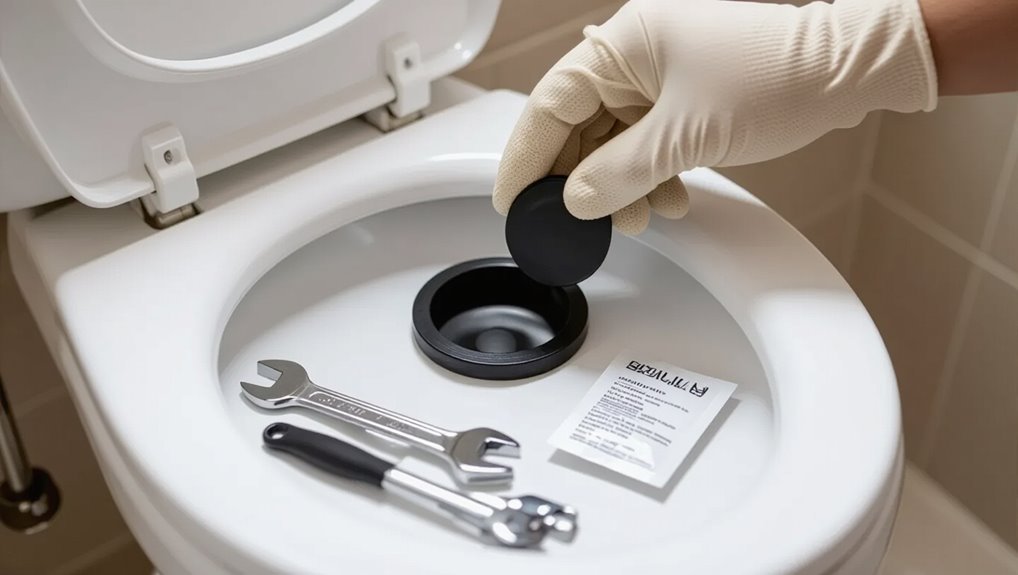
A leaking flapper is often caused by mineral buildup, warped rubber, misalignment, or a worn seal at the base of the flush valve.
Common signs include a running toilet between flushes, hissing or trickling sounds, and a fluctuating water level in the tank.
The choice to repair, replace the flapper, or swap the entire flush valve depends on damage extent, age of parts, and whether repeated leaks persist after basic fixes.
What causes a toilet flapper to leak
Several common issues can cause a toilet flapper to leak, most importantly deterioration of the rubber seal, misalignment, or mineral buildup on the valve seat.
Other causes include warped flapper material, stretched or broken lift chain, incorrect flapper size, and chemical damage from cleaners.
Understanding these factors helps homeowners learn how to fix leaking flapper on toilet and choose proper replacement or cleaning steps.
Signs your toilet flapper is leaking right now
When water slowly seeps from the tank into the bowl, it often indicates a flapper that isn’t sealing properly.
Other signs include a periodic refill sound, a constantly running fill valve, lower-than-normal tank water level, visible waterline changes in the bowl, and dye test results showing colored water entering the bowl.
Occasional weak flushes or inconsistent flush power also suggest flapper leakage.
When to repair vs. replace the flapper or entire flush valve
How can one decide whether a simple flapper repair will suffice or whether the entire flapper assembly—or even the full flush valve—needs replacement?
Inspect for cracks, warping, mineral buildup, or chain misalignment. Replace flapper if sealing lip damaged; repair if cleaning and adjustment fix leaks.
Replace flush valve when seat is corroded, cracked, or multiple repairs fail; persistent running or unstable flush indicate full replacement.
Tools and materials you’ll need
A concise list of tools and materials sets the stage for an efficient repair.
It should cover a basic toolkit checklist, recommended replacement flapper types with notes on compatibility, and optional supplies for stubborn or corroded parts.
Knowing these items beforehand prevents delays and guarantees the correct replacement is on hand.
Basic toolkit checklist
Basic hand tools and a few replacement parts make the flapper repair straightforward for most homeowners.
A concise toolkit reduces time and prevents surprises during the fix. Essential items cover inspection, removal, installation, and leak testing.
- Adjustable wrench
- Flathead screwdriver
- Replacement flapper and chain
- Towels and a small bucket
Recommended replacement flapper types and compatibility
When selecting a replacement flapper, homeowners should match material, size, and mounting style to the existing valve assembly to guarantee a reliable seal and proper flush volume.
Common options include rubber, silicone, and universal adjustable flappers; confirm diameter and hinge type.
Choose chemical-resistant materials for longevity and OEM-compatible models for exact fit.
- Rubber standard flapper
- Silicone flexible flapper
- Universal adjustable flapper
- OEM-specific replacement
Optional supplies for stubborn or corroded parts
Prepare a small kit of specialty supplies to handle stuck, corroded, or mineral-encrusted components that a standard flapper swap won’t free. Include items for cleaning, loosening, and replacing seized parts. Use nonabrasive cleaners, penetrating oil, nylon brushes, replacement clips, and rubber conditioner to restore seals or remove deposits before installing the new flapper.
| Item | Purpose |
|---|---|
| Penetrating oil | Loosen corroded metal |
| Nylon brush | Remove mineral buildup |
Quick triage: Diagnose the leak in under 5 minutes
A fast inspection begins with a visual check of the tank components to spot obvious wear, mineral buildup, or misalignment.
A dye test in the tank will quickly confirm whether water is leaking past the flapper.
Finally, the chain length and alignment should be checked to verify it isn’t holding the flapper partially open.
Step 1 Visual inspection of tank components
Quickly lift the tank lid and scan the interior to identify obvious issues: a warped flapper, mineral buildup, misaligned chain, or a cracked overflow tube.
Note water level relative to the overflow, check that the flapper seats evenly, guarantee the chain has slight slack without binding, and inspect the flush valve seal and surrounding rubber for hardening or tears.
Replace or clean as needed.
Step 2 Dye test to confirm flapper leak
Drop a few drops of food coloring into the tank and wait three to five minutes to see if colored water appears in the bowl; if it does, the flapper or its seal is leaking.
Record the result, then flush to clear dye. If no color appears, inspect other components.
This quick test isolates flapper leaks without tools and confirms whether replacement or reseating is required.
Step 3 Check chain length and alignment
Several small misalignments in the flapper chain can cause constant trickling; inspect the chain length and how it connects to the flush lever to diagnose this common, fast-to-fix issue. Confirm slight slack so the flapper seats fully but not so long it jams under the flapper. Adjust clip position or remove links, then retest flush.
| Problem | Cause | Fix |
|---|---|---|
| Too tight | Prevents seal | Add link/reattach |
| Too loose | Gets under flapper | Shorten chain |
| Off-center | Snags on seat | Reposition clip |
| Twisted | Uneven lift | Untwist chain |
Step-by-step repair: Fix a leaking flapper (fast method)
The technician begins by shutting off the water and draining the tank to prevent spills.
Next steps include cleaning the flapper and valve seat, adjusting or replacing the chain, and reseating the flapper for a proper seal.
A quick dye test or flush verifies success, with small chain or flapper position tweaks made to stop any remaining drip.
Shut off water and drain the tank
Begin by locating and turning the shutoff valve clockwise to stop water flow to the toilet.
Then flush to empty as much of the tank as possible. After flushing, hold the handle down until the water level stops dropping.
Use a sponge or towel to remove remaining water and prevent spills.
Verify the valve is fully closed before proceeding with flapper inspection or replacement.
Clean the flapper and valve seat
With the tank drained, inspect the flapper and valve seat for mineral buildup, debris, or softening that can prevent a proper seal.
Use a non-abrasive cloth and white vinegar to remove deposits; a soft brush dislodges stuck particles.
Rinse thoroughly, dry, and check edges for warping or cracks.
Clean surfaces promote better sealing and reveal whether replacement is necessary.
Adjust or replace the chain and reattach flapper
Inspect the chain length and attachment next, since an improperly adjusted or damaged chain is a common cause of a flapper that won’t seal.
Detach the chain from the flush lever hook, remove excess slack or shorten by one link, or replace corroded chain.
Reattach to allow slight slack when flapper rests.
Verify no twists or catches before closing the tank.
Re-seat the flapper and test with a dye or simple flush
Seat the flapper firmly onto the valve seat, ensuring the rubber rim sits evenly all the way around.
Close the tank, refill, then add a few drops of food coloring or ink to the tank.
Wait ten minutes without flushing; observe the bowl for color.
No color indicates a good seal. If dye appears, re-seat and retest or consider replacing the flapper.
Fine adjustments to stop minor dripping
If minor dripping persists after reseating, small adjustments can often stop the leak without replacing parts.
The user should tighten the chain to remove slack, ensuring the flapper fully seats, or shorten it if too tight.
Slightly rotate or realign the flapper for an even seal.
Clean seating surfaces and retest; repeat minimal tweaks until dripping ceases.
Replacing the flapper: Complete walkthrough
The following walkthrough covers selecting the correct flapper model, removing the old unit safely, and installing the replacement with proper chain connection.
It then explains how to test the flush, adjust chain length, and set the flush volume for a reliable seal.
Clear steps and brief cautions guide the process from start to finish.
Choosing the correct flapper model
Which flapper fits best depends on the toilet’s flush valve size, chain attachment, and material compatibility. Select between 2-inch and 3-inch diameters, universal vs. model-specific designs, and rubber or silicone materials. Confirm chain clip type and lift style. Match manufacturer specs for reliable sealing and longevity.
| Feature | Recommendation |
|---|---|
| Size | 2″ or 3″ |
| Material | Rubber or silicone |
| Attachment | Standard clip or hook |
| Compatibility | Model-specific when available |
Removing the old flapper safely
After confirming the correct flapper model, proceed to remove the old one to avoid damage to the flush valve and chain.
Turn off water supply and flush to empty the tank.
Disconnect the chain from the lever and unhook the flapper from the flush valve pegs or seat.
Inspect the valve for mineral buildup or torn seals.
Clean the area before preparing the new flapper.
Installing the new flapper and connecting the chain
Begin by positioning the new flapper over the flush valve so its ears or tabs align with the pegs, ensuring the sealing surface sits flat against the valve seat. Attach ears, clip securely, and hook the chain to the flush lever arm without kinks. Verify free movement and unobstructed seal.
| Step | Action |
|---|---|
| 1 | Position flapper |
| 2 | Clip ears |
| 3 | Hook chain |
| 4 | Check movement |
Testing and adjusting flush volume and chain length
Test the flapper by flushing the toilet and observing the water level, the seal, and whether the flapper returns fully to its seat.
Adjust chain length so there’s slight slack when closed—about 1/2 inch—avoiding tangles or too much slack that prevents lift.
Modify float or fill valve to set desired flush volume, then repeat flushes until seal, lift, and tank refill are consistent.
Troubleshooting common problems after repair
If a toilet continues to run after cleaning or replacing the flapper, several troubleshooting steps help isolate the cause.
Common issues include an improperly adjusted chain, a warped valve seat or rough sealing surface that prevents a tight seal, and problems with the fill valve that mimic flapper leaks.
Each potential cause should be inspected and corrected in turn to restore a reliable seal.
Flapper still leaks despite cleaning or replacement
When a toilet continues to leak after the flapper has been cleaned or replaced, the issue often lies beyond the flapper itself and requires systematic troubleshooting.
Common causes include a warped seat, incorrect flapper size or grade, worn flush-valve sealing surfaces, a misaligned chain or arm, mineral buildup, or excessive water pressure.
Inspect the valve seat for warping, replace with correct flapper grade, clean deposits, and check for damaged sealing surfaces.
Chain too short or too long causing poor seal
A chain that is either too short or too long can prevent the flapper from seating properly, allowing water to seep past the seal or preventing a full lift during a flush.
Inspect slack with the flapper closed; adjust length so there is slight slack but not enough to drape under the flapper.
Reattach to a different hole on the flush lever if needed.
Warped valve seat or rough sealing surface
Inspect the valve seat for warping, pitting, or roughness that can prevent the flapper from forming a complete seal. If imperfections exist, clean gently with a cloth and light abrasive or replace the seat. Verify the flapper rests evenly. Consider a rubber seat or replacement flapper designed for uneven surfaces to restore reliable sealing.
| Issue | Cause | Fix |
|---|---|---|
| Warp | Age/impact | Replace |
| Pitting | Corrosion | Smooth/replace |
Fill valve issues mistaken for flapper leaks
How can a running or refill problem be clearly traced to the fill valve rather than the flapper?
Inspect whether water rises in the tank after the flapper seals; observe continuous trickle or intermittent refill without drop in bowl.
Test by lifting float—if fill stops correctly, flapper is fine.
Replace or adjust the fill valve if overflow tube siphons or valve fails to shut.
When to call a plumber or replace the flush valve
Persistent leaks, visible corrosion, warped valve seats, or cracks in the flush valve indicate replacement rather than simple flapper adjustment.
The decision should weigh parts cost and expected labor time against the homeowner’s skill and available tools; complex valve replacement often justifies professional service.
When calling a plumber, provide the toilet model, describe observed symptoms (continuous running, water level change, or visible damage), and note any DIY steps already attempted to speed diagnosis.
Signs of a damaged flush valve or corrosion
When water continues to seep into the bowl despite a new flapper or repeated adjustments, it may indicate damage or corrosion to the flush valve rather than a simple seal issue.
Visible pitting, mineral buildup, persistent leaks after flapper replacement, or warped valve seats suggest replacement or professional inspection.
- Visible pitting or cracks
- Hard mineral deposits
- Continuous leakage after repairs
- Distorted or uneven valve seat
Cost and time considerations for professional repair vs DIY
Although minor flapper issues are often resolved with a quick replacement, decisions about repair versus calling a plumber hinge on cost, time, and the condition of the flush valve.
Simple DIY fixes typically take 15–45 minutes and cost $5–30 for parts, while professional service for a damaged or corroded flush valve can run $150–400 or more and may require an hour or longer.
If corrosion, warped seats, or repeated leaks occur, professional replacement is advisable.
How to describe the problem to a plumber for faster service
How should the issue be summarized to get prompt, accurate service?
Describe constant or intermittent tank-to-bowl leaking, audible hissing, or frequent refills. Note flapper age/material, recent adjustments, and whether water level drops visibly.
Report model of toilet if known and whether flapper seats cleanly. Mention attempted DIY fixes.
This lets the plumber bring appropriate replacement flappers, seals, or a flush valve.
Preventive maintenance to avoid future flapper leaks
Preventive maintenance can greatly reduce flapper failures through regular inspections and simple monthly checks of seating, chain tension, and wear.
Attention to water quality and cautious use of tank additives helps protect rubber parts from premature deterioration.
Understanding typical flapper lifespans and following a proactive replacement schedule guarantees reliable operation before leaks develop.
Regular inspections and simple monthly checks
A brief monthly check of the toilet tank can catch small flapper issues before they become leaks: inspect the flapper for warping, mineral buildup, or soft spots; verify the chain has the proper slack and is not rubbing; and confirm the flapper seats evenly on the flush valve.
Regular checks prolong lifespan and prevent unexpected water waste.
- Look for visible wear or cracks
- Test seal by adding food coloring
- Adjust chain length as needed
- Clean around seat and hinge
Water quality and additive tips that affect rubber parts
Because tap water chemistry and common additives directly affect rubber longevity, owners should consider their water quality when maintaining flappers.
Hard water deposits stiffen rubber; chlorinated or high-iron supplies cause accelerated deterioration.
Avoid bleach-based tank cleaners and harsh descalers; use mild, flapper-safe cleaners.
Consider periodic flushing or a water softener if mineral buildup is evident.
Test water before adding treatments.
Lifespan expectancy of flappers and replacement schedule
Most flappers last between 3 and 7 years under normal household conditions, though factors like water chemistry, tank additives, and frequency of use can shorten that span. Routine inspection every 6–12 months and replacement at first sign of wear prevents leaks. Follow a simple schedule based on usage and water quality.
| Condition | Inspection | Suggested Replacement |
|---|---|---|
| Soft water, low use | 12 months | 5–7 years |
| Hard water, regular use | 6 months | 3–5 years |
| Additives used | 6 months | 3–4 years |
Quick reference: Fast fixes and checklist for emergencies
When a toilet flapper leaks suddenly, follow a short, ordered checklist to stop water loss and restore function:
- Turn off water supply at the shutoff valve.
- Lift tank lid and press flapper to test sealing; reseat if misaligned.
- Replace or temporarily seal flapper with a rubber patch if torn.
- Inspect and adjust chain length to prevent partial opening.
Conclusion
Fixing a leaking toilet flapper restores efficiency and prevents water waste. Studies show a single leaky flapper can waste up to 200 gallons daily, so timely repair matters. The guide equips readers with quick diagnosis, fast fixes, full replacement steps, troubleshooting tips, and maintenance advice. If problems persist or the flush valve is damaged, consult a professional. Following these concise steps helps conserve water, save money, and avoid larger plumbing issues.
