How to Drain a Radiator System Safely: Step-by-Step Guide for Homeowners
To safely drain a radiator system, start by identifying your heating type and isolating the radiator by closing the valves. Next, wear protective gear, open the bleed nipple to release air, and attach a hose to the drain point. Control the flow with the lockshield or drain cock into a sealed container. For draining the entire system, vent the highest point and carefully use the boiler drain. After draining, refill slowly, bleed each radiator, and check for pressure and leaks. Follow these steps for a safe and effective process.
How to Drain a Radiator System Safely: Quick Overview
The overview explains when and why a radiator system should be drained, highlighting routine maintenance, repairs, and contamination as common triggers.
It then summarizes essential safety precautions and personal protective equipment required to prevent burns, chemical exposure, and slips.
Finally, it lists the basic tools and materials—drain pan, wrenches, hoses, replacement fluids, and absorbents—needed to complete the job safely.
When and why you should drain a radiator system
Drain a radiator system whenever system maintenance, component replacement, or contamination requires it, because removing water and sludge prevents corrosion, blockages, and inefficient heat transfer.
Homeowners should drain before major repairs, when flushing out rust or sediment, or to replace valves and radiators.
Knowing how to drain a radiator system helps schedule upkeep, restore efficiency, and avoid costly damage.
Safety precautions and personal protective equipment required
Before starting work, assess hazards and assemble appropriate protective gear to prevent burns, chemical exposure, and slips.
Wear heat-resistant gloves, eye protection, and sturdy footwear with non-slip soles. Use long sleeves and chemical-resistant aprons if coolant may contact skin.
Verify good ventilation to avoid inhaling fumes. Keep a first-aid kit and emergency contact information nearby, and work with a partner when possible.
Tools and materials checklist
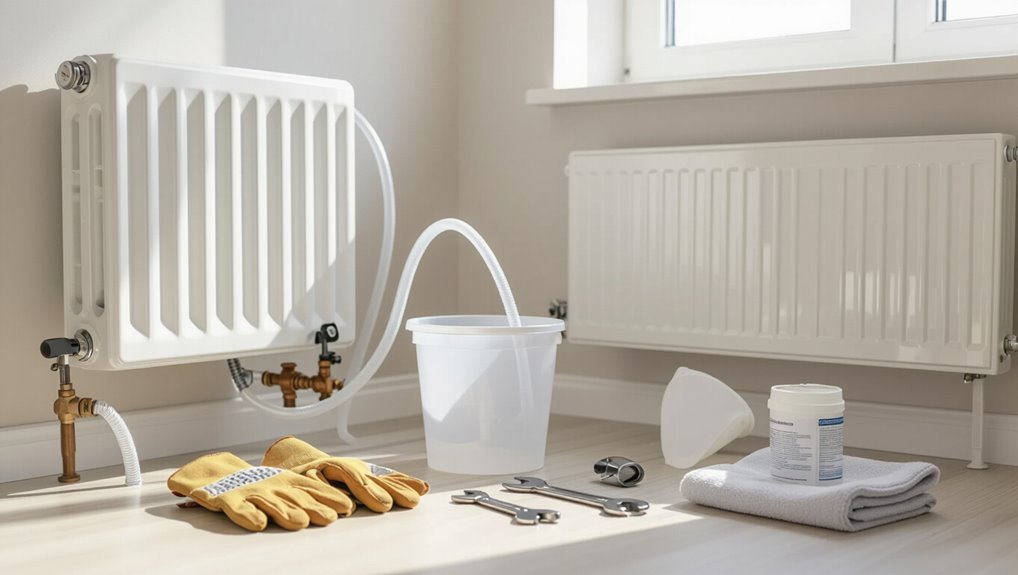
A concise checklist helps guarantee the radiator drain proceeds efficiently and safely: basic hand tools (adjustable wrench, pliers, screwdrivers), a drain pan or clean container sized for the system’s volume, appropriate hoses and fittings to direct coolant, and replacement drain plug or washer if corroded.
Recommended items visualize the task:
- Rubber gloves and safety goggles
- Large drain pan
- Clear hose and clamps
- Clean rags and absorbent pads
- Small flashlight and inspection mirror
Understanding Your Heating System Before Draining
Before attempting to drain a radiator system, the reader should identify the type of system in use—single-pipe, two-pipe, or combi boiler—as each requires different steps.
They must locate key components such as the boiler, radiators, valves (including bleed nipples and lockshield valves), the drain cock, and the filling loop.
Additionally, they should learn to recognize bleed nipples versus lockshield valves by shape and position.
Checking the system pressure gauge and understanding its safe range is essential, since incorrect pressure affects drainage and system integrity.
Types of radiator systems (single-pipe, two-pipe, combi boilers)
Understanding the type of radiator system is essential for planning a safe drain, since single-pipe, two-pipe, and combi boiler setups have different valves, flow patterns, and isolation points that affect procedure and risk.
The homeowner should identify layout differences before any work.
- Single pipe looped radiators
- Parallel two-pipe supply/return runs
- Combi boiler central hub
- Radiator thermostatic valves
- Pipework access points and traps
Key components to locate: boiler, radiators, valves, drain cock, filling loop
Locating the boiler, each radiator, and the associated valves is the first practical step in preparing to drain a heating system.
The homeowner should identify the boiler unit, all radiators, isolation valves, a drain cock or drain point, and the filling loop connecting to mains.
Marking these components and noting access points reduces errors and speeds safe, controlled draining.
How to identify radiator bleed nipples and lockshield valves
With the boiler, radiators and service points identified, the next step is to spot each radiator’s bleed nipple and lockshield valve so air and water can be released or isolated accurately.
Bleed nipples sit at the top end, a small square or slotted screw for a radiator key.
Lockshield valves are at the opposite pipe connection, often covered by a plastic cap and adjusted with adjustable pliers.
How to read the system pressure and why it matters
Why check the boiler pressure gauge before draining? The technician notes system pressure to confirm safe drain conditions: typical cold pressure sits around 1–1.5 bar.
High pressure risks forcing hot water out when valves open; low pressure can indicate leaks or airlocks.
Adjusting to recommended pressure prevents pump damage, avoids air ingress, and guarantees safe, controlled bleeding and refilling afterward.
Preparatory Steps to Prevent Damage and Injury
Before beginning any draining procedure, the operator should shut off the boiler and isolate its power and fuel supplies. Then verify the system has cooled to a safe temperature.
Protective coverings and a designated drain area should be prepared to safeguard floors and furniture while individual radiator valves and the main water feed are closed.
Finally, settings such as the thermostat, TRVs, and pump controls should be recorded or backed up to preserve system configuration.
Turning off the boiler and isolating power and fuel supply
Shut down the boiler and isolate its power and fuel sources to eliminate the primary hazards before any drainage work begins.
The operator should switch off the boiler at its control panel, turn off the circuit breaker, and close the gas or oil supply valve.
Lockout-tagout or clear labeling prevents accidental reactivation.
Confirm indicator lights are off before proceeding.
Allowing the system to cool and verifying temperature
Once power and fuel are isolated, allow the boiler and radiator system to cool to prevent burns and pressure-related hazards; wait until surface temperatures drop and pressure gauges reach ambient levels.
Use a thermometer or infrared gun to confirm safe temperatures. Advise checking multiple radiators and the boiler casing.
Proceed only when readings indicate no residual heat or elevated pressure, reducing risk during draining.
Protecting floors and furniture; setting up a drain area
When preparing to drain the radiator system, establish a clear work area by moving furniture away from the boiler and routing foot traffic to minimize accidental contact.
Protect floors with absorbent pads or heavy-duty plastic sheeting and place drip trays beneath valves and hose connections to catch spills.
Secure hoses to drains, keep absorbents on hand for seepage, and mark wet zones to prevent slips.
Shutting off water supply and closing individual radiator valves
With the work area secured and spill containment in place, attention turns to stopping the water flow and isolating each radiator to prevent leaks and pressure-related injuries.
The main water feed is shut at the stopcock; individual radiator valves—both inlet and lockshield—are closed.
Bleed valves remain slightly open to relieve residual pressure.
Confirm isolation visually before proceeding with drainage.
Backing up settings: thermostat, TRVs, and pump controls
A brief check of all control settings prevents unintended operation during drainage and protects the system from pump damage or thermostat miscalibration.
The homeowner notes current thermostat program, switches TRVs to frost or fully open position, and sets the circulating pump to off or manual stop.
Record settings or photograph displays for accurate restoration after refilling and commissioning.
Step-by-Step Procedure to Drain a Radiator System
The following section outlines clear procedures for both Method A (draining individual radiators) and Method B (draining the entire central heating system via the boiler or drain point).
It also covers safe hose-and-bucket use with recommended adapters and fittings, steps for bleeding radiators to release trapped air, and techniques for monitoring and controlling flow to prevent spills.
Readers will be guided through the sequence of actions and safety checks required for an orderly, leak-free drain.
Method A Draining individual radiators safely
Begin by isolating the radiator from the system to prevent water flow and pressure changes while working.
Close the radiator valves, open a bleed valve to release trapped air, attach a hose and a suitable container to the drain point, and slowly loosen the lockshield to control flow.
Monitor for leaks, re-tighten valves when empty, and dispose of water safely.
Method B Draining the entire central heating system via boiler/drain point
After isolating and emptying individual radiators, attention shifts to draining the entire central heating circuit via the boiler or system drain point.
The technician closes feed valves, attaches a suitable drain line to the boiler drain, opens the drain and a vent at the highest point, then monitors flow until clear.
Finally, the drain is closed and valves left in a safe, labelled position.
How to use a hose and bucket safely; recommended adapters and fittings
Several simple tools — a flexible garden hose, a sturdy bucket, and the correct adapters — allow safe, controlled draining of the system; attach a hose to the radiator drain valve using a compatible brass or nylon spigot adapter, secure clamps to prevent leaks, position the bucket on level ground, and monitor flow.
Use a shutoff and quick-release coupling for fast isolation and safe disposal.
Managing trapped air: how to bleed radiators during draining
When draining a radiator system, trapped air must be released methodically to prevent pressure pockets and guarantee a full, controlled emptying.
Bleeding each radiator in sequence—from the highest to the lowest point in the system—allows water to flow out smoothly while avoiding air locks.
Use a radiator key, open valves slowly until hissing stops, close when steady flow appears, and repeat room-to-room.
Monitoring and controlling water flow to avoid spills
Begin by establishing a controlled drain point and positioning suitable containers and absorbent materials to catch any runoff; this prevents spills from spreading and makes flow easier to monitor.
The operator then opens valves slowly, watching flow rate and container capacity.
Adjust valve position to maintain steady drip or stream, pause to empty containers, and use a hose or funnel to direct water away from finishes and electrical components.
Refilling and Repressurising the System After Work
Once the radiator work is complete, attention turns to refilling the system via the boiler’s filling loop and restoring the correct operating pressure.
The procedure includes bleeding each radiator to expel trapped air, verifying the boiler’s pressure gauge matches the manufacturer’s specification, and running the pump to confirm circulation.
Finally, a thorough check for visible leaks and steady pump operation guarantees the system is safe to return to normal service.
How to refill the system correctly using the filling loop
Reopen the filling loop valves slowly to introduce mains water back into the closed heating circuit while monitoring the system pressure.
Allow water to flow until radiators begin to feel warm and visible trapped air escapes via bleed valves.
Close the filling loop when flow is steady.
Check for leaks at connections, tighten if necessary, then bleed each radiator to remove remaining air before final checks.
How to repressurise to the correct boiler operating pressure
After the filling loop has been closed and radiators have been bled, attention turns to restoring the boiler to its correct operating pressure.
The technician opens the filling valve briefly while monitoring the pressure gauge, topping up to the manufacturer’s recommended value (typically 1–1.5 bar cold).
Close the valve, secure the loop, verify no leaks, and restart the boiler to confirm stable pressure.
Bleeding radiators to remove air pockets after refilling
Begin by isolating each radiator and preparing a bleed key and a cloth or small container to catch water.
Working from the lowest to highest radiators, open each bleed valve slowly until air hisses and water flows steadily.
Close valves promptly.
Recheck boiler pressure after bleeding; top up if it has fallen.
Repeat if cold spots persist, then allow system to stabilise.
Checking for leaks and confirming proper pump operation
Inspect the system visually and run the pump briefly to verify there are no leaks and that circulation has resumed correctly.
Observe joints, valves and radiators for drips or dampness.
Listen for unusual noises from the pump indicating air or bearing issues.
Repressurise if pressure has dropped, recheck after a short run, and document any persistent faults for professional service.
Troubleshooting Common Issues
When problems arise during draining, the guide outlines targeted steps for common failures such as radiators that refuse to empty or trap air.
It covers sealing and repair approaches for leaks at valves, joints and tails, and practical methods for freeing corroded or seized bleed screws and lockshield valves.
Guidance is also provided on spotting sludge or debris and deciding when a simple flush will suffice or a full power-flush is warranted.
What to do if a radiator won’t drain or has stubborn airlocks
If a radiator refuses to drain or vents stubborn airlocks, the likely causes include blocked valves, clogged valves or bleed screws, or trapped pockets of air in low points of the system.
Inspect and clean bleed screws and valve strainer screens.
Partially open upstream and downstream valves to flush debris.
Gently rock the radiator to free pockets, and use a pump or mains refill cycle to purge persistent air before retesting.
Handling leaks at valves, joints, and radiator tails
Address leaks at valves, joints, and radiator tails promptly to prevent water damage and loss of system pressure.
Inspect connections after draining, tighten compression nuts gently, and replace worn olives or PTFE tape where appropriate.
For persistent weeps, isolate the radiator, drain remaining water, and fit replacement valves or tail pieces.
Test under low pressure before restoring full system operation.
Dealing with corroded or seized bleed screws and lockshield valves
After tightening connections and replacing worn parts, attention should turn to corroded or seized bleed screws and lockshield valves, which commonly impede radiator draining and balancing.
Apply penetrating oil, allow soak time, and try gentle taps to free threads. Use correct-size keys or spanners; avoid excessive force.
If immovable, replace valve components or consult a qualified plumber to prevent damage and guarantee system integrity.
Recognising signs of sludge or debris and when to flush or power-flush
Sludge and debris in a radiator system often manifest as cold spots on radiators, slow heat-up times, unusual gurgling noises, or discolored water when bleed screws are released.
Persistent symptoms, frequent balancing issues, or boiler overheating suggest internal blockage.
Small buildup may respond to chemical flushing; widespread sludge, repeated recurrence, or cluster-affected radiators warrant a professional power-flush to restore flow and efficiency.
Safety, Legal and Environmental Considerations
The section addresses proper handling and disposal of radiator and contaminated flush water to prevent environmental harm and comply with local waste regulations.
It notes clear signs and situations—such as complex systems, persistent leaks, or chemical contamination—when a qualified heating engineer or plumber should be engaged.
It also outlines key liability, warranty, and building-regulation considerations that affect who may legally and responsibly perform the work.
Safe disposal of radiator water and contaminated flush water
Proper disposal of radiator water and contaminated flush water is essential because coolant and corrosion byproducts pose health, legal, and environmental hazards if released improperly.
Collected fluid should be stored in labeled, sealed containers and taken to hazardous waste or automotive recycling centers.
Do not pour down drains, into soil, or storm sewers.
Follow local regulations and keep records of disposal where required.
When to call a qualified heating engineer or plumber
When should a qualified heating engineer or plumber be contacted?
A professional should be called if leaks, corrosion, or stubborn blockages appear; if system pressure or boiler fault codes occur; when main drains, complex valves, or sealed systems require work; if asbestos, contaminated sludge, or unclear piping is present;
or when the homeowner lacks tools, confidence, or insurance-covered protection for safe, compliant repairs.
Liability, warranty and building regulations to consider
Many homeowners face legal and financial risks if radiator draining is done without regard for liability, warranty terms, and building regulations.
Professionals should be consulted when warranties require certified work. Local building codes and landlord-tenant rules can dictate permitted procedures and waste disposal.
Incorrect draining may invalidate guarantees or incur fines and insurance disputes; document compliance and retain receipts and photographs for protection.
Maintenance Tips to Reduce Future Draining Needs
Routine maintenance can considerably reduce the need to drain a radiator system by keeping pressure stable and air-free through scheduled bleeding and pressure checks.
The use of proper inhibitors and high-quality antifreeze helps prevent corrosion and scale buildup that force more frequent fluid changes.
Annual inspections and a professional servicing checklist catch small issues early, minimizing disruptive drain-downs.
Regular bleeding schedule and monitoring system pressure
A simple, consistent bleeding schedule combined with regular pressure checks prevents the air buildup and pressure drops that force full system drains.
Homeowners should bleed radiators monthly during heating season and check boiler pressure weekly, recording readings.
Low or fluctuating pressure signals leaks or failing expansion components.
Prompt corrective action—tightening valves, replacing seals, or calling a technician—minimizes corrosion and reduces future draining frequency.
Using inhibitors and quality antifreeze/corrosion protectors
Introduce corrosion inhibitors and quality antifreeze as preventive treatments that extend system life and cut the need for full drains.
Homeowners are advised to use manufacturer-recommended products to prevent rust, scale, and electrochemical corrosion.
Proper concentration and periodic testing maintain protection.
Compatible additives reduce sediment formation, improving heat transfer and minimizing future leaks or blockages that would otherwise require thorough draining and repairs.
Annual checks and professional servicing checklist
Several quick annual checks plus a professional service can prevent many causes of radiator draining.
A concise checklist targets leaks, corrosion, and system balance while documenting actions for technicians.
Recommended inspections include:
- Visual leak and pipe-joint inspection
- Radiator bleed and valve operation test
- Antifreeze/inhibitor concentration check
- Pressure and expansion vessel assessment
- System flush recommendations and service record update
Comparison of DIY vs Professional Drain and Flush Services
A concise comparison helps readers weigh cost, time, required tools, risks, and expected outcomes when choosing between DIY and professional drain-and-flush services. The table below summarizes key differences to guide that choice. Consider household skill level and long-term goals before deciding.
| Aspect | DIY | Professional |
|---|---|---|
| Cost | Lower upfront (parts + rental) | Higher upfront (labor + service fee) |
| Time & Tools | More time; basic tools + rentals | Faster; specialized equipment provided |
| Risks & Outcomes | Higher leak/corrosion risk; variable results | Lower risk; consistent, validated results |
Cost, time, tools required, risks, and expected outcomes
When comparing DIY and professional radiator drain-and-flush services, cost, time, required tools, risks, and expected outcomes differ markedly:
| Aspect | DIY vs Professional |
|---|---|
| Cost | Lower material cost vs higher service fee |
| Time | Longer homeowner time vs faster technician job |
| Tools | Basic tools vs specialized equipment |
| Risks | Higher leak/mistake risk vs insured, lower risk |
| Outcome | Variable effectiveness vs thorough, guaranteed results |
Emergency Checklist: Fast Actions If Something Goes Wrong
If a draining operation goes wrong, immediate, calm steps can limit damage and speed professional help. The technician or homeowner should cut power and isolate valves, contain spills, and record clear details for the call-out engineer.
Prompt, precise actions reduce risk and help responders arrive prepared.
- Turning off the boiler power at the mains and closing the radiator isolation valve
- Placing drip trays and absorbent cloths around leaks to protect floors and furniture
- Shutting off the water supply to the heating circuit if safe and accessible
- Noting the radiator model, visible damage, and any unusual noises or smells
- Having contact details, exact location, and a brief timeline ready for the call-out engineer
Immediate shutdown steps
Cut power to the boiler and close the main supply valve immediately to halt heating and prevent further flow; then open a nearby bleed valve to relieve system pressure while keeping occupants clear of hot surfaces and steam.
Next, isolate individual radiator valves, shut any zone controllers, and turn off electrical breakers serving circulator pumps.
Document valve positions and notify qualified service personnel before attempting further interventions.
Containment and mitigation actions
Containment and mitigation focus on preventing damage and injury after a radiator-system failure: isolate the affected area, relocate occupants to a safe distance, and establish clear barriers to keep untrained people away.
Shut off nearby electrical circuits, cover floor drains and furniture with waterproof sheeting, collect leaking fluid into suitable containers, and ventilate the space.
Label hazards and secure pets until professional help arrives.
Information to give a call-out engineer
After securing the scene and mitigating immediate hazards, the on-site contact should compile concise, actionable information for the call-out engineer.
Include location details, symptom summary (leaks, pressure loss, noises), approximate water volume drained, visible damage, valve positions, system type and boiler model, any recent work, photos, and access constraints.
Provide contact, availability window, and any safety concerns or isolation measures already taken.
Conclusion
Like a seasoned mariner easing a ship into harbor, the homeowner who follows these steps brings a once-rattled radiator system to calm order. Careful preparation, methodical draining, and mindful refilling restore function while avoiding leaks, scalds, and regulatory missteps. When uncertainties loom, professionals stand ready as lighthouse keepers. With routine maintenance, the heating system will repay diligence with quiet reliability, warming rooms as steadily as hearths in old tales.