How to Install a Riser on a Septic Tank: Step-by-Step DIY Guide
To install a riser on a septic tank, start by exposing the tank lid and measuring its depth and diameter. Choose a compatible riser type—plastic, concrete, or adapter—then place it over the access point. Seal it with gaskets or hydraulic cement, secure it according to the manufacturer’s instructions, and fit the lid before backfilling carefully. Remember to wear safety gear and check local permits; consider hiring a professional for heavier concrete units. Continue reading for detailed step-by-step instructions and helpful tips.
What a Septic Tank Riser Is and Why It’s Useful
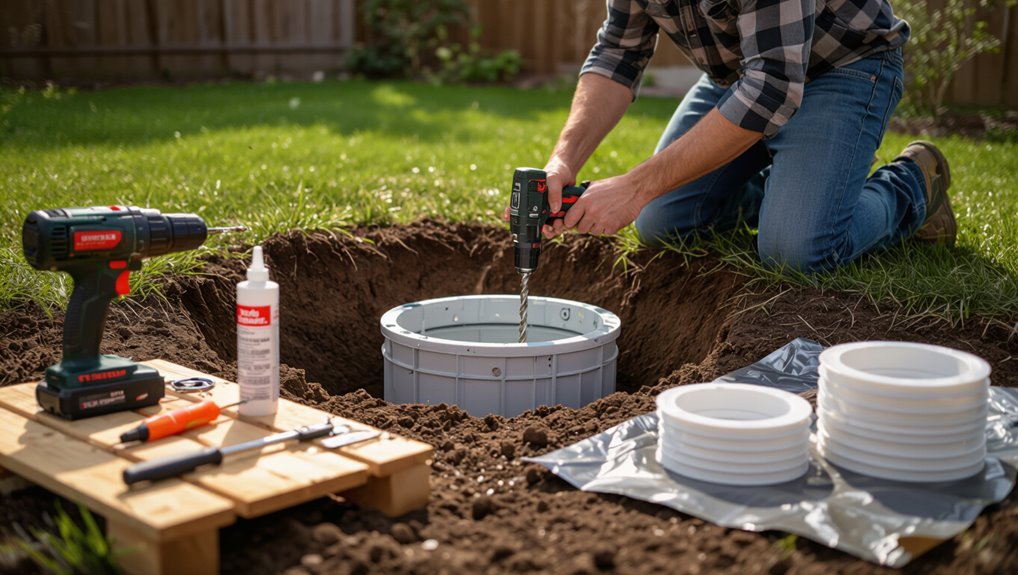
A septic tank riser is a vertical extension that connects the tank access port to the ground surface, typically consisting of a sealed lid, a riser tube, and mounting hardware.
It improves accessibility for inspection, pumping, and repairs, enhances safety by reducing excavation, and helps meet many local code requirements.
Risers are commonly made from plastic, concrete, or modular systems that vary in strength, cost, and ease of installation.
Definition and components of a septic tank riser
Septic tank risers are vertical extensions that connect the buried access port of a septic tank to the ground surface, providing a safe, permanent opening for inspection, pumping, and maintenance.
Components include the riser tube, a secure watertight collar or flange, a locking or threaded lid, and mounting hardware or adhesive.
Guidance on how to install a riser on septic tank covers proper sizing and sealing.
Benefits: accessibility, maintenance, safety, code compliance
Because risers bring the tank access to the surface, homeowners and service technicians gain immediate, safe entry for inspection and pumping without excavation.
Risers reduce service time and cost, simplify routine maintenance, and lower landscaping disruption. They enhance safety by eliminating hazardous digging and hidden lids.
Properly installed risers also help meet local code requirements, easing inspections and ensuring regulatory compliance.
Common riser materials and types (plastic, concrete, modular)
When homeowners or service providers need reliable surface access, risers are manufactured in several common materials and configurations—each balancing durability, cost, and ease of installation.
Plastic risers are lightweight, corrosion-resistant, and affordable.
Concrete risers offer longevity and load-bearing strength but require heavier handling.
Modular riser systems combine adjustable heights and simpler installation, providing a versatile middle ground for varied site conditions and budgets.
Assessing Whether You Need a Riser
The homeowner should first locate the septic tank lid and note the positions of the inlet and outlet to guarantee a riser will align properly.
If the lid is buried, difficult to access, or the system requires frequent service, installing a riser is often warranted.
Before proceeding, local codes and permit requirements must be checked to confirm compliance.
How to locate your septic tank lid and inlet/outlet positions
How can a homeowner quickly find their septic tank lid and determine the inlet and outlet positions before deciding on a riser? A utility sketch, municipal records, or previous inspection report supplies location clues.
Probe with a soil probe or locating rod along the tank axis, following the sewer line from the house. Identify inlet near the house side, outlet toward the drainfield; mark lids for access.
Signs you should install a riser (buried lid, frequent service needs)
Many homeowners discover the need for a riser after encountering buried lids or repeatedly scheduled pumpings that require excessive digging.
Indicators include difficulty locating lids, frequent professional visits, rising service costs, turf damage from repeated excavation, and slow drainage or odors suggesting inspection needs.
Installing a riser reduces labor, protects landscaping, shortens service time, and improves access for routine maintenance and emergency checks.
Local codes and permit considerations
When should a homeowner check local codes before installing a septic riser? Homeowners must review municipal regulations, setback requirements, and permit obligations before beginning.
Some jurisdictions mandate licensed contractors, approved materials, or inspection schedules. Failure to comply can result in fines or required removal.
Contact the local health department or building office for guidance, application procedures, and documentation needed to guarantee code-compliant riser installation.
Tools, Materials, and Safety Precautions
The section outlines the specific tools and equipment needed for riser installation, along with material checklists tailored to common riser types.
It also summarizes essential personal protective equipment and practical safety tips to reduce risk during excavation and handling.
Guidance is provided on signs that a professional should be hired instead of attempting a DIY installation.
Required tools and equipment
A concise set of tools, materials, and safety gear is essential before attempting to install a septic tank riser; proper preparation minimizes risk, guarantees a secure seal, and speeds the job.
Required items include hand and power tools, sealing supplies, lifting aids, and PPE. Recommended essentials:
- Shovel, pry bar, reciprocating saw
- Silicone sealant, gasket, bolts
- Come-along or jack, straps
- Gloves, goggles, respirator
Materials checklist by riser type
Choice of riser material dictates specific fasteners, sealants, and lifting methods; plastic, concrete, and fiberglass risers each require distinct components and safety considerations.
The checklist details compatible gaskets, adhesive types, anchor bolts or straps, and recommended lifting aids. Verify local code approvals and tank flange compatibility before ordering.
- Plastic: solvent welds, neoprene gaskets, stainless screws
- Concrete: epoxy sealant, anchor bolts, lifting straps
- Fiberglass: marine adhesive, rubber gasket, corrosion‑resistant fasteners
- Misc: flange adapter, primer, spare seals
Personal protective equipment and safety tips
Several essential items of personal protective equipment (PPE) and clear safety protocols are required before beginning riser installation on a septic tank.
Recommended PPE includes chemical-resistant gloves, safety goggles, a respirator for odor/particle protection, steel-toe boots, and disposable coveralls.
Guarantee proper ventilation, avoid confined-space entry alone, keep tools organized, mark the work area, and wash thoroughly after handling tank components to prevent contamination.
When to hire a professional
When PPE and safety protocols are in place, homeowners should assess whether the complexity of the riser installation exceeds their skills, available tools, or comfort with confined-space hazards.
Hire a professional if structural repairs, precise alignment, heavy lifting, underground utility risks, uncertain sealing, or local code compliance are involved.
Professionals guarantee proper materials, air-quality monitoring, permits, and warranty-backed workmanship for safety and longevity.
Measuring and Planning the Installation
Before beginning installation, measurements must be taken from the ground surface to the tank access to determine the required riser height.
The installer selects a riser diameter and height that match the lid and provide adequate clearance for maintenance.
Placement is then planned to minimize impact on landscaping and avoid vehicle or foot traffic paths.
How to measure depth from ground to tank access
Accurately measuring the vertical distance from the ground surface to the top of the septic tank access is essential for selecting the correct riser height and ensuring a secure fit.
Use a straight rod or tape measure from ground level to the access lid center, record several readings at different points to account for soil slope, and note the deepest measurement for planning excavation and riser placement.
Choosing the correct riser diameter and height
With the measured depth in hand, the installer must select a riser diameter and height that match the tank opening and anticipated soil cover.
Confirm the tank’s collar diameter (commonly 12–24 inches) and choose a riser providing full sealing and easy access for pumping.
Height should bridge the measured gap plus allowance for cover and minor settling.
Match material and lid type to local codes.
Determining riser placement relative to landscaping and traffic
When siting the riser, the installer evaluates nearby landscaping features and anticipated traffic patterns to minimize disturbance and secure safe access.
Placement avoids root zones, flower beds, and irrigation lines, and aligns with walkways or vehicle routes for safe servicing.
Surface grading and cover blending are planned to prevent pooling, protect plants, and guarantee clear, unobstructed access for maintenance and pumping.
Preparing the Site
The work area is first marked and excavated carefully to expose the tank lid without overdigging.
Measures are taken to protect the tank, piping, and surrounding turf or landscaping during excavation.
The existing lid is then safely supported, lifted, and removed for riser installation.
Marking and excavating to expose the tank lid
Begin by locating the buried tank using existing records, a probe rod, or metal detector. Then mark the outline of the lid and any nearby service fittings with high-visibility paint or flags.
Carefully dig by hand within marked limits, removing soil in layers to avoid striking the lid. Expose the lid fully, clear debris, and verify exact edges before proceeding to riser installation.
Protecting the tank and surrounding area during excavation
Protects the tank and surrounding area by setting up barriers and stabilizing soil before heavy excavation begins.
Temporary fencing, caution tape, and signage restrict access.
Shore up trench edges with timber or sandbags to prevent collapse.
Lay plywood or steel plates to distribute equipment weight and prevent ground compaction.
Divert surface water away from the site to reduce erosion and maintain a dry, stable work area.
Handling and removing the existing lid
Remove any loose debris and clear vegetation around the access area before attempting to handle the existing lid.
Then confirm its material and condition to choose appropriate lifting methods.
Wear gloves and eye protection, use proper tools (manhole hooks, pry bars, lifting straps) for heavy or corroded lids, and enlist help for awkward loads.
Inspect sealing gaskets and surrounding rim for damage before proceeding.
Installing a Plastic Modular Riser
The installer first inspects the tank opening and cleans the sealing surface to guarantee a tight fit.
Next, the base is positioned and secured to the tank, followed by stacking modular riser sections to reach the required height while sealing each joint with gaskets or caulk.
Finally, the riser lid is installed and fastened to complete the assembly.
Inspecting tank opening and cleaning the sealing surface
Before attaching the riser, inspect the tank opening for cracks, spalled concrete, or uneven edges and clean the sealing surface thoroughly to guarantee a watertight fit.
Remove debris, algae, and residue with a stiff brush and water; allow to dry.
Verify the flange seating area is flat and free of loose fragments.
Note any damage for repair before proceeding.
Positioning the base and securing to the tank
Center the plastic modular riser base over the tank opening, aligning its bolt holes or attachment tabs with the flange and ensuring the gasket sits flat against the cleaned sealing surface.
Fasten using specified stainless bolts or corrosion-resistant screws, tighten evenly in a crisscross pattern to compress the gasket uniformly, and apply thread sealant or washer as recommended.
Verify base sits level and secure.
Assembling modular riser sections to desired height
Begin stacking riser sections, matching the tongue-and-groove joints and alignment tabs to guarantee a snug, leak-resistant fit.
Add sections until the riser reaches the target grade, verifying vertical plumb with a level. Temporarily clamp or weight sections to prevent shifting.
Confirm access opening aligns with the tank lid and surface framing. Remove debris from mating surfaces before final tightening.
Sealing joints and applying gaskets or caulk
Seal all mating surfaces methodically to guarantee a watertight, gas-tight connection between riser sections and the tank opening.
Clean surfaces of debris, oil, and moisture. Fit neoprene gaskets or foam seals per manufacturer directions.
Apply a continuous bead of approved sewer-grade caulk to joints, compress evenly, and remove excess. Allow proper cure time before handling.
Verify seals for uniform contact and no gaps.
Installing and securing the riser lid
With the riser sections sealed and cured, attention turns to installing the plastic modular riser lid to guarantee secure, weather‑tight access.
The lid is seated squarely, gasket compressed evenly, and fasteners torqued to manufacturer specs to prevent leaks. Optional security bolts or locking caps are installed.
Inspect the seal, wipe away excess sealant, and confirm the lid closes flush and remains stable under light pressure.
Backfilling and compacting around the riser
Carefully backfill around the riser in uniform lifts, placing soil or approved fill material evenly to avoid creating voids against the riser walls.
Compact each 6–8 inch layer with a hand tamper or mechanical compactor until firm but not overly dense.
Maintain riser alignment and inspect seams.
Finish grade to slope away from the riser for drainage, restore surface vegetation or cover.
Installing a Precast Concrete or Single-Piece Riser
When working with a precast concrete or single-piece riser, the crew must plan for safe lifting and precise placement due to the unit’s weight.
Once positioned, the riser requires proper sealing and anchoring to prevent leaks and shifting.
The procedure concludes with secure lid installation and carefully compacted backfill to restore the site.
Lifting and positioning heavy concrete risers safely
Installing a precast concrete or single-piece riser requires planning for weight, balance, and clearance: these units can weigh several hundred pounds and demand mechanical lifting or multiple trained personnel using proper rigging, lifting points, and spreader bars to control movement and prevent stress on the riser or tank.
Positioning should use level guides, slow controlled lifts, spotters, and temporary supports until seated correctly.
Sealing and anchoring methods for concrete risers
Seal and anchor the precast concrete riser to guarantee a watertight, stable connection to the tank and surrounding backfill.
Apply NSF‑approved solvent or butyl gasket between riser and tank flange, then torque bolts evenly.
Use non‑shrinking hydraulic cement or epoxy grout to fill annular gaps.
Install stainless steel anchor brackets or rebar dowels into concrete for lateral restraint.
Verify seals before backfilling.
Finalizing the lid installation and backfill
Once the riser and lid seating surfaces are verified for alignment and seal integrity, the lid is set into place using proper lifting equipment and guided to avoid edge damage.
Bolts or locking devices are then torqued to manufacturer specifications and any required vapor or watertight gaskets are seated.
After this, the contractor proceeds to backfill in controlled lifts with specified material, compacting around the riser to prevent future settlement while protecting the lid from heavy equipment loads during site restoration.
After compaction, final grade is restored, surface drainage is confirmed, and access is labeled for maintenance.
Installing an Adapter Riser or Extender for Existing Lids
For an adapter riser or extender, precise measurement of the existing lid and riser opening guarantees selection of a compatible model and gasket type.
The attachment sequence should follow manufacturer torque and sealant guidelines to secure the adapter and create a watertight joint.
After installation, the assembly must be inspected and pressure- or water-tested at the seal points to confirm there are no leaks.
Measuring and selecting compatible adapter
Begin by measuring the existing lid and riser opening to determine the correct adapter size and type. Record inner and outer diameters, depth, flange dimensions, and any taper.
Check material compatibility (PVC, ABS, polyethylene) and load rating for traffic or pedestrian use.
Match adapter profile to lid contour and riser wall thickness. Verify manufacturer model compatibility and available gasket options.
Attachment and sealing procedure
After confirming fit and compatibility, the adapter riser is aligned over the existing lid or opening and fastened using the manufacturer’s recommended method—typically adhesive/sealant around the joint, mechanical screws through predrilled flanges, or a combination of both.
Sealant beads are applied evenly, excess wiped away, and fasteners torqued to specified values.
Protective caulking or tape may be added to exposed threads and seams.
Verification and testing for leaks
Inspect the sealed riser assembly visually and by touch to guarantee continuous contact of sealant and proper engagement of fasteners.
Perform a water test: pour a measured amount around the lid and riser joints, then check interior riser seams for moisture or drips.
Reinspect after 24 hours for slow leaks.
Tighten or reseal any compromised areas and document results for future maintenance.
Verifying Installation and Final Checks
The installer confirms the riser sits level, is tightly sealed, and shows no gaps or movement around the tank opening.
They inspect lid locks and any child-safety features to guarantee proper engagement and durability.
Finally, they note recommended checks after heavy rain and schedule routine maintenance to verify ongoing integrity.
Ensuring level, secure fit and proper sealing
Confirm that the riser sits perfectly level, the connection is tight, and all seals are intact before completing the installation.
Visually inspect gasket compression and fasteners, torque clamps per manufacturer specs, and confirm no gaps exist.
Apply recommended sealant where specified.
Test with a light water fill to check for leaks.
Recheck level after settling; adjust if any movement or seepage appears.
Inspecting lid locks and child-safety features
Verify lid locks and child-safety features are tested and operating exactly as designed before declaring the installation complete.
The installer confirms locks engage smoothly, lids resist prying, and any tamper-proof fasteners are secured.
Hinges, latches, and warning labels receive inspection.
If childproof mechanisms fail, adjust or replace components immediately.
Document checks and retain manufacturer instructions for future reference.
Testing after heavy rain and routine maintenance tips
After installation, perform a post-storm inspection to confirm riser seals, lid seating, and venting remain watertight and functional following heavy rain.
Check for infiltration, pooling, soil erosion, and shifted components. Verify riser alignment and secure fasteners.
Schedule biannual inspections, clear debris from vents, test access lid operation, and document observations.
Promptly address any leaks or structural issues to preserve tank integrity and prevent contamination.
Common Problems, Causes, and Fixes
Common issues with riser installations include leaks at the riser seal, movement or cracking from settling, and root intrusion from nearby landscaping.
Each problem has identifiable causes—improper sealing, inadequate bedding or backfill, and aggressive tree roots—that guide the appropriate repair or remediation.
The following sections outline inspection signs and concise fixes for each condition.
Leaks at the riser seal and how to repair
Leaks at the riser seal occur when the junction between the riser and the tank lid fails to keep water and soil out of the tank, risking contamination and premature component deterioration.
Causes include degraded gasket, improper seating, or uneven surfaces.
Repair involves cleaning mating surfaces, replacing the gasket or applying a compatible sealant, torqueing fasteners evenly, and testing with water to confirm watertightness.
Riser movement, settling, or cracking and remediation
While a compromised riser seal allows water intrusion at the lid, movement, settling, or cracking of the riser itself creates broader structural and access issues that can allow soil infiltration, damage pipe alignments, and create safety hazards.
Causes include poor backfill, freeze-thaw, heavy loads, or material fatigue.
Remediation: excavate, assess damage, realign or replace riser, improve bedding and compaction, and restore proper grading.
Root intrusion and landscaping-related issues
Because roots seek moisture and nutrients, landscaping near a septic tank can lead to intrusion that damages risers, lids, and inlet/outlet pipes.
Roots can crack plastic or concrete, clog openings, and displace soil causing misalignment.
Inspect annually, remove offending plants, install root barriers, and use gravel or turf instead of deep-rooted trees.
Repair damaged components promptly and consult a professional for extensive root removal.
Maintenance Schedule and Long-Term Care
A clear maintenance schedule helps preserve riser integrity and prevents septic system failures.
Recommended actions include a routine inspection checklist, periodic cleaning, re-sealing or replacing worn components, and attention to seasonal needs.
Winterizing steps and timing of service visits should be noted to avoid cold-weather damage.
Routine inspection checklist
Regular inspections of a septic tank riser guarantee early detection of leaks, blockages, or structural issues that could lead to costly repairs or system failure.
Inspect quarterly for integrity, signs of settling, and odor; check seals and fasteners; confirm access lid alignment; and document findings with date, observations, and photographs to track changes and schedule professional servicing when abnormalities appear.
- Check lid fit and seal
- Inspect riser walls for cracks
- Look for soil subsidence or pooling
- Record and timestamp all observations
Cleaning, re-sealing, and replacing components
Following the inspection checklist, maintenance shifts to cleaning, re-sealing, and replacing riser components on a scheduled basis to preserve function and prevent leaks.
Periodic cleaning removes debris and biological buildup; inspect gaskets, bolts, and securing collars for wear.
Re-seal joints with manufacturer-recommended sealant and replace cracked or deformed lids, riser sections, and fasteners promptly to maintain airtight, watertight integrity.
Seasonal considerations and winterizing
When temperatures fall and precipitation patterns shift, homeowners should adjust riser and access maintenance to prevent freezing, water intrusion, and material degradation; this includes insulating exposed sections, ensuring lids fit securely to block runoff, and scheduling any necessary repairs before ground freezes.
Routine checks after heavy snow, clearing ice, securing vents, and protecting seals extend component life and reduce emergency repairs during winter months.
Cost Estimates and Budgeting
Typical costs vary by riser material and diameter, with plastic models generally less expensive than concrete or heavy-duty options.
A clear comparison of professional labor versus DIY expenses helps owners decide whether to hire a contractor or save on installation costs.
Additional line items such as permit fees, soil or waste disposal, and contingency funds for unexpected issues should be accounted for in the budget.
Typical costs by riser type and size
Costs for septic risers vary greatly by material, diameter, and features such as lockable lids or extension kits. Typical retail ranges: basic plastic 10–30″, premium polymer 40–80″, concrete risers 80–200″, adjustable extensions 20–60″, and lids or locks 10–50$. Selection balances durability, access height, and budget.
| Riser Type | Typical Price Range |
|---|---|
| Plastic basic | $10–$50 |
| Polymer premium | $40–$150 |
| Concrete | $80–$200 |
| Extensions/lids | $10–$60 |
Labor vs DIY cost comparison
After reviewing price ranges for materials and features, homeowners must weigh the trade-offs between hiring a professional and tackling riser installation as a DIY project.
Labor adds 50–150% of material costs for professional installation but guarantees speed, warranty, and code compliance.
DIY saves labor expenses yet requires tools, time, and confidence; mistakes can increase total cost if remediation becomes necessary.
Permits, disposal, and unexpected expenses
Because local regulations often dictate excavation and septic access changes, homeowners should first verify permit requirements and associated fees before beginning a riser installation.
Budget for permit costs, disposal of excavated soil and contaminated materials, and potential inspection charges.
Include contingency for unexpected issues—collapsed riser wells, anaerobic sludge removal, or contractor delays.
Track receipts to document compliance and control overruns.
Alternatives and Upgrades
The section considers alternative riser configurations such as hidden riser options and low-profile lids that preserve yard aesthetics.
It also reviews integrated security features, including locks and lids designed to deter unauthorized access.
Finally, it introduces monitoring and alarm add-ons that provide remote status alerts and early warning of system issues.
Hidden riser options and low-profile lids
Why consider hidden riser options and low-profile lids?
Hidden risers and low-profile lids improve yard aesthetics, reduce trip hazards, and resist accidental damage while maintaining access for maintenance.
Materials like reinforced plastic or composite blend durability with a subtle appearance.
Installation may require precise grading and secure sealing to prevent water infiltration, but offers a discreet, safer alternative to bulky, exposed risers.
Integrated locks, alarms, and monitoring add-ons
Although often overlooked in basic installations, integrated locks, alarms, and monitoring add-ons provide practical security and operational oversight for septic systems, combining physical access control with real-time status alerts.
These upgrades deter tampering, prevent unauthorized access, and notify owners of high water, pump failure, or odor issues.
Select corrosion-resistant locks, battery-backed sensors, and wireless monitors compatible with existing riser lids and local codes.
Resources and Further Reading
For local assistance, readers are directed to county permit offices and licensed septic contractors for site-specific requirements and inspections.
Manufacturer installation guides and compatibility charts are recommended for selecting riser models and sealing materials.
Combining official permits with product references guarantees compliant, long-lasting installations.
How to find local contractors and permit offices
When seeking contractors and permit offices for a riser installation, homeowners should start with a focused local search that verifies licensing, insurance, and experience with septic systems.
Check municipal permitting portals, county health departments, and state contractor registries for requirements.
Request written estimates, references, and proof of septic-specific work.
Confirm permit timelines and inspection procedures before hiring to guarantee compliance and avoid delays.
Manufacturer guides and compatible product references
Consult manufacturer installation guides and compatibility charts to guarantee the chosen riser, lid, seals, and fasteners match the tank material, riser opening diameter, and local load requirements.
Review product datasheets, ASTM/NSF certifications, and UV/weathering ratings.
Verify warranty terms and replacement part numbers.
Cross-reference local code listings before purchase.
- Manufacturer datasheets
- Compatibility charts
- Certification records
- Warranty and parts info
Conclusion
Installing a septic tank riser is like fitting a convenient doorway into an underground room: it grants safe, direct access and simplifies care. By evaluating need, planning measurements, using proper tools, and following safety precautions, a homeowner can add durable, low-maintenance access that reduces future disruption. Regular inspection and occasional sealing keep it effective. Considering costs and alternatives helps guarantee the chosen riser matches site conditions and long-term maintenance goals.