How to Turn On a Water Heater Boiler: Step-by-Step Safety Guide for Homeowners
To safely turn on a water heater boiler, follow these steps: First, ensure that power or fuel is off. Inspect the vents, valves, pressure relief valve, and expansion tank, and wear personal protective equipment (PPE). For gas units, set the gas valve correctly, follow pilot or electronic ignition instructions, and confirm a steady flame. For electric units, fill and vent the tank, restore power, and set the thermostat. During initial operation, monitor for pressure, temperature, and leaks. If any issues arise, consult a technician. Detailed instructions are provided below.
What a Water Heater Boiler Is and How It Works
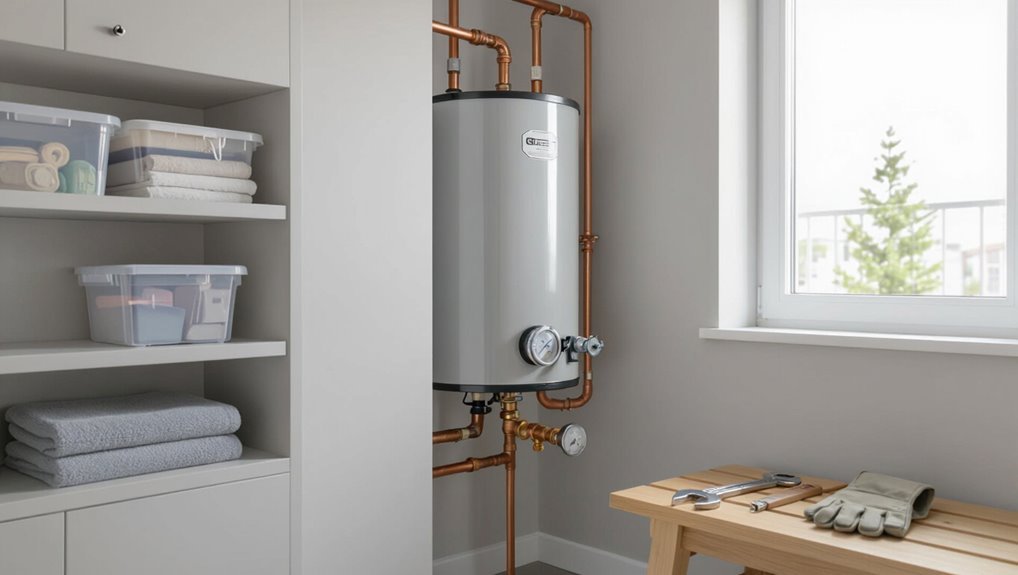
A water heater boiler comes in several residential forms—storage tank, tankless, combi, and indirect—each designed to heat and deliver hot water differently.
Its principal components include burners or heating elements, a thermostat, a pressure relief valve, and often an expansion tank, all working together to control temperature and pressure.
Common energy sources for these systems are natural gas, electricity, oil, and propane.
Types of residential water heater boilers (tank, tankless, combi, indirect)
Residential water heating systems come in four common configurations—tank, tankless, combination (combi), and indirect—each with distinct operation, efficiency, and installation considerations.
Tank stores heated water; tankless heats on demand for efficiency and space savings.
Combi units supply space heating plus domestic hot water.
Indirect systems use a boiler loop and storage tank.
Homeowners should know how to turn on a water heater boiler safely.
Key components and their functions (burner/elements, thermostat, pressure relief valve, expansion tank)
Having outlined common system types, the discussion now moves to the main components that make a water heater boiler operate reliably and safely.
The burner or heating elements provide heat, the thermostat controls temperature, the pressure relief valve prevents overpressure, and the expansion tank absorbs thermal expansion.
Each part guarantees efficient heating, safe pressure management, and protection against overheating or system stress.
Common fuel and power sources (gas, electric, oil, propane)
Although fuel type varies by installation and region, water heater boilers are commonly powered by natural gas, electricity, oil, or propane, each offering distinct advantages and trade-offs in efficiency, cost, and installation requirements.
Natural gas and propane provide fast heating and lower operating costs where available.
Electric units are simpler and safer indoors.
Oil systems suit off‑grid settings but require more maintenance and storage.
Safety Preparations Before Turning On a Water Heater Boiler
Before activating the unit, the reader should confirm appropriate personal protective equipment is worn and basic safety precautions are understood.
Situations that require a licensed professional rather than DIY work, as well as applicable local codes and the manufacturer’s startup instructions, must be identified.
Finally, a concise checklist of required tools and materials should be assembled and verified.
Personal protective equipment and precautions
Personal protective equipment (PPE) and clear precautions reduce the risk of burns, electrical shock, and inhalation hazards when preparing to start a water heater boiler.
Recommended PPE includes heat-resistant gloves, safety goggles, long sleeves, and non-slip footwear.
Ascertain ventilation, turn off power at the breaker, verify no gas odors, use a multimeter to confirm dead circuits, and keep a fire extinguisher nearby.
When to call a professional instead of DIY
Having taken those PPE measures and verified power and gas safety, it is important to recognize situations that exceed typical DIY competence and require a licensed technician.
Examples include persistent leaks, corroded tanks, unusual noises, pilot or ignition failures, gas odor, complex wiring, failed pressure-relief valves, or combustion issues.
When in doubt, cease attempts and contact a certified plumber or HVAC professional for diagnosis and repair.
Checking local codes and manufacturer instructions
Consulting local codes and the manufacturer’s instructions is a critical step that guarantees legal compliance and preserves the unit warranty.
The homeowner must review permit requirements, ventilation, clearance, and fuel source regulations, plus model-specific startup procedures, pressure settings, and safety interlocks.
Follow dated manuals and any amendments; document compliance and contact the manufacturer or authority having jurisdiction if contradictions or unclear requirements arise.
Tools and materials checklist
A concise checklist of tools and materials guarantees the technician can complete safety preparations without delays or improvised substitutions.
Essential items include a multimeter, adjustable wrench, and pipe sealant; personal protective equipment such as gloves and goggles; and a fire extinguisher and carbon monoxide detector.
Prepare spare fittings and a flashlight for inspections.
- Multimeter, wrench, sealant
- PPE: gloves, goggles
- CO detector, extinguisher
Quick Readiness Checklist: Is Your Boiler Safe to Start?
A brief visual inspection should confirm there are no leaks, visible corrosion, or blocked vents before proceeding.
The operator then verifies fuel or electrical supply, guarantees the water inlet and shutoff valves are open, and checks system pressure and thermostat settings.
Only when all items are within safe parameters should the boiler be started.
Visual inspection steps (leaks, corrosion, vents)
Before powering the boiler, perform a concise visual inspection to confirm there are no visible leaks, significant corrosion, or blocked venting that could compromise safe operation.
Check joints, valves, and pressure relief connections for drips or residue.
Inspect flue and vent terminals for obstructions, rust, or animal nests.
Note oxidation on tanks or pipes; tag and postpone startup if structural damage appears.
Verifying fuel and electrical supply
Confirm that both fuel and electrical supplies are adequate and correctly configured before energizing the boiler.
Verify fuel type, pressure, and shutoff valves are set and free of leaks; check fuel lines for damage.
Guarantee electrical supply matches nameplate voltage and phase, breakers are on, and wiring/connections are secure.
Confirm safety interlocks and controls are functional; do not proceed if discrepancies or faults exist.
Confirming water supply and valves
With fuel and electrical systems verified, attention shifts to the water supply and valve configuration to secure safe boiler startup.
Confirm the main water feed is open, isolation and zone valves are correctly positioned, and drain valves are closed.
Inspect for visible leaks, ensure inlet strainers are clear, and verify the condensate trap and pressure relief valve are unobstructed before initiating operation.
Checking pressure and temperature settings
Begin by verifying the boiler’s pressure and temperature readouts align with manufacturer specifications and local codes to guarantee a safe startup.
The technician checks cold pressure (usually 12–15 psi for residential systems) and operating pressure limits, confirms temperature settings avoid scald risk, inspects gauges and sensors for accuracy, and adjusts the pressure-reducing valve or thermostat as needed before proceeding.
Step-by-Step: How to Turn On a Gas Water Heater Boiler
The technician begins by preparing the unit, purging air from fuel lines and confirming the gas valve is correctly positioned before attempting ignition.
They follow the manufacturer’s pilot-light or electronic ignition procedure, set the thermostat, and verify a stable flame and burner operation.
Finally, they confirm proper ventilation and combustion air, then perform initial operational checks to guarantee safe, steady performance.
Preparing the unit (air purge, gas valve off/on)
Prepare the boiler by purging trapped air and confirming the gas valve positions before attempting ignition.
The technician opens the drain or purge valve at a nearby fixture until a steady, air-free water flow appears, then closes it.
They verify the gas supply is off while checking for leaks with a soap solution, then set the main gas valve to the correct position for ignition readiness.
Lighting pilot or ignition sequence
With the purge complete and the gas valve set for ignition, attention turns to initiating the pilot or electronic ignition sequence.
For standing pilot models, hold control to “pilot,” depress the button while sparking until flame appears, then continue holding for recommended seconds before releasing.
For electronic systems, follow manufacturer procedure: enable igniter, allow automatic trials, and observe ignition indicators.
Monitor for steady flame.
Setting thermostat and verifying ignition
After confirming a steady pilot or successful electronic ignition, set the thermostat to the desired temperature and verify the burner cycles correctly.
Observe the burner ignite and run for a full heating interval, then shut off when the setpoint is reached. Confirm consistent cycling without delayed ignition, unusual odors, or noises.
If anomalies appear, shut down and consult a qualified technician.
Ventilation and combustion air checks
Inspect the boiler room’s ventilation and combustion air provisions to confirm safe operation before energizing the gas water heater.
Confirm intake and exhaust openings are unobstructed, properly sized, and compliant with code.
Verify louvers, ducts, and any mechanical ventilation function correctly.
Ascertain no nearby stored combustibles or sealed rooms restrict airflow.
Document findings and correct deficiencies before proceeding.
Initial operational checks after startup
Begin operation by observing the boiler’s behavior immediately following ignition to verify safe, correct function.
Inspect flame stability, combustion color, and burner noise. Confirm no gas odor and that vents exhaust properly.
Monitor pressure and temperature gauges for expected ranges, check for leaks at fittings, and ascertain pilot or ignition remains steady.
Record anomalies and shut down if unsafe readings or smells appear.
Step-by-Step: How to Turn On an Electric Water Heater Boiler
Before working on an electric water heater, the technician confirms the circuit breaker is off and inspects the wiring for safety.
They then fill the tank, bleed air from faucets, and restore power to set the thermostat.
Finally, they check the heating elements and verify the water reaches the correct temperature.
Ensuring power is off at breaker and confirming wiring
Cut power at the household panel and verify the breaker for the water heater is in the OFF position before touching any electrical components; this guarantees technician safety and prevents damage to the unit.
Confirm with a non-contact voltage tester at the heater’s terminals.
Inspect wiring for proper color coding, secure connections, correct gauge, and intact insulation.
Replace damaged wiring or loose terminals before restoring power.
Filling the tank and removing air
With the power confirmed off and wiring inspected, attention turns to charging the tank and expelling trapped air.
The cold-water supply valve is opened slowly until a steady flow emerges from a nearby hot faucet. Allow water to run until sputtering stops, indicating air has cleared.
Inspect for leaks at fittings and the drain valve. Close faucet when flow is steady.
Restoring power and setting thermostat
Restore power only after confirming the tank is full, all fittings are tight, and tools are removed from the work area.
Re-energize the circuit breaker or reconnect power following local codes.
Set the thermostat to the manufacturer-recommended temperature (typically 120°F/49°C) to balance comfort and safety.
Note any error indicators on the control panel and consult documentation before proceeding further.
Verifying heating element operation and temperature
Begin by confirming the thermostat is set and the unit is energized before testing the elements.
Then proceed to verify each heating element and the temperature by measuring voltage at the element terminals, checking continuity with a multimeter, and using a calibrated thermometer or T&P port to confirm water temperature.
Test one element at a time, compare readings to specifications, and replace faulty elements or correct thermostat settings as needed.
Step-by-Step: How to Turn On an Oil or Propane Boiler
Before attempting startup, the technician confirms fuel supply lines, tank levels, and performs any required bleeding to remove air.
Next, ignition sequence and burner startup are initiated following manufacturer procedures while observing for proper flame establishment.
Finally, safety controls and flame supervision systems are tested to verify shutdown response and safe operation.
Fuel supply verification and bleed procedures
Confirming the fuel supply and purging air from the lines are essential steps before attempting to start an oil or propane boiler.
Inspect tanks and supply lines for leaks, proper valve positions, and sufficient fuel.
Close vents, open bleed valves at fittings or filters, operate the pump or manual bleeder until steady fuel appears, then securely retighten fittings and check for leaks before proceeding.
Ignition and burner startup
With fuel verified and lines bled, the operator initiates the ignition sequence by ensuring all safety interlocks are satisfied, setting the thermostat or control to call for heat, and positioning the burner controls to the manual start or reset mode.
The burner motor and fan engage, the ignition device energizes, and fuel is admitted briefly while visual and audible indicators confirm stable ignition before returning controls to automatic operation.
Safety controls and flame supervision checks
Safety hinges on intact interlocks and reliable flame supervision; the operator verifies that low-water cutoffs, pressure/temperature limits, and safety shutoffs are operational and that the flame detector (photoelectric cell, ionization probe, or ultraviolet scanner) is correctly positioned and clean.
Checks include testing lockouts, confirming proper pilot sensing, ensuring gas/oil valves respond to control signals, and documenting functional tests before normal operation resumes.
How to Turn On a Tankless or Combi Boiler
For tankless and combi boilers, the initial steps focus on confirming electrical power and the correct fuel supply while inspecting unit-specific safety switches.
Next, the system must be primed so flow sensors can detect water movement and trigger the proper activation sequence.
Finally, temperature setpoints and control parameters are configured to match demand and efficiency requirements.
Power and fuel checks specific to tankless units
Before powering a tankless or combi boiler, technicians should verify the specific electrical and fuel requirements for that model, since these systems rely on consistent power and proper fuel delivery to operate safely and efficiently.
Confirm voltage, amperage, breaker size, and dedicated circuit presence.
Inspect gas lines for correct pressure, secure fittings, and leak-free connections.
Validate fuel type and regulator settings before initial energization.
Priming, flow sensors, and activation sequence
Prime the system by establishing proper water flow and removing trapped air so that flow sensors can detect movement accurately and the unit will complete its activation sequence without fault codes.
Open inlet valves slowly, purge air at fixtures, and confirm steady pressure.
Observe the boiler’s start-up lights and diagnostics; allow the automated ignition and pump routines to finish before testing hot outlets.
Configuring temperature and control settings
Settings on a tankless or combi boiler determine both comfort and safety, so they should be adjusted deliberately.
The technician or homeowner sets domestic hot water and heating temperatures within manufacturer and code limits, enabling frost protection and anti-scald features.
Use built-in controls or app interfaces to schedule times, enable eco modes, and lock settings.
Verify changes with water and system temperature readings.
Post-Startup Monitoring and Performance Checks
After startup, the operator should inspect the boiler and surrounding piping for leaks, listen for unusual noises, and note any unfamiliar odors.
They should measure outlet water temperature and system pressure, and track fuel or electrical usage for unexpected spikes.
Particular attention is required during the first 24 to 72 hours for persistent leaks, fluctuating temperatures or pressures, and any abnormal consumption patterns.
Checking for leaks, unusual noises, and odors
During the first hour of operation, the system should be observed for leaks, unusual noises, and unfamiliar odors that could indicate installation or component issues.
Visual inspection targets fittings, valves, and seams for drips or moisture.
Listen for banging, hissing, or continuous running sounds.
Detect fuel, burning, or chemical smells.
If any anomaly appears, shut down power/fuel and contact a qualified technician immediately.
Measuring outlet water temperature and pressure
Measure the outlet water temperature and pressure promptly to verify the boiler delivers safe, efficient output and meets system specifications.
Use calibrated thermometer and pressure gauge at designated test points. Compare readings to manufacturer settings and local codes.
Record values, note deviations, and adjust thermostat or pressure relief settings as instructed.
Recheck after stabilization; document results for routine maintenance and troubleshooting.
Monitoring fuel/electric consumption for anomalies
With outlet temperature and pressure verified, attention shifts to tracking fuel or electrical consumption to detect abnormal usage patterns that may indicate inefficiency or faults.
Consumption should be logged against baseline expectations and recent bills. Sudden increases, irregular cycling, or sustained low draw warrant inspection of burners, thermostats, seals, and controls.
Prompt identification prevents damage and higher operating costs.
What to watch for in the first 24 to 72 hours
The initial 24 to 72 hours after startup are critical for observing system behavior under normal operating cycles.
Inspect for leaks, unusual noises, and stable pressure.
Verify consistent temperature delivery, proper thermostat cycling, and absence of soot or exhaust odors.
Monitor fuel/electric draw against expected values.
Record anomalies, shut down if safety devices trip, and contact a qualified technician for unresolved issues.
Common Problems During Startup and How to Fix Them
Common startup issues include failure to ignite or a pilot that won’t light, insufficient hot water, leaks and pressure-related faults, and unusual noises or rapid cycling.
Each problem has specific checks and simple fixes—such as inspecting the pilot assembly, verifying thermostat settings, tightening fittings, and bleeding air from the system—while some symptoms indicate deeper faults.
If basic troubleshooting does not resolve the issue or if gas, electrical, or pressure components are involved, a licensed technician should be contacted.
No ignition or pilot won’t light
If a water heater’s pilot or ignition fails to light, it prevents the unit from producing hot water and indicates an underlying issue that needs diagnosing.
Common causes include empty gas supply, closed valve, clogged pilot orifice, faulty thermocouple, or a defective igniter.
Inspect gas supply and valves, clean the pilot assembly, test/replace the thermocouple or igniter, and follow manufacturer safety shutdown procedures.
Low or no hot water
Encountering little or no hot water during startup signals a range of possible faults—from thermostat missettings, dip tube failure, or sediment-clogged heating elements in electric models, to burner issues, a faulty gas valve, or scale buildup in gas units.
Check thermostat settings, test elements or burners, inspect dip tube condition, and flush sediment.
Replace failed components or call a qualified technician for gas-system repairs.
Leaks and pressure-related issues
After checking for low or no hot water, attention should turn to leaks and pressure-related problems that often emerge during startup. These can range from minor drips at fittings to rapid pressure spikes that trigger the relief valve.
Inspect fittings, tank seams, and connections. Tighten or replace faulty seals, verify the expansion tank is charged, and test the pressure relief valve.
Call a professional if leaks persist.
Strange noises or cycling on/off
Strange noises or rapid cycling during startup often signal mechanical or control issues within the water heater boiler rather than simple temperature variance.
Intermittent knocking, banging, or frequent burner ignition may indicate sediment buildup, blocked vents, failing thermostats, or a faulty control board.
Homeowners should safely power down, inspect visible components, flush sediment, and verify ventilation and electrical connections before restarting to observe improvement.
When troubleshooting requires a licensed technician
If knocking, rapid cycling, or other startup symptoms persist despite basic checks—powering down, flushing sediment, and inspecting vents and connections—the problem may exceed typical homeowner repairs and warrant a licensed technician.
A professional should inspect combustion components, gas valves, thermostats, pressure controls, and heat exchangers.
Complex diagnostics, sealed-system issues, or suspected carbon monoxide risk require immediate, certified intervention to guarantee safety and compliance.
Maintenance Tasks to Prevent Startup Issues
Routine maintenance reduces the likelihood of startup failures and extends boiler life.
Key tasks include annual inspections with safety control testing, periodic flushing and descaling, and timely replacement of anode rods, filters, and other sacrificial parts.
Keeping vents, flues, and chimneys clear is also essential for safe, reliable ignition.
Annual inspections and safety control testing
Because annual inspections and safety control testing verify system integrity and regulatory compliance, they form a critical component of boiler maintenance to prevent startup failures.
Certified technicians should examine pressure relief valves, combustion chambers, ventilation, and electrical controls. Functional testing of low-water cutoffs, safety interlocks, and thermostats identifies latent faults.
Documentation of findings and timely corrective actions guarantee reliable, code-compliant operation and reduce emergency repairs.
Flushing and descaling procedures
Flush and descale water heater boilers regularly to remove mineral buildup and sediment that reduce heat transfer, cause overheating, and shorten component life.
Routine flushing and descaling restore efficiency, prevent noisy operation, and reduce corrosion. Technicians or informed homeowners should follow manufacturer steps, use appropriate descalers, and guarantee safe disposal of waste.
- Relief: quieter, safer heating
- Confidence: longer equipment life
- Savings: lower energy bills
Replacing anode rods, filters, and sacrificial parts
After flushing and descaling remove accumulated deposits, attention turns to the sacrificial components that protect the boiler from corrosion and debris: anode rods, filters, and other replaceable parts.
Inspect anode rods for heavy pitting or depletion and replace if under recommended length. Clean or replace sediment and inline filters.
Reassemble seals and torque fittings to specification, documenting dates for future maintenance.
Keeping vents, flues, and chimneys clear
When preparing to restart a water heater boiler, confirm vents, flues, and chimneys are free of obstructions and corrosion, since blockages can cause poor draft, carbon monoxide buildup, and burner malfunction.
Visually inspect openings, caps, and accessible sections for nests, soot, creosote, or rust, and clear or repair as needed before proceeding with startup.
Periodic professional inspection and chimney sweeping confirm safe combustion and proper ventilation.
Safety Devices and Settings You Should Know
The guide briefly outlines key safety devices and settings every operator should recognize before starting a water heater boiler.
It covers the function and testing of the temperature-and-pressure relief (T&P) valve, the role of expansion tanks and pressure regulators, and recommended thermostat settings to reduce scald risk.
It also notes the need for carbon monoxide detectors and proper ventilation for combustion appliances.
Temperature and Pressure Relief Valve (T&P) operation
A temperature and pressure relief valve (T&P) is a critical safety device that automatically opens to discharge water if a boiler’s internal pressure or temperature exceeds safe limits, preventing explosions and scalding.
It must be installed per code, oriented to drain safely, tested monthly by lifting the lever to verify flow, and replaced if leaking, corroded, or failing to reseat promptly.
Expansion tanks and pressure regulators
Inspecting expansion tanks and pressure regulators reveals their complementary roles in controlling boiler system pressure and accommodating thermal expansion.
The expansion tank absorbs increased volume as water heats, preventing overpressure. The pressure regulator maintains safe inlet pressure from the supply.
Periodic checks guarantee proper air charge in the tank, functioning regulator setpoints, and absence of leaks or corrosion to prevent system stress.
Thermostat temperature recommendations and scald prevention
After confirming expansion tank integrity and regulator settings, attention shifts to thermostat temperatures and scald prevention to protect occupants and preserve equipment.
Recommended domestic hot water setpoints are 120°F (49°C) to balance safety and Legionella control; boilers supplying radiant systems may run higher with mixing valves.
Install thermostatic mixing valves, test anti-scald devices regularly, and label controls for resident awareness and maintenance.
Carbon monoxide detectors and ventilation requirements
Because combustion appliances can produce odorless, lethal carbon monoxide (CO), properly located detectors and adequate ventilation are essential for safe boiler operation.
Install CO detectors near sleeping areas and boiler rooms, following manufacturer placement and replacement guidelines.
Confirm combustion air vents, flues, and chimneys are unobstructed and sized per code.
Test detectors monthly and replace batteries yearly to maintain reliable protection.
When to Shut Down the Boiler and Emergency Procedures
The section explains when a boiler should be shut down and how to do so safely for gas, electric, or liquid fuel systems.
It also outlines immediate actions for leaks or ruptures, including isolation, evacuation, and emergency contacts.
Finally, it covers winterizing and procedures for extended outages to prevent damage and guarantee a safe restart.
How to turn off gas, electric, or fuel supply safely
When a water heater boiler shows signs of malfunction—such as unusual noises, visible leaks, persistent pilot outages, or the smell of gas—shutting off its fuel and power sources promptly minimizes risk and prevents escalation.
This section outlines when to stop the boiler and the safe, step-by-step procedures for isolating gas, electricity, and fuel lines during routine shutdowns and emergencies.
Close the gas valve at the appliance or meter, switch off the circuit breaker, and shut liquid fuel supply valves.
Verify isolation visually, ventilate the area, and contact a licensed professional before restoring service.
Emergency leak or rupture response steps
After isolating gas, electricity, and fuel as described previously, emergency leak or rupture response focuses on rapid risk reduction and clear actions to protect people and property.
Evacuate occupants, keep clear of steam or scalding discharge, and call emergency services.
Shut main water supply if safe, vent pressure per manufacturer instructions, document conditions, and contact a qualified technician for assessment and repairs before restoring operation.
Winterizing and long-term shutdown steps
If temperatures will remain below freezing for extended periods or the boiler will be unused for weeks or months, it should be shut down and winterized to prevent freeze damage, corrosion, and hazards from unattended fuel or pressure systems.
Drain water, close fuel supply, disconnect power, and isolate valves. Add antifreeze where appropriate, ventilate the area, post shutdown notices, and schedule professional inspection before recommissioning.
Comparison: Quick Reference Table for Startup Differences by Boiler Type
The following quick reference highlights key startup steps, common problems, and required safety checks for different boiler types to aid efficient and safe commissioning. Below is a concise table comparing typical gas, electric, and oil boiler startup attributes. Refer to manufacturer guidance for model-specific procedures and local codes before beginning.
| Boiler Type | Key Startup Steps | Common Problems/Safety Checks |
|---|---|---|
| Gas | Confirm gas supply, pilot/ignition, thermostats | Check for leaks, proper venting, flame stability |
| Electric | Restore power, verify elements, set controls | Inspect wiring, tripped breakers, thermostat function |
| Oil | Prime feed, start burner, monitor fuel pump | Watch for clogged nozzles, fuel leaks, proper combustion |
Key startup steps, typical problems, and safety checks per type
Consult a concise checklist to compare startup procedures, common faults, and safety verifications across boiler types—electric, gas-fired, oil, and combi—so operators can apply the correct sequence and safeguards for each model.
Electric: power, thermostat, element faults.
Gas: pilot/ignition, gas valve, carbon monoxide checks.
Oil: fuel supply, burner priming, soot inspection.
Combi: mains cold feed, pressure, diverter valve operation.
Practical Tips to Extend Boiler Life and Improve Safety
Routine user checks—such as monitoring pressure, inspecting for leaks, and testing relief valves—help spot issues early.
Scheduling regular professional servicing and keeping clear maintenance records guarantees safe operation and warranty compliance.
Considering upgrades to older units can improve efficiency and add modern safety features.
Routine user checks homeowners can perform
Homeowners should perform a few simple visual and operational checks on a regular basis to catch minor issues early and maintain safe boiler function.
Inspect for leaks, corrosion, and unusual smells; verify pressure and temperature readings; confirm pilot/flame stability and audible operation.
Immediate attention prevents escalation and reduces anxiety.
- Check for leaks and corrosion.
- Monitor pressure/temperature.
- Listen for odd sounds.
Scheduling professional servicing and documentation
Regularly scheduled professional servicing is essential to preserve boiler efficiency, catch developing faults that visual checks miss, and maintain warranty and safety compliance.
Homeowners should book certified HVAC or plumbing technicians annually, keep detailed service records, and document serial numbers, inspection dates, findings, and repairs.
Retain invoices and manuals in a dedicated file and follow technician recommendations to guarantee safe, reliable operation and clear warranty evidence.
Upgrading older units for efficiency and safety
After documenting service history and following technician recommendations, evaluating older boiler units for targeted upgrades can yield measurable gains in efficiency and safety.
Recommended actions include replacing inefficient burners, installing electronic ignition and programmable controls, upgrading insulation and flue components, fitting modern pressure and temperature relief valves, and adding condensate recovery where applicable.
Prioritize certified parts and licensed installers to guarantee compliance and longevity.
Quick Troubleshooting Flowchart for Startup Issues
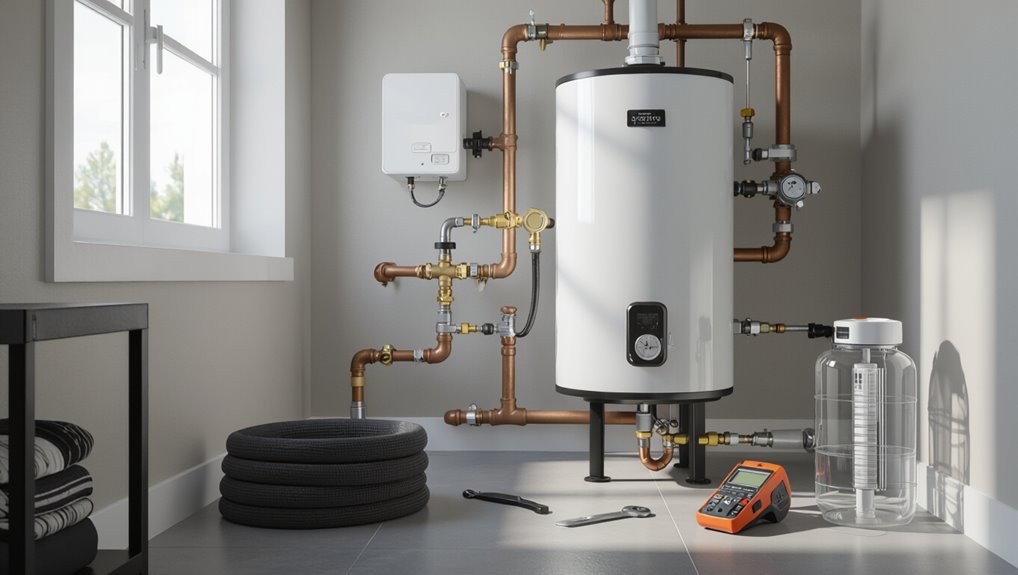
Begin with a clear decision path that guides the user from symptoms to solutions: identify whether the boiler powers up, ignites, maintains flame, or displays error codes.
Then follow branching checks for power supply, pilot/ignition, fuel flow, and safety interlocks.
The flowchart lists sequential checks: circuit breaker, indicator lights, pilot/ignitor, gas/oil valve, pressure, vents, and reset procedures; call a technician if unresolved.
Conclusion
The homeowner approaches the cold, silent boiler with routine caution and quiet confidence, like a gardener tending a sleeping plant. Practical safety checks juxtapose with the machine’s hidden heat: simple valve turns against complex combustion or circuitry. When methodical steps meet respect for risk, the familiar appliance shifts from dormant hazard to reliable comfort. Small, consistent precautions transform occasional anxiety into steady stewardship, keeping warmth predictable and households safer.