How to Unclog a Sump Pump Drain Fast: Step-by-Step Fixes and Prevention Tips
To quickly unclog a sump pump drain, start by cutting the power to the pump. Look for visible debris and clear it away. Check the discharge hose for kinks or airlocks, and use a garden hose to flush the line or a plumber’s snake or wet/dry vacuum to remove any blockages. Inspect the impeller and check valve, then refill the pit to test the system. To prevent future clogs, consider using screens, larger piping, and conducting seasonal checks. More detailed solutions and long-term maintenance tips are available.
How to Tell If Your Sump Pump Drain Is Clogged
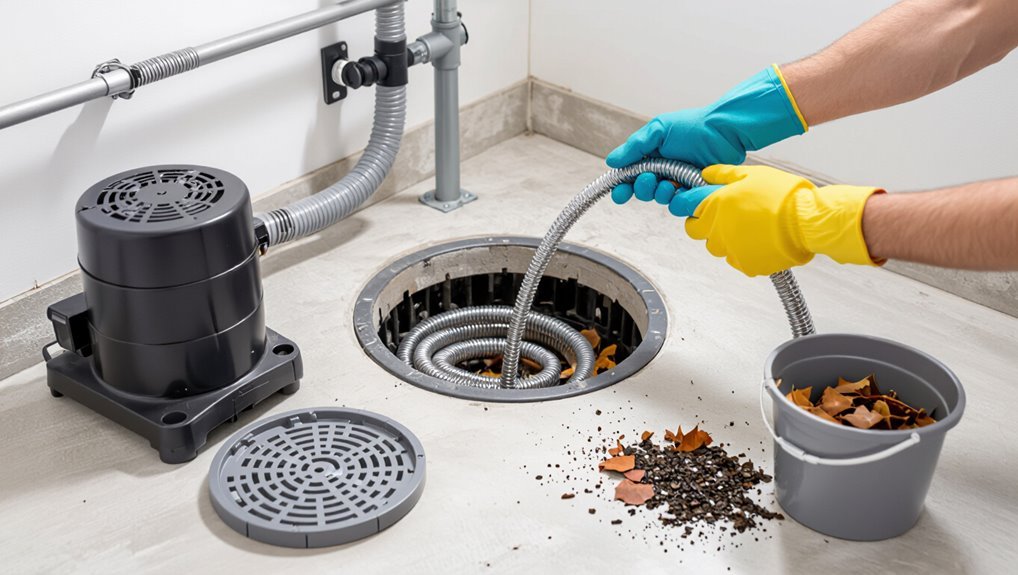
A homeowner can spot a clogged sump pump drain by common signs such as pooling water around the pit, sputtering or weak discharge, and unusual motor strain or noises.
Determining whether reduced flow stems from a blockage or a mechanical failure requires checking discharge line flow and ruling out pump malfunctions.
Before inspecting the drain, basic safety checks—power off, wearing gloves, and confirming no standing electrical hazards—should be performed.
Common signs of a clogged sump pump drain
Unusual noises, slow water removal, and persistent standing water are key indicators that a sump pump drain may be clogged.
Other signs include sputtering discharge, irregular cycling, foul odors from stagnant water, and visible debris at the outlet.
Frequent motor overheating or tripping breakers can accompany clogs.
For guidance on resolving these symptoms, consult the section on how to unclog a sump pump drain.
When reduced flow is a clog vs. mechanical failure
Diagnosing whether reduced discharge stems from a clogged drain or a mechanical failure begins with observing performance patterns and inspecting accessible components.
Intermittent running with normal motor sounds suggests blockage; steady hum, overheating, or no rotation indicates motor or impeller failure.
Check for airlock, kinked discharge hose, visible debris, and compare inlet versus outlet flow.
Record sounds, run cycles, and visible obstructions to distinguish causes.
Safety checks before inspecting the drain
Before any hands-on inspection of a sump pump drain, simple safety checks should be completed to prevent injury and equipment damage: disconnect power at the breaker or unplug the pump, confirm the area is dry and well-lit, wear rubber gloves and eye protection, and make certain that pets or children cannot access the pit during work.
Verify GFCI operation, secure loose wiring, and keep tools organized.
Quick, Immediate Steps to Unclog a Sump Pump Drain
Before attempting any repairs, power to the sump pump should be shut off and any water sources isolated to guarantee safety.
Visible debris can then be cleared from the discharge opening and a garden hose used to flush the line, while creating brief backflow pressure may help dislodge stubborn blockages.
If flow cannot be restored immediately, temporary measures—such as redirecting discharge or using a spare pump—can reduce the risk of basement flooding.
Turn off power and water sources safely
Cut power to the sump pump and shut off any related water sources to prevent injury and further flooding.
The person isolates the circuit at the breaker and unplugs the pump if accessible, then closes shutoff valves feeding nearby fixtures.
Confirm power is off with a noncontact tester.
Wear insulated gloves, avoid wet-hand contact with electrical components, and post a safety notice until work finishes.
Remove visible debris from the discharge line opening
With power and water isolated, attention shifts to the discharge line opening where visible debris often obstructs flow.
The technician inspects the port, removes leaves, mud, and sediment by hand or with gloved pliers, and clears lodged twigs and plastic.
Loose material is placed in a bag for disposal.
Afterward the opening is rechecked to guarantee an unobstructed path before restoring systems.
Use a garden hose to flush the line
A garden hose provides a quick way to flush remaining sediment from the discharge line: once power and water are safely isolated and visible debris removed, the technician feeds the hose into the opening as far as it will go, turns on a steady stream, and allows water to push out trapped mud and grit while watching the outlet for improved flow and dislodged material.
Afterwards, the line is rechecked.
How to create backflow pressure to dislodge blockages
To create backflow pressure that can dislodge blockages, the technician temporarily seals the discharge outlet and forces water or air back through the line to loosen and flush trapped debris.
They use a hose or pneumatic pump, apply short bursts, monitor resistance, and release the seal gradually to avoid surge.
Repeat until flow resumes, then inspect for remaining obstructions and verify proper discharge.
Temporary workarounds to prevent basement flooding
After creating backflow pressure to dislodge a clog, immediate measures can limit basement flooding while a permanent fix is arranged.
Place sandbags or heavy towels around the pit, divert water with a temporary gravity-fed hose to an outdoor drain, run a portable pump if available, and elevate valuables.
Monitor water levels, shut off power near the sump if hazards arise, and call a technician promptly.
Step-by-Step Guide to Fully Clear a Blocked Discharge Line
The following section outlines the practical steps and necessary tools for fully clearing a blocked discharge line, from preparation through final testing.
It covers safely disconnecting the pipe, inspecting and cleaning the check valve and couplings, and the correct use of a plumber’s snake or drain auger.
It also explains when to employ high-pressure water or a wet-dry vacuum to remove stubborn obstructions.
Tools and materials needed
Several essential tools and materials are required before attempting to clear a blocked sump pump discharge line.
The technician should gather equipment that enables inspection, removal of debris, and basic safety without improvisation.
- Protective gloves and eye protection
- Adjustable wrench and pliers
- Garden hose or plumbing snake
- Bucket and rags
- Flashlight and inspection mirror
Disconnecting the discharge pipe safely
Begin by shutting off power to the sump pump and closing any inline valves to prevent flow; this guarantees a safe, dry workspace before loosening fittings.
Then, wear gloves and eye protection, support the pipe to avoid strain, and use the appropriate wrench or pliers to loosen clamps or unions.
Remove the discharge section slowly, containing residual water and inspecting seals for damage.
Checking and clearing the check valve and couplings
Inspect the check valve and couplings next, since blockages or failed seals here commonly cause restricted discharge.
The technician disconnects fittings, checks the flap for debris or warping, and inspects rubber gaskets and threaded joints for leaks.
Remove sediment, replace damaged seals, and reassemble hand-tight plus a quarter turn.
Test for proper one-way flow and retighten if leaks persist.
Using a plumber’s snake or drain auger properly
To clear a clogged discharge line, the technician feeds a plumber’s snake or drain auger into the pipe and advances it slowly while rotating the handle to break up or hook debris.
Progress is monitored by feel and by periodically retracting the cable to remove material and prevent kinking. The technician avoids forcing the cable, uses appropriate tip size, and cleans the tool after extracting debris to inspect for damage.
Using high-pressure water or a wet-dry vacuum
Using high-pressure water or a wet-dry vacuum provides two effective, complementary methods for dislodging and removing debris from a blocked discharge line without dismantling the system.
The first force-flushes clogs; use a pressure washer with a suitable nozzle and short bursts.
The second extracts soft debris and standing water; seal the hose tightly at the outlet and run on wet mode until flow clears.
Reassembling and testing the system
With the discharge line cleared by pressure flushing or vacuum extraction, reassembly proceeds in a methodical sequence to restore watertight connections and verify pump operation.
Reinstall fittings, seals, and clamps, tighten to manufacturer torque, and replace access covers.
Reconnect power, fill the sump to activate the float, and observe flow and check valves for leaks or backflow.
Document performance and schedule follow-up inspection.
Dealing with Specific Types of Obstructions
Different obstruction types require distinct approaches: sediment and sand are often flushed or brushed out. Roots and organic matter may need cutting or chemical treatment, and frozen lines call for thawing techniques.
Collapsed or mechanically damaged pipes usually demand inspection and replacement rather than cleaning. The following section outlines practical methods and safety considerations for each situation.
Clearing silt, sand, and sediment buildup
Silt, sand, and fine sediment commonly accumulate in sump pump pits and discharge lines, gradually constricting flow and reducing pump efficiency.
Technicians recommend isolating power, removing the pump, and shoveling or vacuuming sediment from the basin.
Flush the line with high-pressure water or use a wet/dry vacuum to extract fines.
Reinstall, test flow, and add a coarse filter or settling basin to prevent recurrence.
Removing roots or organic blockages
After addressing sediment, technicians often encounter organic obstructions such as tree roots, leaf mats, and fibrous debris that lodge in pump intakes and discharge lines.
Use manual removal, flexible root saws, or mechanical augers designed for soft material.
Inspect impeller and screen, flush lines with water, and apply enzyme cleaners to break remaining matter.
Trim nearby vegetation and install root barriers to prevent recurrence.
Handling frozen discharge lines in winter
When temperatures drop below freezing, discharge lines can freeze solid or form ice plugs that prevent proper drainage and strain the sump pump.
Technicians should recognize this risk early and treat frozen lines as a distinct obstruction type requiring both thawing and preventive measures.
Recommended actions: safely thaw with heated tape or warm water, clear residual ice, inspect for insulation gaps, and install freeze-resistant piping or slope adjustments to prevent recurrence.
Addressing collapsed or damaged pipes
Frozen discharge lines are not the only serious threat to sump pump performance; collapsed or mechanically damaged pipes present a different set of hazards that often require excavation or section replacement rather than simple clearing.
Inspection via camera or trenching identifies crushed, root-invaded, or crushed joints.
Repairs may include replacing segments, installing rigid pipe, or rerouting; professional assessment guarantees proper bedding, slope, and durable connections.
When to Call a Professional
If the sump pump continues to fail, shows electrical issues, or produces unusual noises or backups, professional assessment is recommended.
A plumber or pump technician will inspect wiring, impeller and check valve condition, provide power testing and safe removal of stubborn blockages, and offer repair or replacement options.
Homeowners can expect service call fees plus labor and parts costs, typically ranging from modest diagnostic fees to several hundred dollars for repairs or more for full replacement, with emergency or after-hours service costing extra.
Signs a clog requires professional help
Recognize that some sump pump clogs exceed basic homeowner fixes and demand a professional’s assessment; persistent backups, unusual noises like grinding or humming, repeated cycling, foul sewage odors, visible mechanical damage, or electrical issues indicate the problem may be more complex than a simple blockage and warrant calling a licensed plumber or sump specialist.
Continued water intrusion after cleaning, tripped breakers, or signs of corrosion also justify professional intervention.
What to expect from a plumber or pump technician
When a homeowner contacts a plumber or pump technician for a sump pump clog, the professional typically begins with a concise assessment: inspect the pit, check the power supply and float switch, listen for motor or bearing noises, and test the pump under load to reproduce the problem.
They will clear blockages, verify discharge line integrity, replace faulty components if needed, and advise on immediate mitigation and preventive measures.
Average costs and service options
Several common service options exist for addressing a clogged sump pump, each with distinct costs and response levels: a basic diagnostic and debris removal typically runs low, a full repair (replacing switches, impellers, or seals) sits midrange, and complete pump replacement with installation commands the highest price. Professionals may charge by visit, hour, or flat job; warranties vary.
| Service Type | Typical Cost | Response |
|---|---|---|
| Diagnostic/Clean | $75–$150 | Same day |
| Repair | $150–$400 | 1–3 days |
| Replacement | $400–$1,200+ | 1–5 days |
Preventive Maintenance to Keep the Discharge Line Clear
A concise preventive plan helps keep the discharge line free of clogs and reduces emergency repairs.
Routine inspections and seasonal tasks like winterizing and spring checks, combined with fitted screens, risers, or covers, address common entry points for debris.
Upgrading to sturdier piping and adding smart accessories such as alarms, automatic backups, and remote monitoring further protect performance and provide early warning of problems.
Regular inspection checklist
One concise checklist itemizes routine checks and actions to keep the sump pump discharge line clear and functional.
- Inspect outlet for debris and animal nests.
- Verify hose connections are secure and watertight.
- Check for kinks, cracks, or sagging in the line.
- Run the pump briefly to confirm steady flow and no clogging.
- Clear and reposition the end pipe away from foundation and walkways.
Seasonal maintenance tasks (winterizing, spring checks)
Seasonal maintenance protects the discharge line from freeze damage and spring blockages by addressing weather-specific risks.
In winter, drain and blow out external lines, insulate exposed sections, and verify check valves to prevent backflow.
In spring, flush the line, inspect for debris and rodent nests, confirm proper slope, and run the pump to guarantee unobstructed flow before heavy rains resume.
Installing protective measures: screens, risers, and covers
After winterizing and spring flushing have reduced immediate freeze and debris risks, attention turns to durable hardware that prevents future blockages.
Install coarse mesh screens at the discharge outlet to stop leaves and gravel, add a riser or elbow to lift openings above ground level, and fit vented covers to deter rodents and ice.
Regular inspections guarantee continued effectiveness.
Upgrading to larger or more durable discharge piping
Consider upgrading discharge piping to a larger diameter or more durable material to reduce clogging, improve flow capacity, and extend service life.
Selecting smooth-walled PVC or rigid HDPE resists debris buildup and corrosion. Increasing diameter lowers velocity-related blockages and eases solids passage.
Guarantee proper slope, secure joints, and compatible fittings. Professional assessment verifies sizing, code compliance, and long-term reliability.
Smart pump accessories: alarms, automatic backups, and remote monitoring
Install smart accessories to add layers of protection and early warning for discharge-line issues.
Alarms detect high water or pump failure, signaling before backups occur. Automatic backup pumps or battery systems maintain flow during outages.
Remote monitoring provides real-time status, alerting homeowners to clogs, power loss, or abnormal cycles.
Together these devices reduce damage risk and speed response to discharge-line problems.
Common Mistakes and How to Avoid Them
Many homeowners make unsafe attempts to clear a discharge line that end up damaging the pump or plumbing.
Others mistakenly treat a motor or electrical failure as a clog, delaying correct repairs.
Technicians also frequently overlook check valves and fittings, which can mimic or cause flow problems if not inspected.
Unsafe attempts that damage the pump or line
Attempting quick fixes without proper knowledge often causes more harm than the original clog. Users force tools, run the pump dry, or use corrosive chemicals, which can crack fittings, seize motors, or damage seals.
Improperly snaking the line kinks or dislodges joints. Professionals recommend shutting power, inspecting visually, and avoiding aggressive DIY methods to prevent costly repairs and safety hazards.
Misdiagnosing pump failure as a clog
Misreading symptoms can lead homeowners to assume a clogged discharge when the real issue is pump failure: a motor burnout, worn bearings, a stuck float switch, or an electrical problem often mimics the signs of a blockage.
Verify power, listen for unusual motor noise, check float movement, and test pump operation before clearing the line.
Document findings; replace or repair rather than repeatedly snaking an intact drain.
Overlooking check valves and fittings during troubleshooting
Although a clogged discharge line is often the first suspect, failing to inspect check valves, couplings, and threaded fittings is a common oversight that can mask or cause sump pump problems.
Corroded or stuck check valves prevent backflow control; loose or leaking fittings reduce flow and pressure.
Technicians should visually inspect, operate valves manually, tighten or replace damaged fittings, and test pump operation under load.
Long-Term Solutions and Upgrades
Long-term strategies focus on preventing recurring clogs and protecting structures by re-routing discharge away from foundations and neighboring properties.
Options include installing a dry well or infiltration system and upgrading to a higher-capacity pump when heavy flow is common.
Durable materials and recommended pipe types—rigid PVC, UV-resistant HDPE, or schedule‑80 where abrasion is a concern—should be specified to guarantee reliable, low-maintenance operation.
Re-routing discharge away from foundation and neighbors
Several practical rerouting options can move sump pump discharge away from a home’s foundation and neighboring properties to prevent recurring water issues.
Options include extending rigid PVC or corrugated pipe downslope, burying pipe to reduce tripping hazards, adding check valves to prevent backflow, and directing flow toward street drains or approved stormwater outlets per local codes to avoid flooding adjacent lots.
Installing a dry well or infiltration system
When routing discharge away from foundations reaches practical limits or local outlets are impractical, installing a dry well or other infiltration system offers a permanent way to manage sump pump effluent on-site.
A properly sized, gravel-filled or prefabricated chamber collects runoff, disperses it into native soil, and reduces surface pooling.
Permeability tests, local codes, and professional installation guarantee effectiveness and prevent groundwater contamination.
Choosing a higher-capacity pump for frequent heavy flow
Upgrade to a higher-capacity sump pump when existing units strain under frequent heavy inflows, as a more powerful pump can handle larger volumes and reduce cycle frequency.
Select a pump rated for higher flow (GPM) and appropriate head height for the basin.
Verify electrical supply, float switch compatibility, and reliable backups.
Professional sizing guarantees efficient operation, longer service life, and fewer clogs from sustained demand.
Materials and pipe types recommended for durability
Long-term sump pump reliability depends heavily on choosing durable materials and pipe types that resist corrosion, abrasion, and biological buildup.
Recommended materials include PVC Schedule 40 or 80 for discharge lines, stainless steel for pump housings and connectors, and CPVC where higher temperature resistance is needed.
Smooth-bore pipes reduce clogging; avoid porous or galvanized options.
Proper fittings and solvent-weld joints enhance longevity and leak resistance.
Troubleshooting Checklist After Clearing the Drain
After clearing the drain, technicians should verify proper flow and observe pump cycling under normal and peak conditions.
They should monitor for recurring clogs and note any patterns in timing, debris type, or trigger events.
Finally, they should record findings and set a regular maintenance schedule to prevent repeat blockages.
How to verify proper flow and pump cycling
Begin by running the sump pump through a full cycle to verify that water flows freely into the discharge line and that the pump activates and shuts off at the appropriate water levels.
Observe discharge velocity, listen for irregular noises, and inspect for leaks or airlocks.
Measure run duration to confirm it matches specifications.
Repeat cycles to verify float switch reliability and consistent priming.
Monitoring for recurring clogs and patterns
Monitor the system closely for signs of recurring clogs by tracking pump cycles, discharge flow, and any changes in noise or vibration over several operating periods.
Note timing patterns, frequency spikes, and flow interruptions that suggest intermittent blockage or debris migration.
Inspect inlet screens, check the check valve and hose for obstructions, and compare observations to baseline performance to identify recurring causes.
Record-keeping and maintenance scheduling
Document all actions and observations immediately following drain clearance to create an accurate record that supports future troubleshooting and maintenance planning.
A concise log improves response time, tracks recurring issues, and informs scheduled service intervals.
- Date and time of service
- Cause of clog and method used
- Parts replaced or repaired
- Next recommended inspection date
- Notes on environmental contributors and outcomes
Conclusion
Regular inspection and prompt action keep a sump pump’s discharge line flowing like a well-oiled machine. By recognizing clog signs early, following immediate and thorough clearing steps, addressing specific obstructions, and scheduling routine maintenance, homeowners reduce flood risk and prolong equipment life. Avoiding common mistakes, considering upgrades when appropriate, and seeking professional help for stubborn problems guarantees long-term reliability. A final troubleshooting pass confirms the system is ready for the next heavy rain.