How to Remove a Compression Fitting Safely: Step-by-Step Guide for Plumbing Repairs
To safely remove a compression fitting, first shut off the water supply and drain the line. Then, back up the fitting body and use two wrenches to loosen the compression nut. Carefully remove the nut and ferrule, applying penetrating oil, gentle heat, or light tapping if they are stuck. After removal, deburr and clean the pipe end, checking for any damage. Prepare for a replacement or alternative connector as needed. Always wear eye protection and be ready to catch any residual water. For further assistance, continue reading for tools, pipe-specific steps, and troubleshooting tips.
Quick overview of removing a compression fitting
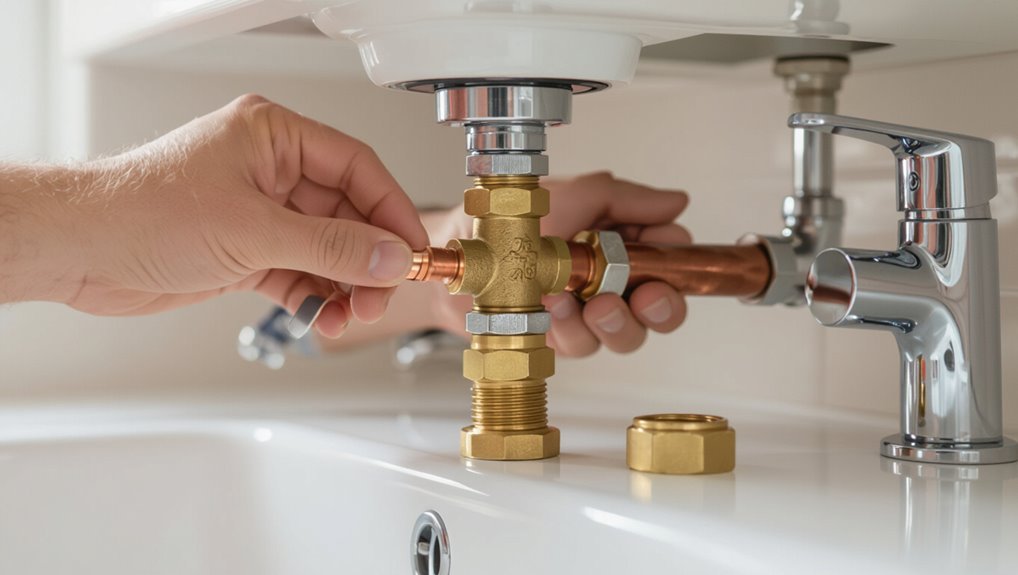
A compression fitting is a mechanical connector commonly used on copper, plastic, or soft metal tubing for water and gas lines.
Removal is required when replacing faulty fittings, rerouting piping, or performing repairs and should be planned to prevent leaks or contamination.
Before starting, the person must shut off supply lines, relieve pressure, and use proper protective gear and tools.
What a compression fitting is and where it’s used
Compression fittings are simple mechanical joints that secure tubing or pipe by compressing a ferrule onto the pipe with a nut, creating a seal without soldering.
Commonly used on water supply lines, ice makers, and appliance connections, they suit copper, brass, and plastic tubing.
This section briefly defines parts and typical locations to inform how to remove compression fitting safely and efficiently.
When and why you would remove a compression fitting
Having understood the parts and typical locations of a compression fitting, homeowners or technicians may need to remove one when replacing a faulty valve, upgrading tubing, repairing a leak, or installing an appliance.
Removal is required if the nut or ferrule is damaged, connections are corroded, fittings leak despite tightening, or system reconfiguration demands new line routing or different connector types.
Safety precautions to take before starting
Before any tools touch the fitting, shut off the water supply and relieve line pressure to prevent sprays or floods.
Verify flow stoppage at fixtures.
Wear gloves and eye protection.
Drain nearby lines and catch residual water with a bucket or rags.
Guarantee adequate lighting and stable footing.
Keep a wrench and replacement parts handy.
Disconnect electrical sources if working near wiring.
Tools and materials needed
The article lists the essential tools—adjustable wrenches, pliers, a tubing cutter—and notes optional items like penetrating oil, a heat source, and spare ferrules or nuts.
It also highlights personal protective equipment such as gloves and eye protection and recommends a well-lit, clear workspace.
The following section explains when each tool or supply is needed and how to prepare the work area safely.
Essential tools (wrenches, pliers, tubing cutter, etc.)
A compact selection of durable tools and a few consumable materials make removing a compression fitting safe and efficient.
Essential items include a set of adjustable wrenches for nut control, slip-joint pliers for gripping, and a tubing cutter for clean pipe ends.
- Adjustable wrench set
- Slip-joint or tongue-and-groove pliers
- Quality tubing cutter
Optional tools and handy supplies (penetrating oil, heat source, replacement parts)
Include a few optional tools and supplies to handle stubborn fittings and unexpected issues:
- Penetrating oil — loosens corrosion for seized nuts.
- Controlled heat source (propane torch or heat gun) — expands metal gently when oil fails.
- Replacement parts — extra olives, nuts, short tubing sections for quick swaps.
These items reduce delays and limit pipe damage during removal attempts.
Personal protective equipment and workspace setup
Personal protective equipment and a well-organized workspace minimize injury risk and protect plumbing components during compression fitting removal.
Gloves shield hands; safety glasses prevent eye injury; knee pads add comfort.
Clear, well-lit area keeps tools accessible and parts uncontaminated.
Recommended items:
- Sturdy gloves, safety glasses, dust mask
- Bright work light, drip tray, magnetic parts dish
- Clean rags, bucket, adjustable wrench
Preparing the plumbing system
Before removing a compression fitting, the water supply should be shut off and the line drained to prevent spillage.
The installer must relieve any remaining pressure and isolate the work area to avoid accidental flow.
Finally, the pipe material and fitting type should be identified to choose the correct removal method.
Shutting off water supply and draining the line
Shut off the main or local shutoff valve to isolate the affected section, then open nearby faucets to relieve pressure and drain residual water from the line.
Verify isolation by checking that faucets and fixtures no longer supply water.
Use a bucket to catch remaining drips, and inspect accessible low points and drain plugs to remove trapped water before beginning work on the compression fitting.
Relieving pressure and isolating the work area
Confirm that the isolated section is depressurized and create a clear, safe work zone by opening a nearby faucet to release trapped pressure.
Place absorbent towels or a drip pan under the fitting, and cordoning off the immediate area to prevent accidental disturbance.
Verify pressure relief, switch off nearby electrical sources if wet work is possible, and keep tools organized on a stable, dry surface to limit movement and spills.
Identifying pipe material and fitting type
How can the correct tools and technique be chosen if the pipe material and compression fitting type are not identified?
The technician inspects pipe appearance, markings, and wall thickness to distinguish copper, PEX, CPVC, or steel.
Compression fittings are checked for brass, plastic, or stainless bodies and whether they use olives, ferrules, or push-fit designs.
Accurate ID prevents damage and guarantees proper removal methods.
Step-by-step method to remove a compression fitting
The technician first inspects the fitting to choose the safest removal approach.
Then, methodically loosens the compression nut.
Once the nut is removed, attention turns to extracting the ferrule without nicking the pipe and addressing any seized components with appropriate techniques.
Finally, the pipe end is cleaned and prepared for repair or a new fitting.
Step 1: Inspect the fitting and determine removal approach
Before any tools are used, inspect the compression fitting to identify its components — nut, ferrule (or ferrules), and the connected tubing — and note visible signs of corrosion, paint, deformation, or previous tampering.
Determine whether tubing is copper, PEX, or plastic, assess accessibility, check for nearby valves to isolate flow, and decide if replacement parts or a full cut-out will be required before proceeding.
Step 2: Loosen the compression nut safely
Begin by ensuring the water supply is isolated and any residual pressure relieved.
Wear safety glasses and gloves.
Secure the pipe to prevent twisting.
Select the correct-sized wrench; an adjustable or compression spanner fits the nut.
Apply steady counterclockwise force, avoiding sudden jerks.
If corrosion resists, apply penetrating oil and wait.
Stop if the pipe shows movement; reassess support before continuing.
Step 3: Remove the nut and ferrule (olive) without damaging the pipe
Loosened nut in hand, the technician carefully unthreads it the rest of the way while supporting the pipe to prevent rotation or kinking.
The nut is slid off, exposing the ferrule. Using pliers or a dedicated ferrule puller, the ferrule is gently pried and rotated until free, avoiding scoring the pipe.
Debris is removed and the area inspected for damage before proceeding.
Step 4: Dealing with stuck nuts or seized ferrules
When a nut or ferrule refuses to budge, the technician assesses the seizure to choose the least invasive removal method that preserves the pipe and fitting.
Penetrating oil is applied, allowed to soak, then gentle back-and-forth torque with correctly sized wrenches is attempted.
If still stuck, controlled heat or careful ferrule cutting with a tubing cutter or mini hacksaw frees the components without crushing the tube.
Step 5: Cleaning and preparing the pipe after removal
After the compression fitting is removed, the technician inspects the pipe end for nicks, burrs, and residual solder or ferrule fragments and then cleans it to guarantee a proper seal for the next fitting.
He files or deburrs edges, removes corrosion and debris with emery cloth or steel wool, wipes with a clean rag and solvent, and measures diameter and squareness before installing a replacement.
Removing compression fittings on specific pipe types
Different pipe materials require tailored approaches when removing compression fittings to avoid damage and leaks.
For copper, focus on cutting and flare or ferrule removal techniques and watch for work-hardened or corroded sections.
For PEX, use compatible methods and avoid tools or fittings that can deform the tubing.
For brass or steel, account for harder ferrules, thread condition, and the potential need for penetrating oil or heat.
The instructions that follow highlight techniques, common issues, and safety considerations for each material.
Copper pipe: techniques and common issues
Copper tubing requires specific attention when removing compression fittings because its softness and work-hardening properties change how fittings grip and how the pipe reacts to force.
Use gentle, controlled torque and back-off compression nuts slowly to avoid kinking or fracturing.
If the ferrule has seized, apply penetrating oil, alternate heat and gentle tapping, and consider replacing a deformed tube end rather than forcing reuse.
PEX pipe: compatible methods and cautions
While copper’s softness and work‑hardening demand careful torque and ferrule replacement when necessary, PEX presents a different set of considerations: its flexibility and ringed or crimped fittings require methods that avoid crushing or nicking the tubing.
Removal favors cutting behind crimp rings, using PEX‑compatible slip fittings, and replacing damaged sections with new fittings or couplers; heat and aggressive wrenches are discouraged.
Brass or steel pipe: special considerations
Handle brass and steel pipe with care during compression fitting removal, since their hardness and tendency to gall or deform under improper force demand different tactics than softer materials.
Use correct-sized wrenches, steady torque, and avoid hammering. Apply penetrating oil if threads bind.
If nuts or ferrules seize, cut the fitting and replace ferrules; inspect pipe ends for burrs or thinning before reinstalling new fittings.
Alternatives and follow-up actions after removal
After removal, decisions about reuse versus replacement of the compression nut and ferrule should be assessed based on visible wear and sealing integrity.
If replacement is chosen, clear step‑by‑step guidance for installing a new compression fitting helps guarantee a reliable joint.
Alternatives such as soldered, push‑fit, or crimp connections can then be considered for durability, speed, or compatibility with the pipe material.
Reusing vs replacing the compression nut and ferrule
Decide whether to reuse the compression nut and ferrule based on visible condition and leak history: a undamaged nut and a ferrule without distortions or deep scratches can sometimes be reused, but any sign of deformation, corrosion, or improper sealing warrants replacement to guarantee a reliable joint.
Reuse saves cost and time but risks future leaks; replace when doubt exists, especially after repeated installations.
Installing a new compression fitting step-by-step
Begin installing the new compression fitting by ensuring the tubing end is squarely cut, clean, and free of burrs; slide the nut and ferrule onto the tube in the correct orientation.
Insert the tube fully into the fitting body, hand-tighten the nut, then secure it with a wrench to the manufacturer’s specified turns or torque while backing up the fitting body as needed.
After tightening, test for leaks and recheck tightness.
Converting to soldered, push-fit, or crimp connections
When replacing a removed compression fitting, evaluate whether to convert the joint to soldered, push-fit, or crimp connections based on pipe material, access, pressure rating, and permanence desired; each method has distinct tool, skill, and compatibility requirements that affect reliability and future serviceability.
Consider options visually:
- Soldered: clean copper, torch, flux.
- Push-fit: no heat, simple, removable.
- Crimp: requires rings, tool, reliable for PEX.
Troubleshooting common problems
When issues arise during or after removal, the guide outlines targeted fixes for the most common problems.
It covers techniques to free a stuck nut and remove a ferrule, options for repairing a damaged pipe end, and a concise diagnostic checklist for post-reinstallation leaks.
Each item prioritizes safety and practical steps to restore a sound, leak-free connection.
Nut won’t budge: methods to free it
A stuck compression nut is usually caused by corrosion, overtightening, or grit trapped in the threads; diagnosing the likely cause guides the safest approach to freeing it.
Apply penetrating oil, allow dwell time, then use two wrenches for opposing turns.
Tap the nut gently with a hammer to break corrosion. If heat is safe, warm the nut briefly.
Protect nearby seals and retest slowly.
Ferrule stuck on pipe: removal tactics
If the nut loosens but the ferrule remains clamped to the pipe, the problem shifts from freeing threads to separating a ring that’s often crushed, corroded, or embedded in tubing.
Use penetrating oil, gentle tapping with a brass punch, and back-and-forth rotary motion with pliers or a pipe wrench.
For brass ferrules, carefully score and pry; for stubborn corrosion, use a thin cutoff wheel to remove the ring.
Damaged pipe end: repair and patch options
Assess damaged pipe ends quickly to determine whether the defect is limited to surface gouges, a short-section fracture, or deformation that compromises sealing.
Small scratches may be smoothed with fine emery, while minor dents can be reshaped.
For short fractures or badly scored ends, cut back to sound material and deburr.
Consider coupling sleeves, repair connectors, or replacing the section when integrity is doubtful.
Leaks after reinstallation: diagnostic checklist
When leaks appear after reinstalling a compression fitting, diagnosing the cause requires a systematic checklist to isolate installation errors, component defects, and material incompatibilities.
Inspect ferrule seating, nut torque, and pipe alignment; verify ferrule and nut condition for cracks or deformation; confirm pipe end squareness and burr-free surface; test with low pressure, then full pressure.
Replace suspect parts and retest to confirm leak elimination.
Best practices and tips for a durable repair
The section outlines practical steps to protect pipes during fitting removal, including proper tool selection and techniques to minimize stress on joints.
It also identifies clear signs that warrant calling a professional plumber rather than attempting DIY repairs.
Finally, routine preventive maintenance measures are recommended to reduce the likelihood of recurring leaks and extend the life of the plumbing.
How to avoid damaging pipes during removal
Start by securing a clear workspace and isolating the affected section of pipe to minimize movement and stress during fitting removal.
Use properly sized wrenches, support the pipe on both sides, and apply steady, controlled force.
Inspect for corrosion, heat gently if needed, protect soft tubing with jaw covers, and avoid twisting or bending to prevent cracks, kinks, or compromised seals.
When to call a professional plumber
How should a homeowner decide whether to call a professional plumber rather than attempt removal and repair alone?
If corrosion, unknown pipe material, persistent leaks, limited access, or high water pressure exist, a licensed plumber guarantees durable repair.
Professionals offer appropriate tools, replacement parts, and code compliance.
Call when uncertainty risks property damage, safety, or when prior DIY attempts failed to stop leaks promptly.
Preventive maintenance to reduce future issues
Regular inspections and basic upkeep greatly reduce the chance of recurring leaks and prolong the life of compression fittings.
Periodic checks, cleaning, and gentle tightening keep joints secure. Replace worn olives and ferrules promptly, and use compatible materials to avoid corrosion.
- Inspect for corrosion and moisture.
- Clean threads and fittings.
- Replace seals and ferrules as needed.
Comparison of connection methods after removal
When a compression fitting is removed, choosing the replacement connection—soldered, push-fit, flare, or re-compressed—depends on factors such as pipe material, pressure rating, permanence, and available tools. Each method balances leak resistance, skill, and time; selection follows site constraints and code.
| Method | Strength |
|---|---|
| Soldered | Permanent |
| Push-fit | Quick |
Conclusion
In closing, the guide gently ushers readers away from confusion toward confident action. It suggests that, with measured tools and calm hands, one can discreetly retire an old compression fitting and welcome a tidier connection. By treating the work as a simple, polite exchange—removing the tired, installing the steady—the plumbing is allowed to “move on” gracefully. The result: a quietly improved system that serves without fanfare or fuss.