How to Change a Shower Mixing Valve: Step-by-Step Guide for DIYers
To change a faulty shower mixing valve, start by shutting off the water supply. Next, remove the handle and trim to access the valve. Extract the old cartridge or valve body, then install the correct replacement using proper seals and plumber’s tape. Key steps include draining the lines, confirming shutoff valves, matching the valve type, and testing for leaks and temperature accuracy. Basic repairs typically take about an hour, while full replacements may require more time. For detailed instructions and troubleshooting tips, continue reading.
What a Shower Mixing Valve Does and Why You Might Replace It
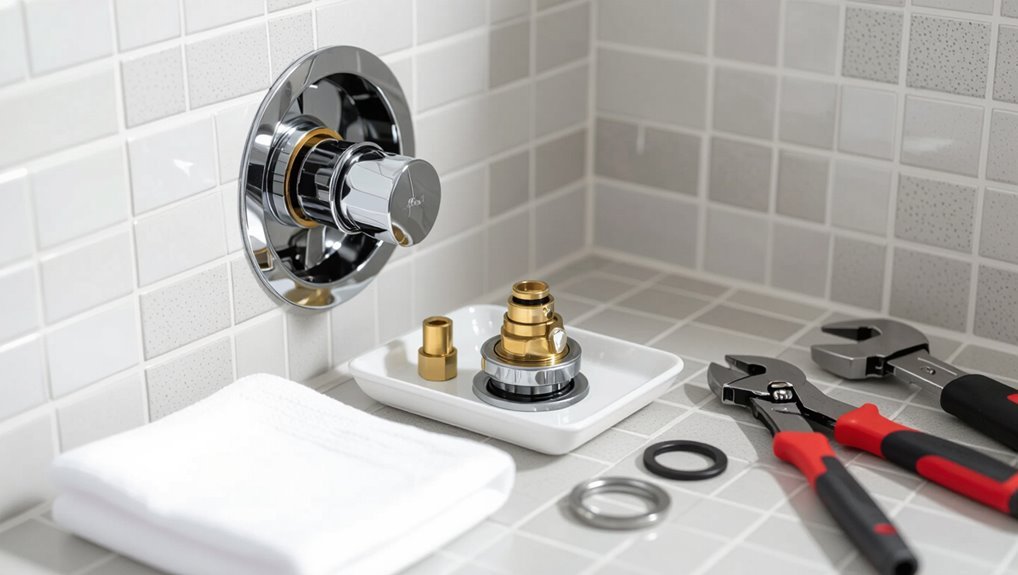
The shower mixing valve regulates hot and cold water flow to maintain a set temperature and balance pressure.
Visible signs that it needs replacement include fluctuating temperatures, persistent leaks, or difficulty turning the handle.
Delaying replacement can lead to scalding, water damage from leaks, and reduced system efficiency.
How a mixing valve controls temperature and pressure
A mixing valve blends hot and cold water to deliver a steady shower temperature while preventing scalding or chilling from pressure fluctuations.
The cartridge modulates flow proportionally, compensating for supply pressure shifts so set temperature remains constant.
Understanding this mechanism helps DIYers approach how to change shower mixing valve safely and select compatible replacements that maintain pressure balance and thermal control.
Common signs that the valve needs replacement
When water temperature becomes unpredictable or operation feels stiff, these are clear indicators that a shower mixing valve may be failing.
Additional signs include persistent drips from the showerhead, sudden changes from hot to cold without adjustment, sputtering or reduced flow, and visible corrosion or mineral buildup around the trim.
Frequent adjustments to maintain temperature also suggest internal wear or cartridge failure.
Risks of delaying replacement (scalding, leaks, inefficiency)
Delay can escalate a failing shower mixing valve from a minor annoyance into a safety and property hazard. Continued use risks sudden scalding as thermostatic control fails, persistent leaks that damage walls and flooring, and reduced efficiency raising water and energy bills.
Prompt replacement limits injury, prevents costly repairs, restores temperature control, and maintains system reliability.
Types of Shower Mixing Valves and How to Identify Yours
Different valve types affect both performance and replacement approach, so identifying the installed unit is an important first step.
Common categories include:
- Single-handle cartridge valves
- Pressure balance valves
- Thermostatic valves
- Multi-function and diverter-integrated valves
Owners should also check model numbers and manufacturer markings on the valve body to confirm the exact type before ordering parts or beginning work.
Single-handle cartridge valves
Identify a single-handle cartridge valve by its smooth, linear operation and a single exterior handle that controls both temperature and flow.
Internally, a replaceable cartridge moves within a sleeve to mix hot and cold. Common materials include brass or plastic cartridges.
Removal exposes a single central retaining nut or clip.
Cartridge designs vary by manufacturer, so match parts for proper replacement and sealing.
Pressure balance valves
Pressure balance valves maintain a consistent mix of hot and cold water by mechanically sensing and compensating for pressure fluctuations in either supply line, preventing sudden temperature spikes when someone else uses plumbing elsewhere.
Typically found in single-handle showers, they use a sliding spool or piston linked to the handle.
Identification: look for a compact valve body with two inlet ports and a central moving element.
Thermostatic valves
When precise temperature control is required, a thermostatic mixing valve maintains a set water temperature by sensing and adjusting the hot and cold supplies independently of pressure changes.
Thermostatic valves feature a temperature dial, separate shutoff or service stops, and cartridge mechanisms. They prevent scalding and compensate for inlet temperature shifts.
Identification: look for dual inlet connections, temperature markings, and a limiting stop on the handle.
Multi-function and diverter-integrated valves
Multi-function and diverter-integrated valves combine flow control and outlet selection into a single unit, allowing a shower to feed multiple fixtures—such as a handheld, rainhead, and tub spout—without separate external diverters.
These valves house internal cartridges or rotary diverters, vary by port count and control style, and require identification of mounting depth and inlet/outlet layout before replacement to guarantee compatibility and proper function.
How to read model numbers and manufacturer markings
Although model numbers and manufacturer markings can appear cryptic, they provide essential information for identifying a shower mixing valve’s series, configuration, and compatible replacement parts.
Inspect cast bodies, trim plates, and cartridge faces for stamped or molded codes. Cross-reference codes with manufacturer websites, parts diagrams, or customer service.
Note date codes and revision letters; photographs expedite accurate identification when ordering replacements or seeking technical support.
Tools, Materials, and Preparations You’ll Need
Before beginning the replacement, the necessary tools, parts, safety gear, and preparatory steps should be assembled and confirmed.
A concise checklist can guide the process:
- Wrenches, screwdrivers, cartridge puller, and other essential tools.
- Correct replacement valve or cartridge, chosen by model and connection type.
- Protective gear and coverings to safeguard tiles and fixtures.
- Pre-replacement steps: shut off water, open drains, and clear the work area.
With these items in place, the work proceeds more smoothly and safely.
Essential tools (wrench, screwdriver, cartridge puller, etc.)
Gathering the right tools prevents delays and damage when replacing a shower mixing valve.
Essential items include adjustable and basin wrenches for nuts, flat and Phillips screwdrivers, cartridge puller, pliers, hex keys, and a silicone or plumber’s grease-safe brush.
A flashlight, tape measure, utility knife, and plumber’s tape complete the set, ensuring efficient removal, installation, and leak-proof sealing.
Replacement parts and how to choose the correct valve
Several core replacement parts should be identified and matched to the existing plumbing before purchasing a new shower mixing valve.
Measure pipe type and center-to-center dimensions, note cartridge model and trim compatibility, and record inlet/outlet orientations.
Purchase matching escutcheon, trim kit, and mounting hardware.
Verify pressure balancing or thermostatic function requirements and compatible flow rates to guarantee proper operation and code compliance.
Safety gear and materials to protect surrounding finishes
Having identified the correct valve and matching trim, attention turns to protecting the installer and surrounding finishes while work proceeds.
Recommended items: safety glasses, nitrile gloves, dust mask, knee pads, and ear protection.
Materials to shield finishes include painter’s tape, drop cloths, plastic sheeting, and foam edge protectors.
Keep a container for small fasteners and a utility knife for precise cuts.
Pre-replacement checklist (shut-off, drain, room prep)
Before any cutting or disassembly begins, verify the water supply is fully shut off, the shower lines are drained, and the work area is prepared to protect finishes and provide clear access.
Confirm main and local shutoff valves, open faucets to relieve pressure, and drain remaining water from the shower arm and mixer.
Lay down drop cloths, remove nearby items, guarantee lighting, and gather tools within reach.
Step-by-Step Guide to Replacing a Shower Mixing Valve
The procedure begins by shutting off the water supply and draining the lines to prevent leaks and pressure.
Next, the handle, trim plate, and escutcheon are removed to expose the valve, which is then inspected for mounting and access issues.
The old cartridge or valve assembly is safely extracted and replaced with the prepared new valve or cartridge.
Step 1 Turn off water supply and drain the lines
Shut off the home’s main water supply and verify both hot and cold lines are closed before any work begins.
Next, open nearby faucets and the shower valve to relieve pressure and drain residual water.
Use a bucket and towels to catch discharge. If available, open an outdoor spigot to speed drainage.
Confirm no flow before proceeding with any disassembly.
Step 2 Remove handle, trim plate, and escutcheon
With the lines verified dry and fittings depressurized, the next task is to expose the valve by removing the handle, trim plate, and escutcheon.
First, remove the handle screw and pull the handle off.
Unscrew or pry off the trim plate, keeping fasteners and decorative components organized.
Finally, detach the escutcheon gently to reveal the valve access area without forcing or damaging surrounding tile.
Step 3 Inspect the valve body and assess mounting/access
Inspect the exposed valve body closely to identify its type, condition, and how it’s mounted to the wall or framing.
Observe corrosion, mineral buildup, leaks, or damaged threads.
Note whether the valve is secured to studs, a mounting bracket, or a carrier system and whether nearby pipes or insulation limit access.
Record measurements and obstruction points before proceeding.
Step 4 Remove old cartridge or valve assembly safely
Having noted mounting points and any obstructions, the technician prepares to remove the old cartridge or valve assembly by first ensuring the water supply at the service shutoff is closed and remaining pressure relieved from the lines.
Protective eyewear and gloves are donned. Fasteners and retaining clips are carefully removed, then the cartridge is extracted with firm, even pressure.
Debris and gasket remnants are cleared from the valve cavity.
Step 5 Prepare and install the new valve or cartridge
Begin by confirming that the replacement valve or cartridge matches the make and model of the original and that all included seals, O-rings, and mounting hardware are present and undamaged.
Lubricate O-rings with plumber’s grease, position the cartridge correctly to alignment tabs or notches, and seat it fully.
Secure retaining clips or screws to manufacturer torque recommendations before restoring water supply and checking for leaks.
Step 6 Reassemble trim, handle, and sealing surfaces
With the new valve or cartridge secured and tested for leaks, attention turns to restoring the trim, handle, and any sealing surfaces to their proper positions.
Refit escutcheon plate, replace backing gaskets or O-rings, and align trim with mounting screws.
Seat decorative flange flush, tighten fasteners without overtightening, and reinstall handle(s).
Confirm smooth operation and correct alignment before final cosmetic adjustments.
Step 7 Turn water back on, flush lines, and check for leaks
Open the main supply valves slowly and observe the valve and connections for any sign of leakage; doing this gradually prevents pressure surges and allows trapped air to escape.
After flow begins, open the shower to flush debris and air from lines until water runs clear and steady.
Inspect exposed joints, tighten fittings if needed, and monitor for several minutes to confirm no slow leaks remain.
Step 8 Test temperature range and pressure balance
Once the main supply is steady and fittings show no leaks, the next step is to test the valve’s temperature range and pressure balance.
Rotate handle through full range, confirm hot and cold limits meet expectations, and set stop if needed.
Simulate pressure drop by closing another fixture; verify temperature stays stable and adjust cartridge or balancing mechanism until consistent, then document settings.
Dealing with Common Complications During Replacement
Common complications during a mixing valve replacement include stuck or corroded cartridges that require careful extraction, limited behind-the-wall access that may call for an access panel, and soldered or threaded connections needing appropriate tools.
Technicians must also address trim misalignment and persistent leaks by verifying valve placement, seal integrity, and proper fasteners.
The following section outlines safe removal methods, access solutions, connection strategies, and troubleshooting steps for trim and leakage.
Stuck or corroded cartridges and safe removal methods
When a mixing valve cartridge refuses to budge, it is often due to mineral buildup, corrosion, or years of trapped sediment binding the parts together.
Apply penetrating lubricant, let it soak, then use proper cartridge pullers or strap wrenches to avoid damage.
Heat with a hair dryer to expand metal lightly. Protect surrounding finishes and proceed slowly; cut-out extraction should be a last resort.
Limited access behind the wall and access panel solutions
Stubborn cartridges often prompt more aggressive removal methods, but tight or nonexistent wall access presents a different challenge: reaching the valve body and connections without damaging surrounding finishes.
Temporary access panels, cutting minimal openings behind the valve, or removing adjacent tile sections permit inspection and repair.
Use a stud finder, mark utilities, and brace openings.
Restore with matching material and proper waterproofing to preserve appearance and integrity.
Dealing with soldered or threaded connections
Encountering soldered or threaded connections requires different tools and precautions than modern push-fit or compression fittings.
The technician should identify joint type, use an appropriate torch or pipe wrench, and clean fittings before reassembly.
When soldering, flux and proper heating avoid cold joints; when threaded, apply pipe dope or PTFE tape and torque evenly.
Shutoff, test, and inspect for leaks carefully.
What to do if trim doesn’t align or leaks persist
Check the alignment and sealing of the trim before declaring the job complete: misaligned escutcheons or persistent drips usually indicate installation errors, warped parts, or hidden defects in the valve or supply lines.
Verify cartridge seating, tighten mounting screws evenly, replace warped escutcheons or gaskets, and retape threaded joints.
If leaks continue, isolate supply lines and test valve body; consider professional inspection or replacement.
When to Repair vs Replace the Entire Valve or Valve Body
A basic cartridge swap often suffices when leaks, reduced flow, or inconsistent temperature result from worn seals or internal cartridge wear while the valve body and trim remain intact.
Extensive corrosion, mineral buildup inside the valve body, or obsolete valve designs that lack modern safety features typically justify replacing the entire valve or body.
Homeowners should weigh the lower immediate cost and shorter labor time of a cartridge repair against the longer-term benefits and higher upfront cost of a full replacement.
Signs a simple cartridge swap is sufficient
When is a simple cartridge swap enough versus replacing the entire valve or valve body?
A cartridge swap suffices when:
- Leaks are confined to the handle area.
- Temperature control falters but the body shows no damage.
- Flow issues stem from worn seals or mineral buildup.
- The valve body is stationary, not corroded.
Confirm compatibility and test after replacement to guarantee full function.
When body corrosion or outdated valves require full replacement
Inspecting the valve body for visible corrosion, extensive mineral encrustation, cracks, or damaged mounting surfaces signals the need to replace the entire valve rather than attempt a repair.
Replacement is also warranted for obsolete designs lacking compatible cartridges, compromised seals causing leaks into wall cavities, or warped bores preventing reliable sealing.
Safety codes, inaccessible internal damage, and recurring failures justify full valve body replacement.
Cost and time comparison for repair vs full replacement
How much time and money will determine whether a repair or full valve-body replacement is the better choice. A quick cartridge swap often costs less and takes an hour; corroded bodies need full replacement, higher cost and several hours. Consider parts availability, labor rates, and long-term reliability when deciding.
| Option | Typical outcome |
|---|---|
| Repair | Low cost, quick |
| Replace | Higher cost, durable |
Tips to Ensure a Long-Lasting Valve Installation
A durable mixing valve installation depends on correct sealing with plumber’s tape or compound and attention to water quality and anti-scald settings.
Regular maintenance—such as inspecting seals, flushing mineral buildup, and testing temperature limits—helps prevent premature failure.
Keeping a small stock of recommended spare cartridges, O-rings, and basic tools on hand reduces downtime when repairs are needed.
Proper sealing and use of plumber’s tape or compound
Proper sealing prevents leaks and guarantees the mixing valve maintains pressure balance and longevity.
Installers should clean threads, apply plumber’s tape clockwise for threaded fittings, and wrap three to five turns without overlapping the bore.
For flanges or soldered joints use approved pipe compound or flux per manufacturer instructions.
Tighten fittings to spec, inspect for seepage, and retest under full pressure before finishing.
Water quality considerations and anti-scald settings
Because feed-water chemistry and temperature settings directly affect performance and safety, attention to water quality and anti-scald adjustments is essential for a durable mixing valve installation.
Test hardness and pH; install a softener or scale inhibitor if mineral buildup is likely.
Set anti-scald or thermostatic limits per local code, verify with a thermometer, and document settings for future reference.
Routine maintenance checklist to prevent future failure
Following verification of water chemistry and anti-scald settings, routine maintenance becomes the primary defense against premature mixing valve failure.
Inspect annually for leaks, mineral buildup, corrosion, and worn seals. Operate cartridge through full range to prevent sticking.
Clean aerators and strainers; flush lines if sediments appear. Verify temperature limits and trim integrity.
Document service dates and observations for future reference.
Recommended spare parts and tools to keep on hand
A small, well-organized kit of spare parts and basic tools helps guarantee quick repairs and extends the life of a shower mixing valve.
Recommended items include:
- Replacement cartridge and O-rings for the specific valve model.
- Assorted screws, escutcheon screws, and retaining clips.
- Plumber’s grease, silicone plumber’s tape, and thread sealant.
- Channel-lock pliers, adjustable wrench, and a small screwdriver set.
When to Call a Professional Plumber
When safety, local code compliance, or permits are at stake, a licensed plumber should handle the work.
Complex systems—such as multi-outlet installations, thermostatic mixing valves, or pressure-regulating setups—also warrant professional expertise.
Homeowners should compare estimates, check licensing and references, and confirm warranty terms before hiring.
Safety and code issues that require licensed work
How should a homeowner decide whether a mixing valve issue requires a licensed plumber?
A licensed plumber is needed for work affecting structural piping, gas lines, backflow prevention, or where local codes mandate permits.
Jobs involving soldering on potable lines, relocations, major leak repairs, or safety device installation (anti-scald/pressure relief) should be left to professionals to guarantee code compliance and liability protection.
Complex systems (multiple outlets, thermostatic mixing, pressure systems)
Evaluate system complexity before attempting repairs: setups that feed multiple showerheads, body sprays, tub spouts, or that use thermostatic mixing valves and pressure-balancing equipment create interdependent flows and safety considerations that exceed typical DIY scope.
Such systems demand diagnostic tools, knowledge of cross-connection prevention, correct cartridge selection, and calibrated pressure/temperature settings; hire a licensed plumber when cascading failures, inconsistent temperatures, or complex manifold plumbing are present.
How to evaluate plumber estimates and warranties
What should guide a homeowner’s decision to hire a professional is a clear comparison of written estimates, scope details, and warranty terms.
The homeowner should verify license, insurance, and references, compare labor and parts breakdowns, ask about warranty length, coverage, and transferability, and confirm response times for repairs.
Choose the bid balancing price, experience, and robust warranty protections.
Quick Reference: Typical Time, Difficulty, and Cost Estimates
A concise quick-reference helps readers compare typical time, difficulty, and cost for changing different valve types and access conditions. Below is a compact table summarizing expected time, DIY skill level, and rough parts/labor costs for common scenarios to guide decision-making. Use this as a starting point; individual projects may vary.
| Scenario | Time Estimate | Estimated Cost (parts + labor) |
|---|---|---|
| Cartridge valve, easy access | 1–2 hours | $50–$200 |
| Pressure-balancing valve, moderate access | 2–4 hours | $150–$400 |
| Thermostatic/hidden valve, difficult access | 4–8+ hours | $300–$900 |
Time required by valve type and access level
Most replacements fall into a few predictable time bands based on valve type and how easily the valve can be reached.
Cartridge swaps with access panels often take 1–2 hours.
Ceramic-disk or pressure-balancing valve replacements typically require 2–4 hours.
Full-body valve replacements or behind-wall access via demolition and repair can take 6–12 hours or longer, depending on plumbing complexity and required drywall or tile restoration.
DIY difficulty rating and skill prerequisites
This quick-reference summary rates typical shower mixing-valve jobs by time, difficulty, and cost to help homeowners decide when to DIY and when to hire a pro.
Difficulty ranges from easy (cartridge swaps, basic trim removal) to advanced (access panels, soldering, multi-valve systems).
Prerequisites: basic plumbing tools, comfort shutting water, pipe-joining skills, steady troubleshooting, and adherence to local codes; confidence level dictates hiring a professional.
Ballpark parts and labor costs
Following the skill and time considerations, homeowners should weigh expected parts and labor costs to decide whether to proceed alone or hire a pro.
Typical cartridge or mixing valve parts range $25–$150; trim kits add $50–$250.
DIYers save labor but should factor in tools and possible replacement fittings.
Professional labor typically runs $150–$400 for a standard replacement, more for complex jobs.
Visual Aids and Diagrams to Follow During the Job
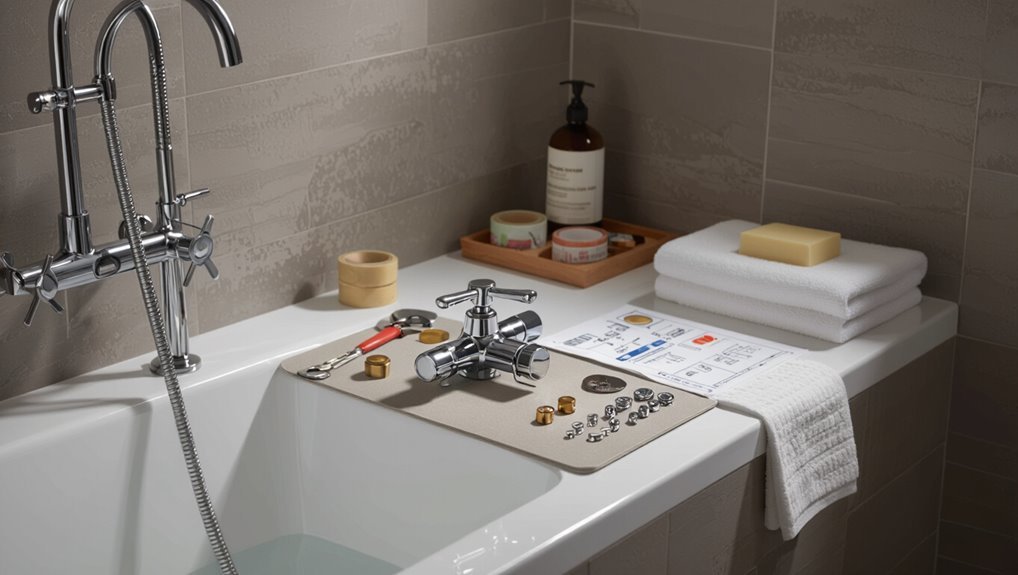
Clear, labeled diagrams of a typical mixing valve help identify the body, cartridge, seals, and inlet/outlet ports.
Step-by-step illustrations showing trim removal and cartridge extraction sequence reduce errors and speed the procedure.
Annotated figures highlighting common leak sources and seal locations guide inspection and correct reassembly.
Typical valve anatomy labeled
A typical shower mixing valve consists of a central cartridge or cartridge-style mechanism, inlet ports for hot and cold supply lines, an outlet to the showerhead, a pressure-balancing or thermostatic assembly, and sealing components such as O-rings and seats.
Each part is usually identified on diagrams to show flow direction, mounting points, and fastener locations. Labels also mark trim screw positions, access panels, and serviceable check valves.
Trim removal and cartridge extraction sequence
With the valve anatomy identified, attention turns to removing the trim and extracting the cartridge in a defined sequence that protects internal parts and avoids damage to the finished surface.
First remove handle set screws, escutcheon screws, and trim plate. Label and store fasteners.
Gently pry trim away, expose retaining clip or nut, remove retaining device, then pull cartridge straight out using pliers or a cartridge puller.
Common leak sources and seal locations
Multiple predictable leak points typically account for most mixing valve failures: inlet and outlet ports where supply lines connect, the cartridge bore where seals seat, the temperature/pressure-balancing bypass passages, and the bonnet or escutcheon interfaces where trim meets the valve body.
Inspect O-rings, backflow seals, cartridge washers, seat rings and pipe threads.
Note gasket compression, corrosion, hairline cracks and improper assembly that allow weeping.
Conclusion
Replacing a shower mixing valve restores control and safety to a bathroom’s plumbing system. The DIYer should weigh skill level, time, and tools before proceeding, since even routine swaps can reveal unexpected problems. When following the steps and tips provided, a careful approach usually keeps projects on track; however, if complications arise, calling a pro can save time and money. In short, proceed with caution—don’t bite off more than one can chew.