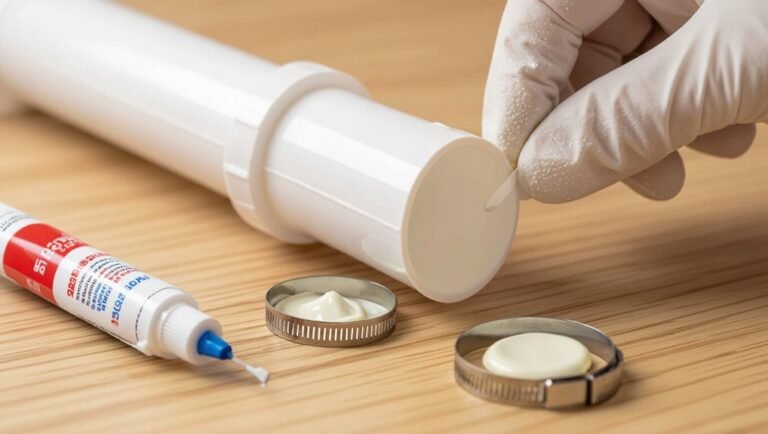
How to Connect PEX Pipe to PVC: Step-by-Step Guide for a Leak-Free Joint
To connect PEX to PVC securely, you can use approved methods such as push-to-connect fittings, solvent-weld junctions with a PEX barb, or compression/crimp fittings. Start by cutting the pipe ends square, deburring, and cleaning them thoroughly. For push fittings, ensure proper insertion by aligning with depth markings. Solvent-weld connections require primer, cement, and adequate curing time before pressure testing. Finally, conduct a pressure test and inspect for leaks to ensure a reliable joint. For detailed steps, tools, codes, and troubleshooting tips, continue reading.
Overview of Connecting PEX to PVC
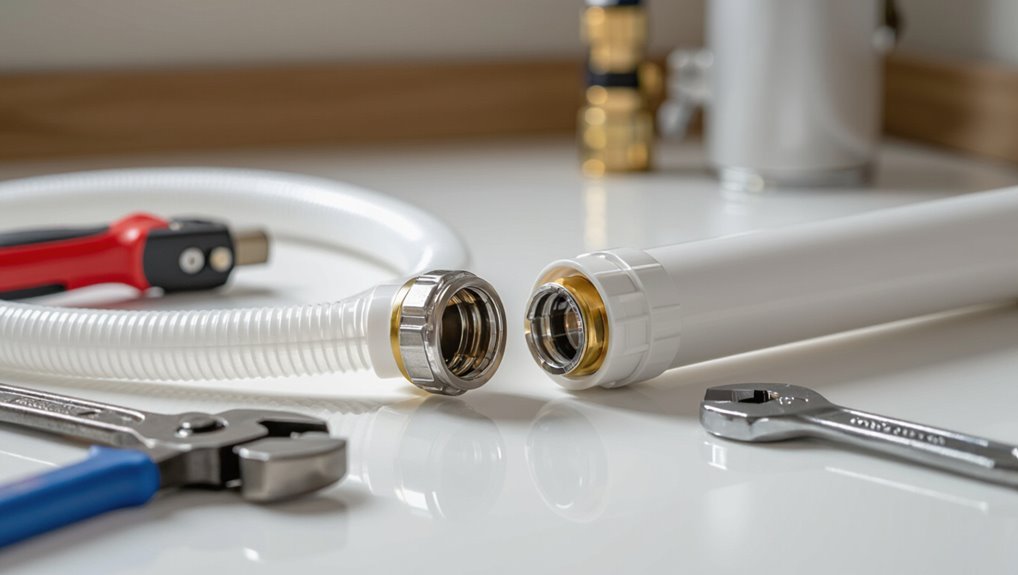
Connecting PEX to PVC is often required when extending or repairing plumbing systems that combine flexible and rigid piping, such as retrofits or conversions to outdoor irrigation.
Typical applications and compatibility issues—pipe sizes, pressure ratings, and chemical exposure—must be assessed before selecting a joining method.
Achieving a leak-free joint depends on using the correct adapters, fittings, clamps or crimp tools, and appropriate sealants or tape.
When and why you need to join PEX to PVC
Why would a plumber or DIYer need to join PEX to PVC?
Practical situations arise where existing PVC systems connect to new PEX installations; repairs, extensions, or material changes require understanding how to connect PEX pipe to PVC.
Joining accommodates different materials’ strengths, simplifies retrofits, and restores flow without full replacement.
Proper connectors and technique guarantee reliable, code-compliant changes.
Common applications and compatibility considerations
Several routine plumbing scenarios call for joining PEX to PVC, including extending older PVC mains with modern PEX branches, repairing damaged sections without replacing long runs, and adapting systems during fixture upgrades.
Consider chemical compatibility, temperature and pressure ratings, and local code limitations. Use appropriate coupling fittings and guarantee dissimilar-metal or solvent-weld restrictions are observed to prevent leaks or premature failure.
Tools and materials required for a leak-free joint
Before attempting the joint, gather a concise set of tools and approved materials specific to PEX-to-PVC connections to confirm the work is safe, code-compliant, and durable.
Essential items guarantee proper fusion, sealing, and support for a leak-free result.
- PEX cutter, deburring tool, and PVC cutter
- Compatible connector fitting (brass or approved plastic)
- Primer, PVC cement, and appropriate PEX crimp/ring system
- Pipe supports, measuring tape, and marker
Understanding PEX and PVC Materials
PEX and PVC differ in flexibility, temperature tolerance, and chemical compatibility, which affects how they join.
Common PEX types (A, B, C) and rigid PVC require specific fittings and adapters—crimp, clamp, push-fit, or threaded—chosen to match materials and pressure ratings.
Applicable plumbing codes and safety guidelines determine permitted connection methods and require corrosion-resistant junctions or dielectric unions where needed.
Physical and chemical differences between PEX and PVC
A clear distinction exists between the two materials: cross-linked polyethylene (PEX) is a flexible, semi-crystalline thermoplastic formed by chemically bonding polymer chains, while polyvinyl chloride (PVC) is a rigid, amorphous thermoplastic composed of vinyl chloride monomers with chlorine atoms along its backbone.
PEX resists fatigue, tolerates freeze–thaw flexing and offers lower thermal conductivity; PVC provides high tensile strength, solvent resistance and easy solvent-weld joining.
Types of PEX and PVC fittings and adapters
Although the two pipe types differ structurally and chemically, their connection systems share a focused set of fittings and adapters designed to address compatibility, pressure ratings, and installation methods.
Common items include PEX crimp, clamp, expansion, and push-fit fittings; PVC solvent-weld sockets and threaded adapters; brass junction fittings and male/female iron pipe threads; and dielectric unions and compression adapters for secure mixed-material joins.
Code and safety considerations for mixed-material connections
The selection and installation of mixed-material connections must comply with local plumbing codes, manufacturer instructions, and recognized standards to guarantee safe, durable joints between PEX and PVC.
Inspect compatibility, use approved connection fittings, and follow temperature, pressure, and burial restrictions.
Employ proper support, dielectric isolation where needed, and test assemblies.
Document materials and retain manufacturer warranty and inspection records for code enforcement.
Choosing the Right Connection Method
Selection of a connection method hinges on the tradeoffs between compression fittings, crimp rings, push-to-connect fittings, and solvent-weld adapters.
Each option carries specific pros and cons—reliability, ease of installation, cost, and suitability for hot water, cold water, underground, or exposed runs.
Recommendations will vary by scenario: solvent weld or compression for permanent PVC joins, crimp or push-to-connect for PEX conversions in accessible areas, and burial requires fittings rated for underground use.
Compression fittings vs. crimp vs. push-to-connect vs. solvent weld adapters
Several common methods exist for joining PEX to PVC—compression fittings, crimp rings, push-to-connect fittings, and solvent-weld adapters—each with distinct strengths, installation steps, and suitability for different applications.
Selection depends on system pressure, accessibility, permanence, required tools, and code compliance.
Installers evaluate pipe size, material compatibility, and ease of future maintenance before choosing the most appropriate connection type.
Pros and cons of each method
When choosing between compression fittings, crimp (or clamp) rings, push-to-connect fittings, and solvent-weld adapters, each method presents a distinct balance of durability, ease of installation, required tools, and long-term serviceability; installers weigh these trade-offs against project needs—permanent vs. reversible joints, indoor vs. buried use, and applicable plumbing codes—to determine the most appropriate connection for joining PEX to PVC.
| Method | Key trade-off |
|---|---|
| Compression | Reusable, requires precise torque |
| Crimp/Clamp | Low cost, tool-dependent |
| Push-to-connect | Fast, higher material cost |
| Solvent-weld | Permanent, durable but irreversible |
Recommended methods for different scenarios (hot water, cold water, underground, exposed)
For specific applications—hot water, cold water, underground, or exposed—the recommended connection method depends on temperature tolerance, pressure demands, accessibility for future service, and local code restrictions.
Use CPVC connector fittings or solvent-weld adapters for hot water; push-fit or crimp with brass adapters for cold.
For underground, choose corrosion-resistant coupling connectors with mechanical compression and burial-rated sleeves.
Exposed runs favor accessible unions or unions with removable fittings.
Step-by-Step Guide: Using a Push-to-Connect (Quickest)
A push-to-connect fitting offers the fastest way to join PEX to PVC when the surfaces are prepared and measured accurately.
The procedure requires careful inspection and cleaning of both pipe ends, correct installation of the fitting, and a final pressure check to confirm a watertight seal.
The following steps outline the essential actions to complete the connection reliably.
- Prepare the pipes: cutting, deburring, and measuring
- Inspect and clean PEX and PVC ends
- Install the push-to-connect fitting
- Test the joint for leaks and pressure
Preparing the pipes: cutting, deburring, and measuring
Several simple preparations guarantee a reliable push-to-connect joint: measure twice, cut squarely, and remove any burrs or debris from PEX and PVC ends.
Mark insertion depth on both pipes, ensuring alignment with the connector’s stop. Use a proper pipe cutter for clean, perpendicular cuts.
Deburr and chamfer edges lightly to prevent seal damage. Confirm lengths before final assembly.
Inspecting and cleaning PEX and PVC ends
Inspect the cut ends of both PEX and PVC for burrs, cracks, or residual debris before attempting the push-to-connect joint.
Use a clean, lint-free cloth to wipe surfaces. Remove burrs with a deburring tool; smooth rough PVC edges lightly with fine sandpaper.
Verify pipe ends are square and dry. Confirm inner surfaces are free of adhesive, oil, or particulate before fitting.
Installing the push-to-connect fitting
With both pipe ends cleaned, square, and dry, the installer positions the push-to-connect fitting and prepares to join PEX to PVC.
The installer marks insertion depth on each pipe, aligns straight, then pushes firmly until the fitting seats.
Visual and tactile confirmation of engagement is noted.
Excess pipe is removed from workspace, and any protective caps are discarded, leaving the joint ready for subsequent testing.
Testing the joint for leaks and pressure
Begin testing immediately after installation to verify the push-to-connect joint is watertight and holds system pressure.
Slowly pressurize the line to normal operating pressure, inspect the connection for visible drips, and feel for moisture.
Leave pressure applied for several minutes, then monitor for pressure drop on a gauge.
If any leak or loss appears, depressurize and reseat or replace the fitting.
Step-by-Step Guide: Using a Transition Adapter with Solvent Weld PVC and PEX Barb
The following steps outline a reliable method for joining solvent-weld PVC to PEX using a connector adapter with a PEX barb.
It covers cutting and prepping the PVC, solvent welding the adapter with attention to technique and cure times, attaching PEX to the barb with crimp or clamp fittings, and final pressure testing and curing considerations.
Proper sequencing and curing are essential to guarantee a leak-free joint.
- Cutting and preparing PVC for solvent welding
- Solvent welding the PVC adapter: technique and curing times
- Installing PEX onto the barb adapter (crimp or clamp method)
- Pressure testing and curing considerations
Cutting and preparing PVC for solvent welding
Measure and mark the PVC precisely where the connector will join, then cut squarely using a PVC-cutting tool or fine-toothed saw.
Deburr and chamfer the pipe end to remove burrs and ease insertion.
Clean both surfaces with a PVC cleaner or primer, wiping away dust and oil.
Confirm dry, solvent-free surfaces and verify a snug, gap-free fit before proceeding to the solvent-welding step.
Solvent welding the PVC adapter: technique and curing times
Apply solvent weld technique carefully when attaching the PVC adapter to guarantee a secure, leak-free joint between the PVC pipe and the connector adapter with a PEX barb.
Clean and prime both surfaces, apply an even coat of solvent cement, insert the adapter with a single quarter-turn, and hold for the manufacturer’s recommended set time.
Allow full cure before pressurizing per temperature-specific cure charts.
Installing PEX onto the barb adapter (crimp or clamp method)
Begin by sliding the selected crimp ring or stainless-steel clamp onto the PEX. Then push the pipe fully onto the barb adapter until the stop or the last barb is seated.
Position the ring/clamp 1/8–1/4 inch from the barb base, guarantee even alignment, then compress with the appropriate crimp tool or tighten the clamp with a torque-limited driver to secure a uniform, leak-resistant connection.
Pressure testing and curing considerations
After the conversion adapter is assembled, perform a controlled pressure test and allow adequate curing time before placing the joint into service.
The assembly should be held at recommended test pressure (usually 50–100 psi) for the manufacturer-specified duration while inspected for leaks.
Allow solvent-weld joints full cure per solvent cement directions and ambient conditions; delay thermal or mechanical stress until curing and successful leak testing are complete.
Step-by-Step Guide: Using Compression or Threaded Adapters
The section outlines practical steps for joining PEX to PVC with compression or threaded adapters, emphasizing correct part selection and sealing methods.
It covers preparing threads and applying sealant or tape, the recommended tightening sequence and torque, and methods to test for and fix leaks. Clear adherence to these steps reduces the chance of failures and makes troubleshooting straightforward.
- Selecting threaded or compression adapters for PEX-to-PVC
- Preparing threads and using thread sealant or tape
- Tightening sequence and torque guidance
- Leak testing and troubleshooting
Selecting threaded or compression adapters for PEX-to-PVC
When choosing between threaded and compression adapters for connecting PEX to PVC, factors such as pressure rating, ease of installation, accessibility, and whether the joint will be above or below ground determine the most suitable option.
Threaded fittings suit removable, high-pressure zones; compression fittings provide quick, tool-minimal connections and perform well where space or alignment limits threading.
Material compatibility and code compliance guide final selection.
Preparing threads and using thread sealant or tape
Prepare threaded connections by cleaning, inspecting, and dressing threads to guarantee a tight, leak-free joint.
Remove burrs, corrosion, and debris with a wire brush; verify threads match and seat properly.
Apply appropriate thread sealant or PTFE tape: wrap tape clockwise three to four turns or brush on pipe-thread compound evenly.
Avoid excess material that can contaminate the flow or impede sealing.
Tightening sequence and torque guidance
Start tightening systematically to guarantee compression and threaded adapters seat correctly without overstressing fittings.
Alternate between opposite sides on multi-bolt compression nuts, progressing in small increments until snug.
For threaded adapters, hand-tighten then use a wrench for an additional quarter to half turn or follow manufacturer torque values.
Avoid excessive torque to prevent deformation; confirm alignment before final seating.
Leak testing and troubleshooting
After snugging compression nuts and seating threaded adapters to the recommended torque, the next step is to verify a watertight connection through systematic leak testing and quick troubleshooting.
Pressurize the system to working pressure, inspect joints for visible drips, and use a dry tissue to detect weeps.
If leaks appear, depressurize, tighten incrementally, reseat ferrules or thread tape, and retest until sealed.
Common Problems and How to Fix Them
Common problems at PEX-to-PVC joints include leaks, misalignment, poor cuts or damaged pipe ends, and long-term issues such as corrosion or chemical incompatibility.
The guide outlines how to detect and diagnose leaks, correct alignment and cutting errors, and decide when a full joint redo is required versus a localized patch.
It also covers recognizing signs of material incompatibility and planning for repairs or replacements to guarantee longevity.
Detecting and diagnosing leaks at the joint
Detecting leaks at a PEX-to-PVC joint requires methodical inspection and simple tests to pinpoint their source and severity.
Visual check for moisture, corrosion, or solvent-weld residue; feel for dampness while pressurizing the line; apply soapy water to fittings to reveal bubbles; isolate sections to narrow location; monitor pressure drop over time.
Document findings before repair.
Addressing misalignment, poor cuts, and damaged pipe ends
Addressing misalignment, poor cuts, and damaged pipe ends requires identifying the specific defect, its effect on the joint, and the appropriate corrective action.
Realign fittings, loosen clamps or unions, and reposition pipes for concentric seating.
Recut jagged or angled PEX or PVC ends squarely with proper cutters; deburr and chamfer PVC.
Replace pipe sections with cracks, crushes, or severe deformation before reassembling to guarantee a reliable seal.
When to redo a joint versus patching
After correcting misalignment, poor cuts, or damaged ends, evaluate whether the leak or defect requires a full joint replacement or a localized repair.
Choose replacement when fittings are cracked, seals are compromised, or multiple failed attempts exist.
Opt for patching for small pinholes, isolated corrosion at the join, or minor compression-ring deformation.
Test after repair and replace if leaks persist.
Corrosion, chemical incompatibility, and longevity issues
Corrosion, chemical incompatibility, and long-term durability are common failure modes when joining PEX to PVC, especially where dissimilar materials, aggressive water chemistry, or improper fittings are involved.
Proper use of approved connector fittings, dielectric unions, and compatible adhesives prevents galvanic reaction and degradation.
Regular inspection, water chemistry correction, and replacing compromised components extend service life; avoid solvent welding PEX or mismatched metals.
Safety, Codes, and Best Practices
The author notes that adherence to local code requirements and recognizing when a licensed plumber is needed are essential before attempting any PEX-to-PVC connection.
Temperature and pressure limits for PEX-PVC joints must be observed to prevent failures and voided warranties.
A recommended inspection and maintenance schedule—periodic visual checks and pressure testing—helps guarantee long-term reliability.
Local code requirements and when to hire a plumber
Who decides whether a PEX-to-PVC connection is acceptable in a particular installation? Local building authorities and adopted plumbing codes govern approvals; inspectors enforce requirements.
Installers should verify rules, permitted fittings, and permit needs before starting work.
Hire a licensed plumber when codes are unclear, for complex alterations, or to obtain inspections and warranties.
Professional work reduces risk of failed inspections and costly repairs.
Temperature and pressure limits for PEX-PVC joints
Assess temperature and pressure limits for PEX-to-PVC joints before installation, since each material and connection method has distinct ratings that affect safety and code compliance.
Verify manufacturer specifications for maximum operating temperature and pressure, including derating for fittings, clamps, and adhesive bonds.
Confirm selected components meet local code maxima for hot-water systems and avoid exceeding limits during testing or seasonal temperature fluctuations.
Recommended inspection and maintenance schedule
For routine safety and code compliance, establish a fixed inspection and maintenance schedule for PEX-to-PVC joints that specifies frequencies, responsible parties, and documented actions.
Inspect visible joints quarterly; perform full system checks annually. Verify clamps, fittings, supports, and signs of leakage or degradation.
Record findings, corrective actions, and parts replaced. Replace suspect fittings immediately and review schedule after any failure or code update.
Cost, Time, and Material Comparison
The article compares estimated costs and installation time for common PEX-to-PVC connection methods, presenting typical price ranges and labor requirements.
It also contrasts durability and expected maintenance needs, noting which fittings and techniques tend to require fewer repairs over time.
Readers are guided to weigh upfront expense against long-term performance when selecting a method.
Estimated costs and time for each connection method
Practical planning hinges on comparing the upfront material costs, typical labor time, and any specialized tools required for each PEX-to-PVC connection method. Estimated costs vary: push-fit fittings cost more but save labor; crimp and clamp are low-cost but need tools; solvent-weld is cheapest materials, moderate labor. Typical times: push-fit 5–15 minutes, crimp/clamp 10–30, solvent-weld 15–40.
| Method | Approx. Cost/Time |
|---|---|
| Push-fit | $5–20 / 5–15 min |
| Crimp/Clamp | $2–8 / 10–30 min |
| Solvent-weld | $1–5 / 15–40 min |
Durability and long-term maintenance comparison
Several factors determine long-term durability and maintenance needs when joining PEX to PVC, including joint type, material compatibility, and exposure conditions.
Mechanical fittings offer easy serviceability but may require periodic retightening.
Solvent-weld connections are low-maintenance if properly primed; improper bonding risks failure.
Corrosion, UV, and temperature cycling affect lifespan.
Regular inspections, appropriate clamps, and correct installation practices minimize repairs and extend service life.
Tips to Ensure a Leak-Free Joint
Before starting the connection, a concise pre-installation checklist guarantees the correct fittings, tools, and pipe preparation are on hand.
The text outlines common mistakes to avoid, such as improper cutting, inadequate deburring, or skipping primer and solvent where required.
A final testing checklist covers pressure testing and visual inspection to confirm the joint is watertight before concealment.
Pre-installation checklist
A short checklist can prevent common causes of leaks when joining PEX to PVC: confirm pipe compatibility and sizes, inspect fittings for cracks or burrs, verify the chosen connector type is rated for the application (pressure, temperature, and potable water if applicable), and gather the proper tools and materials—cleaners, primers, solvent cement, or crimp/expansion tools—so each step is performed without improvisation.
- Verify measurements and cut quality.
- Confirm materials and ratings.
- Inspect and clean connection surfaces.
- Organize tools, seals, and backup parts.
Common mistakes to avoid
Avoiding common mistakes is essential to achieving a durable, leak-free connection between PEX and PVC; small errors—improper cuts, contaminated surfaces, mismatched fittings, or incorrect adhesive use—are the most frequent causes of failure.
Inspect and clean ends, cut squarely, select compatible junction fittings, follow manufacturer curing times, and avoid over-tightening clamps.
Verify alignment and support to prevent stress and movement that cause leaks.
Final testing checklist before concealing the joint
Run a systematic pressure and visual check to confirm the PEX-to-PVC connection holds under expected conditions before it is concealed.
Inspect fittings, clamps, and adhesive bonds for moisture, stress, or deformation.
Maintain test pressure for the recommended duration, monitor for pressure loss, and recheck after cooling.
Document results, address any leaks or weak seals, and only conceal when the joint remains stable and dry.
Visual Reference and Quick Reference Resources
The article provides step-by-step photo and diagram suggestions for each connection method to clarify tool placement, cutting lines, and assembly order.
A concise cheat-sheet accompanies the visuals, matching methods to common scenarios such as pressure rating, accessibility, and permanence.
Readers are directed to use the visuals for quick comparison and to confirm technique before beginning work.
Step-by-step photo or diagram suggestions for each method
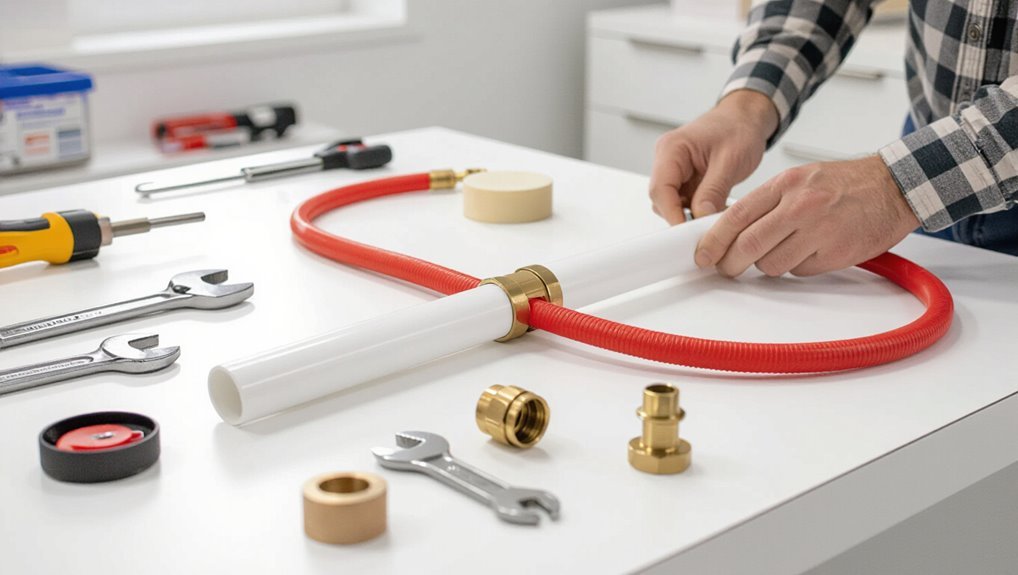
Begin by presenting clear, numbered visual sequences for each PEX-to-PVC method—cutting/cleaning, primer/solvent welding with a PVC connection, and mechanical couplings—so readers can follow the exact order of actions at a glance.
Include close-ups of tool placement, cleaned ends, primer and solvent application, insertion depth marks, clamp tightening angles, and finished joint leaks-tested with labeled captions and scale references.
Quick cheat-sheet: which method to choose by situation
Which method fits this job best depends on pipe size, access, pressure, permanence, and local code:
A concise visual cheat-sheet clarifies choices and links to quick-reference diagrams and tools.
Use the list to match situation to method.
- Compression/adaptor for tight access, low pressure.
- Solvent-weld PVC + connection fitting for permanence.
- Mechanical coupling for mixed materials, moderate pressure.
- Crimp/expander with adapter for PEX-specific systems.
Conclusion
Like two rivers finding a safe harbor, PEX and PVC can be joined smoothly when the right method guides their flow. Whether choosing the speedy push-to-connect or the more deliberate solvent-weld-and-barb route, careful prep, correct fittings, and attention to codes act as the compass. A leak-free junction is not luck but craft—measure, clean, secure, and test—and the plumbing will sing steady and true for years to come.