
How to Tighten Handle on Glass Shower Door: Easy Step-by-Step Fixes and Tools
To tighten a loose glass shower door handle, start by identifying the type of fastener used. Remove any decorative caps to access the screws, then tighten the exposed set screws or through-bolts using the appropriate Allen key or screwdriver. Check gaskets and washers for wear, replace any corroded or stripped hardware, and consider using threadlocker for a secure fit. Always wear gloves and eye protection, avoid over-tightening to prevent stress on the glass, and finish with a final alignment check for smooth operation. Continue for a detailed step-by-step guide and a list of necessary tools.
Quick solution to tighten a loose glass shower door handle
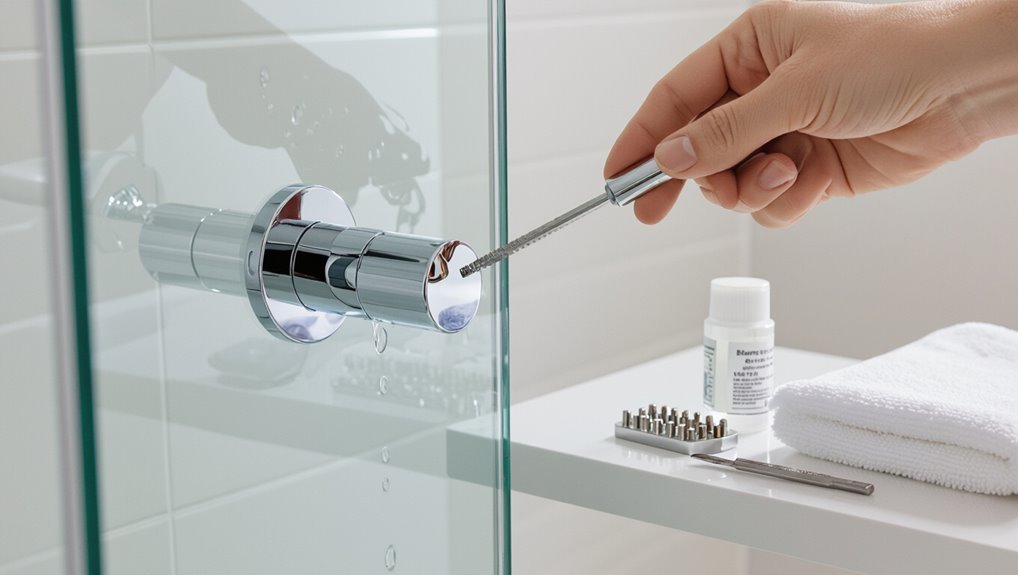
A quick fix for most loose glass shower knobs or levers is to locate and tighten the exposed set screw or use a screwdriver to snug the visible mounting screws.
If the handle is secured with hidden fasteners, gently tighten the decorative cap to access and adjust the internal screw.
A professional should be called immediately if the glass shows cracks, the mounting hardware is stripped, or the door sash is misaligned and won’t secure safely.
One-sentence fix for common knob/lever types
Tighten the visible set screw or toggle the concealed clip—most loose glass shower knobs and levers are secured by a small hex or Phillips set screw on the underside or a spring clip behind the escutcheon; use the appropriate driver, hold the handle steady, and turn clockwise until snug, taking care not to overtighten and crack the glass.
For how to tighten handle on glass shower door, tighten gently.
When to call a professional immediately
Call a professional immediately if the handle wobbles despite basic tightening, if glass shows chips or hairline cracks around the mounting holes, if the set screw or mounting hardware is stripped or missing, or if water has corroded internal components; these conditions indicate structural risk or concealed damage that DIY fixes can worsen and may require glass specialist tools or replacement parts to guarantee safety.
A pro assesses glass integrity, replaces hardware, and prevents injury.
How shower door handles are attached to glass
Shower door handles connect to glass in a few common ways, with pull-style knobs and bar handles typical on frameless doors and surface-mounted or through-bolt types used on framed systems.
Fasteners range from visible screws and escutcheons to internal through-bolts with rubber gaskets, sleeves, and nylon bushings that clamp the glass without damaging it.
Glass thickness and edge preparation determine which handle designs and hardware finishings are compatible, dictating bolt length, gasket size, and torque limits.
Common handle types for frameless and framed glass doors
Although glass door handles come in many styles, they generally attach to frameless and framed doors using a few standard methods: through-bolts for solid, hole-to-hole mounting; clamp-style fittings that grip the glass edge; and surface-mounted plates for framed systems.
Common handle types include tubular pulls, D-handles, knob-style grips, and back-to-back lever sets, chosen for style, ergonomics, and compatibility.
Typical fasteners and internal components
Moving from the common handle styles and mounting methods, attention shifts to the hardware that actually secures those fittings to the glass.
Typical fasteners include through-bolts with ferrules, set screws, and threaded studs paired with interior nuts or backing plates.
Internal components often feature rubber gaskets, nylon washers, and spindle assemblies that clamp or pivot, providing grip and alignment without stressing the glass.
How glass thickness affects handle fit and hardware choice
Glass thickness directly determines which handle types and fasteners can be used, since the hardware must match the panel’s depth to secure properly without overloading the glass.
Thicker glass accepts through-bolts, back-to-back handles, and heavier pulls; thinner glass requires clamp-style fittings, adhesive mounts, or reinforced sleeves.
Correct selection prevents stress concentrations, cracking, and loosening, ensuring safe, long-lasting attachment.
Tools and materials you’ll need
A concise set of tools and materials makes tightening a glass shower door handle straightforward.
Typical essentials include screwdrivers, Allen keys, a torque driver, and pliers, while replacement parts such as screws, washers, rubber gaskets, and threadlocker should be on hand.
Appropriate safety gear—gloves, safety glasses, and towels to protect the glass and catch small parts—completes the preparation.
Essential tools (screwdrivers, Allen keys, torque driver, pliers)
Tools for tightening a shower door handle should be selected for fit and control: a set of screwdrivers (flat and Phillips) sized to the fasteners, Allen keys matching any hex set screws, a torque driver for applying consistent tightness without stripping, and pliers for holding or turning stubborn components.
Optional extras include a magnetic bit holder and small needle-nose pliers for confined spaces; choose corrosion-resistant tools.
Replacement parts and consumables (screws, washers, rubber gaskets, threadlocker)
After selecting properly sized screwdrivers and hex keys, attention turns to the spare parts and consumables that will be needed to complete the repair.
Stock stainless steel screws matching original thread and length, assorted rubber gaskets for glass protection, flat and split washers, and small O-rings.
Include a small tube of medium-strength threadlocker and replacement handle screws to guarantee secure, vibration-resistant fastening.
Safety gear and protective items (gloves, safety glasses, towels)
Because glass can chip or slip unexpectedly, appropriate personal protective equipment is essential: cut-resistant gloves to protect hands from sharp edges, safety glasses with side protection to shield eyes from shards or spray, and sturdy footwear to prevent injury from dropped hardware.
Add absorbent towels to cushion glass, collect debris and wipe sealant; keep a first-aid kit nearby for minor cuts and splinters.
Step-by-step tightening for knob-style handles
First, the knob is inspected to identify the visible or hidden fastener type and any protective caps.
Next, access to set screws or concealed fasteners is gained, worn washers or gaskets are replaced, and fasteners are tightened in the correct sequence with appropriate torque to avoid over-stressing the glass.
Finally, operation is checked for smooth movement and any glass contact points are inspected for protection.
Inspecting the handle and identifying the fastener
One clear inspection determines whether the knob-style handle uses a visible screw, a hidden set screw, or a through-bolt assembly.
The observer notes screw location, trim caps, and visible hardware on both sides.
Check for alignment, wobble, and any gasket or spacer.
Identify whether fasteners are recessed, exposed, or pass through the glass to select proper tools and next actions.
Accessing hidden set screws or caps
Begin by locating any trim caps, decorative covers, or small set-screw holes on the knob assembly; these often conceal the fastener and require gentle pry or removal to access.
Use a thin flat tool or plastic pry tool to lift caps without scratching. If a cap clips off, set it aside.
Expose the set screw, confirm its type, and prepare the correct driver before proceeding.
Proper torque and tightening sequence
Tighten the handle methodically, using the correct driver and a calibrated feel for torque to avoid over-stressing glass or hardware.
For knob-style handles, alternate turns between opposing screws in small increments—quarter turns each pass—until snug.
Verify alignment and smooth operation after each cycle.
Stop when resistance increases noticeably; avoid forcing.
Recheck after several uses to confirm retention without overtightening.
Replacing worn washers or gaskets
After the handle is brought to the correct snugness and alignment, inspect the mounting assembly for deteriorated washers or gaskets that can permit play or cause glass stress.
Remove the handle, note washer type and thickness, then source matching replacements—rubber, nylon, or silicone.
Install new washers evenly on both sides, reassemble, and tighten to specified torque to restore secure, cushioned contact without overtightening.
Final checks for smooth operation and glass protection
Confirm that the knob operates smoothly and that the glass remains free of stress or movement before finishing.
Inspect mounting hardware, ensuring screws are snug but not over-torqued.
Verify gaskets sit evenly, preventing glass-to-metal contact.
Cycle the knob several times, watching for wobble or binding.
If any strain appears, loosen, realign, and retighten incrementally until motion is consistent and glass shows no deflection.
Step-by-step tightening for lever or pull handles with through-bolt mounting
For lever or pull handles secured with through-bolts, the procedure begins with carefully loosening and removing the handle components to avoid chipping or stressing the glass.
The mating surfaces should be cleaned and debris removed, then reassembled with the correct washers and gaskets in place, applying threadlocker where specified and tightening bolts to the manufacturer’s torque recommendations.
Finally, alignment and function are verified before final tightening to guarantee smooth operation and glass safety.
Loosening and disassembling the handle without damaging glass
Begin by preparing a stable, well-lit workspace and gathering tools: an appropriate-sized Allen wrench or screwdriver, a small adjustable wrench or pliers with jaw protection, soft cloths or rubber pads, and masking tape.
Protect glass with cloths and tape around bolts. Loosen visible set screws while supporting the handle.
Remove through-bolts evenly from both sides, keeping hardware organized and avoiding torque on glass edges.
Cleaning mating surfaces and removing debris
After the handle and through-bolts have been loosened and removed with care to protect the glass, attention turns to the mating surfaces where the handle contacts the glass and the bolt heads seat.
Inspect both sides for dried sealant, mineral deposits, grime, or metal shavings.
Use a soft cloth, isopropyl alcohol, and a plastic scraper to remove contaminants.
Dry thoroughly before proceeding.
Reassembling with correct washer/gasket placement
Reassemble the handle components in the reverse order of removal, ensuring each washer and gasket is positioned exactly as planned to protect the glass and create a snug seal;
the inner gasket should sit against the glass on the inside face, the protective washer on the bolt head side, and any decorative trim or exterior washer aligned before the exterior escutcheon is seated.
Confirm alignment, hand-start bolts, then evenly tighten alternating sides until flush.
Using threadlocker and recommended torque values
With the handle pieces hand-started and washers seated correctly, attention turns to securing the through-bolts with threadlocker and to the proper torque values for a durable, glass-safe fit.
Apply a single drop of medium-strength threadlocker to bolt threads; avoid excess.
Tighten incrementally, alternating sides. Torque typical 6–10 in·lb (0.7–1.1 N·m) for tempered glass—consult manufacturer specs when available.
Verifying alignment and function
Begin by gently tightening the through-bolts in small, alternating increments while checking that the handle halves remain parallel and centered on the glass.
After each increment, operate the handle to confirm smooth motion and proper engagement with any latch or strike.
Inspect glass for stress marks, gaps, or rocking.
Adjust torque evenly until secure, then recheck function and alignment.
Tightening patch fittings and lock-style handles
Patch-style fittings and lock-style handles require inspection for concealed set screws, clamping plates, or recessed fasteners before any adjustments are made.
The technician should loosen and retighten clamp screws to the manufacturer’s torque recommendations, being careful to protect the glass with pads and to avoid overcompression.
Integrated locks and latches should be tested and, if needed, serviced by tightening mounting screws, lubricating moving parts, and replacing worn components.
Identifying hidden screws and clamps in patch hardware
Although often concealed behind small caps or trim plates, the fasteners and clamps that secure patch hardware and lock-style handles can be located and accessed with a few simple inspection steps.
Inspect edges and underside of fittings for seams, pry caps gently with a flat tool, and trace visible screws or set screws.
Magnetic pickup tools and flashlight help reveal recessed hardware without damaging finishes.
Adjusting clamp tension safely
To adjust clamp tension safely, the technician uses small, controlled turns on accessible set screws and clamps while supporting the glass to prevent slippage.
Torque is incrementally increased until wobble ceases, avoiding over-tightening. Protective pads prevent glass marring.
After each adjustment, alignment and smooth operation are verified. If resistance or binding occurs, tension is slightly relieved and realignment performed before final tightening.
Servicing integrated locks and latches
After confirming clamps are secure and the door operates without wobble, attention shifts to the integrated locks and latches, where wear or loose fasteners can compromise security and smooth operation.
Inspect striker plates, patch fittings and spindle connections; tighten accessible screws incrementally.
Replace worn cartridges or rubber gaskets, lubricate moving parts with silicone grease, and recheck alignment to guarantee reliable engagement and no binding.
When a loose handle indicates deeper problems
A persistently loose handle can signal stripped threads, corroded fasteners, or even cracked glass around the mounting area.
Inspectors should check fastener engagement, look for rust or deformed fittings, and examine the glass edge for stress lines or hairline fractures caused by handle movement.
If damage is found, replacement of the fasteners, patch fittings, or the glass itself should be considered to restore safety.
Signs of stripped threads, corroded fasteners, or cracked glass
When a shower door handle stays loose despite repeated tightening, it often signals underlying damage such as stripped threads, corroded fasteners, or even hairline cracks in the glass.
These issues require inspection beyond surface adjustments because continued use can worsen the defect or create a safety hazard.
Observable signs include wobble with no resistance, stripped screw heads, rusted or pitted fasteners, metal shavings, or visible glazing fractures.
How to inspect for handle-induced glass stress or fractures
Begin by visually and tactilely examining the glass around the handle for stress indicators: look for hairline fractures, spiderweb patterns, tiny surface pits or white stress lines in the tempering, and feel for any raised or uneven areas where the handle contacts the glass.
Note propagation, edge chips, or delamination. Document findings, avoid applying pressure, and consult a qualified glazier if signs suggest structural compromise.
Replacement options for damaged hardware or glass
If a loose shower door handle reveals cracked fittings, corroded fasteners, or stress patterns in the glass, replacement becomes necessary rather than repair.
Options include swapping to OEM-matching hardware, upgrading to stainless steel or brass for corrosion resistance, replacing the patch fitting or spindle assemblies, or ordering tempered glass panels from a certified glazier.
Always verify measurements, load ratings, and warranty coverage before installation.
Replacement parts guide and buying checklist
A quick checklist helps guarantee replacement parts fit and endure in wet conditions. It should emphasize matching handle style and finish to the existing door, recording glass thickness and other dimensions before ordering, and choosing corrosion-resistant materials and appropriate finishes.
Consult the following focused checklist when sourcing parts:
- Match handle style, finish, and glass thickness.
- Measure and record hole spacing, glass thickness, and mounting hardware dimensions.
- Prefer stainless steel/brass and durable finishes (PVD, powder coat) for wet environments.
Matching handle style, finish, and glass thickness
Several key measurements and visual matches determine whether a replacement handle will fit and look right: confirm the glass thickness and hole diameter, note whether the handle is through-bolted or clamp-mounted, and select a finish and profile that align with existing hardware and shower aesthetics.
Match metal tone, style (modern, contemporary, traditional), and backplate size; prefer same mounting type to avoid adapters.
Measuring and recording dimensions before ordering
With the handle style and mounting type identified, precise measurements should be taken and recorded before ordering replacement parts.
Measure glass thickness, hole diameters, center-to-center spacing, handle projection, and plate/backset dimensions. Note thread sizes and screw lengths.
Photograph mounting locations and label measurements.
Consolidate specs into a checklist to verify compatibility with vendor listings and replacement part descriptions before purchase.
Recommended materials and finishes for wet environments
Corrosion resistance and ease of maintenance should guide material and finish choices for replacement handles and hardware in wet environments.
Recommended materials include marine-grade stainless steel (316), brass with protective plating, and solid aluminum.
Finishes such as polished chrome, brushed nickel, and PVD coatings improve durability and resist tarnish.
Avoid plain steel or untreated metals.
Match seals, stainless fasteners, and compatible cleaning agents when purchasing.
Common mistakes to avoid when tightening handles
When tightening a glass shower door handle, common errors can compromise safety and finish.
Technicians should be mindful of torque, correct tool and fastener selection, and the presence of gaskets or protective pads. Ignoring these points often leads to cracked glass, stripped hardware, or leaks.
- Over-tightening and causing glass cracks
- Using wrong-sized tools or fasteners
- Skipping gaskets or protective pads
Over-tightening and causing glass cracks
Apply force carefully: over-tightening a glass shower door handle can concentrate stress around the mounting holes and cause hairline cracks or sudden fractures.
It is advisable to tighten incrementally, stop when fittings are snug, and inspect for stress lines. Excess torque bypasses protective gaskets and may fracture tempered glass.
When resistance increases abruptly, back off and reassess alignment before proceeding.
Using wrong-sized tools or fasteners
Select the correct-sized tools and fasteners to prevent damage and assure a secure fit.
Using oversized or undersized screwdrivers, Allen keys, or bolts can strip heads, warp fittings, or create uneven pressure on glass.
Match fastener diameter and length to original parts, use proper bits, and avoid improvised substitutes.
Correct sizing assures reliable clamping and reduces risk of loosening or component failure.
Skipping gaskets or protective pads
Although the temptation to omit gaskets or protective pads may speed the job, skipping them risks direct metal-to-glass contact that can cause scratches, chips, or uneven clamping pressure.
Proper cushions distribute force, prevent micro-movement, and maintain seal integrity. Always use manufacturer-recommended pads or soft washers, replace worn pieces, and guarantee correct positioning before tightening to protect glass and preserve handle alignment.
Preventive maintenance to keep handles secure
A brief preventive routine can keep a glass shower door handle secure and prevent the need for frequent repairs.
Scheduled inspections and simple upkeep—tightening fasteners, cleaning seals, and checking for wear—identify issues early, while periodic lubrication and corrosion protection preserve moving parts and metal finishes.
In humid or coastal environments, more frequent checks and rinsing of salt or mineral buildup reduce accelerated wear.
Regular inspection schedule and simple upkeep
Regular inspections every one to three months help catch loose fittings before they worsen, keeping glass shower door handles secure and extending hardware life.
Technicians or homeowners should check fasteners, alignment, and glass-to-hardware contact, tighten screws as needed, and replace worn washers or gaskets promptly.
Record dates and actions in a simple log to track trends and prevent recurring looseness.
Lubrication, corrosion protection, and seal care
Once fasteners and alignment are confirmed, attention shifts to lubrication, corrosion protection, and seal care to preserve smooth operation and prevent deterioration.
Apply a silicone-based lubricant sparingly to moving parts, wipe away excess, and use a corrosion-inhibitor compatible with metal finishes.
Inspect seals for cracks or compression, replace deteriorated gaskets, and clean seal channels to maintain a watertight barrier and prevent hardware strain.
Seasonal tips for humid and coastal environments
In humid or coastal settings, seasonal preventive checks should be scheduled at least twice yearly to counter accelerated corrosion and seal degradation.
Inspect fasteners, replace corroded screws with stainless or brass, reapply marine-grade sealant, and clean salt deposits with fresh water.
Lubricate moving parts with silicone-based products and verify handle alignment.
Document findings and perform timely replacements to prevent loosening and water intrusion.
Cost and time estimates for DIY vs professional repair
A concise comparison of DIY versus professional repair helps homeowners weigh time and cost trade-offs for a loose glass shower door handle. Typical DIY fixes often require 15–45 minutes and inexpensive parts, while professional service costs more but can be more cost-effective for complex or risky jobs. The table below summarizes common estimates and when hiring a pro is recommended.
| Scenario | Typical DIY Time | Typical Cost Range |
|---|---|---|
| Simple tightening (screws/fasteners) | 15–30 min | $0–$15 (hardware) |
| Replacing handle or gasket | 30–45 min | $10–$50 (parts) |
| Professional repair or replacement | 30–90 min on site | $100–$300 (labor + parts) |
Typical DIY time and parts cost
Typical projects to tighten a glass shower door handle usually require 15–45 minutes for someone with basic tools and experience.
Parts cost ranges from free (if only tightening existing fasteners) up to $10–30 for replacement screws, washers, or a new handle set.
Additional small expenses may include thread locker or silicone pads ($3–10).
Expect occasional extra time if alignment or gasket replacement is needed.
When professional service is more cost-effective
After estimating DIY time and parts costs, homeowners should assess when hiring a professional is more cost-effective.
If labor exceeds a few hours, specialized tools or glass repair are needed, or warranty concerns exist, pro rates may be justified.
Professionals also reduce risk of damage and repeat visits.
Compare local service quotes, including travel and minimum fees, before deciding.
Troubleshooting checklist for persistent looseness
When a handle continues to wobble after basic tightening, a focused checklist helps identify the real cause.
Simple tests—such as checking for play at the mounting studs, verifying screw engagement, and noting movement of the glass or escutcheon—can isolate the faulty component.
If replacement parts or a technician are required, temporary measures like applying tape, a rubber spacer, or snugging set screws can reduce motion until a permanent fix is made.
Quick tests to isolate the faulty component
Begin by performing a few quick, targeted tests to determine whether the looseness stems from the handle hardware, the glass-to-hardware interface, or the door itself.
Check for play by wiggling the handle, inspect mounting screws or set screws, examine gasket or spacer compression, and test door alignment by opening/closing.
Note where movement concentrates to identify the component needing repair or replacement.
Temporary fixes while awaiting parts or service
If parts or a technician are delayed, apply simple temporary measures to keep the handle secure and prevent further damage while awaiting a proper repair.
Use waterproof tape or a silicone band to stabilize the handle, avoid heavy use, and mark loose movement.
Pad contact points with a soft washer or gasket substitute to reduce glass stress.
Schedule professional replacement and document condition for service.
Step-by-step summary for a successful handle tightening job
A concise safety checklist should be observed before starting, including turning off water, protecting glass edges, and wearing eye protection.
The technician then follows condensed action steps: loosen fittings, realign the handle, apply threadlocker if needed, and tighten to specification.
Finally, a post-repair inspection verifies smooth operation, confirms no glass stress, and checks for remaining play.
Short safety checklist before starting
Before any tools touch the glass, make certain the work area is dry, well-lit, and free of obstructions so movement is safe and visibility is clear.
Wear cut-resistant gloves and safety glasses. Confirm the door is stable and won’t swing.
Gather appropriate tools and non-marring pads. Shut off nearby water sources.
Keep a phone nearby for emergencies and avoid working alone if glass is compromised.
Condensed action steps to follow
Begin by placing non-marring pads under the door and stabilizing it; then follow a concise sequence: inspect the handle and fasteners, loosen retaining screws just enough to relieve tension, realign the handle halves on the glass, tighten screws evenly to manufacturer torque or until snug without over-stressing the glass, wipe away debris, and test operation through several full swings to confirm stability.
Verify no binding and secure finish.
Post-repair inspection checklist
Having completed the tightening sequence and confirmed smooth operation, the technician proceeds through a compact post-repair inspection checklist to verify durability and safety.
Verify torque settings, confirm no glass cracks or chips, check handle alignment and movement, guarantee fasteners are secure and thread-locked, test door swing and latch engagement, inspect seals for leaks, and document findings with photos and timestamps for future reference.
Conclusion
The homeowner completed the handle tightening with steady care, restoring a secure grip that felt as reliable as a well-tied knot. Following the step-by-step guidance and using the recommended tools prevented glass damage and avoided unnecessary replacements. Routine inspections and light maintenance kept fasteners snug, reducing future risk. If looseness persisted despite correct technique, professional assessment was advised to check internal fittings or replace worn hardware, ensuring long-term safety and function.
