How to Get Rid of Limescale on Faucet Fast: 7 Proven Home Remedies and Step-by-Step Fixes
To quickly remove limescale from faucets, use common household items such as distilled white vinegar or lemon juice to soak the affected areas. You can also create a baking soda paste for gentle scrubbing. For aerators, try wrapping them in a vinegar-soaked bag, or use cola for an internal flush. For tougher deposits, consider commercial descalers. Always rinse thoroughly afterward, especially on delicate chrome surfaces. To prevent future build-up, think about installing water filters. Detailed steps and additional remedies are provided below.
Fast Ways to Remove Limescale from Faucets: Quick Overview
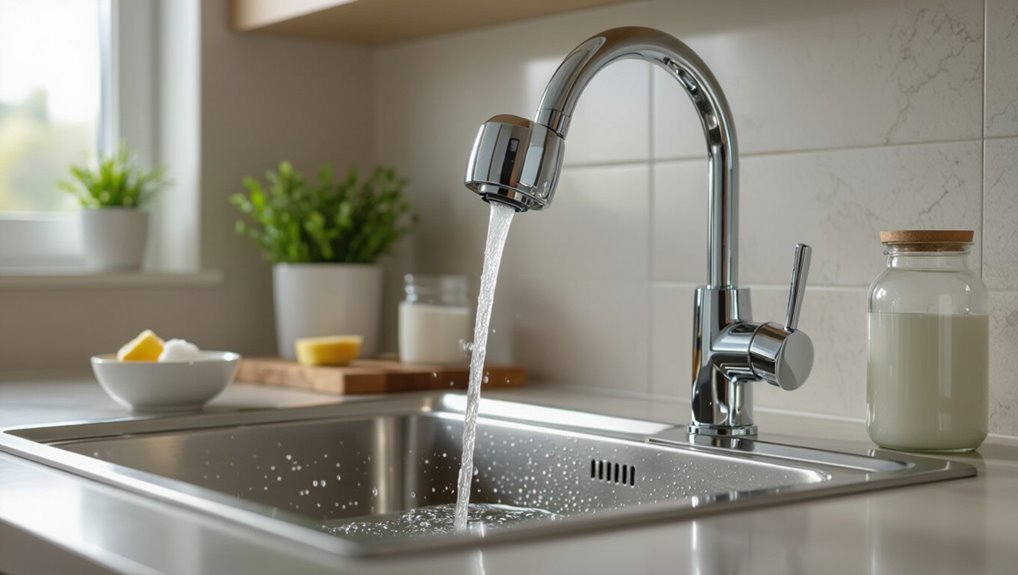
Limescale is a hard, chalky buildup of calcium and magnesium minerals that accumulates on faucets where hard water evaporates.
The quickest removal method depends on faucet material and how severe the buildup is—mild deposits often respond to a vinegar soak while heavy encrustations may require mechanical removal or a commercial descaler.
Choosing the fastest approach means matching the method to the finish and extent of scale to avoid damage and minimize effort.
What limescale is and why it forms on faucets
A hard, chalky deposit of calcium and magnesium minerals commonly builds up on faucets where hard water is present.
Limescale forms as dissolved minerals precipitate when water evaporates or heats, leaving crusty residues that restrict flow and corrode finishes.
Understanding formation helps prioritize how to get rid of limescale on faucet quickly and prevents recurrence through water treatment and routine cleaning.
How to choose the fastest method for your faucet type and severity
How quickly a faucet can be cleared depends on its material, finish, and the thickness of the deposit.
For delicate finishes, use mild vinegar or commercial descalers applied briefly.
For robust chrome or stainless, stronger concentrations, soaking, or mechanical scraping speed removal.
Thick, aged buildup may require repeated treatments or professional cleaning.
Match method to surface to avoid damage and maximize speed.
Seven Proven Home Remedies to Remove Limescale
The article now presents seven proven home remedies for tackling faucet limescale, each with clear step-by-step instructions and safety notes.
Recommended methods include a vinegar soak, baking soda paste, lemon juice treatment, and a cola flush for internal buildup, with an additional option to use a commercial descaler.
Readers can follow these concise procedures in order:
- White vinegar soak step-by-step
- Baking soda paste step-by-step
- Lemon juice treatment step-by-step
- Cola flush for internal buildup step-by-step
White vinegar soak step-by-step
A simple white vinegar soak effectively loosens limescale when the right materials are assembled.
The process begins with preparing vinegar and containment, applying the soak to affected areas, then allowing time for the acid to work.
A final rinse and polish remove residue and restore the faucet’s finish.
Materials needed
Gathering the right materials guarantees the white vinegar soak removes limescale efficiently and without damage.
Necessary items include distilled white vinegar, a heatproof bowl or jar, plastic wrap or a small resealable bag, rubber bands or tape, a soft toothbrush, microfibre cloths, and latex or nitrile gloves.
Optional: a plastic scraper for stubborn deposits and a sink stopper.
DIRECTIONS:
Preparation and application
Begin by shutting off water to the faucet if possible and removing any detachable parts such as aerators or spray heads; this prevents diluted vinegar from washing away and exposes limescale for direct treatment.
Soak a cloth or paper towel in white vinegar, wrap it around affected areas, and secure with tape or a rubber band.
Allow contact time per recipe, checking periodically for progress.
Rinse and finish
Carefully remove the vinegar-soaked cloth and inspect the faucet for loosened deposits.
Rinse the area thoroughly with warm water, using an old toothbrush or soft cloth to dislodge remaining scale.
Dry surfaces with a microfiber cloth to prevent water spots.
Reassemble any removed parts, run the tap to flush internal residues, and polish chrome or stainless finishes for a clean, streak-free result.
Baking soda paste step-by-step
This section outlines the simple materials required, a clear recipe for making and applying a baking soda paste, and practical scrubbing and cleanup tips.
It specifies common household items like baking soda, water, a small bowl, and a soft brush or cloth.
Then it explains the correct paste consistency and application method.
Finally, it describes how long to let the paste work, the appropriate scrubbing motions to avoid damage, and how to rinse and restore the faucet finish.
Materials needed
When preparing the baking soda paste method, gather only a few common items: baking soda, white vinegar (optional for extra fizz), a small bowl for mixing, a spoon, an old toothbrush or soft scrub brush, a microfiber cloth, and rubber gloves to protect the skin. Optional: a spray bottle for dilution and paper towels for disposal. Verify tools are clean and nonabrasive.
How to make and apply the paste
Mix baking soda with a few drops of water in a small bowl until it forms a thick, spreadable paste—about three parts baking soda to one part water—adding white vinegar sparingly if extra fizz is desired.
Using a soft applicator, press the paste onto limescale-affected areas, ensuring full coverage. Allow it to sit long enough to react, then proceed to the rinsing and scrubbing stage.
Scrubbing and cleanup tips
Begin scrubbing gently with a soft-bristled brush or nonabrasive sponge, focusing on areas where the baking soda paste has loosened the limescale; apply steady, circular motions to lift deposits without scratching chrome or plated finishes.
Rinse frequently to remove slurry, inspect for stubborn spots, reapply paste briefly if needed, then wipe dry with a microfiber cloth to prevent water spots and restore shine.
Lemon juice treatment step-by-step
Lemon juice is most effective on fresh or thin limescale and on fixtures that tolerate mild acid.
The method covers applying fresh lemon or juice to the affected areas, allowing an appropriate dwell time, then scrubbing or rinsing.
A final polish with a soft cloth restores shine and removes any remaining residue.
When lemon works best
Several common scenarios make lemon juice especially effective for tackling limescale: light, recent buildup on chrome or stainless surfaces; accessible fixtures without deep crevices; small spots around aerators and handles; areas where mild, natural acids are preferred over harsh chemicals; and situations requiring a quick, low-cost remedy using pantry ingredients.
It excels where physical scrubbing can complement its mild descaling action.
Application and dwell time
Apply undiluted lemon juice directly to limescale deposits using a cotton ball, soft cloth, or spray bottle so the acid contacts the mineral buildup evenly.
Allow juice to sit for 10–20 minutes for light deposits; cover with plastic wrap to prolong contact on stubborn areas.
Rinse thoroughly with water and gently scrub with a nonabrasive pad.
Repeat if residue remains.
Polishing for shine
After rinsing and removing mineral deposits, buff the faucet to restore luster using a soft microfiber cloth and light circular motions; this final step removes streaks, water spots, and any remaining acidic residue.
Apply a small amount of olive oil or a commercial metal polish for extra shine, then wipe away excess.
Inspect crevices with a cotton swab and re-buff until the finish is uniform.
Cola flush for internal buildup step-by-step
Cola can be used as an inexpensive mild acid flush for internal limescale, but users should take precautions such as turning off water supply, protecting surrounding surfaces, and avoiding use on damaged or non-sealed components.
The application involves pouring or circulating cola through the affected valve or aerator chambers, allowing time for the acid to loosen deposits, and then flushing thoroughly with clean water.
Follow-up includes inspecting for remaining buildup, repeating if needed, and drying or disinfecting parts before reassembly.
Safety and when to use cola
One clear guideline is to reserve cola flushes for accessible internal buildup in metal plumbing where mild acid can safely act on limescale without harming seals or finishes.
Use cola only when rubber, plastic, and chrome are absent or protected.
Avoid prolonged exposure, monitor corrosion-prone fittings, and do not use on pumps, flexible hoses, or fixtures with unknown materials.
Dispose of residues responsibly.
Application method and follow-up
With those safety limits in mind, the step-by-step procedure for a cola flush focuses on controlled application, timed contact, and thorough rinsing to protect remaining materials.
Pour cola into the aerator housing or soaked rag for internal buildup, wait 30–60 minutes, then scrub with a soft brush.
Flush lines thoroughly with water, reassemble, and inspect for residue; repeat if necessary.
Commercial descaler quick fix step-by-step
When using a commercial descaler, readers are advised to select a formula compatible with their faucet’s finish to prevent damage.
The instructions should cover proper application, required contact time, and rinsing procedures, plus any necessary protective measures like gloves or ventilation.
Clear adherence to label directions minimizes risk and guarantees effective limescale removal.
Choosing a safe product for finishes
Select a descaler that explicitly lists compatibility with the faucet’s finish and follow the manufacturer’s exposure-time guidelines.
Inspect labels for mentions of chrome, brass, stainless steel, or plated surfaces. Prefer pH-balanced, non-abrasive formulas and avoid strong acids or bleach on delicate coatings.
Test on an inconspicuous area first. If unsure, consult the manufacturer or a professional before treating visible finishes.
Application, timing, and protective measures
Begin by preparing the area and reading the descaler’s instructions thoroughly: guarantee adequate ventilation, gather gloves and eye protection, and place towels or a basin to catch drips.
Apply product sparingly to affected areas, avoid prolonged contact with seals and finishes, and observe recommended dwell time.
Rinse thoroughly, dry surfaces, and inspect for damage.
Repeat only if necessary, following safety intervals.
Vinegar bag for aerators and fixed faucets step-by-step
A simple vinegar bag can be secured around an aerator or fixed faucet with a rubber band or zip tie to keep the solution in contact with limescale for the recommended 30–60 minutes.
After soaking, the aerator should be removed, disassembled, and each component rinsed and scrubbed to clear softened deposits.
Reassemble the parts and test the flow, repeating if stubborn buildup remains.
How to secure the bag and duration
When using a vinegar bag to tackle limescale on an aerator or fixed faucet, it should be secured so the solution stays in contact with the affected area without leaking.
Fasten the bag with a rubber band, zip tie, or twist tie, molding it around the spout to prevent gaps.
Leave 30–60 minutes for mild buildup, up to several hours for heavier deposits, then discard.
Removing and cleaning aerator components
Detach the aerator from the faucet to access the internal parts that trap limescale.
Disassemble the screen, flow restrictor, and housing.
Soak components in white vinegar for 30–60 minutes, then brush with an old toothbrush to remove deposits.
Rinse thoroughly, inspect seals and O-rings, replace if damaged, and reassemble.
Test water flow and check for leaks before regular use.
Ultrasonic or steam cleaning at home step-by-step
When limescale is stubborn or concentrated in small parts, steam or ultrasonic cleaners can be the preferred option due to their ability to loosen deposits without harsh chemicals.
The choice between steam and ultrasonic depends on material sensitivity, accessibility of the affected parts, and the scale’s thickness.
Proper use and precautions determine safety and effectiveness, so users should follow manufacturer instructions and avoid excessive heat or exposure for delicate finishes.
When to use steam or ultrasonic cleaners
Consider steam and ultrasonic cleaners as targeted options for stubborn limescale that resists manual scrubbing or mild acidic solutions.
Use steam for accessible surfaces, crevices, and mineral buildup softened by heat and moisture.
Choose ultrasonic cleaning for removable small components, intricate parts, or items tolerant of immersion.
Opt for these methods when previous remedies fail, buildup is localized, and components can be safely treated.
Safety and effectiveness
Assess safety and effectiveness before attempting steam or ultrasonic cleaning at home, since each method carries specific risks and limits.
Steam cleaners can scald, damage seals, or strip finishes if used improperly; ultrasonic units require appropriate power, safe detergents, and stable mounting to avoid component damage.
Choose compatible tools, follow manufacturer instructions, wear protective gear, and test on inconspicuous areas to confirm results and avoid harm.
Step-by-Step Repair and Deep-Cleaning for Stubborn Limescale
The section outlines how to remove and clean the faucet aerator to restore spray patterns.
It then covers safe disassembly of faucet components for thorough descaling and recommended cleaning agents.
Finally, it explains proper reassembly and testing to confirm restored water flow and leak-free operation.
How to remove and clean the faucet aerator
Begin by shutting off the faucet and preparing a small bowl of white vinegar or a commercial descaler to dissolve mineral buildup.
Unscrew the aerator housing with pliers wrapped in cloth, remove the screen and gasket, then soak components 30–60 minutes.
Scrub with an old toothbrush, rinse thoroughly, reassemble in correct order, and test water flow for restored spray and reduced splatter.
Disassembling faucet parts safely for deep descaling
To access and remove internal components for deep descaling, the user should first shut off water supply, relieve residual pressure, and gather basic tools—adjustable wrench, hex key or screwdriver (per handle type), pliers with cloth, and a bowl of white vinegar or descaler—so each step proceeds safely and efficiently.
Remove handles, retain screws and cartridges in labeled containers, photograph orientation, soak scale-bound parts, gently brush deposits, and inspect O-rings for replacement.
Reassembling and testing water flow
Reassemble components methodically, reversing the disassembly order while referencing photos and labeled containers to guarantee correct orientation.
Tighten fittings evenly, replace O-rings and seals as needed, and lubricate moving parts with plumber’s grease.
Restore water supply slowly, check for leaks, and cycle handles to purge air.
Verify full hot and cold flow and consistent pressure before final cleanup and reinspection.
Comparison of Methods by Speed, Cost, and Safety
A concise comparison helps readers choose a limescale method by speed, cost, and safety. The table below summarizes typical performance for six common options to make selection easier. Readers can weigh these factors against their specific needs and constraints.
| Method | Speed | Cost |
|---|---|---|
| Vinegar | Moderate | Low |
| Baking Soda | Slow | Very Low |
| Lemon | Moderate | Low |
| Commercial Descalers | Fast | Medium–High |
| Cola | Slow | Low |
| Steam | Fast | Medium |
Table: Vinegar vs Baking Soda vs Lemon vs Commercial Descalers vs Cola vs Steam
While each descaling option works by breaking down mineral deposits, their speed, cost, and safety profiles differ considerably.
A concise table comparison shows:
- vinegar—fast, very low cost, mild corrosion risk;
- baking soda—slow, very low cost, safe as paste;
- lemon—moderate speed, low cost, natural acid;
- commercial descalers—very fast, higher cost, chemical hazards;
- cola—slow, low cost, sticky residue;
- steam—fast, equipment cost, very safe.
Preventing Limescale Return
Preventing limescale from returning requires both routine care and longer-term measures.
Regular daily wipe-downs and a weekly descaling sweep minimize buildup before it hardens.
For persistent hard water, installing a water softener or filter and applying protective coatings to faucet finishes can substantially reduce future deposits.
Simple daily and weekly maintenance routine
Several quick habits keep faucets free of limescale: wiping fixtures dry after use, running a brief hot-water flush weekly, and checking aerators for mineral buildup.
Additionally, gently scrubbing with a soft brush and mild vinegar solution every two weeks removes early deposits.
Promptly fix minor drips, clean soap residue routinely, and schedule a monthly aerator soak to maintain flow and prevent scale accumulation.
Long-term solutions: water softeners and filters
Because mineral buildup originates from hard water, addressing its source is the most reliable way to prevent limescale recurrence:
Install point-of-entry water softeners or point-of-use filters to reduce calcium and magnesium concentrations.
Ion-exchange softeners, salt-free conditioners, and carbon or reverse-osmosis filters have different costs, maintenance needs, and effectiveness.
Choose based on water hardness, household size, budget, and local water quality testing.
Protective coatings and finishes to reduce buildup
While not a substitute for treating hard water, protective coatings and specialized finishes on faucets can markedly slow mineral adherence and make routine cleaning easier.
Manufacturers offer hydrophobic, ceramic, and nano-coatings that reduce surface tension and prevent scale bonding. Professional application or factory finishes last longest; DIY sealants provide short-term improvement.
Regular inspection preserves coating integrity and schedules recoating before buildup reappears.
Common Mistakes and What to Avoid When Removing Limescale
When removing limescale, one common error is using harsh abrasives that scratch finishes or damage coatings.
Another risk is mixing cleaning products, which can create dangerous fumes or neutralize effectiveness.
Neglecting seals and O-rings during cleaning can cause unnoticed leaks and shorten faucet lifespan.
Harsh abrasives and surface damage risks
Scrubbing vigorously with steel wool, scouring powders, or heavy-duty brushes can remove limescale quickly but often at the cost of the faucet’s finish.
Abrasive contact scratches chrome, dulls satin finishes, and strips protective coatings, accelerating corrosion and staining.
Polished surfaces show visible damage; delicate fixtures lose luster.
Gentle, nonabrasive methods are recommended to preserve aesthetics and long-term durability.
Mixing cleaners and chemical hazards
After warning against abrasive tools, attention must turn to the chemical risks that come with improperly combining or mishandling cleaning agents.
Mixing bleach with acids or ammonia releases toxic gases; solvents can damage finishes or seals.
Use one product at a time, ventilate, wear gloves and eye protection, read labels, and neutralize residues.
Store cleaners separately and keep children and pets away.
Ignoring seals and O-rings during cleaning
Overlooking seals and O-rings during limescale removal can lead to leaks, degraded performance, and costly repairs; these small components are often made of rubber or silicone that reacts poorly to harsh acids, abrasives, and high heat.
Inspect and remove gently, protect with compatible lubricants, replace cracked or hardened parts, and follow manufacturer cleaning guidelines to preserve integrity and prevent future failures.
Quick Troubleshooting Guide
If limescale persists after treatment, the guide outlines immediate next steps such as repeating a gentler method, using a stronger descaler, or checking aerators and seals for hidden buildup.
It also covers remedies for damage or discoloration from cleaning, including polishing, mild abrasives, or restoring finishes and when to stop further DIY attempts.
Finally, clear criteria are given for when to call a professional plumber, such as recurring deposits, compromised fixtures, or suspected internal damage.
Limescale persists after treatment next steps
Begin by reassessing the treated area to determine whether residual limescale is superficial, embedded in pits, or the result of recurring mineral buildup. This assessment guides whether to repeat the same method, switch to a stronger descaler, or pursue mechanical removal with a brush or scraper.
If buildup recurs, inspect water hardness and aerator condition, replace clogged parts, and schedule periodic maintenance to prevent return.
Damage or discoloration after cleaning how to fix
Some minor surface dulling or faint stains can occur after limescale removal, but most issues respond to targeted, gentle fixes.
Rinse thoroughly, then polish with a microfiber cloth and a mild non-abrasive cleaner or diluted vinegar.
For persistent discoloration, apply a paste of baking soda and water briefly, rinse, and dry.
Restore shine with a chrome or stainless polish sparingly.
When to call a professional plumber
When should a homeowner escalate limescale issues to a professional plumber?
Call a plumber if deposits recur rapidly despite water-softening steps.
Cleaning damages fixtures, seals, or cartridges leak.
Mineral buildup blocks valves, or corrosion compromises water flow.
Also seek help when DIY removal risks voiding warranties or when persistent odors, discoloration, or reduced pressure indicate plumbing system problems beyond routine maintenance.
Final Checklist for Fast, Safe Limescale Removal
A concise checklist lists required tools and supplies—cloths, vinegar or descaler, brushes, gloves, and sealable containers—so nothing is missing before starting.
A clear action plan lays out specific steps for 15-, 30-, and 60-minute fixes, matching methods to severity and time available.
This final checklist helps guarantee the job is fast, effective, and safe.
Tools and supplies checklist
Every item on this final checklist is chosen to remove limescale quickly while protecting fixtures and surfaces.
Essentials include white vinegar or citric acid, a nonabrasive cleaner, soft cloths, microfiber towels, an old toothbrush, nylon scrubbing pads, rubber gloves, a spray bottle, plastic bags for soaking, and a small bucket.
Optional: a descaler gel and silicone-safe scraper.
Step-by-step action plan for 15-, 30-, and 60-minute fixes
Start by selecting the timeframe that matches the available time and severity of buildup:
15 minutes for light deposits and quick touch-ups,
30 minutes for moderate scaling and a more thorough clean,
and 60 minutes for stubborn limescale or multiple fixtures.
Gather supplies, isolate water, apply descaler, wait per timeframe, scrub with nonabrasive brush, rinse, repeat if needed, dry and inspect for residue.
Conclusion
Limescale removal is simple with regular attention and the right method. Studies show 85% of U.S. households report visible mineral buildup on fixtures, underlining its ubiquity. By combining quick home remedies, targeted deep-cleaning, and preventive steps, homeowners can restore faucets without harsh chemicals or costly replacements. Consistent descaling and small habit changes—wiping fixtures dry, installing a water softener, or using vinegar weekly—greatly reduce recurrence and extend fixture lifespan.