How to Stop Smells Coming Through Bathroom Vents: Easy Fixes That Work
To effectively stop odors from coming through bathroom vents, start by cleaning the fan, grille, and duct termination. Open a window while running the fan to improve airflow. For seldom-used drains, pour water or vinegar to reseal traps. Installing a backdraft damper and replacing worn gaskets can also help. If smells persist, consider adding a charcoal filter or an inline fan. If the problem continues, a professional inspection is recommended. The following sections will detail practical fixes, necessary tools, and guidance on when to seek help.
Why Bathroom Vent Smells Happen
Odors in bathroom vents commonly originate from sources such as drains, toilets, mold growth, vent ducts, or pests.
Improper or reversed ventilation can pull these smells into the room rather than expel them.
Persistent or strong odors may signal health or safety hazards like sewer gas infiltration or extensive mold that require immediate attention.
Common sources of odors (drain, toilet, mold, vents, pests)
Bathroom smells often originate from several identifiable sources rather than the vent itself: slow-draining fixtures and trap-dry drains, toilet seals and wax rings, mold and mildew in damp cavities, accumulated debris in ductwork and fans, and infestations by pests or their droppings.
Identifying each source guides practical fixes and informs how to stop smells from coming through bathroom vents effectively and efficiently.
How ventilation systems can draw smells into the bathroom
Many ventilation systems can pull unwanted smells into a bathroom when they create pressure imbalances or provide a pathway from contaminated spaces.
Fans, ducts, and exterior vents that are improperly sealed, clogged, or connected to shared plenums can siphon air from drain lines, attics, crawlspaces, or adjacent units and then distribute those contaminants back into the room.
Leaky duct joints, reverse airflow, and poor termination points worsen odor intrusion, especially during wind or HVAC cycling.
When smells indicate a health or safety issue (sewer gas, mold)
When persistent or unusually strong smells emanate from a bathroom vent, they can signal more than mere nuisance; they may indicate sewer gas leaks, hidden mold growth, or other conditions that pose health or safety risks.
Such odors warrant immediate investigation: check for damaged vent pipes, dry trap seals, sewage backups, and mold behind walls or vents.
Engage a plumber or mold remediation professional if sources aren’t obvious.
Quick Fixes You Can Do Immediately
Immediate steps can reduce or hide vent odors while longer repairs are arranged.
Simple deodorizing—air fresheners, baking soda, or activated charcoal—can neutralize smells briefly, while opening windows and running the exhaust fan improve airflow to clear trapped air.
The distinction between masking and eliminating odors is important: temporary methods conceal scents, but increased ventilation and odor absorbers help address their source.
Short-term deodorizing methods (air fresheners, baking soda, activated charcoal)
Addressing odors quickly often relies on short-term deodorizing methods that neutralize or mask smells until a longer-term fix can be applied.
Portable air fresheners and odor-neutralizing sprays offer immediate scent control; gel or plug-in dispensers provide steady release.
For passive absorption, place open baking soda containers or small activated charcoal pouches near vents.
Replace absorbents regularly to maintain effectiveness.
Temporary airflow adjustments (open windows, exhaust fan use)
If outside air is available, briefly opening a window near the bathroom and running the exhaust fan creates a cross-breeze that dilutes and expels trapped odors.
Positioning the fan to push air outward, opening internal doors to promote flow, and repeating cycles for several minutes quickly reduces vent smells.
These temporary airflow adjustments offer immediate relief while longer fixes are arranged.
Masking vs eliminating odors: what works and when
When is it better to mask a bathroom vent odor than to eliminate it outright?
Masking suits brief visits or when immediate elimination isn’t feasible: use sprays, scented plug-ins, or essential-oil diffusers.
Elimination is preferred for persistent, health-related, or source-based smells—clean ducts, fix backups, deodorize traps, or install inline purifiers.
Prioritize elimination for long-term effectiveness; mask only as a stopgap.
Step-by-Step: How to Stop Smells Coming Through Bathroom Vents
A technician or homeowner should start by inspecting the vent path and fan housing for obstructions or damage.
Next steps include cleaning the exhaust fan and vent cover, clearing ducts and roof termination points, and sealing gaps around vent and duct connections.
Finally, installing or repairing backdraft dampers prevents reverse airflow and completes the remediation.
Inspecting the vent path and fan housing
Begin by visually tracing the vent route from the bathroom fan to the roof or exterior wall, noting any bends, junctions, or exposed duct sections.
Inspect housing for loose panels, gaps, or disconnected ductwork.
Check for crushed or flattened ducts and missing seals at connections.
Look for signs of moisture, mold, or pest entry points.
Document defects for repair or replacement.
Cleaning the exhaust fan and vent cover
Disconnect power to the fan and remove the vent cover to access accumulated dust and grime before further cleaning.
Wipe the cover with warm, soapy water; dry completely.
Vacuum fan blades, housing, and motor area with a soft brush attachment to remove dust.
Use a damp cloth for stubborn residue, avoiding moisture on electrical parts.
Reassemble only after all components are fully dry.
Clearing vent ducts and roof termination points
With the fan and cover clean and reassembled, attention turns to the vent ductwork and roof termination, where trapped debris and animal nests often cause odors to return.
Inspect the duct from the grille to the roof; remove lint, dust, and nests with a brush and vacuum.
At the roof cap, clear obstructions, check the flapper or screen, and restore free airflow.
Sealing gaps around the vent and duct connections
Seal gaps around the vent and duct connections to prevent odors from migrating into living spaces and to maintain proper airflow.
Inspect junctions at the fan housing, duct joints and wall or ceiling penetrations.
Use foil tape for metal ducts and HVAC-rated mastic for flexible ducts; seal around flange with silicone caulk.
Verify seals are continuous, dry, and accessible for future inspection or repair.
Installing or repairing backdraft dampers
After confirming that duct and flange joints are properly sealed, attention turns to the backdraft damper, a simple mechanical valve that prevents stale air and sewer gases from flowing back into the bathroom when the fan is off.
Inspect for stuck or damaged flaps, clean buildup, replace worn springs or seals, and fit a new inline or fan-mounted damper sized to the duct to restore one-way flow.
Replacing damaged ducting or vent caps
Begin by visually inspecting the entire run of ducting and the exterior vent cap for cracks, crushed sections, corrosion, or loose connections that can allow odors to escape or enter.
Remove and replace damaged flexible or rigid duct segments, seal joints with foil tape or clamps, and fit a weatherproof, backdraft-resistant exterior cap.
Test for leaks and secure fasteners to restore proper airflow and odor control.
Tools and Materials You’ll Need
A concise list of tools and materials makes the ventilation fix faster and safer.
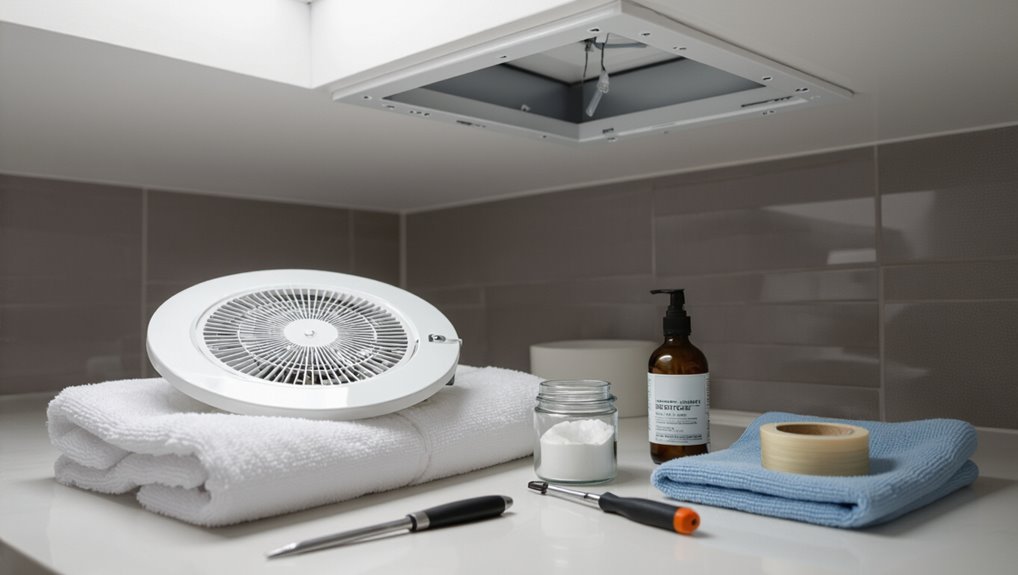
Recommended items include cleaning supplies and safety equipment, sealing materials such as foil tape, mastic, and caulk, and common replacement parts like dampers, duct sections, and vent caps.
Having these on hand prevents interruptions and guarantees proper repairs.
Cleaning supplies and safety equipment
Gather strong cleaning supplies and proper safety gear before tackling bathroom vent odors to guarantee effective results and personal protection.
Essential items include a stiff-bristle brush, microfiber cloths, mild detergent, bleach or enzyme cleaner for mold, and a vacuum with brush attachment.
Safety items: gloves, eye protection, a dust mask or respirator, and adequate ventilation equipment to minimize exposure during cleaning.
Repair and sealing materials (foil tape, mastic, caulk)
Seal leaks and reinforce connections with the right repair materials—foil HVAC tape, mastic sealant, and exterior-grade caulk—each chosen for specific duct and housing needs.
Foil tape bonds metal joints and resists heat; mastic fills gaps, resists vibration and long-term air sealing; exterior-grade silicone or polyurethane caulk seals penetrations at wall, roof, and vent housings to prevent odor and moisture entry.
Replacement parts (dampers, duct sections, vent caps)
Replace worn or damaged components—dampers, short runs of duct, or exterior vent caps—when repairs cannot restore proper seals or airflow.
Purchase replacement backdraft dampers sized for the fan, rigid or semi-rigid duct sections, and weatherproof vent caps with bird screens.
Include appropriate clamps, foil tape, and exterior caulk.
Match materials to existing system dimensions and local code for reliable odor control and ventilation performance.
When to Call a Professional
Persistent or worsening odors, visible mold, unusual noises from ductwork, or recurrent drainage backup indicate the need for an HVAC or plumber inspection.
Immediate professional attention is required for sewer-like smells or any suspected gas odor due to health and safety risks.
Technicians commonly clear blockages, repair seals or drains, and replace damaged vent components, with typical costs ranging from modest service fees to several hundred dollars for major repairs.
Signs you need an HVAC or plumber inspection
Several clear warning signs indicate it’s time to call an HVAC technician or plumber for an inspection.
Persistent odors despite cleaning, recurring dampness or mold near vents, unusually loud or irregular fan noise, reduced airflow, and visible rust or corrosion on ductwork warrant professional assessment.
Frequent tripping of breakers tied to ventilation, unexplained water stains, or repeated DIY failures also justify scheduling an expert inspection.
Sewer smell emergencies and gas risks
When odors persist despite routine cleaning and basic troubleshooting, the problem may signal a more hazardous source—sewer gases or a gas leak—that requires immediate professional response.
Signs include strong rotten-egg or sewage smells, dizziness, nausea, or multiple bathroom vents emitting odor.
Evacuate if symptoms occur, ventilate if safe, shut off gas supply, and contact qualified plumbers or gas utility emergency services without delay.
Typical professional fixes and expected costs
Call a qualified technician if basic checks and DIY fixes fail or if signs point to sewer gas, mold, electrical issues, or structural faults.
Professionals diagnose, repair vent ducts, replace fans, seal roof or wall penetrations, remediate mold, or fix plumbing traps.
Typical costs vary by scope: expect diagnostic fees plus repair estimates.
- Diagnostic inspection: $75–$200
- Fan replacement: $150–$500
- Duct repair/lining: $200–$800
- Mold remediation: $500–$5,000
- Plumbing/sewer fix: $200–$2,500
Preventive Measures to Keep Smells Out Long-Term
A practical preventive plan combines regular cleaning and maintenance with ventilation improvements to stop odors before they start.
Attention to moisture control and mold-prevention techniques keeps biological odors from recurring.
Selecting the right vent type and timely upgrades further reduces long-term problems and maintenance needs.
Regular cleaning and maintenance schedule
Establishing a regular cleaning and maintenance schedule prevents odors from developing and keeps bathroom vents functioning efficiently.
Inspect grilles, fan blades, and ducts monthly for dust, hair, and mold. Clean removable parts and vacuum accessible duct openings quarterly.
Replace filters and worn components annually. Document tasks and dates to guarantee consistency.
Promptly address any unusual noises or reduced airflow to avoid odor recurrence.
Improving bathroom ventilation and airflow design
Optimize bathroom airflow by designing paths that quickly remove humid, odorous air and replace it with fresh air.
Position exhaust fans near odor sources, add intake vents or transfer grilles, and use ducts with smooth, short runs.
Guarantee balanced supply and exhaust capacity, install adjustable-speed fans linked to timers or humidity sensors, and verify that airflow patterns prevent stagnation and short-circuiting to adjacent rooms.
Mold and moisture control strategies
Good ventilation alone cannot prevent lingering odors if moisture and mold are allowed to develop; controlling humidity and eliminating wet surfaces are the next line of defense.
Regularly dry wet areas, repair leaks, and seal grout and caulk to prevent water intrusion.
Use a dehumidifier or humidity-sensing fan set below 50% RH.
Inspect and clean hidden damp spots to disrupt mold growth and odor sources.
Best vent types and upgrades to consider
When selecting or upgrading a bathroom vent, priority should go to models and features that reduce odor buildup over time: high-extraction inline or wall-mounted fans, ducts with smooth interiors and minimal bends, and exhaust outlets that terminate outside rather than into attics or crawlspaces.
Consider ENERGY STAR-rated fans, insulated ducts to prevent condensation, backdraft dampers, and timed or humidity-sensing controls to guarantee consistent, efficient ventilation.
Common Mistakes That Make Vent Odors Worse
Many common errors actually make bathroom vent odors worse rather than better.
These include improper sealing or using the wrong duct materials, blocking vents or otherwise reducing airflow, and masking smells with fragrances instead of addressing their source.
Recognizing these mistakes helps prioritize fixes that stop odors at the root.
Improper sealing and wrong materials
Failing to seal duct connections properly or using non-duct-rated materials can turn a simple ventilation system into a persistent odor source.
Gaps, loose tape, and porous sealants allow sewer, attic, or crawlspace smells to infiltrate bathrooms.
Incompatible plastics or cloth-wrapped ducts degrade, trap moisture, and harbor mold.
Proper metal ducts, approved sealants, and secure fasteners prevent leakage and odor migration.
Blocking vents or reducing airflow
Blocking or restricting bathroom vents often makes odors worse by preventing proper air exchange and allowing moisture and contaminants to accumulate.
Homeowners who block grills, close dampers, or throttle fans create stagnation, promoting mold, mildew, and sewer gas buildup.
Temporary fixes can hide sources and worsen corrosion or duct contamination.
Proper airflow, routine cleaning, and correct fan sizing are preferable to restriction.
Over-reliance on fragrances instead of fixing the cause
When airflow is impeded, some homeowners reach for scented sprays, plug-ins, or diffusers as a quick fix; however, masking odors with fragrances often conceals the underlying problem rather than resolving it.
Relying on scents delays diagnosis of mold, clogged ducts, or sewer issues, complicates ventilation performance, and can trigger allergies.
Address sources directly: clean, inspect, and repair vents for lasting odor control.
Comparison of Odor-Blocking Solutions
A brief comparison highlights how dampers, filters, fans, and air purifiers balance odor control against cost and maintenance. The table below summarizes key pros and cons and a simple cost-effectiveness view to guide choice. The discussion that follows will reference these trade-offs to recommend practical options.
| Solution | Key advantage | Typical cost-effectiveness |
|---|---|---|
| Damper | Prevents backflow of smells | Low cost, high effectiveness for passive control |
| Filter | Traps particulates and odors | Moderate cost, requires regular replacement |
| Fan | Removes contaminated air quickly | Varies by model, ongoing energy costs |
| Air purifier | Neutralizes odors chemically/with HEPA | Higher upfront cost, strong effectiveness |
| Combined approach | Layered protection | Best overall effectiveness, higher complexity |
Pros and cons: dampers, filters, fans, air purifiers
Evaluate common odor-control options by weighing effectiveness, cost, maintenance, and installation constraints.
Dampers: simple, low cost, occasional cleaning, may stick or leak air.
Filters: trap particles and odors, require regular replacement and modest expense.
Inline fans: strong removal, higher installation and energy costs.
Air purifiers: flexible, effective for lingering smells, ongoing filter and power costs, limited to room circulation.
Cost vs effectiveness overview
Because bathroom-vent odor solutions vary widely in upfront and ongoing costs, comparing them requires balancing purchase/installation expenses against measurable effectiveness and maintenance demands.
Dampers are low-cost, low-maintenance but limited against persistent smells. Inline fans and filters increase cost and effectiveness, needing filter replacement. Air purifiers offer best odor control but higher purchase and operating costs.
Choose by budget, odor severity, and maintenance willingness.
Real-Life Examples and Short Case Scenarios
The following real-life examples illustrate common causes and practical fixes for bathroom vent odors, highlighting diagnostic steps and outcomes.
Each brief case shows how a specific source—roof vent, trap failure, or mold in ductwork—was identified and resolved. Readers can use these scenarios to recognize similar symptoms and choose appropriate remedies.
- Roof vent odor: leak and animal nesting found at the roof vent, repaired and screened to stop smells.
- Sewer-like smell: partial trap seal loss traced to a rarely used fixture, fixed by adding a trap primer and restoring water seal.
- Persistent musty smell: mold discovered in ductwork after moisture buildup, remediated by cleaning and improving ventilation.
- Quick diagnostic tip: follow odor timing and location to narrow down vent, trap, or duct causes.
- Preventive step: regular inspection and simple fixes reduced recurrence in each case.
Case: Smell from roof vent diagnosis and fix
When a persistent odor seems to originate from a roof vent, a straightforward diagnostic sequence—visual inspection, smoke or incense testing for airflow direction, and checking for obstructions or animal nests—quickly narrows likely causes.
Resolving the issue typically involves clearing blockages, sealing gaps, or repairing vent caps and flashing to restore proper venting and prevent future backflow.
A homeowner cleared debris, resealed flashing, and replaced a cracked cap, eliminating the smell.
Case: Sewer-like odor how it was traced to trap issues
Investigators traced a persistent sewer-like odor to failing traps after systematically eliminating roof vent and plumbing-vent causes. Scented smoke tests, dye checks, and moisture inspections revealed several dry or improperly trapped fixtures that allowed sewer gas to enter living spaces.
Technicians replaced worn P-traps, corrected trap arm slopes, added trap primers where needed, and sealed loose cleanout caps, stopping the intrusion and restoring normal air quality.
Case: Persistent musty smell mold in ductwork
Technicians documented several instances where a persistent musty odor traced not to visible mold on surfaces but to growth within HVAC ductwork and associated components.
Investigation revealed accumulated moisture, insulation degradation, and biofilm on interior metal and flex ducts.
Remediation combined targeted cleaning, duct sealing, insulation replacement, and improved ventilation.
Post-repair testing confirmed odor elimination and reduced airborne spore counts, preventing recurrence.
Maintenance Checklist to Prevent Future Odors
A concise maintenance checklist helps prevent future odors by assigning routine tasks and tracking component lifespans.
It distinguishes monthly, quarterly, and annual actions and specifies what to log after each service. Records should note dates, findings, and recommended replacement timelines for parts like filters and fan motors.
- Wipe and inspect grille and visible ductwork (monthly)
- Test fan operation and clean impeller (quarterly)
- Inspect roof/attic duct joints and condensate lines (annual)
- Log date, task performed, findings, and any odor sources
- Replace filters, seals, or motors based on recorded condition and manufacturer intervals
Monthly, quarterly, and annual tasks
Regular inspections and a consistent maintenance schedule reduce the risk of recurring odors from bathroom vents.
Monthly: clean grille, wipe fan housing, check for visible mold or debris.
Quarterly: remove fan assembly for deeper cleaning, inspect duct joints and exterior vent cap.
Annually: verify duct integrity, test fan performance, replace worn filters or gaskets, and schedule professional inspection if issues persist.
What to record and when to replace components
When should records be updated and parts replaced to keep bathroom vents odor-free? A log should note cleaning dates, filter changes, fan runtime, odors, and repairs.
Replace disposable filters every 3–6 months, carbon filters annually, and aging fans every 7–10 years or when performance drops.
Inspect duct seals and backdraft dampers yearly; document findings and actions for proactive maintenance and warranty support.
Conclusion
To sum up, the homeowner sees that most bathroom vent odors have simple, fixable causes and that quick measures—cleaning, sealing, adding a backdraft damper, or replacing a clogged filter—usually nip problems in the bud. Routine checks and modest upgrades keep foul air at bay, saving time and money. When DIY steps fail, calling a pro prevents wasting effort. In short, a stitch in time stops smells from becoming a bigger headache.