How to Get Air Out of Pool Pump Basket: Quick Fixes to Stop Gurgling and Loss of Suction
To quickly remove air from your pool pump basket and stop gurgling and loss of suction, follow these steps: First, turn off the power and close the valves. Then, loosen the pump lid or air relief valve to release trapped air. Refill the strainer housing with water and restart the pump, observing for a steady flow without bubbles. Check the lid O-ring, unions, and skimmer for any leaks or cracks, and replace any faulty components. For further troubleshooting, repairs, and prevention tips, continue reading.
Why Air in the Pool Pump Basket Causes Gurgling and Loss of Suction
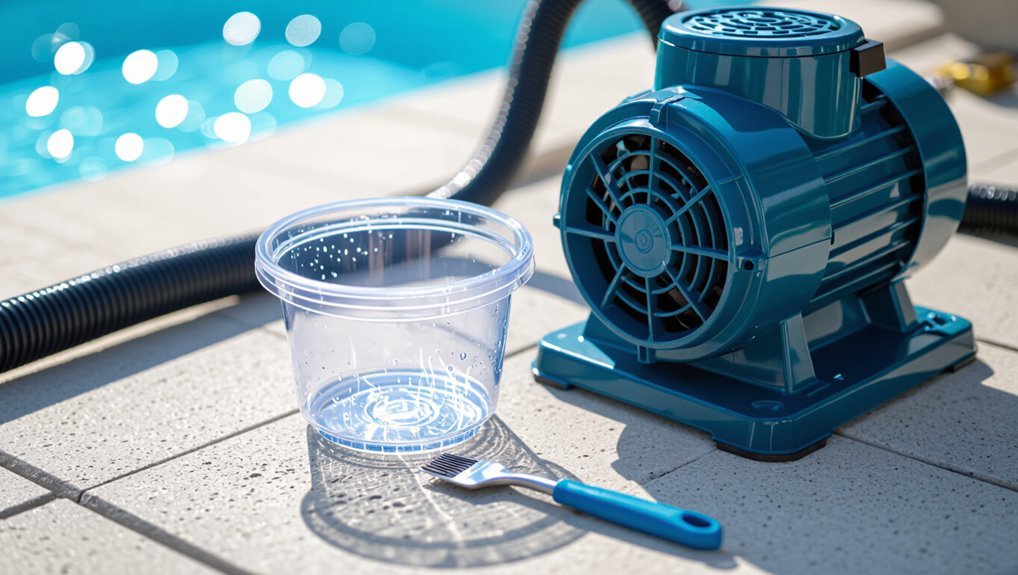
A pool circulation system relies on a sealed suction line from the skimmer through the pump basket to maintain steady flow and pressure.
When air infiltrates that sealed path—through cracked fittings, loose lids, or low water level—it interrupts the pump’s ability to draw water, causing turbulence and reduced pressure.
Signs of an air leak include audible gurgling at the pump, cavitation or sputtering in the basket, and uneven or weak return flow.
How the pump and skimmer system should work
Several components must work together for the pump and skimmer system to maintain steady suction and silence: the skimmer draws surface water into the pump basket, the pump creates a steady low-pressure zone to pull water through, and airtight seals and unobstructed lines preserve that flow.
Proper operation involves correct water level, functioning impeller, sealed pump lid and clear plumbing; instructions on how to get air out of pool pump basket follow.
How air enters the pump basket and the effects on performance
Air entering the pump basket typically originates from leaks, low water level, or trapped air pockets in the suction line, and it disrupts the pump’s ability to maintain continuous, hydraulic prime.
Air reduces flow, causes cavitation risk, and forces the motor to work harder. Filtration efficiency falls, pressure fluctuates, seals wear faster, and circulation weakens, increasing debris return and chemical imbalance.
Common symptoms to identify an air leak (gurgling, cavitation, irregular flow)
Many pool systems exhibit telltale signs when an air leak is present: gurgling noises at the skimmer or pump, intermittent suction, and noisy cavitation around the impeller.
Additional indicators include fluctuating water level in the pump basket, spurting flow from return jets, reduced pressure on the filter gauge, and visible air bubbles crossing the skimmer.
Prompt diagnosis prevents seal and impeller damage.
Quick Immediate Fixes to Get Air Out of the Pump Basket
The technician first powers down the pump and secures the skimmer and return valves before loosening the pump lid and any air-relief ports to purge trapped air.
After bleeding air, the pump is re-primed with clear, stepwise actions to restore full suction.
Finally, the pump is restarted with a close watch during the first minutes for steady flow and absence of new air ingress.
Step 1 Turn off the pump and close the skimmer/return valves safely
Shut off the pump at its power source before touching any plumbing, then close the skimmer and return valves to isolate the pump from the pool.
Verify power is off, then slowly turn valves to the closed position to prevent sudden pressure changes.
Check for secure valve handles and visible leaks.
Record valve positions before adjustment to restore original circulation settings after servicing.
Step 2 Bleed trapped air via the pump lid and air relief ports
Begin by loosening the pump lid or opening the air relief valve to let trapped air escape while observing for steady water flow. This quick, temporary venting often restores normal suction and reduces noise without disassembling the basket.
After air stops, retighten the lid and close the relief port. Check for continued steady flow and monitor for recurring air entry indicating a leak elsewhere.
Step 3 Re-prime the pump: step-by-step actions to restore full suction
Re-prime the pump by filling the strainer housing and suction line with water, then restarting the motor to re-establish full suction.
Close skimmer and return valves, open the pump lid, pour water until the basket and inlet port are fully submerged, reseal the lid and tighten clamps.
Slowly open valves, switch the pump on, and confirm steady, bubble-free flow.
Step 4 Restart sequence and what to watch for during first minutes
With the strainer housing topped up and the lid secured, the restart sequence focuses on gradual restoration of normal flow while watching for air-related symptoms.
The pump is restarted briefly, then paused to check for steady water return and steady pressure.
Listen for gurgling, watch for air bubbles at returns, monitor pressure gauge for drops or spikes, and confirm continuous, solid suction before normal run time.
Systematic Troubleshooting: Finding the Source of the Air Leak
A systematic check begins with the pump lid and O-ring, inspecting for cracks, nicks, or missing lubricant and replacing or reseating them as needed.
Next, all suction-side plumbing, unions, skimmer basket, weir, and hair/debris traps should be examined for loose fittings, cracks, or clogs that can introduce air.
Finally, verify pool water level and skimmer operation and inspect the multiport valve, drain plugs, and pump baskets for damage or wear that could cause intermittent air entry.
Inspect the pump lid and O-ring (what to look for, quick repairs)
Inspecting the pump lid and O-ring is a quick way to identify common sources of air entering the system: cracked or clouded lids, misaligned or pinched O-rings, and debris lodged in the sealing groove are the usual culprits.
Verify lid integrity, replace cracked or hazed covers, clean the groove, lubricate the O-ring with silicone grease, reseat it evenly, and hand-tighten the lid to test for leaks.
Check all suction-side plumbing and unions for loose fittings or cracks
Begin at the pump and trace every suction-side pipe, fitting, and union for signs of looseness, hairline cracks, or wet/dry residue that indicate air entry.
Tighten unions, hand-fit threaded connections, and replace cracked PVC or deteriorated flex hose.
Inspect glued joints for stress fractures and listen for hissing.
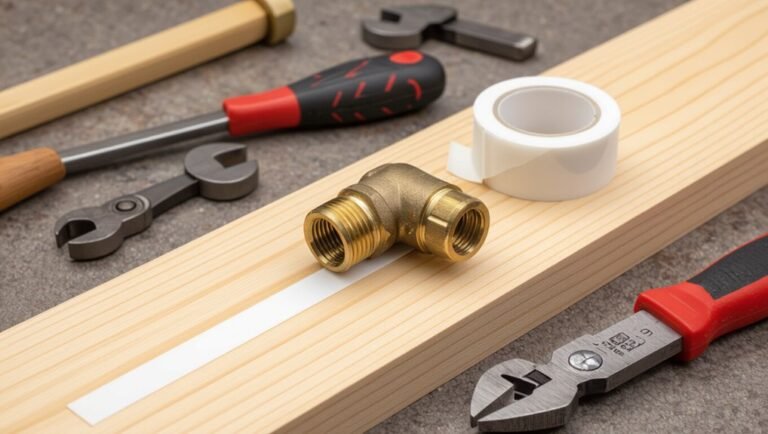
Re-seat or replace worn gaskets and use appropriate primer/cement or Teflon tape to secure seals.
Examine skimmer basket, weir, and hair/debris clog issues that cause air
With the pump and suction plumbing checked, attention shifts to the skimmer assembly where blockages and worn parts commonly introduce air into the system.
Inspect and empty the skimmer basket, clear trapped hair and debris, and make certain the weir moves freely.
Check for cracks or gaps around the skimmer lid and throat; replace damaged baskets or a faulty weir to restore proper flow and seal.
Inspect pool water level and skimmer conditions causing intermittent air
A low pool water line or a partially blocked skimmer can cause air to be drawn intermittently into the suction side. The operator should confirm the water level sits midway up the skimmer opening and that the skimmer throat and lid form a tight seal.
If water fluctuates with wind, swimmers, or an automatic fill cycle, the air entry will often appear sporadic rather than constant. The inspector should clear debris, verify the weir moves freely, replace warped lids or gaskets, and observe during different conditions to reproduce the intermittent leak before proceeding to further components.
Evaluate multiport valve, drain plugs, and pump baskets for damage
After confirming skimmer and water-level issues have been addressed, attention shifts to the pool’s multiport valve, drain plugs, and pump baskets as common sources of suction-side air leaks.
Technicians inspect valve handles, diverter seals, and sight glasses for cracks or looseness.
Drain plugs and O-rings are checked for wear and proper seating.
Pump baskets are examined for cracks, warped lips, or damaged lid gaskets that admit air.
How to use a simple soap test and dry-paper test to pinpoint leaks
Begin by isolating the suction-side components and running the pump at low speed while applying a simple soap solution to suspected joints and fittings; bubbles forming indicate air being drawn in.
Use a dry-paper test along unions, o-rings, and hose crimps—paper will flutter or stick where suction leaks.
Mark leak locations, shut down power, and tighten or replace faulty seals before retesting to confirm repair.
Permanent Fixes and Parts Replacement
Permanent fixes focus on replacing worn or damaged components rather than repeatedly patching leaks.
Key actions include swapping the pump lid O-ring with correct lubrication, replacing cracked lids, baskets, or union fittings, and evaluating whether hoses or PVC suction lines should be repaired or fully replaced.
Guidance on appropriate sealants, clamps, and taped joints helps guarantee long-term air-tightness while avoiding temporary or unsafe repairs.
Replacing the pump lid O-ring and proper lubrication technique
One common cause of air entering the pump basket is a worn or improperly seated pump lid O-ring.
Replacing it with a correctly sized, undamaged O-ring while applying the proper lubricant usually restores an airtight seal.
Inspect O-ring for nicks, replace if flattened, clean lid groove, seat O-ring evenly, and apply a thin film of silicone-based lubricant to prevent pinching and drying without attracting debris.
Replacing cracked pump lids, baskets, or union fittings
Inspecting and replacing cracked pump lids, baskets, or union fittings is a definitive step when recurring air leaks persist after sealing and O-ring replacement.
Damaged plastic parts warp or crack, admitting air under suction. Replace visibly cracked or brittle components with OEM or compatible replacements, ensuring proper mating surfaces and secure clamps or unions.
Test for airtight operation before restoring normal circulation.
When to replace hoses or PVC suction lines vs. repair
Decisions about repairing versus replacing hoses or PVC suction lines hinge on the extent of damage, accessibility, and long-term reliability needs.
Minor cracks, superficial abrasions, or accessible fittings can be repaired temporarily, but recurring leaks, crushed hoses, delamination, extensive corrosion, or inaccessible joints warrant full replacement.
Replacement guarantees proper diameter, bond integrity, and reduced air intrusion risk, minimizing future service and protecting pump performance.
Sealants, clamps, and taped joints: best practices and cautions
Addressing leaks and securing connections with sealants, clamps, and tape requires selecting the right materials and installation technique to produce a durable, airtight joint rather than a temporary stopgap.
Use silicone or pool-rated thread sealant for threads, stainless-steel worm clamps for hoses, and PVC primer/solvent cement for pipes.
Avoid relying on Teflon tape alone, overtightening clamps, or incompatible adhesives that degrade under chlorine.
Preventive Maintenance to Avoid Future Air Intrusion
A concise preventive plan helps minimize future air intrusion by combining routine checks, proper seasonal care, and parts readiness.
Weekly, monthly, and seasonal inspection checkpoints along with correct priming and winterization practices reduce the chance of leaks and suction problems.
Keeping recommended spare parts on hand and maintaining balanced water chemistry and debris control further prevents air from entering the pump basket.
Regular inspection checklist (weekly, monthly, seasonally)
When performed on a consistent schedule, inspections catch early signs of air intrusion before they escalate into circulation problems or equipment damage.
A concise checklist helps technicians and owners track seals, fittings, and pump performance to prevent leaks and loss of suction.
- Check lid O-ring, clamp tightness, and visible cracks.
- Monitor pump basket for air bubbles and debris.
- Verify pressure readings and vacuum lines for steady operation.
Proper priming and winterization habits
Establishing consistent priming and winterization routines prevents air intrusion by maintaining a sealed, water-filled system and protecting vulnerable fittings during inactive periods.
Operators should purge air, backfill pump and strainer with water, and close or winterize valves per manufacturer guidance.
Drain or insulate exposed lines, apply antifreeze where recommended, and document steps each season to guarantee reliable, air-free startup and extended component life.
Recommended spare parts to keep on hand
Several essential spare parts should be kept on hand to prevent and quickly remedy air intrusion issues, including replacement o-rings and lid gaskets for the pump strainer, a spare pump lid clamp or screws, extra union fittings and threaded adapters, and a selection of replacement valves and valve seat seals.
Proper storage and labeled bins speed repairs.
- O-rings and gaskets
- Union fittings and adapters
- Valve cartridges and seat seals
How water chemistry and debris management reduce suction issues
Keeping spare parts on hand helps speed repairs, but long-term prevention of pump suction problems depends on proactive water chemistry control and debris management.
Balanced pH and sanitizer prevent scale and biofilm that trap air; regular skimming, vacuuming, and cleaner maintenance remove leaves and hair that clog baskets.
Routine filter backwashes and inspections minimize cavitation, preserving consistent suction and reducing air intrusion risk.
When to Call a Professional
If air continues after basic checks or if there are visible cracks, persistent leaks, or pump cavitation, professional assessment is advisable.
Homeowners should gather details on symptoms, recent repairs, model numbers, and clear photos of the pump, plumbing connections, and any damaged parts to share with the technician.
Typical service calls range from simple resealing or part replacement to full pump servicing, with costs varying by labor, parts, and regional rates.
Signs the problem is beyond DIY repair
When should a homeowner stop troubleshooting and call a professional?
Persistent air intake after checking lids, seals, and valves, sudden pressure drops, visible hairline cracks in pump housing, repeated basket flooding, or unexplained motor overheating indicate deeper faults.
Electrical issues, complex plumbing leaks behind walls, or failed internal seals typically require trained diagnostics.
If basic fixes fail, contact a pool technician.
What information and photos to provide to a technician
After deciding a technician is needed, homeowners should gather clear, specific information and photographs to speed diagnosis and repair.
Include pump make/model, age, recent maintenance, symptom timeline, and when gurgling occurs.
Photograph the pump, suction and return lines, skimmer, visible fittings, labels, and any cracks or corrosion.
Note water level, filter pressure, and whether air appears in the basket or plumbing.
Expected costs and common professional services
Repairs for air in a pool pump typically range from simple, low-cost fixes to more expensive professional services depending on the cause and parts required.
Technicians charge $75–$150 service calls; common services include seal or O-ring replacement ($50–$200), pump lid or housing repair ($100–$500), suction-line excavation or leak repair ($200–$1,000+), and full pump replacement ($400–$1,200+).
When leaks persist, call a pro.
Troubleshooting Scenarios and Solutions
The section presents common troubleshooting scenarios with clear causes and practical fixes so the reader can identify and resolve specific air-entry problems.
Each scenario focuses on symptoms, likely sources of air, and step-by-step corrective actions that a confident homeowner can follow. Quick checks and targeted remedies reduce guesswork and help determine when professional help is required.
- Pump loses prime after a few minutes: check for suction leaks at fittings, impeller blockages, or a failing pump lid O-ring; tighten/replace seals, clear obstructions, and re-prime.
- Constant gurgling only at high speed: inspect for cavitation or an undersized suction line, ascertain skimmer/valve positions are correct, and test at varied speeds or replace restrictive plumbing.
- Air bubbles in return lines but pump seems sealed: examine heater/chlorinator unions and multiport valve seals, purge trapped air from the system, and verify one-way valves and automatic air relief devices.
Scenario: Pump loses prime after a few minutes likely causes and fixes
When a pool pump initially primes but loses prime within minutes, air intrusion or flow restrictions are usually to blame.
Identifying whether air is entering the suction line, leaking lid or fittings, or whether a blocked impeller or clogged skimmer is reducing flow directs the repair steps.
Check and tighten all o-rings, inspect suction fittings and strainer lid for cracks, clear skimmer baskets, and clean the impeller and suction line.
Scenario: Constant gurgling only at high speed likely causes and fixes
Hear a steady gurgle only at high pump speed indicates air is entering the suction side or flow is briefly disrupted under higher demand.
Likely causes: small suction leaks, cracked fittings, or restrictive suction lines.
Fixes: inspect and tighten unions, replace cracked hose or O-rings, clean skimmer and hair/lint pot, and guarantee valves and baskets are fully open.
Test at varying speeds.
Scenario: Air bubbles in return lines but pump seems sealed likely causes and fixes
Moving from gurgling that points to suction-side air entry, this scenario focuses on visible air bubbles in return lines despite an apparently sealed pump.
Likely causes include leaks at fittings or valves on the return side, a cracked return line, or air introduced by automatic chlorinators and heaters.
Inspect unions, pressure-side valves, and equipment; tighten, replace damaged fittings, and isolate accessories to pinpoint and fix the source.
Safety Notes and Best Practices
Before inspecting or servicing the pump basket, power should be disconnected and the circuit breaker turned off to prevent electrical shock.
Careful handling of seals and lubricants is advised to avoid contamination, skin irritation, or damage to components.
All work must respect pool bonding and grounding requirements to maintain electrical safety.
Electrical safety and shutting down equipment before repairs
Any work on a pool pump’s basket should begin with a complete shutdown of electrical power to the pump and related circuits.
The technician verifies breaker off, locks out and tags out per local code, and disconnects power at the wiring compartment.
Residual charge in capacitors is discharged safely.
Only after confirming zero voltage with a meter should covers be removed and mechanical inspections commence.
Safe handling of seals, lubricants, and bonding requirements
Several key precautions govern safe handling of seals, lubricants, and bonding when servicing a pool pump:
Use manufacturer-approved seals and NSF/WRAS-compatible lubricants; avoid petroleum-based greases on polymer parts.
Inspect and replace damaged O-rings; apply thin, even lubricant coats.
Confirm electrical bonding and grounding remain intact after reassembly.
Wear gloves and eye protection; dispose of contaminated materials per local regulations.
Quick Reference: Step-by-Step Checklist for Clearing Air from Pump Basket
Follow this concise checklist to clear air from a pool pump basket efficiently and safely. Inspect lid and O‑ring; tighten or replace. Close valves, prime pump, and open slowly. Monitor pressure and flow; purge trapped air. Verify no leaks and restore normal operation.
| Step | Action | Visual |
|---|---|---|
| 1 | Inspect lid/O‑ring | Check seal |
| 2 | Prime | Air vents clear |
| 3 | Monitor | Steady flow |
| 4 | Confirm | No leaks |
Conclusion
Air in the pump basket signals a problem but isn’t hopeless; prompt, methodical action restores performance and peace of mind. Even homeowners who fear complex repairs can follow the outlined quick fixes and troubleshooting steps to stop gurgling and regain suction, and they’ll feel reassured knowing professional help is available if needed. Taking these steps prevents damage, reduces costs, and returns the pool to crystal clarity—so don’t delay addressing air intrusion.