How to Test Backflow Preventer: Step-by-Step Guide for Homeowners and Plumbers
A backflow preventer is essential for ensuring that contaminated water does not enter your home’s potable water supply. Regular testing is crucial to maintain its effectiveness and compliance with local codes. This guide outlines the step-by-step process for testing a backflow preventer, including necessary tools and documentation.
To begin, a tester will isolate and depressurize the device, install calibrated gauge hoses, and record supply and differential pressures. They will then exercise the valves to confirm the proper functioning of the check and relief mechanisms. Common issues that may arise include debris accumulation, worn seals, and conditions of backpressure or siphoning. While some minor repairs can be conducted on-site, certain units may need to be replaced. Follow along for detailed procedures and requirements.
What a Backflow Preventer Is and Why Testing Matters
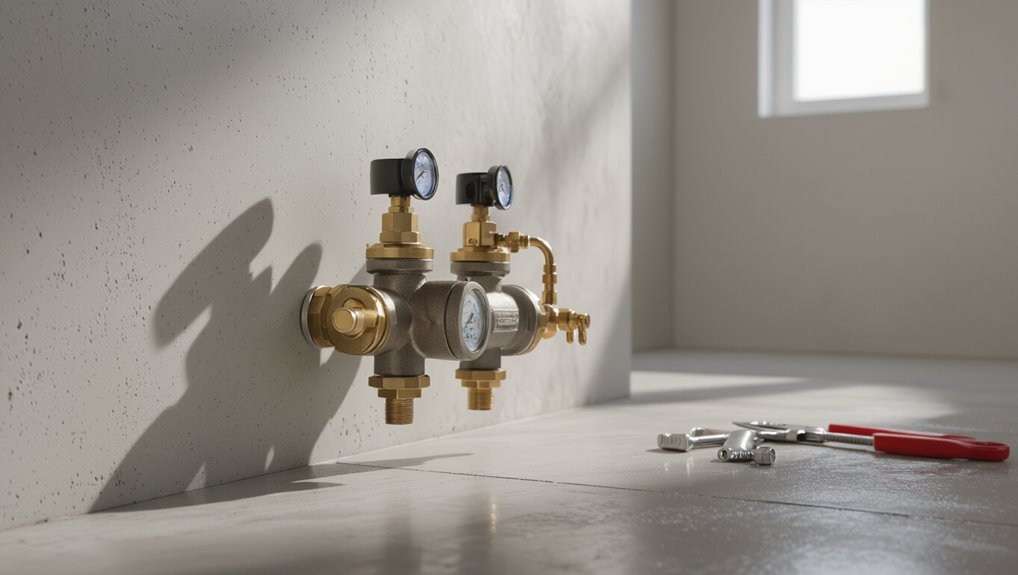
A backflow preventer is a valve assembly that stops contaminated water from reversing into a potable supply, protecting public and private health.
Common residential and commercial types include vacuum breakers, double-check valves, and reduced-pressure zone (RPZ) assemblies.
Regular testing is required to verify these devices work correctly and to meet health codes, legal obligations, and insurance conditions.
How backflow preventers protect potable water
Protecting a building’s drinking water relies on devices called backflow preventers, which stop contaminated or nonpotable water from flowing backward into the public supply.
These valves isolate potable lines, using check mechanisms and relief ports to block or discharge reversed flow.
Regular procedures explain how to test backflow preventer to verify seals, detect leaks, and confirm correct operation, preserving public health.
Common types of backflow preventers found in homes and commercial properties
Backflow preventers come in several standard designs—common types include air gaps, check valves, reduced pressure zone (RPZ) assemblies, double-check valves, and residential dual-checks—each suited to different risk levels and installation contexts in homes and commercial properties.
Air gaps provide physical separation; check valves allow one-way flow; RPZs and double-checks offer layered protection for high-risk systems; residential dual-checks suit low-risk domestic connections.
Health, legal, and insurance reasons for regular testing
Because contaminated water can flow backward into potable systems when pressure reverses, regular testing of backflow preventers is essential to safeguard public health, comply with laws, and maintain insurance coverage.
Routine testing detects failures, prevents illness from cross-contamination, and documents compliance with municipal codes.
Insurers often require proof of maintenance to honor claims; missed tests can lead to fines, liability, or denied coverage.
Quick overview: Can you test a backflow preventer yourself?
Testing may be suitable for homeowners with simple residential assemblies using a basic test kit, but complex devices or systems subject to municipal regulations generally require a licensed tester.
Legal requirements and certification rules vary by jurisdiction, so compliance often dictates who may perform and sign off on tests.
Typical testing frequency is set by local authorities and must be documented, with records retained according to those rules.
When DIY testing is acceptable and when to call a licensed tester
When is a homeowner’s simple inspection sufficient, and when does the job demand a certified tester?
A homeowner may perform visual checks, basic maintenance, and detect obvious leaks or debris.
Call a licensed tester for annual certification, pressure or relief valve issues, failed DIY attempts, complex assemblies, or where local codes or insurance require certified results.
Safety and accuracy favor professionals.
Legal requirements and certification rules by jurisdiction
Across jurisdictions, statutes and local ordinances determine whether a homeowner may test a backflow preventer or must hire a certified tester, with rules varying by device type, property use, and risk category.
Many areas require licensed testers, formal training, registration, and approved test kits for high‑risk or commercial connections.
Homeowners should consult local water authorities to confirm certification, permitted scope, and legal liabilities.
Typical testing frequency and record-keeping
Because water systems must be protected continuously, most jurisdictions set fixed intervals for backflow preventer testing—commonly annually, but sometimes semiannually or quarterly for high‑risk or commercial connections—while requiring written test reports, retention of records for a specified period, and prompt submission to the local water authority.
Homeowners may perform visual checks, but certified testers usually must conduct official tests; records document compliance and repairs.
Tools and equipment needed for backflow testing
A basic backflow test kit typically includes hoses, a differential pressure gauge or digital tester, and valve adapters, each serving to measure pressure and isolate test points.
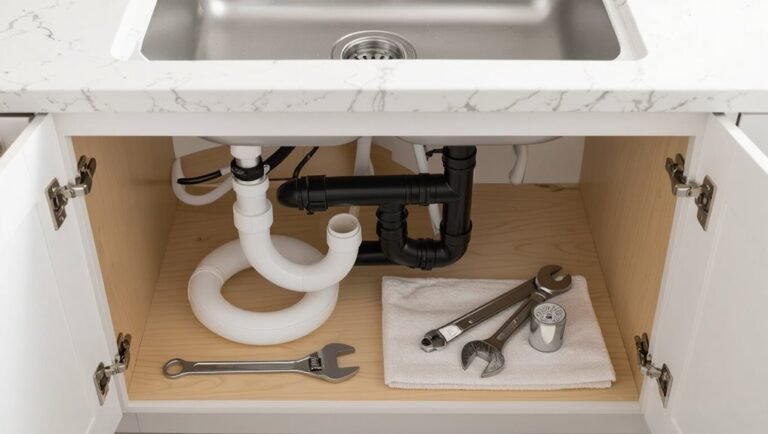
Technicians also rely on wrenches, spare fittings, and personal protective equipment to access devices and complete tests safely.
Selecting the correct kit depends on the backflow assembly type and size, so compatibility with relief valves and shutoffs should be confirmed before testing.
Backflow test kit components and how they work
Effective backflow testing depends on a specific set of tools designed to diagnose pressure differentials and valve integrity accurately.
A standard test kit includes calibrated differential pressure gauges, hose adapters, isolation cocks, and recording forms.
Gauges measure inlet, outlet, and relief chamber pressures; adapters connect gauges to test ports; isolation cocks control flow for sequential checks.
Recording forms document results and failures.
Additional tools: wrenches, gauges, safety gear
Several essential hand tools and safety items complement the core test kit when performing backflow testing.
A set of adjustable and box wrenches enables secure valve access and fitting adjustments. Additional pressure gauges provide independent verification.
Personal protective equipment—gloves, safety glasses, and hearing protection if needed—reduces risk.
Thread sealant, spare fittings, and a flashlight aid inspection and temporary repairs.
Choosing the right kit for different backflow device types
Following the inventory of hand tools and safety items, selecting the appropriate test kit requires matching its features to the specific backflow assembly being inspected.
Kits differ by gauge range, valve adapters, sealing fittings and differential capabilities. Check compatibility for reduced pressure, double check and pressure vacuum breakers.
Portable, calibrated gauges and adapter sets simplify testing; certified kits guarantee regulatory acceptance and accurate diagnostics.
Step-by-step guide to testing a residential backflow preventer
The technician begins by observing required safety precautions, then prepares the assembly by shutting off supply valves, isolating the unit, and relieving system pressure.
Test gauges are installed and initial readings recorded before proceeding to functional checks.
The procedure continues with relief and differential tests on double-check valves and the prescribed sequence of critical readings for reduced pressure zone (RPZ) assemblies.
Safety precautions before you start
Before beginning any test, the technician should verify that all relevant utility shutoffs are accessible and that the work area is free of hazards such as standing water, ice, loose debris, or obstructive vegetation.
The technician must wear appropriate PPE, confirm electrical safety, guarantee adequate lighting and ventilation, establish clear access and egress, and use lockout/tagout where applicable to prevent accidental system activation.
Preparing the device: shutoffs, isolating the unit, and relieving pressure
Begin by shutting off the supply valves on both the inlet and outlet of the backflow preventer, then lock or tag them to prevent accidental reopening.
Isolate the unit by closing downstream isolation valves and opening any bypass if present.
Slowly relieve trapped pressure using test cocks or relief valves, drain residual water, and verify zero downstream flow before proceeding to gauge installation or service.
Installing test gauges and taking initial readings
Install calibrated test gauges to the device’s test cock ports using appropriate adapters and leak-free fittings, ensuring gauge ranges match expected pressure differentials for the model being tested.
Verify valves are closed or positioned per manufacturer instructions. Open test cocks slowly, record static supply and zone pressures, note any gauge drift or leaks, and document baseline readings before proceeding to functional tests.
Performing the relief and differential tests for double-check valves
With baseline pressures recorded and gauges confirmed steady, the technician proceeds to the relief and differential tests for the double-check valve assembly.
They isolate each check, close and bleed ports as required, and create controlled upstream and downstream pressure differentials.
Observations note leakage, valve seating, and required relief activation.
Results are compared to manufacturer tolerances and documented for repair or certification.
Testing reduced pressure zone (RPZ) assemblies: sequence and critical readings
When testing a reduced pressure zone (RPZ) assembly, the technician follows a precise sequence of isolation, pressure measurement, and relief verification to confirm the unit maintains required separation between potable and nonpotable water.
The procedure includes isolating inlet/outlet, attaching test gauges, recording upstream, intermediate, and downstream pressures, actuating relief valve, observing pressure drop and relief flow, and documenting readings and component condition.
Interpreting gauge results and pass/fail criteria
After completing isolation, gauge attachment, and relief verification on an RPZ, interpreting the recorded pressures determines whether the backflow preventer meets regulatory and operational standards.
Compare gauge readings to manufacturer and local codes: check static, differential, and relief valve values.
Pass criteria require proper differential under flow and no relief activation beyond setpoint.
Any deviation mandates repair, further diagnostics, or replacement.
Restoring system to normal operation and leak checks
Restore system pressure and verify integrity systematically to guarantee safe return to normal operation.
Close test cocks, open isolation valves slowly, and relieve trapped air. Gradually restore supply pressure while watching gauges for stable readings.
Inspect joints, housings, and relief ports for drips or seepage. Tighten fittings as needed and recheck.
Document actions, final pressures, and confirmed absence of leaks before leaving site.
Testing procedures for other common device types
The article next outlines testing procedures for other common device types, starting with pressure vacuum breakers (PVBs) and their required sequence of checks and gauge placements.
It then summarizes first-check and second-check assembly testing for double check assemblies, highlighting verification of seat tightness and relief valve function.
Finally, it covers hose bib and simple vacuum breaker inspections for irrigation systems, noting common failure points and pass/fail criteria.
Pressure vacuum breakers (PVB) testing steps
Several straightforward steps guarantee a pressure vacuum breaker (PVB) functions correctly and prevents backflow into the potable water supply.
Inspect external condition and valves, shut downstream flow, attach test gauge to test cock, slowly open inlet to pressurize assembly, observe relief valve operation and gauge readings, record results, close inlet, relieve test pressure, and restore service.
Replace components if readings fail.
First-check/second-check assembly testing for double check assemblies
After completing PVB procedures, attention turns to double check assemblies, which rely on two independently acting check valves to stop backflow.
Test sequence: isolate inlet, attach test kit, record static pressure.
Open test cocks to measure differential across first check; operate second similarly.
Verify relief and tight shutoff.
Compare readings to manufacturer tolerances and document results, repairing failing checks as required.
Hose bib and vacuum breaker checks for irrigation systems
Inspectors assess hose bibs and atmospheric vacuum breakers (AVBs) by confirming proper installation, functional sealing, and absence of backpressure or back-siphonage pathways.
They verify hose bibs are elevated or protected, test AVBs for visible vacuum ports and free-moving components, check for leaks, and confirm no downstream valves create backpressure.
Findings are recorded, noncompliant devices tagged, and recommendations given for repair or replacement.
Recording, reporting, and compliance
The technician should record test results clearly and consistently, noting device type, serial number, test pressures, observed values, and any repairs performed.
A compliance report for local authorities must include certified test forms, date and location of service, tester credentials, and a summary of corrective actions.
The procedure should also specify conditions that trigger immediate notification to the water utility or building inspector, such as failed tests, containment breaches, or backflow incidents.
How to document test results properly
Begin by establishing a clear, consistent system for recording backflow test results that meets local regulatory requirements and facility policies.
Use standardized forms, timestamped entries, and legible signatures. Store copies securely and back up digitally.
Share results with responsible parties promptly and retain records per regulations.
- Test date/time
- Device ID/location
- Measured values
- Tester name/license
- Actions taken and parts replaced
What to include in a compliance report for local authorities
When submitting a compliance report to local authorities, the document should concisely present verifiable test outcomes, device identification, corrective actions, and tester credentials to enable prompt review and regulatory acceptance.
Include property and owner details, device model and serial, test date/time, pass/fail readings with gauge calibration, photographs, repairs performed, parts replaced, signature and license number of the tester, and any recommended follow‑up.
When you must notify the water utility or building inspector
After submitting a compliance report, testers must also determine whether the water utility or building inspector requires direct notification of test results, repairs, or failures.
Notification is mandatory when local codes specify immediate reporting of failed tests, significant repairs, device replacement, or service interruptions.
Timelines, acceptable channels (online portal, email, phone), and required documentation vary by jurisdiction; follow local rules to avoid penalties and guarantee system safety.
Troubleshooting failed tests and common problems
When a backflow test fails, common causes such as debris, worn seals, or incorrect installation should be considered first.
Technicians will distinguish pressure loss and whether the problem is backpressure or back-siphonage, then evaluate whether on-site repairs (cleaning, seal replacement, minor adjustments) will suffice or if full replacement is necessary.
Clear signs that replacement is required include repeated failures after repair, corrosion, or irreparable valve damage.
Causes of common failures: debris, worn seals, incorrect installation
Diagnose common backflow test failures by focusing on three frequent causes: debris obstructing valves, worn or hardened seals, and incorrect installation or alignment.
Debris can prevent proper seating or cause leakage. Deteriorated seals shrink, crack, or lose elasticity, failing closure.
Misinstalled units, improper orientation, or loose mounting create misalignment and stress, producing intermittent failures or inaccurate test readings requiring correction or replacement.
Diagnosing pressure loss and backpressure vs back-siphonage issues
Having ruled out debris, degraded seals, and misalignment as common mechanical causes, the technician next focuses on pressure-related failures and distinguishing backpressure from back-siphonage.
They verify system pressures, observe flow conditions, and simulate demand scenarios. Backpressure is identified by higher downstream source pressure forcing flow back; back-siphonage shows negative pressure potential from upstream vacuum.
Test gauges and valve sequencing confirm diagnosis.
Repair options: on-site fixes vs full replacement
Assess repair options by weighing the extent of damage, code requirements, and long-term reliability: many failures can be corrected on-site with seal and spring replacements, seat lapping, or cleaning of internals.
However, others—severe corrosion, warped valve bodies, or failed check assemblies—warrant full replacement.
Technicians should document findings, consult local regulations, estimate lifecycle costs, and recommend the safest, most economical solution.
Signs that replacement is required rather than repair
When troubleshooting failed backflow tests, certain clear indicators point to replacement rather than repair: persistent leakage despite seal or spring replacement, severely corroded or pitted valve bodies, warped or cracked housings, damaged or missing critical check assembly components, and recurrent failures after multiple repairs.
Additional signs include internal scoring, seized mechanisms, nonstandard modifications, and parts unavailable or costlier than a new unit.
Maintenance tips to extend backflow device life
Seasonal care, including proper winterization of outdoor assemblies, helps prevent freeze damage and prolongs component life.
Homeowners can perform routine visual checks for leaks, corrosion, and proper operation between professional visits.
Professional maintenance and annual certified testing should be scheduled when issues are found or per local code to guarantee long-term reliability.
Seasonal care and winterization for outdoor devices
Proper winterization preserves backflow preventers by minimizing freeze damage, corrosion, and valve seizure through straightforward preventative steps.
Technicians drain and isolate outdoor assemblies, insulate exposed piping, and install temporary heat or insulated enclosures. They apply corrosion-resistant coatings, tighten fittings, and replace worn seals before cold spells.
Seasonal records document actions and schedule professional servicing to guarantee reliable operation and code compliance.
Routine inspections homeowners can perform
Several simple checks performed monthly can help homeowners catch problems early and extend the life of a backflow preventer.
- Inspect for visible leaks or moisture around fittings.
- Check for corrosion, cracks, or physical damage.
- Confirm access covers and insulation are intact.
- Operate test ports briefly to confirm valves move.
- Verify surrounding drainage is clear and vegetation is trimmed.
When to schedule professional maintenance and annual testing
When should a homeowner call a professional? Homeowners should schedule professional maintenance annually and after any system repairs, pressure spikes, freezing events, or visible leaks.
Licensed testers must perform required regulatory inspections and certification.
More frequent service is advisable for older devices, complex irrigation, or commercial connections.
Prompt professional attention prevents contamination, extends device life, and guarantees compliance with local codes.
Cost considerations and choosing a certified tester
Typical testing and minor repairs for a backflow preventer commonly fall within a modest price range, while larger repairs or replacements can raise costs considerably.
Homeowners should confirm a tester’s certification and check references or reviews, then obtain multiple quotes to compare scope of work and pricing.
Attention to warranty terms and what services are covered helps avoid unexpected expenses after work is completed.
Typical cost ranges for testing and repairs
Although rates vary by region and device complexity, homeowners and facility managers can expect predictable categories of expense for backflow testing and repairs.
Typical inspection fees range from $50–$150.
Minor repairs or parts replacement often cost $75–$300.
Major overhauls or device replacement can run $300–$1,200+.
Additional trip or emergency charges may apply; warranties and bundled service plans affect total outlay.
How to verify a tester’s certification and references
How can a property owner confirm that a backflow tester is qualified and reliable? Verify licensing, ask for certification numbers, and request recent test reports.
Check references and online reviews. Confirm insurance and local registration.
- State or local tester license
- Current certification card/number
- Proof of liability insurance
- Recent client references
- Online reviews and complaints database
Comparing quotes and understanding warranty implications
After confirming a tester’s license, certification, insurance, and references, the property owner should compare quotes with an eye toward long-term protection and accountability. Evaluate scope, parts, labor, response time, and whether a warranty covers subsequent failures or workmanship. Prefer certified testers offering written guarantees and clear dispute procedures.
| Quote Item | Warranty Detail |
|---|---|
| Parts/Labor | Coverage length |
| Response Time | Service terms |
Safety and liability considerations for homeowners and plumbers
The section addresses essential safety and liability topics related to backflow testing, including proper personal protective equipment and safe handling to prevent injury and contamination.
It outlines the legal and financial risks of DIY testing or improper repairs, which can void warranties or create code violations.
It also summarizes insurance, permitting, and documentation requirements that homeowners and plumbers should verify before work begins.
Personal protective equipment and safe handling
Proper personal protective equipment (PPE) and safe handling practices are essential to minimize injury and contamination when testing a backflow preventer.
Technicians should wear gloves, eye protection, and durable footwear; use chemical-resistant gear if exposure is possible.
Tools must be clean, insulated, and secured.
Follow lockout/tagout, depressurize lines before work, and dispose of contaminated materials per local regulations to reduce hazards.
Liability issues for DIY testing and improper repairs
Alongside PPE and safe handling, liability risks arise when homeowners attempt DIY testing or make improper repairs to backflow preventers.
Incorrect procedures can cause contamination, property damage, code violations, and void warranties. Unlicensed work may expose homeowners to fines and civil claims; contractors risk professional liability for negligent repairs.
Proper documentation, compliance with local codes, and using qualified testers mitigate most legal exposures.
Insurance and permitting considerations
When homeowners or plumbers engage with backflow preventer testing and repairs, attention to insurance coverage and permitting requirements is essential to manage financial and legal risk.
Verify liability and professional indemnity policies cover testing, repairs, and potential property damage.
Confirm local permit, inspection, and certification mandates; obtain required permits and retain records.
Noncompliance can void coverage and incur fines.
Quick checklist: Before, during, and after testing
Before beginning, the technician should confirm the system is isolated, depressurized, and that required permits and safety gear are in place; this checklist streamlines preparation, guides the stepwise test process, and guarantees proper documentation and system restoration after completion.
- Verify permits, notifications, and insurance coverage
- Confirm isolation valves and depressurization
- Inspect valves, gauges, and test kit
- Record test results and corrective actions
- Restore system, retest, and file documentation
Conclusion
Regular testing of backflow preventers is essential: studies show up to 60% of residential systems exhibit failures or valve degradation within five years without maintenance. Homeowners and plumbers should view testing as preventive care that protects drinking water and avoids costly repairs. By following proper procedures, using the right tools, and hiring certified testers when required, property owners can reduce contamination risk, extend device life, and meet local code and insurance obligations.