How to Empty a Black Water Tank on an RV: Step-by-Step Guide for Safe, Odor-Free Dumping
To safely and effectively empty a black water tank on an RV, follow these essential steps: First, gather your personal protective equipment (PPE), a secure sewer hose, and compatible fittings. Next, connect to an authorized dump station, ensuring the hose is positioned downhill. Open the black valve slowly to allow gravity drainage, and flush the tank with fresh water or a rinser until the discharge runs clear. After emptying the black tank, open the gray tank to rinse the line. Finally, sanitize your hoses and seals, and store all equipment properly. For additional techniques, troubleshooting tips, and legal considerations, continue reading.
Why Proper Black Water Tank Dumping Matters for RV Owners
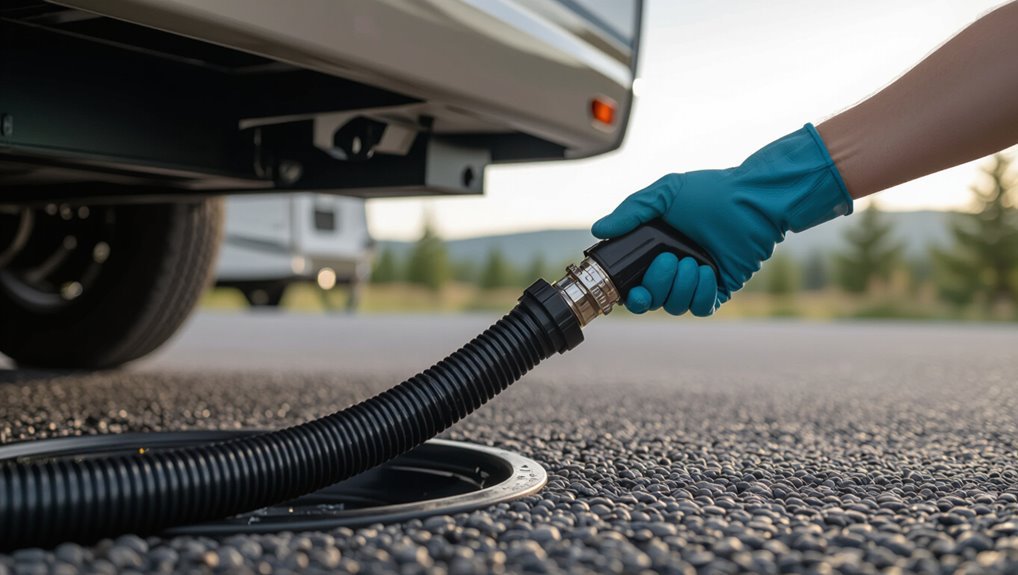
Properly dumping a black water tank reduces health and sanitation risks and prevents contamination of campgrounds and waterways.
It also guarantees compliance with legal requirements and campground policies that prohibit improper disposal.
Regular, correct dumping and maintenance extend tank and valve life, reducing costly repairs.
Health, sanitation, and environmental risks of improper dumping
Every year, careless or incorrect dumping of RV black water can create serious health, sanitation, and environmental hazards that affect campers and surrounding communities.
Exposure to pathogens and contaminated water risks illness, wildlife harm, and groundwater contamination.
Proper knowledge of how to empty black water tank on RV prevents disease, odor, and habitat damage.
Responsible disposal protects public health and recreational areas.
Legal and campground rules to be aware of
Many jurisdictions and campgrounds enforce specific laws and site rules governing when, where, and how RV black water may be discharged.
Regulations typically prohibit roadside dumping, require designated dump stations, mandate sealed connections and proper disposal receipts, and may impose fines for violations.
Campground policies can include scheduled dump times, passworded or fee-access stations, and rules about chemical use and odor control to protect public health.
Benefits of regular, correct dumping for tank longevity
When an RV owner follows a consistent, correct dumping routine, the black water system experiences fewer clogs, reduced corrosion, and longer-lasting seals and valves.
Regular flushing prevents solids buildup, limits chemical damage, and preserves float sensors.
Properly timed dumping reduces odors, minimizes emergency repairs, and extends pump and plumbing lifespan.
Routine care lowers maintenance costs and preserves resale value.
Quick Overview: How to Empty a Black Water Tank Safely
Before starting, one should gather gloves, a sewer hose with secure fittings, a hose support, a clear viewing elbow or adapter, and a fresh-water rinse source.
For experienced RVers: connect the sewer hose to the dump station and RV, open the black valve fully, let gravity empty the tank, close the valve, open the gray valve to rinse, then flush with fresh water.
Attention to secure connections and proper disposal prevents spills and odors.
What you’ll need before you start
To empty a black water tank safely, gather the essential tools and safety gear ahead of time: rubber gloves, eye protection, a sewer hose with secure fittings, a clear elbow or inspection port, a sewer hose support, and a stiff toilet brush or tank wand for stubborn buildup.
Also include a fresh water hose for rinsing, RV-safe toilet chemicals, disposable wipes or paper towels, and a sealed waste bucket.
One-sentence step sequence for experienced RVers
Follow a tight sequence: don gloves and eye protection, secure the RV to level and stable, attach the sewer hose to the RV outlet and the dump station inlet with the clear elbow in place, open the black tank valve fully and allow gravity to clear solids, close the valve, flush with fresh water or use the RV’s tank rinser, add RV-safe treatment, open the gray tank to rinse the line, then disconnect, cap fittings, and sanitize hands and equipment.
Experienced users follow this single-line checklist briskly, verify seals, monitor flow, and avoid backflow or splashes.
Tools, Supplies, and Protective Gear Checklist
A concise checklist helps guarantee the black water tank is emptied safely and without mess.
The essential and optional items, plus protective gear and sanitation supplies, should be staged before starting the job. Proper preparation reduces risk and speeds the process.
- Sewer hose and adapters
- Heavy-duty gloves and goggles
- Tank rinser and hose sprayer (optional)
- Disinfectant and enzymatic treatments
Essential tools: sewer hose, adapters, gloves, tank rinser
Gather essential tools before opening any valves: a sturdy sewer hose, the correct adapters and couplings for the RV’s sewer outlet, disposable or reusable gloves rated for chemical resistance, and a tank rinser or high-flow flush device.
Inspect hoses for cracks, confirm adapter fit, secure connections with clamps, and carry a spare gasket.
Use gloves throughout, and store the rinser to prevent contamination.
Optional items: scissors, hose sprayer, enzymatic treatments
Consider adding a few optional items—scissors, a hose sprayer, and enzymatic treatments—to streamline maintenance and reduce odors.
Scissors trim toilet paper or debris caught in fittings. A hose sprayer attaches to the sewer line or rinser for targeted flushing.
Enzymatic treatments break down solids and control odor between dumps. These items are optional but can improve efficiency and tank hygiene.
Protective gear and sanitation supplies: gloves, goggles, disinfectant
Several essential protective items—chem-resistant gloves, splash-resistant goggles, and a reliable disinfectant—are indispensable when servicing an RV’s black water tank.
Disposable nitrile gloves prevent skin contact; goggles shield eyes from splashes. Use a hospital-grade or EPA-registered disinfectant for fittings and surfaces.
Include a long-sleeved coverall, hand sanitizer, and sealable waste bags. Replace contaminated PPE promptly to prevent cross-contamination.
Preparatory Steps Before Dumping
Before opening any valves, the camper locates and confirms the black water valve and sewer connection. They then position and level the RV securely for a safe dump.
They verify campground dump station rules and compatibility of the hookup before proceeding.
Finally, basic safety checks are completed, including ventilation, shutting off incoming water, and taking odor-control precautions.
Locate and identify the black water tank valve and sewer connection
Locate the black water tank valve and sewer connection by examining the RV’s exterior access panel area near the rear or undercarriage, where the waste outlet, valve handle, and sewer hose fittings are typically grouped together.
Confirm valve type (gate or ball), note handle orientation, identify the sewer hose coupling and cap, and verify any secondary vents or cleanouts before proceeding with hose attachment.
Park positioning, leveling, and stabilizing the RV
Good parking and precise leveling are essential steps before dumping the black water tank to guarantee safe hose connections, prevent spills, and allow proper tank drainage.
The RV should face the dump station access, be centered for hose reach, and sit on firm, even ground.
Use wheel chocks, leveling blocks, and stabilizers to secure position and confirm accurate tank emptying.
Check campground dump station rules and sewer hookups
How should one approach campground dump station rules and sewer hookups to avoid surprises and fines?
One should review site-specific regulations, hours, and fees before dumping.
Confirm sewer adapter types, hose length, and any required permits.
Inspect hookups for damage, odor, or debris.
Adhere to posted procedures for waste disposal and local environmental guidelines to prevent violations and protect shared facilities.
Safety checks: ventilation, water supply, and odor precautions
Before dumping, a brief but thorough set of safety checks should be completed to guarantee proper ventilation, a reliable water supply, and effective odor control.
Inspect roof and vent caps for blockages, verify fresh water spigot function and hose integrity, confirm sewer hose and fittings are secure, apply enzyme treatments as needed, and position carbon filters or vent fans to minimize odors during and after the dump.
Step-by-Step Guide to Emptying the Black Water Tank
The procedure begins by securely attaching the sewer hose and connector to both the RV outlet and the campground sewer inlet.
The black tank valve is then opened slowly and fully to allow gravity to drain without repeated valve toggling. A freshwater flush or tank rinser can be used afterward to clear remaining solids.
Finally, the gray water valve is opened last to help rinse the line.
Step 1 Secure sewer hose and connector to RV and sewer inlet
Attach the sewer hose firmly to the RV’s black tank outlet and the campground sewer inlet, ensuring both connections are seated and secured.
Inspect fittings for cracks, wear, and proper gaskets. Use a threaded or clamp-style connector and hand-tighten; avoid cross-threading.
Route the hose downhill without kinks, support it on the ground, and position the connection point to prevent accidental dislodging during use.
Step 2 Open the black tank valve slowly and fully
Open the black tank valve slowly and then move it to the fully open position once flow is steady.
The operator monitors the hose for continuous, unobstructed flow and checks all connections for leaks.
If resistance or splashing occurs, the valve is repositioned cautiously until smooth discharge resumes.
Gloves and eye protection remain worn; nearby foot traffic is kept clear.
Step 3 Allow gravity to drain; avoid frequent valve toggling
Allow gravity do the work by leaving the black tank valve fully open and resisting the urge to close it repeatedly; frequent toggling can dislodge solids, create clogs, and prolong emptying.
Observers should wait patiently, monitor flow visually, and avoid agitation.
Gentle vibrations or vehicle movement are discouraged.
Allowing uninterrupted gravity flow yields a cleaner, quicker dump and reduces risk of downstream blockages.
Step 4 Use freshwater flush or tank rinser to clear solids
Flush the tank with fresh water or activate a dedicated tank rinser to dislodge and carry out remaining solids.
The operator introduces sufficient water to agitate trapped waste, letting gravity and flow evacuate residue. Run the rinser until discharge clears and water runs mostly transparent.
Repeat briefly if needed. Close fittings, inspect seals, and sanitize the rinser connection before stowing.
Step 5 Open gray water valve last to help rinse the line
After clearing the black tank and securing its fittings, the gray valve is opened last so its cleaner wastewater can sweep any remaining residue from the sewer line. This final rinse helps prevent clogs and reduces odors in the hose before disconnecting.
The operator slowly opens the gray valve, allows sufficient flow to flush the line, then observes clear runoff before preparing to finish the procedure.
Step 6 Close valves, disconnect hose, and cap fittings properly
Close the gray valve first, then the black valve, ensuring each handle is fully seated to prevent leaks.
The hose is then disconnected at the RV end using gloves, twisting and easing to avoid splashes.
Inspect fittings and threads for debris or damage, replace seals if worn, and secure caps on both inlet and outlet.
Confirm valves remain closed before departing.
Step 7 Sanitize and store sewer hose and accessories
Sanitize the sewer hose and fittings promptly to prevent odors and bacterial buildup, using gloves and a disinfectant solution approved for RV systems.
Flush the hose with clean water, circulate disinfectant, then rinse thoroughly. Allow all parts to air-dry on a clean surface.
Coil the hose loosely, store fittings in a sealed container, and keep accessories separate to maintain hygiene and prolong lifespan.
How to Flush and Clean the Black Water Tank Effectively
The section compares built-in macerator systems with manual freshwater flush methods, highlighting pros and cons for flow, maintenance, and speed.
It then covers use of tank rinsers or wands, practical techniques for thorough rinsing, and recommended safe cleaning agents and enzymatic treatments.
Finally, it explains how often to perform a deep clean and what signs—persistent odors, slow draining, or visible buildup—indicate it’s needed.
Built-in macerator vs. manual freshwater flush methods
Compare built-in macerators and manual freshwater flush systems by focusing on how each breaks down waste, the water volume required, user effort, and downstream maintenance needs. A macerator grinds solids, uses modest water, requires pump power and blade upkeep. Manual flush relies on dilution, needs more water and elbow grease, and risks clogs downstream.
| Feature | Summary |
|---|---|
| Waste breakdown | Macerate vs dilute |
| Maintenance | Motor/blades vs hoses/valves |
Using a tank rinser or wand: techniques and best practices
After weighing macerator and manual freshwater flush options, attention turns to using a tank rinser or wand to achieve a deeper clean.
The user should insert the wand through the toilet or access port, spray progressively to dislodge solids and biofilm, rotate to reach all walls, and flush thoroughly.
Wear gloves, check seals, and rinse until runoff runs clear.
Safe cleaning agents and enzymatic treatments to use
While many household chemicals can damage seals and the environment, RV-specific cleaners and enzymatic treatments provide effective, safe options for breaking down waste and controlling odors. They are formulated to preserve rubber components and septic systems while accelerating organic decomposition.
Users should choose products labeled for black tanks and follow manufacturer dosing and dwell-time recommendations. Recommended types include enzyme concentrates, biological powders, and biodegradable liquid formulas; avoid bleach.
How often to deep-clean the tank and signs it’s needed
When should a black water tank receive a deep cleaning, and how can users recognize the need for one? A deep clean is recommended every 3–6 months or sooner after heavy use.
Signs include persistent odors, slow draining, visible residue, frequent sensor failure, or toilet backups.
Perform enzyme treatments, tank rinses, and mechanical agitation when these indicators appear to restore function and hygiene.
Preventing Odors and Clogs
Preventing odors and clogs begins with choosing the right waste additives and enzyme treatments, distinguishing effective biological products from harsh chemicals that can damage seals and plumbing.
Conserving water and using brief, high-flow flushes helps keep solids suspended and reduces buildup in the tank.
Regular exercise of valves and keeping vents clear guarantees proper airflow and reliable drainage, minimizing odor problems.
Waste additives and enzyme treatments: what works and what to avoid
Choosing the right waste additives and enzyme treatments can markedly reduce odors and break down solids in an RV black water tank, but effectiveness varies by product type and tank material.
Enzyme and bacterial formulas safely digest organics; avoid bleach, ammonia, and caustic chemicals that harm seals and sensors.
Prefer biodegradable, RV-specific products, follow dosing instructions, and monitor tank components for compatibility and long-term performance.
Best practices for water use in the RV to reduce solids buildup
Conserve and control water use in the RV to minimize solids entering the black tank and reduce the chance of clogs and odors.
Encourage short, efficient flushes, use low-flow fixtures, and toilet-safe wet wipes or biodegradable toilet paper.
Rinse solids with extra water when possible, limit non-biodegradable items, and educate occupants on disposal habits to maintain flow and reduce buildup between dump cycles.
Routine valve operation and vent maintenance to prevent odors
Inspect routine valve operation and vent systems regularly to keep odors and clogs at bay.
Technicians or owners should cycle valves fully to prevent sticking, lubricate seals with RV-safe products, and confirm vent caps are clear and screened.
Periodic inspections detect hair, debris, or insect nests.
Prompt cleaning and replacement of worn parts preserves airflow, prevents backpressure, and minimizes foul smells.
Common Problems and How to Troubleshoot Them
Common problems with black water systems include clogs, lingering odors, leaks at fittings, and frozen drains, each requiring different diagnostic steps.
The guide outlines stepwise remedies for blocked hoses or outlets, inspection and fixes for persistent smells, methods to identify and reseal leaking connections, and winterizing techniques to prevent or address frozen lines.
Readers are advised to follow safety precautions and use appropriate tools and seals when performing repairs.
Clogged sewer hose or tank outlet: stepwise remedies
When a black water line becomes obstructed, flow can slow or stop entirely, causing backups and odors; addressing clogs promptly restores function and prevents damage.
Begin by closing valves, disconnecting hose, and inspecting outlet. Use a stiff brush or plumber’s snake to clear debris.
Flush with fresh water, reconnect and test flow. Replace damaged hose or seal if leaks persist.
Persistent odors after dumping: inspection and fixes
Persistent odors after dumping indicate residual waste, trapped gases, or venting issues that require systematic examination.
Inspect tank interior via access port or flushing, run a thorough rinse with RV-safe enzyme cleaner, and verify vent cap clearance.
Check seals at toilet and sensors for buildup, activate macerator or flush valve repeatedly, and leave vents open to aerate until odors dissipate.
Leaks at connections: diagnosing and repairing seals
After addressing lingering odors, attention should shift to leaks at connections, a frequent source of mess and water damage in RV plumbing systems.
Inspect fittings, hose clamps, and gate valves for cracks, loose threads, or degraded O-rings.
Tighten hardware incrementally, replace brittle seals with compatible replacements, and apply plumber’s tape where threads leak.
Test under pressure and recheck after a short use period.
Frozen drains and winterizing the black tank
If temperatures dip below freezing, the black tank and its drain lines can solidify, blocking flow and risking cracked fittings or a ruptured tank if expansion is severe.
Winterize by flushing, adding RV antifreeze, insulating vents and hoses, and using heat tape or heated storage.
Empty before freeze, maintain a low continuous antifreeze level, and inspect seals and sensors for cold-related damage.
Maintenance Schedule and Long-Term Care
Maintenance routines should match travel habits, with frequent travelers emptying after every few days and occasional users following a less aggressive schedule.
Seasonal tasks—such as flushing with appropriate cleaners, winterizing, and inspecting vent lines—help prevent odor and corrosion.
Valves, seals, and the sewer hose require replacement when leaks, hardening, or persistent odors appear, or at regular intervals recommended by the manufacturer.
Recommended dumping frequency based on travel habits
How often should a black water tank be dumped depends largely on travel patterns and usage intensity.
Full-time travelers using onboard facilities daily should dump every 2–3 days or when 50–75% full.
Weekend users can wait 1–2 weeks.
Boondockers with limited water use may extend intervals but should monitor levels and odors.
Adjust frequency for group size and waste-reduction habits.
Seasonal maintenance tasks for black water systems
Plan seasonal maintenance for black water systems around occupancy patterns and local climate to prevent odors, damage, and costly repairs.
Inspect and clean tank interior each offseason; flush with appropriate cleaners and plenty of water.
Treat with enzyme or bacterial additives during storage and before reuse.
Winterize lines in freezing regions and de-winterize with inspection.
Log maintenance dates and findings for long-term care.
When to replace valves, seals, or the sewer hose
Determining when to replace valves, seals, or the sewer hose depends on visible wear, functional performance, and time since last replacement; routine inspections after each season and a focused check annually will catch most failures before they cause leaks or odors.
Replace components showing cracks, brittleness, persistent leaks, stiff operation, or foul odors despite cleaning.
Typical service intervals: seals and hoses every 3–5 years, valves as needed.
Safe and Legal Alternatives for Disposing Black Water
The article outlines safe, legal options for emptying an RV black water tank, including public dump stations, campground sewer hookups, and RV-friendly apps that help locate them.
It also describes portable waste tanks and professional black-water removal services as viable alternatives when hookups are unavailable.
Environmental considerations and prohibited disposal methods are highlighted to prevent contamination and legal penalties.
Public dump stations, campground sewer hookups, and RV-friendly apps
Many RV owners rely on public dump stations, campground sewer hookups, and RV-focused apps to empty black water tanks safely and legally; each option offers different levels of convenience, cost, and infrastructure.
They guide users to legal disposal points, list hookups, and sometimes show fees, hours, and reviews.
- Accessibility
- Cost transparency
- Hookup types
- User ratings and hours
Portable waste tanks and black-water removal services
Several practical options exist beyond fixed hookups for legally disposing of black water, particularly portable waste tanks and professional black-water removal services.
Portable tanks allow RVers to transport sewage to authorized dump sites when hookups are unavailable; sizes and wheels vary for maneuverability.
Mobile pump-out services visit sites, empty tanks, and sanitize connections for a fee, offering convenient, time-saving disposal.
Environmental considerations and prohibited disposal methods
One key priority when disposing of RV black water is protecting public health and the environment by using only approved methods and facilities.
Disposal into storm drains, natural waterbodies, or on the ground is illegal and harmful.
Safe alternatives include campground dump stations, designated municipal sewage hookups, and licensed waste-hauling services.
Follow local regulations, use proper connectors, and keep documentation when required.
Quick Reference: Do’s and Don’ts for Clean, Odor-Free RV Dumping
A concise checklist helps guarantee every emptying is sanitary and odor-free while highlighting common errors to avoid.
The following quick reference groups essential do’s for safe dumping and don’ts that prevent backups, spills, and smells. Readers are encouraged to follow the list each time to maintain hygiene and comply with regulations.
- Always wear gloves, secure fittings, and rinse lines after dumping.
- Close valves in the correct order: black first, then gray, then vent.
- Don’t overfill holding tanks or ignore strange odors and slow drains.
- Don’t dump at non-designated sites, skip sanitizing, or reuse single-use fittings.
Do’s checklist for safe dumping every time
When preparing to dump, follow a concise checklist that guarantees safety, cleanliness, and minimal odor every time:
wear gloves, secure wheel chocks, locate and inspect sewer inlet, connect hose tightly, open black tank first then gray to flush, monitor flow, rinse hose and valves, close and cap connections, sanitize hands and fittings, record tank levels and maintenance performed.
Don’ts common mistakes to avoid
After following the do’s checklist, attention turns to common don’ts that can cause odors, clogs, or equipment damage.
Avoid dumping without campsite authorization, skipping the tank rinse, neglecting gloves and eye protection, forcing a stuck valve, or using household cleaners that harm seals.
Do not mix chemicals indiscriminately, ignore smell indicators, or delay repairs—these mistakes increase risk, cost, and unpleasantness.
Visual Guide and Diagrams for Connecting and Emptying the Black Water Tank
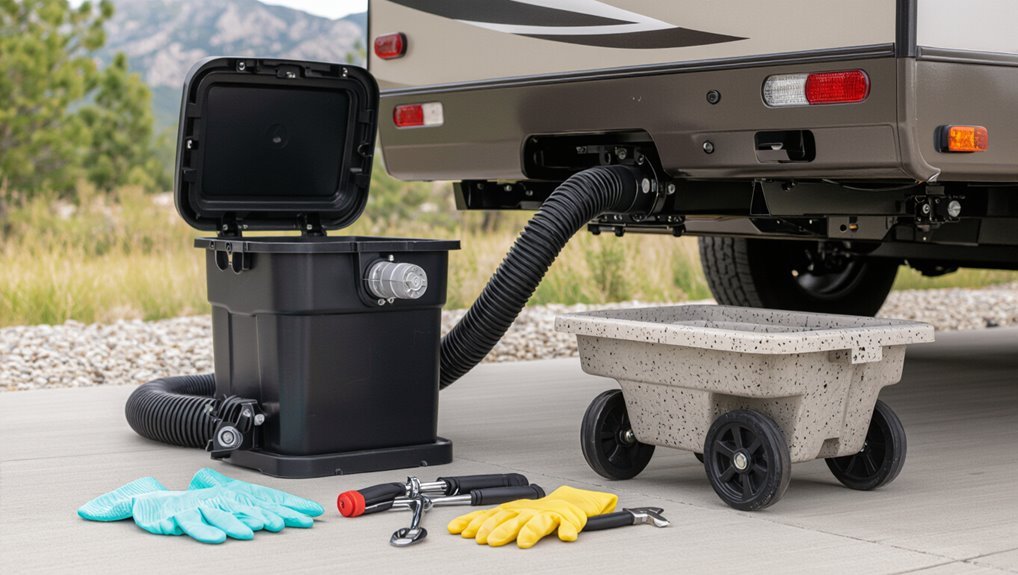
How should the hose, fittings, and valves be laid out to guarantee a secure, sanitary connection before draining?
A labeled diagram shows tank outlet, elbow, clear elbow for inspection, inline gate valve, sanitary sewer hose, and tight cam-lock or threaded adapter to the dump station.
Arrows indicate flow; a separate sketch highlights sealing O-rings, hose slope, support straps, and proper PPE placement for clean, safe operation.
Conclusion
Proper black water tank care prevents costly repairs and safeguards campground hygiene. Surprisingly, studies show RVers who routinely maintain their tanks cut odor complaints by about 60%, underscoring how simple habits pay off. Following the steps and using appropriate gear keeps dumping safe, legal, and odor-free. With regular flushing, enzyme treatments, and mindful disposal practices, owners enjoy cleaner systems, fewer clogs, and more pleasant trips—making maintenance a small effort with big rewards.