How to Clean Kitchen Faucet Aerator Fast: Step-by-Step Guide to Remove Mineral Buildup and Improve Water Flow
To quickly clean a clogged kitchen faucet aerator and restore water flow, follow these simple steps: First, shut off the water supply. Then, carefully remove the aerator using pliers with a protective covering to avoid damage. Disassemble the aerator and soak the parts in white vinegar for 15–30 minutes to dissolve mineral buildup. After soaking, gently brush the components, rinse them thoroughly, and reassemble the aerator, tightening it by hand. For tougher deposits, consider using CLR or an ultrasonic cleaner. If you notice damaged washers or screens, replace them. Additionally, check for troubleshooting tips, preventive maintenance advice, and instructions on when to replace parts if issues continue.
What a Faucet Aerator Is and Why It Gets Clogged
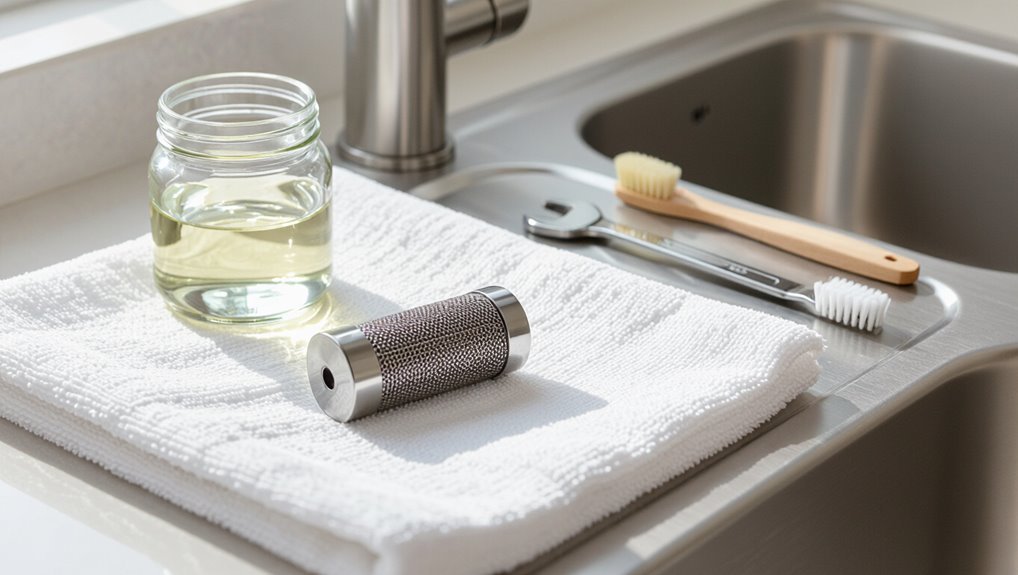
A faucet aerator is a small assembly of mesh screens, flow restrictors, and housing that mixes air with water to shape the stream and reduce splashing.
It commonly clogs from mineral scale, trapped debris, and corrosion that block the screens and channels.
Reduced flow, sputtering or spraying in multiple directions are clear signs the aerator needs cleaning.
Components and functions of a kitchen faucet aerator
Small, simple, and often overlooked, a faucet aerator is a screened nozzle screwed onto the tip of a kitchen faucet that mixes air into the water stream to reduce splashing and conserve flow.
Its components—outer housing, screen, flow restrictor, and rubber washer—control spray pattern, pressure, and seal integrity.
Understanding these parts aids in routine maintenance and how to clean kitchen faucet aerator effectively.
Common causes of aerator clogs (mineral buildup, debris, corrosion)
Understanding the aerator’s parts makes it easier to see why they foul up over time.
Hard water deposits (calcium, magnesium) accumulate on screens and flow restrictors, narrowing passages.
Particulate debris—sand, pipe scale, mineral flakes—lodges between mesh layers.
Corrosion of metal components degrades seals and creates residue that traps particles.
Combined, these factors progressively impede flow and alter spray pattern.
Signs your aerator needs cleaning (reduced flow, sputtering, uneven spray)
When water pressure drops or the stream breaks into irregular spurts, the aerator is often the culprit.
Other signs include a thin, weak flow, sputtering that sprays unpredictably, and uneven or distorted patterns from the faucet head.
Visible mineral crust or discoloration around the tip also indicates buildup.
Regular inspection and prompt cleaning restore consistent pressure and an even, reliable spray.
Quick Answer: Fast Way to Clean an Aerator
A quick, effective method is to remove the aerator, soak its components in vinegar for a few minutes, then scrub and rinse before reattaching.
If mineral buildup is severe, parts are damaged, or the flow screen is warped, replacement is faster and more reliable than repeated cleaning.
In routine cases, this one-minute approach restores flow and clarifies whether further action is needed.
One-minute summary of the fastest effective method
Start by shutting off the faucet, then unscrew the aerator with pliers wrapped in a cloth to protect the finish.
Disassemble, soak parts in vinegar for 15–30 minutes, scrub with an old toothbrush, rinse thoroughly, and reassemble.
Run water to flush remaining debris and check flow.
This fastest effective method clears mineral buildup and restores normal water pressure in minutes.
When to opt for replacement instead of cleaning
After cleaning restores flow but problems persist or parts are visibly damaged, replacement should be considered.
Replacement is recommended when persistent clogging, corrosion, cracked screens, stripped threads, or irregular spray patterns occur.
If frequent cleanings are necessary or the aerator is inexpensive and worn, swapping it saves time and guarantees reliable flow.
Match size and flow rate when purchasing a new aerator.
Tools and Materials You’ll Need
A basic toolkit for a quick aerator clean typically includes pliers, a soft cloth, and a small brush to remove debris.
Common cleaning solutions are white vinegar and baking soda, with commercial descalers as an alternative for heavy buildup.
Gloves and a small container or labeled tray help protect hands and keep removed parts organized.
Basic toolkit for a quick clean (pliers, cloth, brush)
Gather the few essential tools before removing the aerator: a pair of adjustable pliers (preferably with a cloth or rubber jaw cover), a soft-bristled brush or old toothbrush, and a lint-free cloth for drying and protecting finishes.
These items enable safe removal, gentle scrubbing of mesh and housing, and careful reassembly without scratching.
Keep a small container nearby to hold parts during cleaning.
Recommended cleaning solutions (vinegar, baking soda, commercial descalers)
With tools at hand, attention turns to the cleaning solutions that remove mineral buildup and grime from an aerator.
White vinegar dissolves calcium deposits; use full-strength or diluted for soaking.
Baking soda provides gentle abrasion when made into a paste.
Commercial descalers offer faster, stronger results—follow manufacturer directions and rinse thoroughly afterward to prevent chemical residue.
Protective items and parts organization tips
Wear protective gloves and eye protection, and lay out a towel or tray to keep removed aerator parts from rolling away.
Use small containers or magnetic trays for screws, screens, and springs to prevent loss. Keep pliers, brushes, and cleaning solutions within reach.
Label parts if unfamiliar and work over a sink or soft surface to avoid damage.
Reassemble in reverse order.
Step-by-Step Fast Cleaning Method
The fast cleaning method begins by preparing the sink area and shutting off the water when needed.
The aerator is then removed—by hand if possible or with a tool if it’s stuck—and its screens and housing are inspected for damage.
A quick soak in vinegar or a descaling solution removes mineral buildup, after which parts are scrubbed and reassembled.
Step 1 Prepare the area and shut off water if necessary
Clear the sink area and gather a small bucket or bowl, an adjustable wrench or pliers wrapped with tape, and a towel to protect fixtures.
Inspect the faucet for leaks and note aerator type.
Place the bowl to catch parts, lay the towel to prevent scratches, and keep a soft brush and vinegar nearby.
Turn off water at the shutoff valves if available.
Step 2 Remove the aerator safely (manual vs. tool-assisted)
Begin by determining whether the aerator can be unscrewed by hand or needs tool assistance: if fingers turn it easily, twist counterclockwise while supporting the spout.
If stuck, protect the finish with tape, use adjustable pliers or a strap wrench, apply steady pressure, and avoid forceful jerks.
Once loosened, carefully remove the aerator and set aside for cleaning.
Step 3 Inspect the aerator parts for damage
With the aerator removed and placed on a clean surface, inspect its components: outer casing, screen, flow restrictor, and rubber gasket.
Look for corrosion, cracks, deformed threads, clogged or torn screens, and compressed or cracked gaskets.
Note any mineral deposits fused to metal or plastic that indicate wear.
Replace parts that are damaged to guarantee proper seal and flow before reassembly.
Step 4 Quick soak method for rapid mineral removal
Soak the aerator parts in a mild acidic solution to dissolve mineral buildup quickly and safely.
Submerge components in equal parts white vinegar and water (or a commercial descaler) for 15–30 minutes, depending on buildup severity. Use a covered container to prevent evaporation.
After soaking, rinse parts thoroughly with clean water to remove loosened deposits and residual acid before drying.
Step 5 Scrub and reassemble the aerator
After rinsing and drying the aerator components, proceed to remove any remaining deposits with targeted scrubbing and then reassemble the unit.
Use a soft brush or toothbrush to clean mesh screens, flow straighteners, and housing, clearing trapped grit and calcium.
Inspect seals and O-rings, replace if damaged, then stack parts in correct order and hand-tighten the aerator housing to guarantee proper alignment before reinstalling.
Step 6 Reinstall and test water flow
Reinstall the aerator by threading the reassembled housing back onto the faucet tip, ensuring threads engage smoothly to avoid cross-threading; hand-tighten until snug.
Then test the water flow by running the tap and checking for steady spray pattern and leaks, observing both aeration and stream strength to confirm debris removal and proper seal.
If leaks appear, tighten slightly or reseat the gasket; repeat test.
Alternative Fast Methods for Different Aerator Types
Different aerator designs call for tailored quick-clean approaches.
Snap-in aerators often release with a thin tool or gentle prying, while threaded models require unscrewing with pliers or a strap wrench.
Multi-piece or filter-style aerators may need partial disassembly and a brief soak to clear trapped debris.
For snap-in aerators
Snap-in aerators, common on many modern faucets, remove without tools by compressing tabs or prying gently at the edge. Their simple clip mechanism allows quick access to the screen and flow restrictor for cleaning.
After removal, rinse parts under warm water, soak briefly in vinegar to dissolve mineral deposits, scrub with a soft brush, reassemble ensuring clips engage, and test flow for leaks or misalignment.
For threaded aerators
For threaded aerators, twist-off removal provides a straightforward alternative: unscrew the outer casing with pliers protected by cloth or use a strap wrench to avoid scratching.
Then, separate the screen, flow restrictor, and washer for inspection.
Soak components in vinegar or descaling solution, gently brush mineral deposits, rinse thoroughly, reassemble in correct order, and hand-tighten before testing for leaks and restored flow.
For multi-piece or filter-style aerators
Threaded aerators often come apart with simple unscrewing, but multi-piece or filter-style aerators require a different approach because their components can be nested, clipped, or press-fit.
Use pliers with cloth to gently pry clips, note component order, and photograph for reassembly.
Soak removable filters in vinegar, brush passages with a soft brush, rinse thoroughly, and reassemble carefully to avoid misalignment or damage.
Deep Clean and Descale Options (When Fast Method Isn’t Enough)
When mineral buildup resists quick cleaning, a longer soak in white vinegar or a commercial descaler such as CLR often restores performance.
Ultrasonic cleaning or professional service can remove stubborn deposits from tight spaces and restore delicate parts without damage.
Internal screens and flow restrictors should be removed, inspected, and brushed or soaked separately to guarantee full flow restoration.
Extended soak with vinegar or CLR
Soak the aerator parts in a descaling solution to remove stubborn mineral buildup that a quick scrub can’t handle.
Submerge mesh, screen, and housing in white vinegar or a CLR dilution per label instructions. Leave for 30 minutes to several hours depending on deposits, then rinse thoroughly.
Use a soft brush to dislodge loosened scale, inspect seals, and reassemble when parts are clean and free of residue.
Ultrasonic cleaning and professional options
Consider ultrasonic cleaning or professional descaling when routine methods fail to restore flow or remove deep mineral deposits. These services use high-frequency sound waves in a cavitating bath to dislodge scale from tiny crevices and offer chemical treatments and equipment access that home kits cannot match.
Professionals can also advise on replacement parts, warranty-safe chemicals, and on-site repair for heavily corroded housings or inaccessible assemblies.
How to clean internal screens and flow restrictors
Begin by disassembling the aerator to expose the internal screens, flow restrictors, and any nested washers, taking care to note their order and orientation for reassembly.
These components often harbor compacted mineral scale and trapped debris that simple surface cleaning won’t remove.
Soak parts in white vinegar or descaling solution for 30–60 minutes, gently brush with a soft toothbrush, rinse, inspect for damage, and reassemble in original order.
Troubleshooting and When Cleaning Won’t Fix the Problem
If low flow persists after cleaning, the next steps are testing feed valves, supply lines, and cartridge function to isolate the restriction.
Visible damage, corrosion, or crumbling seals indicate parts that should be replaced rather than further cleaned.
Professional help is recommended when diagnostics point to internal cartridge failure, hidden blockages, or when disassembly exceeds the user’s comfort or tools.
Persistent low flow after cleaning next diagnostic steps
When low flow persists after the aerator has been cleaned, the problem likely lies elsewhere in the faucet or supply system and requires systematic diagnosis rather than repeated scrubbing.
Check shutoff valves for full opening, inspect flexible supply lines for kinks or blockage, and test water pressure at other fixtures.
Isolate the faucet by disconnecting supply lines to check inlet flow; consult a plumber if pressure is adequate but flow remains restricted.
Identifying damaged or corroded parts that need replacement
Look for visible signs of wear and corrosion on components such as the aerator housing, valve seats, O-rings, cartridge, and supply fittings; pitting, green or white mineral buildup that cannot be wiped away, cracked plastic, or distorted seals usually indicate parts that cleaning alone will not restore.
Also check for leaks, loose threads, or rough valve movement—these confirm replacement of seals, cartridges, or the aerator assembly.
When to call a plumber
Call a professional when basic troubleshooting and aerator cleaning fail to restore normal flow, eliminate leaks, or correct persistent pressure and temperature issues; such symptoms often signal deeper problems—damaged cartridges, corroded supply lines, worn valve seats, or hidden pipe blockages—that require tools, parts, or expertise beyond routine maintenance.
A plumber diagnoses internal valve failures, sediment in mains, or faulty diverters and performs repairs, replacements, or pressure testing safely.
Preventive Maintenance to Keep Aerators Clear
Frequency of aerator cleaning should reflect water hardness, with softer supplies needing only occasional attention and hard water requiring monthly or bi-monthly care.
Simple monthly checks and quick flushes help prevent visible buildup and maintain flow without tools.
For persistent sediment or mineral problems, installing a sediment filter or water softener greatly reduces the rate of clogging.
How often to clean based on water hardness
How often an aerator should be cleaned depends largely on local water hardness: softer water typically allows for annual inspections, while hard or very hard water—high in calcium and magnesium—can require cleaning every 1–3 months to prevent flow reduction and spray irregularities.
Mid-range hardness suggests biannual checks. Users in variable areas may adjust frequency based on visible buildup, reduced pressure, or changes in spray pattern.
Simple monthly checks and quick flushes
Performing a quick monthly check and flush helps prevent mineral buildup from becoming a clog and preserves steady water flow.
The task is brief: inspect, run water hot and cold, and clear debris. Regularity prevents stubborn deposits and extends aerator life.
- Remove screen, visually inspect for debris.
- Run water full force for 30 seconds.
- Reassemble and test flow.
Installing sediment filters or water softeners to reduce buildup
Installing a sediment filter or water softener can markedly reduce mineral and particulate buildup on a kitchen faucet aerator by treating water before it reaches fixtures.
These systems capture sand, rust, and calcium deposits, extending aerator life and preserving flow. Selection depends on local water quality; professional testing and proper sizing guarantee effectiveness.
Regular filter replacement maintains performance and prevents clogs.
Cost, Time, and Environmental Considerations
Typical DIY aerator cleaning takes 10–30 minutes and costs only a few dollars for vinegar and basic tools, while professional service may take longer and cost $50–150 depending on labor and parts.
Choosing biodegradable cleaners, reusing fittings when possible, and recycling metal components minimize environmental impact.
Disposal of heavily corroded or plastic parts should follow local recycling or hazardous-waste guidelines to avoid contaminating water systems.
Typical time and cost for DIY fast clean vs professional service
How long and how much depends on whether the homeowner opts for a quick DIY descaling or hires a professional service: a basic at-home aerator clean—disassembling, soaking parts in vinegar, scrubbing, and reassembling—usually takes 10–30 minutes and costs only the price of common household supplies (often under $5), whereas a plumber’s visit to clean or replace an aerator typically requires a service call of 30–90 minutes and can run $75–$200 or more depending on travel, labor rates, and whether replacement parts are needed.
| Option | Time | Typical Cost |
|---|---|---|
| DIY quick clean | 10–30 min | <$5 |
| DIY deep clean | 30–60 min | $5–$20 |
| Professional service | 30–90 min | $75–$200+ |
Eco-friendly cleaning choices and disposal of old parts
After weighing time and cost differences between a quick DIY clean and hiring a professional, attention should turn to greener cleaning choices and proper disposal of old aerator parts.
Use vinegar, baking soda, or biodegradable cleaners to dissolve mineral buildup safely. Rinse parts thoroughly, recycle metal components where facilities accept them, and dispose of irreparable plastics per local guidelines to minimize landfill impact.
Common Mistakes to Avoid When Cleaning Aerators
When cleaning an aerator, common mistakes can turn a simple task into a repair.
Over-tightening or cross-threading on reinstall can strip fittings, and using harsh tools risks deforming screens and housings.
Ignoring damaged washers and seals often leads to leaks despite a clean aerator.
Over-tightening or cross-threading during reinstall
Reinstalling the aerator demands care to avoid over-tightening or cross-threading, which can strip threads, warp fittings, or crack the housing.
Align threads carefully, start by hand, and stop when snug. Use minimal force with a wrench and protect surfaces with a cloth.
If resistance or misalignment occurs, back off and reseat the aerator to prevent damage and future leaks.
Using harsh tools that damage parts
Avoid using harsh tools that can nick, deform, or crack aerator components; doing so compromises seals and can create leaks or reduce water flow.
Abrasive pads, metal brushes, and oversized pliers often damage screens and housings. Use soft-bristled brushes, nylon picks, and properly sized wrenches with protectors.
Gentle hand pressure and patience preserve parts, ensuring reliable reassembly and long-term function.
Ignoring damaged washers and seals
Damaged washers and seals are often overlooked after careful handling of aerator components, yet they play a direct role in preventing leaks and maintaining proper flow.
Ignoring wear, cracks, or hardening risks persistent drips, reduced pressure, and recurring mineral buildup.
Inspect each gasket and O‑ring, replace any compromised parts with correct sizes, and test the assembly for a secure, leak‑free seal before reinstalling.
Quick Reference: Fast Cleaning Checklist
Keep this checklist nearby for a fast, step-by-step guide to cleaning a kitchen faucet aerator: shut off the water, remove the aerator, inspect for debris, soak in vinegar or a mild descaling solution, scrub with a soft brush, rinse thoroughly, and reinstall with a snug hand-tight fit.
- Verify parts and seals.
- Use gentle tools; avoid metal scraping.
- Test flow and re-tighten if needed.
Conclusion
In a few brisk minutes, the clogged kitchen faucet aerator can be transformed from a trickle to a torrent of smooth, steady flow—an almost miraculous fix for a household annoyance. Following simple tools and quick steps removes mineral buildup, restores pressure, and extends fixture life. Regular, light maintenance prevents stubborn clogs and costly replacements. With minimal time and expense, households can keep taps performing like new and avoid unnecessary plumbing drama.