How to Fix a Garbage Disposal That’s Humming: Easy Troubleshooting Steps to Get It Running Again
If your garbage disposal is humming but not working, it likely means the motor is powered but stalled due to a jam or electrical issue. To fix it, first turn off the power at the switch and breaker. Then, press the reset button on the disposal. Use an Allen wrench to manually free the impellers from underneath the unit, and remove any visible debris with pliers. Check the splash guard and test the outlet or GFCI. If the humming persists, or if you notice burning smells or frequent tripping, this may indicate motor or wiring problems that require professional help. Follow these step-by-step fixes and safety tips to get your disposal running again.
Why a Garbage Disposal Hums but Won’t Run
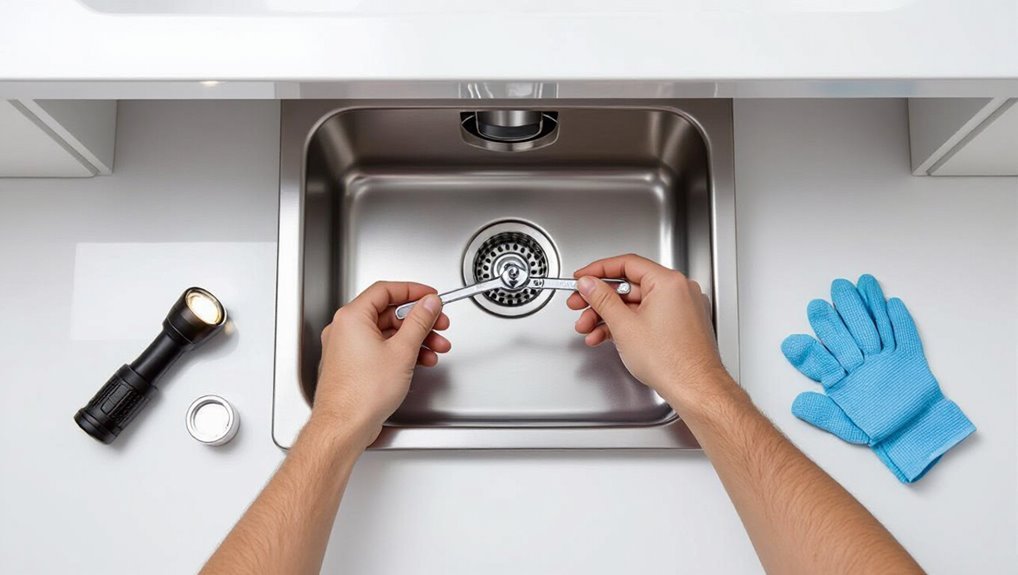
A humming noise from a garbage disposal that does not run often indicates either a mechanical jam or an electrical issue affecting the motor.
This sound should be distinguished from grinding (obstructions being shredded), clanking (loose metal striking), or complete silence (no power or a failed motor).
Determining whether the motor is simply stuck and can be freed or has failed outright guides the next troubleshooting steps.
Common mechanical and electrical causes
Several common mechanical and electrical faults can cause a garbage disposal to hum without engaging its blades.
Motor seizure, jammed impellers from debris, or a tripped overload switch are frequent mechanical issues.
Electrical causes include a faulty switch, loose wiring, or a burned motor winding.
For concise guidance on how to fix a garbage disposal humming, inspect jams, reset the unit, and check power connections.
How humming differs from grinding, clanking, and silence
Many homeowners encounter distinct sounds from a malfunctioning disposal—hum, grind, clank, or complete silence—each indicating different underlying issues.
A humming motor suggests power but stalled impeller or jam; grinding denotes contact between metal components or hard debris; clanking implies loose or broken parts striking housing; silence often signals lack of power or interrupted circuit rather than mechanical contact.
When the motor is stuck vs. when the motor has failed
When a disposal emits a steady hum without turning, it can mean either a mechanically seized impeller or an electrical failure within the motor. Distinguishing the two hinges on simple diagnostics—manual rotation, reset attempts, and power checks—because a stuck motor still draws current while a failed motor usually does not.
If blades rotate by hand yet hum persists, inspect wiring and reset; no current suggests motor replacement.
Quick Safety Checklist Before You Start
Before touching the unit, the person guarantees power is cut at both the disposal switch and the circuit breaker.
They assemble necessary tools and items such as an Allen wrench, pliers, a flashlight, and a bucket.
They also don protective gloves and eye protection and confirm the disposal is cool and stationary to avoid injury.
Turn off power at the wall and circuit breaker
Cut power to the disposal at both the wall switch and the household circuit breaker to eliminate any risk of accidental startup.
Confirm both are off: flip the breaker and move the switch to off.
Verify by attempting to turn the switch or noting absence of indicator lights.
For added safety, leave the breaker off while working and inform others to prevent restoration of power.
Tools and items you’ll need
With power confirmed off and the breaker left open, gather the tools and safety items needed for the job.
Essentials include a flashlight, adjustable wrench, hex (Allen) key for the disposal’s reset slot, pliers, screwdriver set, bucket, and rags.
Have a cleaning brush, a work light, and replacement rubber splash guard or mounting hardware handy.
Keep a phone nearby for emergencies.
Protective steps to avoid injury
A short checklist guarantees the work proceeds safely: confirm the disposal’s circuit breaker remains off and locked or tagged, verify the unit is unplugged if accessible, and remove jewelry and loose clothing that could catch.
Wear cut-resistant gloves and eye protection, use a flashlight for visibility, keep children and pets away, and position a bucket beneath the sink for water or debris containment.
Immediate Troubleshooting Steps to Fix a Humming Disposal
If the disposal only hums, the first step is a simple reset and an attempt to run it again.
If that fails, a technician or homeowner can manually free a jam with the hex wrench at the unit’s underside, then use pliers or tongs to remove any visible obstructions and clear trapped food from the splash guard.
After removing obstructions, the motor should be tested again to confirm normal operation.
Perform a simple reset and test
Begin by cutting power to the disposal and locating the reset button—usually a small red or black square on the unit’s lower exterior—so the motor can be safely restarted.
Press the reset firmly until it clicks.
Restore power, run cold water, and switch the disposal on briefly.
If humming stops and grinding resumes, normal operation is likely; if not, proceed to deeper inspection.
Manually free a jam using the hex wrench
When the reset and quick test do not restore normal operation, the next step is to manually free a jam using the hex wrench.
Power must be off and the unit unplugged or breaker switched off.
Insert the wrench into the disposer’s bottom socket, apply steady back-and-forth force to dislodge the rotor, then remove the wrench and test rotation by hand before restoring power.
Use pliers or tongs to remove visible obstructions
Use pliers or long-handled tongs to reach into the disposal and extract any visible debris that could be preventing the impellers from turning.
With power off and the unit unplugged or circuit tripped, grasp and remove loose items—silverware, bones, or hard debris—avoiding bare hands.
Inspect the chamber for obstructions, then test rotation manually before restoring power.
Check for and clear trapped food debris in the splash guard
After removing visible obstructions from the disposal chamber, attention should shift to the splash guard—the rubber flange at the sink opening that often traps bits of food and creates noise or a humming sensation.
The guard should be lifted or peeled back while wearing gloves; any lodged particles removed with a brush or fingers.
Rinse thoroughly and replace the guard, ensuring it seats evenly.
Test the disposal motor after freeing a jam
Power the unit briefly and observe its response to confirm the jam is cleared and the motor operates normally.
If it runs smoothly, turn it off and restore the splash guard.
If it still hums or stalls, cut power, reset the unit using the reset button, and attempt manual turning with the hex key.
Repeat testing until rotation is consistent and noise is absent.
How to Identify Electrical Problems
First, the reset button and the home’s circuit breaker or oven switch should be checked to rule out simple trips.
Next, the disposal’s plug and the wiring under the sink should be inspected for loose or damaged connections and the outlet tested with a voltage tester or GFCI.
Persistent silence, burning smells, or sparking indicate a possible burnt-out motor or wiring short that requires professional attention.
Check the reset button and oven/breaker switches
Begin by locating the garbage disposal’s reset button and the home’s circuit breakers to determine whether a simple electrical fault is responsible for the failure.
Press the reset if it has tripped; listen for a click.
Check nearby breaker switches, including ranges/ovens if they share a circuit.
Reset any tripped breaker and test the disposal again, noting persistent trips for professional service.
Inspect the plug and under-sink wiring for loose connections
If resetting the unit and checking breakers doesn’t restore function, attention should turn to the disposal’s electrical connections under the sink.
The inspector should unplug the unit, examine the cord and plug for damage, and open the junction box to look for loose, corroded, or disconnected wires.
Tighten terminals, secure wire nuts, and replace damaged components before testing power restoration.
Test the outlet with a voltage tester or GFCI
Use a non-contact voltage tester, plug-in outlet tester, or the outlet’s GFCI reset to determine whether the disposal’s outlet is supplying power.
Verify voltage presence at the receptacle and test GFCI functionality by tripping and resetting.
If the tester indicates no power while the breaker is on, document findings and proceed to check upstream protection or consult a qualified electrician rather than attempting invasive repairs.
When to suspect a burnt-out motor or wiring short
When should a user suspect a burnt-out motor or a wiring short in a garbage disposal?
Signs include a persistent humming without blade movement after reset, burning smell, visible charring at the unit or wiring, repeated trips of the circuit breaker, or smoke.
If the motor remains cold but unresponsive, or overheating occurs quickly, power should be cut and a qualified electrician contacted for inspection.
Step-by-Step Guide to Unjamming a Disposal (With Safety Steps)
Before any work begins, power to the disposal is switched off at the breaker and verified with a tester to prevent accidental startup.
A hex wrench is inserted into the motor shaft to free the impeller, after which any lodged items are removed either down the sink with pliers or by detaching the mounting ring if needed.
Once clear, the unit is reassembled, water is run, and the disposal is tested for normal operation.
Turn off power and confirm with a tester
Shut off the disposal’s power at the circuit breaker or unplug it from under the sink, then verify the circuit is dead with a non-contact voltage tester or multimeter.
Confirm absence of voltage at the disposal housing and switch. Lock or tag the breaker if possible.
Only proceed when testing shows no live voltage; document results mentally and keep testing tool accessible until repair is complete.
Insert and use the disposal wrench safely
Insert the hex wrench into the disposal’s underside opening and apply steady, controlled pressure to rotate the grinding plate until resistance clears.
Verify the unit remains powered off and the plug removed. Use both hands for stability, keep fingers away from the sink drain, and avoid sudden jerks.
Rotate clockwise and counterclockwise as needed until the mechanism moves freely, then remove the wrench carefully.
Remove jammed objects through the sink or mounting ring
To clear a jam by accessing the sink or mounting ring, the operator first confirms the disposal is unplugged or the circuit breaker is off and the unit is cool.
Then, they use a flashlight to locate the obstruction from above or below. Once identified, the person removes visible debris with long-handled pliers or a hooked tool while keeping hands and loose clothing away from the drain opening.
Then they loosen the mounting ring bolts or twist the ring per manufacturer instructions to widen the opening, carefully extracting trapped items and inspecting for additional fragments before restoring power.
Reassemble and run water to test operation
With the obstruction removed and the mounting ring or sink flange returned to its proper position, reassembly begins by reversing the disassembly steps and preparing the unit for a brief operational check.
Tighten fasteners, reconnect electrical plug or wiring, and verify the drain trap and dishwasher hose are secure.
Restore power, run a steady cold water flow, and briefly activate the disposal to confirm smooth, quiet operation.
When the Reset Button Won’t Stay Pushed
If the disposal’s reset button pops back out, common causes include an internal thermal trip, a persistent electrical short, or motor failure.
Basic diagnostic checks—confirming power at the outlet, testing continuity, and listening for motor noise—help distinguish a temporary fault from a serious malfunction.
Temporary remedies like cooling or clearing a jam may work, but repeated trips or confirmed electrical/motor issues require professional repair or replacement.
Causes: internal thermal trip, persistent short, or motor failure
When the reset button on a garbage disposal repeatedly pops back out, it usually indicates a deeper electrical or mechanical issue.
Possible causes include an internal thermal trip from overheating, a persistent short circuit drawing excess current, or catastrophic motor failure.
Each implies the unit is unsafe to operate repeatedly; continued attempts to reset can worsen damage or create fire risk, often necessitating professional repair or replacement.
Diagnostic checks to perform
Why does the reset button refuse to stay engaged?
Inspect for persistent overload: check for seized flywheel or jammed impellers using the manual hex key slot.
Test outlet power with a multimeter and verify wiring at the disposal junction.
Smell for burnt insulation indicating motor damage.
Measure motor coil resistance to detect shorts or open windings before considering replacement.
Temporary fixes vs. permanent solutions
Although a temporary reset or quick jam clearance can restore function briefly, distinguishing stopgap measures from lasting repairs is essential. The reset button that won’t stay engaged often signals persistent electrical faults, motor burnout, or internal mechanical failure.
Temporary fixes—unplugging, freeing debris, or repeated resets—mask underlying issues. Recommend professional diagnosis, replacing worn components, or installing a new unit for reliable, safe, long-term operation.
Signs You Need a Replacement Instead of Repair
A few clear indicators suggest replacement is a better option than repair.
Units beyond their typical 8–15 year lifespan, persistent humming after jams are cleared and the reset is pressed, or recurring excessive noise, leaks, or a burned odor usually signal irreversible wear or electrical failure.
In those cases, replacement often proves safer and more cost-effective than repeated fixes.
Age and lifecycle benchmarks for disposals
When a disposal shows recurring failures, persistent leaks, or diminished grinding performance after roughly 8–12 years of service, replacement should be considered rather than repeated repairs.
Typical lifespans vary by build quality and usage; inexpensive units often fail sooner, heavy commercial use shortens life, and stainless models last longer.
Evaluate frequency of faults, repair costs versus replacement, and warranty status when deciding.
Persistent humming after clearing jams and resetting
Persisting humming after a jam is cleared and the unit is reset indicates the motor is attempting to run but cannot spin the grinding assembly.
This often points to internal mechanical failure, stripped flywheel splines, or a seized bearing rather than a simple obstruction, and signals that replacement is likely more cost-effective and reliable than further repairs.
Continued humming despite inspection and minimal repair attempts justifies replacement.
Excessive noise, leaks, or burned odor
Detecting excessive noise, persistent leaks, or a burned odor from a garbage disposal signals internal failure beyond simple troubleshooting.
These symptoms often indicate worn bearings, cracked housings, or electrical overheating requiring replacement rather than repair. Assess damage, note safety risks, and plan for unit replacement when multiple signs coexist.
- Loud grinding or rattling during operation
- Continuous water seepage under sink
- Acrid or electrical burning smell
How to Replace a Garbage Disposal (Overview)
When replacement is needed, the homeowner should select a unit that matches the sink flange size and offers adequate motor power for household needs.
Removal typically involves disconnecting power, detaching the dishwasher and drain lines, and unmounting the old disposal before fitting the new unit and reconnecting plumbing and wiring.
A licensed plumber or electrician should be called if the sink or wiring configuration is complex, if local codes require it, or if the homeowner is uncomfortable with electrical or plumbing tasks.
Choosing the right replacement model for power and size
Although a replacement disposal must fit the sink and plumbing, selecting the right model hinges primarily on matching motor power and grinding capacity to household needs.
Consider horsepower: 1/3–1/2 HP for singles or light use, 3/4–1 HP for families and frequent cooking.
Also compare grind stages, stainless components, noise insulation, and electrical requirements to guarantee reliable performance and compatibility.
Basic removal steps for old units
Begin by turning off power to the disposal at the circuit breaker and confirming the unit is dead with a noncontact voltage tester.
Disconnect the dishwasher hose and drain line, place a bucket under the sink, and loosen the trap.
Support the disposal, rotate the mounting ring to release it, and lower the unit.
Detach electrical wiring at the junction box and remove the old gasket and mounting components.
Installing a new unit and reconnecting plumbing and electrical
Install the new disposal by first preparing the mounting assembly and ensuring all electrical and plumbing connections are ready for reattachment.
Align and secure the unit to the sink flange, tighten the mounting ring, then reconnect the dishwasher inlet and drain tailpiece.
Reattach trap and slip nuts, restore wiring via junction box or plug, and test for leaks and proper operation before finalizing beneath-sink organization.
When to call a licensed plumber or electrician
After reconnecting the plumbing and electrical and confirming the new disposal operates without leaks, the next consideration is whether to continue with DIY fine-tuning or summon a licensed professional.
Call a licensed plumber for persistent leaks, misaligned mounts, clogged or damaged sink drains.
Contact a licensed electrician for wiring faults, tripped breakers, or unfamiliar electrical work.
If safety or code compliance is uncertain, hire a pro.
Preventive Maintenance to Avoid Future Hums and Jams
Preventive maintenance focuses on what should and should not be run through the disposal, simple cleaning and deodorizing routines, and routine monthly checks to catch wear before it causes hums or jams.
Recommended items to run include cold water and small food scraps; fibrous, starchy, and hard materials should be avoided.
Monthly upkeep typically involves flushing with cold water, using mild cleaners or ice and salt for scouring, and confirming mounts, connections, and reset switches are secure.
What to run down the disposal and what to avoid
While a garbage disposal can handle many small food scraps, users should be selective about what goes down it to reduce clogs, jams, and odor buildup.
Soft, biodegradable items like fruit and vegetable peelings, coffee grounds in small amounts, and cold water to flush the unit are generally safe, whereas fibrous materials (onion skins, celery), starchy foods (pasta, rice), grease or oil, bones, and nonfood items should be avoided.
- Safe: small fruit/veg scraps, cold water
- Avoid: fibrous, starchy, greasy items
- Never: bones or nonfood debris
Regular cleaning and deodorizing methods
Regular, simple cleaning and deodorizing keeps a garbage disposal running smoothly and minimizes odors before they become jams or mechanical issues.
Periodic rinses with cold water and ice dislodge debris; citrus peels or baking soda with vinegar neutralize odors. A stiff brush cleans the splash guard and visible parts.
Avoid harsh chemicals; follow manufacturer’s guidance for safe, effective routine maintenance to reduce malfunctions.
Monthly checks and simple upkeep tasks
After routine cleaning and deodorizing, a brief monthly inspection catches small problems before they escalate into humming motors or stubborn jams.
Check mounting bolts, drain connections, splash guard condition, and for leaks. Run cold water while operating to flush debris.
Test reset button and listen for unusual noises. Grind citrus or ice periodically.
Replace worn parts promptly to prevent failures.
Troubleshooting Scenarios and Solutions
The troubleshooting section outlines common humming problems and appropriate fixes based on likely causes.
Key scenarios include different sounds and accompanying issues that point to jams, electrical faults, impact damage, or seal failures.
Common situations to address include:
- Humming after grinding fibrous or starchy foods
- Humming with intermittent power loss or tripping
- Humming following a hard object drop-in or with leaking seals
Humming after grinding fibrous or starchy foods
When a disposal hums after processing fibrous or starchy foods, it usually indicates the motor is running while the grinding mechanism is jammed or overloaded.
Strands of celery, corn husks, potato peels, or pasta can wrap around the impellers or clog the chamber, preventing blades from turning.
Power should be off, then inspect and remove debris with tongs or an Allen wrench at the bottom hex socket.
Humming with intermittent power loss
Investigate humming with intermittent power loss as a sign of an unstable electrical connection, overheating motor, or failing switch or wiring. The disposal may briefly receive power, attempt to start, then drop out as thermal protectors reset or voltage fluctuates.
Check the reset button, inspect wiring and switch for looseness, test outlet and voltage, and listen for motor strain.
Replace faulty switch or consult an electrician if uncertain.
Humming following a hard object drop-in
Listen for a metallic grinding or single-tone hum immediately after a hard object falls into the disposal; this often indicates the impeller or flywheel is jammed against debris or damaged by impact, causing the motor to strain without turning.
Power should be cut, a hex wrench inserted into the reset hole to free the jam, and visible debris removed with pliers before testing.
Humming with leaking seals
A low-tone hum accompanied by water pooling under the sink often signals that worn or cracked seals are allowing moisture to reach the motor housing and interfere with operation.
The unit should be unplugged, water shut off, and inspected for leaks at the sink flange, disposal gasket, and drain connections.
Replace compromised seals, dry the housing, and test; persistent humming may require professional repair.
Tools, Parts, and Accessories to Keep on Hand
A small set of dedicated tools and spare parts can make common disposal repairs faster and safer. Recommended items include a disposal hex wrench and long-handled tongs, a voltage tester and basic plumbing tools, and replacement parts such as a mounting kit, seals, and a switch.
Keeping these on hand helps address jams, leaks, and electrical issues without delay.
Disposal hex wrench and long-handled tongs
Several small tools make routine disposal maintenance safe and simple, chief among them the hex (Allen) wrench and a pair of long-handled tongs.
The hex wrench fits the underside reset socket to free jammed impellers; long-handled tongs extract debris without reaching into the unit. Both are inexpensive, compact, and should be stored near the sink for quick, safe access during troubleshooting and minor repairs.
Voltage tester and basic plumbing tools
Multiple small electrical and plumbing tools form the foundation of safe disposal work: a non-contact voltage tester and a basic set of plumbing tools guarantee power can be verified and leaks or loose fittings addressed quickly.
A tester confirms circuits are dead before contact.
Essential plumbing tools include adjustable wrench, slip-joint pliers, plumber’s tape, bucket, and small flashlight for drain inspection and tight-space access.
Replacement parts to consider (mounting kit, seals, switch)
Consider keeping a small stock of common replacement parts—mounting ring assemblies, rubber seals and gaskets, and the disposer switch—so repairs can proceed without delay.
Include replacement mounting kits for different sink types, assorted O-rings and splash guards, and a compatible toggle or air switch.
Having these parts avoids trips to the store, reduces downtime, and guarantees proper seals and secure mounting during DIY repairs.
Cost Considerations: Repair vs Replace
Cost considerations often determine whether a homeowner opts to repair or replace a garbage disposal, with typical repair costs and replacement prices varying considerably. The table below sketches common repair ranges, replacement model price bands, and a simple labor vs DIY comparison to frame that decision. Weighing parts, labor, and potential risks clarifies which option is more economical in each case.
| Repairs (typical) | Replacement models (price) | Labor vs DIY (savings/risks) |
|---|---|---|
| Jam clearing: $20–$60 | Basic: $80–$150 | DIY saves labor but risks improper install |
| Seal/gasket: $30–$100 | Mid-range: $150–$300 | Pro offers warranty and correct wiring |
| Motor or major: $100–$300 | Premium: $300+ | Labor costs can exceed simple repair cost |
Typical cost ranges for common repairs
Repairing a garbage disposal typically ranges from a modest DIY expense to a few hundred dollars for professional service, depending on the fault.
Common items: jam clearing or reset costs are often free or minimal; replacement parts like seals or switches run $10–$60; motor or flange repairs typically $100–$300 with labor; electrical fixes vary by complexity and local rates.
Price comparison for common replacement models
When evaluating whether to fix or replace a garbage disposal, comparing prices of common replacement models provides a practical baseline for decision-making.
Entry-level units typically range $60–$120, mid-tier models $150–$300, and premium or insulated units $350–$600.
Warranty length, motor horsepower, and noise reduction features influence cost. Documented price points help weigh parts-plus-repair against full replacement.
Labor vs DIY savings and risks
Although parts can be inexpensive, labor often determines whether fixing a disposal saves money: hiring a plumber or appliance technician typically adds $100–$300 in service fees and hourly rates, whereas a competent DIYer might limit outlay to replacement parts and basic tools.
Professional work reduces risk of leaks, electrical hazards, and voided warranties, while DIY saves money but may incur higher costs if mistakes require later professional repair.
Troubleshooting Checklist You Can Print and Follow
A printable troubleshooting checklist guides the user through a quick decision flow to either continue repairing or opt for replacement.
- Assess: simple fixes vs signs that indicate replacement
- Safety first: power off, disconnect, inspect
- Verify: restore power and run a test to confirm resolution
This compact list can be kept near the sink for fast reference during repairs.
Quick decision flow: keep repairing or replace
Decision flowcharts guide homeowners through a short series of checks to determine whether a garbage disposal should be repaired or replaced.
The chart prioritizes safety, age, noise, leak presence, and motor responsiveness. Minor jams and electrical resets favor repair; persistent grinding, corrosion, repeated failures, or hairline leaks point to replacement.
A printable checklist records findings and recommended next steps for clarity.
Stepwise actions from power off to test run
Begin by ensuring the disposal and surrounding area are safe and completely de-energized before any hands-on work.
Then follow numbered steps:
1) unplug or switch off breaker,
2) confirm power off with tester,
3) inspect chamber with flashlight,
4) remove lodged debris with pliers,
5) reset disposal,
6) restore power,
7) run water and test operation.
Record findings and repeat if needed.
When to Contact a Professional
If persistent electrical issues, burning smells, or flooding occur, a qualified electrician or plumber should be contacted.
Homeowners are advised to ask about licensing, experience with disposals, estimated cost, and warranty before hiring.
Provide the pro with the disposal model, a clear description of symptoms, and any troubleshooting steps already taken.
Signs that require an electrician or plumber
When should a homeowner call a professional rather than attempting further repairs alone?
If humming persists after reset and manual rotation, electrical sparks, burning odor, tripped breakers, or repeated trips occur, contact an electrician.
If leaks, persistent clogs, broken mounting, or exposed internal damage appears, hire a plumber.
Also seek help when unsure of diagnosis to avoid injury or property damage.
Questions to ask a service pro and information to provide
After recognizing signs that warrant professional help, homeowners should prepare targeted questions and concise information to guarantee effective service.
Ask about credentials, estimated cost, diagnosis process, warranty, and timeline.
Provide model number, age, recent issues observed, attempted fixes, water leaks, and electrical status.
Note accessibility under sink and preferred appointment windows.
Clear, concise facts speed accurate assessment and repair.
Conclusion
Like a stalled engine that needs a gentle nudge, a humming garbage disposal often responds to calm, methodical attention. The reader is advised to follow safety checks, try resets, and use the hex wrench unjam method before assuming electrical failure. If basic troubleshooting, visual inspections, and simple part replacements fail, weighing repair costs against replacement is prudent. When uncertainty or persistent problems remain, contacting a licensed electrician or appliance technician guarantees safe, reliable resolution.