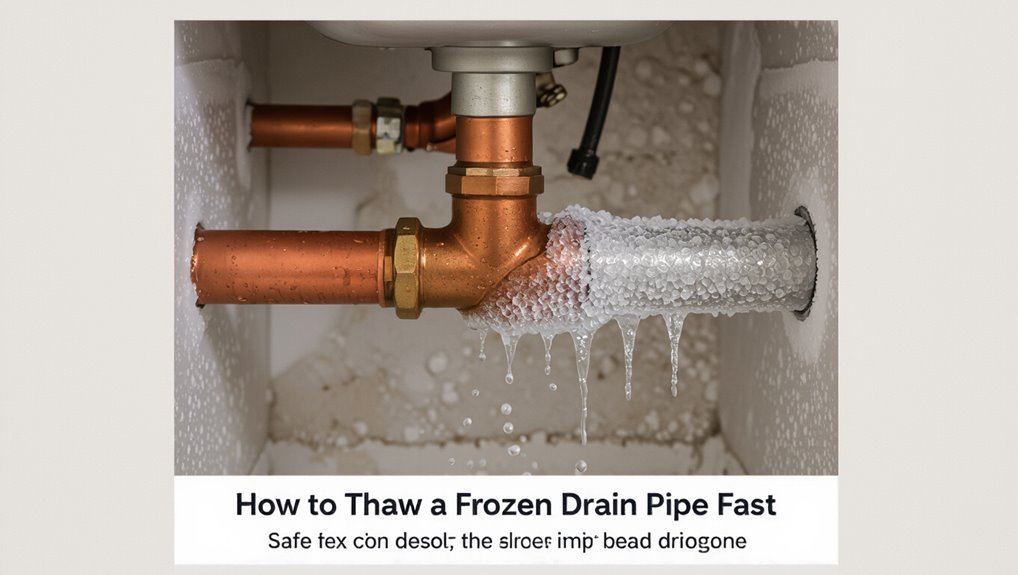
How to Thaw a Frozen Drain Pipe Fast: Safe DIY Methods
To quickly and safely thaw a frozen drain pipe, use gentle heat sources like warm water, a hairdryer, or low-wattage heat tape. First, identify the frozen section and turn off nearby valves if there’s a risk of damage. Keep the faucet open to allow melted water to escape. Avoid using boiling water, open flames, or harsh chemicals, as these can cause cracks or leaks. After the water flow returns, inspect the pipe for any leaks. Follow the additional steps and precautions outlined below for further guidance.
Quick Method: Thaw a Frozen Drain Pipe Fast
Begin by locating the frozen section and ensuring all connected fixtures are closed; this prevents water from flowing into the thawing area and reduces the risk of refreezing.
The quickest safe method applies controlled heat: use a hair dryer, heat gun on low, or electric space heater aimed at the pipe’s exterior, moving steadily along the frozen stretch until flow resumes.
Protect surrounding materials and avoid open flames.
Monitor temperature to prevent damage to pipes or insulation.
If heat cannot reach the pipe, access it by opening cabinets or cutting minimal drywall to expose the frozen portion.
Call a professional if uncertainty or complications arise.
Frozen Drain Pipe vs. Clog: How To Tell?
When diagnosing a blocked drain, attention to the blockage location helps distinguish ice from a clog.
A frozen section typically occurs in exposed pipes or near exterior walls, while clogs are more common at bends, traps, or where debris accumulates.
Additionally, water flow patterns differ: a freeze often causes a sudden stop or slow drip, whereas a clog usually produces slow drainage, gurgling, or partial backups.
Location Of The Blockage
In many cases, the blockage’s location gives the clearest clue whether a drain is frozen or simply clogged. Cold-exposed sections—outdoor spigots, exterior walls, unheated crawlspaces—are likelier sites for ice formation. Indoor traps, junctions near kitchens or bathrooms, and areas where grease or hair accumulates point toward mechanical clogs.
Inspectors should note whether multiple fixtures share the affected run: a single outdoor outlet frozen in an exposed pipe suggests ice, while backups across several fixtures downstream indicate a blockage within the shared main. Mapping pipe routes and comparing affected fixture locations helps narrow whether thawing or clearing tools are appropriate.
Water Flow Behavior
Observe how water behaves at the fixture to distinguish ice from a mechanical clog: a frozen drain typically produces little or no flow, slow trickling that resumes only after warming, or sudden spurts as ice shifts, whereas a clog often allows steady but reduced drainage, intermittent gurgling, or localized backups.
The technician notes temperature-sensitive changes—flow improving when ambient heat increases signals ice.
Airborne noise and bubbling suggest trapped air above a solid obstruction.
Consistent partial flow despite plunging or snaking points to soft debris.
Testing with warm water and listening for movement helps identify the cause before applying thawing or clearance methods.
Which Drain Pipes Freeze Most Often And Why
Exterior hose bibs are prone to freezing because they sit outside the protective envelope of the home and often lack shutoff valves or insulation.
Uninsulated basement pipes freeze when cold air travels through cracks or when the pipes run along exterior walls without thermal barriers.
Attic and second-floor lines are vulnerable due to poor insulation and greater exposure to subfreezing temperatures in upper, less-heated spaces.
Exterior Hose Bibs
Hose-bib connections on the outside of a building are among the most vulnerable drain lines because they sit at the junction between indoor plumbing and the uninsulated exterior, exposing residual water to freezing temperatures. These valves and short pipe stubs extend through walls, creating a thermal bridge that cools faster than interior runs.
Exterior hose bibs often retain water in angled sections or behind shutoff valves, so ice can form even when indoor pipes remain flowing. They freeze frequently in exposed walls, under eaves, or where insulation is minimal. Preventive insulation, indoor shutoff and draining reduce freeze risk and simplify thawing.
Uninsulated Basements
Often, uninsulated basements are where drain pipes freeze first because cold air accumulates near foundation walls and the pipes running along them lose heat rapidly.
Pipes most at risk are horizontal runs against perimeter walls, laundry and utility sink drains, and waste lines near floor joists where insulation is absent.
Metal pipes conduct heat away faster than plastic, so older iron or copper lines freeze sooner.
Low-use drains with stagnant water and narrow-diameter traps are vulnerable.
Poorly sealed rim joists and vents allow frigid drafts.
Identifying these locations helps prioritize insulation, heat tape, or targeted thawing to prevent bursts and service interruptions.
Attic/Second-Floor Lines
In attics and on second floors, drain lines most prone to freezing are short, poorly insulated vented runs and small-diameter trap arms that sit near cold roof sheathing or unheated eaves. These lines freeze because limited water flow, cold exposure, and thin insulation allow rapid heat loss. Attention to routing, insulating, and maintaining minimal flow prevents issues. Inspection focuses on junctions, roof penetrations, and vents. Repair emphasizes added insulation, heat tape where safe, and sealing drafts. The table below summarizes typical vulnerabilities, causes, and preventive measures.
| Vulnerability | Cause | Preventive Measure |
|---|---|---|
| Trap arm | Cold exposure | Insulate/relocate |
| Vent run | Low flow | Add heat tape |
| Roof penetration | Drafts | Seal and insulate |
Safety Precautions Before You Start Thawing
Before attempting to thaw a frozen drain pipe, assess the work area for hazards and gather appropriate personal protective equipment; this includes insulated gloves, eye protection, and non-slip footwear to reduce injury risk.
Confirm the main water supply is shut off to limit flooding if a thaw releases blockage and inspect nearby electrical outlets, cords, and appliances for water exposure.
Ventilate areas where heat will be applied and keep combustibles clear.
Make certain someone else is aware of the task or nearby to assist if needed.
Verify clear access to exits and maintain phone access for emergencies before starting.
Quick Tools To Gather For Fast DIY Thawing
With safety checks completed and assistance arranged, gather a compact kit of tools that speeds thawing and limits damage. The list focuses on items that are practical, portable, and reduce risk when applied correctly.
- Heat source: an electric hair dryer or heat gun with variable settings, plus an extension cord (avoid open flames).
- Insulation and barriers: pipe insulation sleeves and heat tape rated for plumbing, plus cloth to protect finishes.
- Basic plumbing tools: adjustable wrench, basin wrench, and a bucket to catch water if joints loosen.
Keep instructions and manufacturer guides nearby; use items only as intended.
Protecting Nearby Fixtures And Flooring
Near heat sources and tools, nearby fixtures and flooring require deliberate protection to prevent scorch marks, water damage, and accidental chemical exposure.
Remove rugs and movable items; cover fixed surfaces with heat‑resistant mats or layers of foil and rigid board.
Place drip trays or absorbent towels under joints and access points to catch leaks.
Shield cabinetry and appliances with cardboard or plywood, fastening loosely to allow ventilation.
Protect electrical outlets and switches with plastic sheeting and tape.
Use caution with chemical deicers: confine application and clean residues promptly.
Inspect protective coverings periodically during thawing and replace saturated materials immediately.
Hot Water Method For Exposed Drain Pipes
Before applying heat, the person should take safety precautions such as wearing gloves and eye protection and ensuring electrical sources are kept away from water.
For exposed drain pipes, carefully pouring boiling water in stages can help melt ice without shocking the pipe.
The technique should be applied slowly and monitored for leaks or pipe damage.
Safety Precautions First
When using the hot water method on an exposed drain pipe, prioritize personal safety and property protection by preparing appropriate gear and barriers. The operator should assess surroundings for electrical risks, clear combustible materials, and guarantee a stable work platform.
Use insulated gloves and eye protection, and keep bystanders and pets away. Monitor for pipe damage or leaks; stop if corrosion or joint failure appears.
Maintain a safe route for waste water to prevent slips or water damage. Follow local codes and call a professional if unsure.
- Inspect area and isolate hazards
- Wear PPE and secure footing
- Keep escape/drainage paths clear
Applying Boiling Water
With safety measures in place and hazards isolated, the operator can begin applying boiling water to an exposed frozen drain pipe.
The operator pours or pours-from-a-kettle progressively, starting at the nearest unfrozen section and moving toward the frost.
Water is applied in small, controlled amounts to avoid thermal shock that could stress metal or PVC.
Insulating gloves and eye protection are worn; electrical sources remain off.
If thawing stalls, repeat cycles after a minute to allow heat transfer.
Watch for leaks and stop immediately if fittings fail.
Once flow resumes, wrap the pipe with insulation to prevent refreeze.
Use A Hairdryer For Inside‑Wall Drain Lines
Using a hairdryer to thaw inside-wall drain lines offers a controlled, low-risk method for restoring flow without cutting into finished surfaces.
The homeowner directs warm air at accessible pipe outlets and fixtures, moving the dryer continuously to avoid local overheating.
Maintain several feet of clearance from finishes and use medium heat to limit damage.
Monitor progress by testing nearby taps periodically.
If no thaw occurs within 20–30 minutes or if smells or leaks appear, stop and consult a plumber.
Follow these steps:
- Clear area, protect surfaces.
- Apply warm air around fittings.
- Test flow and inspect for leaks.
Heat Gun Method: When And How To Use It Safely
A heat gun is recommended only for accessible, non-pressurized sections of pipe where slower methods have failed.
Safety precautions—including distancing the nozzle from pipe fittings, using a low heat setting, wearing heat-resistant gloves, and ensuring no nearby combustible materials—must be implemented before starting.
A clear step-by-step thawing sequence should be followed: inspect and isolate the line, apply heat gradually while monitoring pipe temperature, and stop immediately if signs of overheating or damage appear.
When To Use Heat Gun
Occasionally a heat gun is the most effective tool for thawing a frozen drain pipe, but it should be chosen only when the pipe and surrounding materials are compatible and the user can follow strict safety precautions.
Use a heat gun when other gentler methods fail and the frozen section is accessible, metallic, and away from combustible insulation or drywall.
Prefer short, controlled passes rather than prolonged exposure.
- When the pipe is metal and exposed.
- When localized thawing is needed without warming the entire line.
- When professional-level equipment is available and the operator is confident.
Safety Precautions First
Before applying a heat gun, confirm that all safety measures are in place and that the environment and materials are suitable for direct heat.
The operator should wear heat-resistant gloves, eye protection, and long sleeves.
Remove flammable materials and make certain there is good ventilation to disperse fumes.
Confirm the pipe material tolerates localized heat and that adjacent insulation, wiring, and fittings are shielded.
Keep a fire extinguisher rated for electrical and ordinary fires within reach.
Do not use a heat gun near standing water or on pipes with visible corrosion or leaks.
Maintain safe distances and never leave the tool unattended while powered.
Step-By-Step Thawing
When conditions call for rapid, controlled thawing, the heat gun method can be employed safely by following a precise sequence of steps to warm the pipe while minimizing risk. The operator confirms power is off to nearby outlets, removes insulation selectively, and inspects for cracks. Maintain a 6–8 inch distance, sweeping the heat gun steadily to avoid hotspots. Avoid prolonged heating on joints or plastic fittings; stop if plastic softens. After thawing, run warm water and check for leaks. If corrosion, bulging, or persistent freezing appears, cease and contact a professional.
- Prepare and inspect
- Apply heat steadily
- Verify and monitor
Electric Pipe Heating Tape: Quick Setup And Limits
Electric pipe heating tape provides a fast, straightforward way to prevent or clear ice in drain pipes by wrapping a self-regulating or constant-wattage heating element along the pipe’s length and securing it with recommended tape or clips.
Installation requires clean, dry pipe surfaces, following manufacturer spacing, and connecting to a grounded outlet or GFCI-protected circuit.
Self-regulating tape adjusts heat output; constant-wattage delivers steady warmth but needs thermostat control.
Limits include electrical load, outdoor exposure ratings, and incompatibility with plastic piping unless specified.
Regular inspection for wear, proper insulation over the tape, and adherence to local electrical codes guarantee safe, reliable operation.
Portable Space Heater Method For Basements And Crawlspaces
Although portable space heaters can quickly raise ambient temperatures in basements and crawlspaces to help thaw frozen drain pipes, they must be used with attention to safety, airflow, and humidity control.
A technician-like approach emphasizes placement, monitoring, and gradual warming to avoid pipe stress. Heaters should be positioned to direct warm air along the pipe run while keeping combustible materials clear.
Continuous supervision and a working smoke detector are recommended. Moisture must be managed to prevent condensation on cold pipes.
Suggested steps:
- Place heater 3–6 feet from pipe, unobstructed.
- Use thermostat or timer; monitor temperature.
- Vent space to reduce humidity and check progress.
Steam Thawing With A Kettle Or Steam Cleaner
If applied carefully, steam from a kettle or steam cleaner can be an effective, localized method to thaw frozen drain pipes by delivering moist heat directly to the affected area.
Practitioners direct steam along accessible pipe runs, moving steadily to avoid overheating one spot.
Insulate surrounding materials and keep steam source at a safe distance to prevent burns and damage to fittings.
Monitor pipe temperature and progress; stop if sounds of cracking or leaks occur.
Avoid introducing excessive pressure into the system.
For concealed sections, combine with visual inspection via access panels and call a professional if thawing fails or leaks are suspected.
Warm Towels And Hot‑Water Bottles For Small Sections
Warm towels and hot-water bottles provide a low-risk, targeted way to thaw short stretches of frozen drain pipe where access is limited. They transfer gentle heat without risking pipe damage.
Steps:
- Wrap a thick towel soaked in hot (not boiling) water around the exposed pipe, replacing it as it cools.
- Apply a sealed hot-water bottle or heating pad over the towel for sustained warmth, checking fittings and valve connections for leaks.
- Continue until flow resumes, then dry the area and insulate the pipe to prevent refreezing.
Monitor frequently; stop if fittings leak or pipe feels excessively hot.
Use A Plumber’s Snake To Check And Clear Ice Jams
When gentle surface heat cannot reach the frozen section deep inside a drain, a plumber’s snake can be used to probe and break up internal ice jams. The user should select a hand or power snake sized for the pipe and feed it gently toward the obstruction. Rotate and advance slowly; abrupt force risks cracking older pipes.
As the coil contacts ice, work to fracture and push slush toward the drain opening. Withdraw periodically to clear debris and inspect progress. After passage feels clear, flush with warm water (not scalding) once thawing is achieved. Stop and call a pro if resistance persists.
Thaw With Heat Plus Running Water: Step‑By‑Step
When thawing a frozen drain pipe with heat and running water, the technician starts by selecting safe heat sources such as a hair dryer or heat lamp, avoiding open flames.
They then open the faucet to maintain a steady flow, which helps carry melted ice away and prevents refreezing.
Throughout the process they monitor pipe temperature and surrounding materials to guarantee safe, controlled thawing.
Apply Safe Heat Sources
How should one combine heat and running water to safely thaw a frozen drain pipe? Apply safe, localized heat sources while monitoring fittings and joints. Use gentle, controllable methods to avoid thermal shock and fire risk.
- Use a hair dryer or heat gun on low, sweeping across accessible pipe sections, keeping the device moving to prevent overheating.
- Wrap pipes with electric heating tape or a thermostatic heating cable rated for plumbing; follow manufacturer instructions and secure connections.
- Place warm (not boiling) towels around the pipe, replacing them as they cool, and inspect for leaks as thawing progresses.
Keep Water Running
Frequent monitoring and a steady flow of water together speed thawing and reduce pressure buildup in a frozen drain pipe.
Begin by opening the faucet served by the frozen line slightly to allow a thin, continuous trickle. Apply approved external heat sources gradually along accessible sections, working from the faucet toward the freeze.
The flowing water carries latent heat into the blockage, helping to melt ice and flush fragments. Maintain water flow until full throughput resumes, adjusting flow to avoid overflow.
If thawing stalls, stop and reassess for safe access or professional help. Record visible leaks and restore insulation after successful thawing.
Monitor Temperature Carefully
After establishing a steady trickle and applying external heat toward the freeze, attention must shift to careful temperature monitoring to prevent pipe damage and scalding.
The person monitors both pipe surface and water temperature regularly, using a noncontact infrared thermometer for metal and an inline thermometer for outflow.
Heat should be increased slowly; spikes indicate localized thawing and pressure changes.
If readings exceed safe limits, reduce heat and maintain flow.
Watch fittings for leaks and unusual sounds; stop and inspect if detected.
- Measure pipe surface temperature.
- Check outgoing water temperature.
- Adjust heat and flow accordingly.
What Not To Use: Flames, Boiling Water, Or Harsh Chemicals
When confronting a frozen drain pipe, resist the instinct to apply open flames, pour boiling water, or use harsh chemical deicers; each of these methods risks damaging the pipe, surrounding materials, or posing a safety hazard. Open flames can overheat fittings and ignite nearby combustibles. Boiling water may crack cold metal or PVC from thermal shock. Strong deicers corrode metal, ruin seals, and contaminate drainage.
| Method | Risk |
|---|---|
| Open flame | Melts joints, fire risk |
| Boiling water | Cracks pipes, scalding |
| Harsh chemicals | Corrosion, environmental harm |
Choose controlled, low-heat, noncorrosive alternatives instead.
When To Shut Off The Water And Why It Helps
When a drain pipe freezes, shutting off the water supply to the affected line should be considered before attempting thawing.
Stopping the flow reduces pressure buildup that can lead to pipe bursts.
It also limits the volume of water that can escape if a joint or section fails, minimizing cleanup and water damage.
When To Shut Off Water
Before shutting off the water, assess whether pipes are actively leaking, visibly bulging, or showing frost—these signs indicate an immediate need to stop the supply to prevent flooding and further damage.
Shutting off the main minimizes pressure that can force ice expansion into joints and reduces water available to leak if a crack forms.
It also allows safer, controlled thawing without unexpected flows.
After shutting the valve, open nearby faucets to drain standing water and relieve trapped pressure.
Once thawed and inspected, restore supply slowly and watch for leaks.
- Stop main valve first
- Drain fixtures after shutoff
- Restore supply slowly
Preventing Pipe Bursts
To prevent costly bursts, homeowners should shut off the water supply as soon as pipes show signs of freezing or when a sudden temperature drop threatens vulnerable plumbing. Doing so relieves pressure that builds between ice plugs and closed fixtures, reducing the likelihood of seams splitting.
Isolating affected sections via shutoff valves confines risk and simplifies later repairs. After shutoff, opening faucets drains residual water, lowering freeze risk and making controlled thawing safer.
Prompt notification of occupants and, if needed, a plumber guarantees proper inspection before restoring service. Restoring water only after verification prevents hidden failures and secondary water damage.
Reducing Cleanup Damage
A swift shutoff of the main or localized supply markedly limits water spread and secondary damage once a pipe fails or begins to thaw, because stopping flow prevents overflowing fixtures and reduces pressure that can force water into walls, floors, and electrical systems.
Timing matters: shut off as soon as ice compromise or leakage is detected, before thawing increases flow.
After shutoff, drain lines and open faucets to relieve trapped water and pressure.
Reopening only after repairs or professional inspection prevents renewed flooding and electrical hazards.
- Stop flow immediately.
- Drain and relieve pressure.
- Inspect before restoring.
Inspecting The Pipe After Thawing For Damage
Carefully examine the thawed section for visible signs of damage such as cracks, bulges, corrosion, or joint separation, since these indicate compromised integrity or ongoing leaks.
The inspector should trace the pipe along its accessible length, looking for hairline fractures, distorted fittings, discolored areas, or dampness.
Listen for dripping and inspect surrounding insulation, drywall, and flooring for moisture or staining.
Note any irregular sounds when water runs.
Document findings with photos and timestamps.
If damage is suspected beyond superficial issues, recommend professional assessment and shutoff of affected valves to prevent pressure-related failures until repairs are arranged.
Temporary Fixes If You Find A Crack Or Leak
Begin temporary repairs promptly to minimize water loss and prevent further damage, but treat them as short-term measures until a qualified plumber can perform permanent fixes.
Inspect the crack’s size and stop water flow if possible. Dry the area, then apply a temporary seal that matches pipe material.
- Use plumber’s epoxy or putty for small hairline cracks; follow cure times.
- Wrap with rubber and hose clamps or a repair tape designed for plumbing for wider splits.
- For threaded joints, tighten or add thread sealant; replace damaged washers.
Monitor the repair and avoid prolonged pressure or hot water until professional repair.
If DIY Fails: Quick Triage And Next Steps
If temporary patches fail to stop leakage or the damage appears larger than anticipated, the homeowner should shift to rapid triage and call a professional.
Meanwhile, they should shut off main water to limit flooding, document visible damage with photos for records, and move valuables away from affected areas.
If safe, place buckets under drips and use towels to contain minor seepage.
Avoid attempting high-risk repairs or using open flames.
Communicate observed symptoms and any temporary measures taken to the arriving technician.
Arrange for emergency coverage if needed and confirm contractor credentials before work begins.
When To Call A Plumber: Red Flags You Shouldn’t Ignore
Visible cracking, bulging, or leaking on exposed sections of pipe signals possible structural failure and warrants professional assessment.
If freezing recurs in multiple locations or affects large portions of the system, a plumber should be called to identify underlying causes and prevent further damage.
Promptly contacting a licensed professional can minimize repair costs and water damage risk.
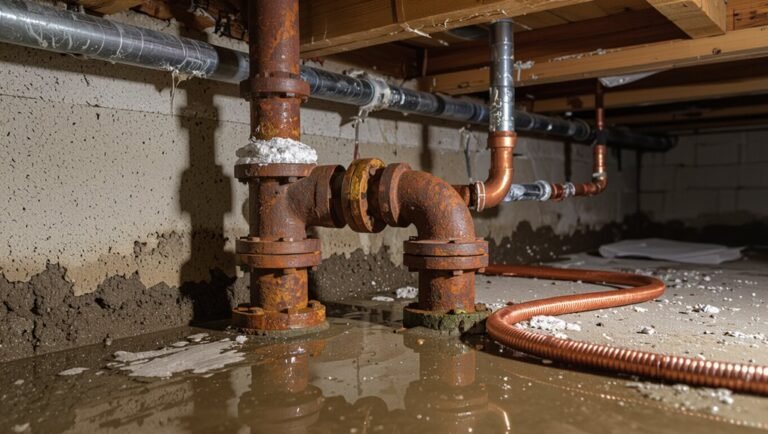
Visible Pipe Damage
Cracks, bulges, corrosion, or obvious leaks on a frozen drain pipe are clear indicators that professional help may be required. Visible damage suggests compromised integrity and risk of rupture, water damage, or contamination. Immediate DIY thawing attempts can worsen fractures or dislodge corroded joints.
- Note size and location of cracks, bulges, or wet spots; document with photos.
- Avoid applying heat directly to severely corroded or split sections; this can expand damage.
- Shut off water supply if leakage is present and contact a licensed plumber for inspection and repair.
Do not attempt permanent fixes; prioritize safety and professional assessment.
Repeated or Widespread Freezing
When multiple sections of a drain system freeze repeatedly or ice forms across several fixtures, it signals a systemic problem beyond a single localized fault and warrants professional evaluation.
Such recurrence suggests inadequate insulation, persistent drafting, compromised heating, or buried pipe faults. A plumber can perform pressure testing, camera inspection, and thermal assessment to locate sources and recommend remedies like rerouting, insulating, heat-tracing, or replacing damaged segments.
Repeated freezing increases risk of hidden cracks, mold, and failing joints; temporary DIY thawing may mask danger. Call a licensed professional when freezing recurs, affects multiple areas, or follows prior repairs to prevent escalation and costly failures.
Stop Refreezing: Temporary Measures Right After Thawing
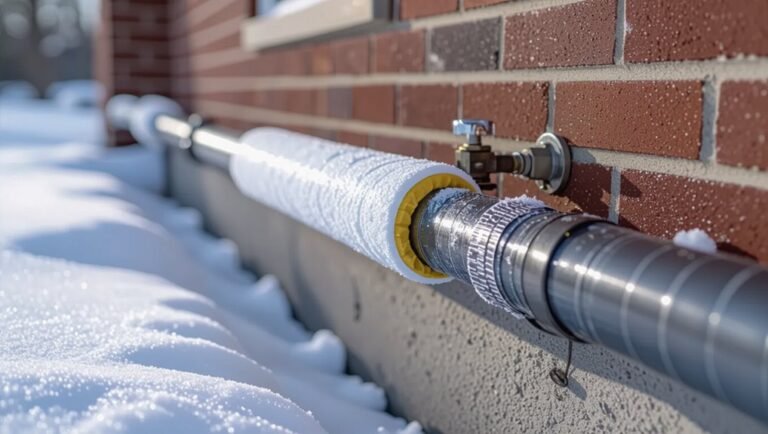
After thawing a frozen drain pipe, implement immediate temporary measures to prevent refreezing: insulate exposed sections with foam or wrapped towels, maintain a slow, steady trickle of warm water through the line, and apply localized heat sources such as a portable heater or hairdryer kept at a safe distance.
The person should monitor temperature and moisture, check fittings for leaks, and avoid open flames. Short-term fixes aim to stabilize the pipe until permanent repairs or insulation occur.
Recommended actions include:
- Keep warm water trickling for several hours.
- Wrap and secure temporary insulation.
- Use cautious localized heat and monitor continuously.
Prevent Frozen Drain Pipes: Insulation And Routing Tips
By insulating exposed drain lines and thoughtfully rerouting vulnerable sections, homeowners can greatly reduce the risk of future freezes.
Assess pipe locations for drafts, unheated spaces, or exterior walls and prioritize those most at risk. Seal gaps where cold air enters and relocate pipes away from exterior walls or crawlspaces when feasible.
Maintain proper slope and support to prevent standing water that freezes easily.
Where rerouting is impractical, create thermal barriers and make certain nearby heat sources or heating cables are safely installed.
Regularly inspect insulation integrity and clear attic or basement ventilation that chills piping to sustain protection.
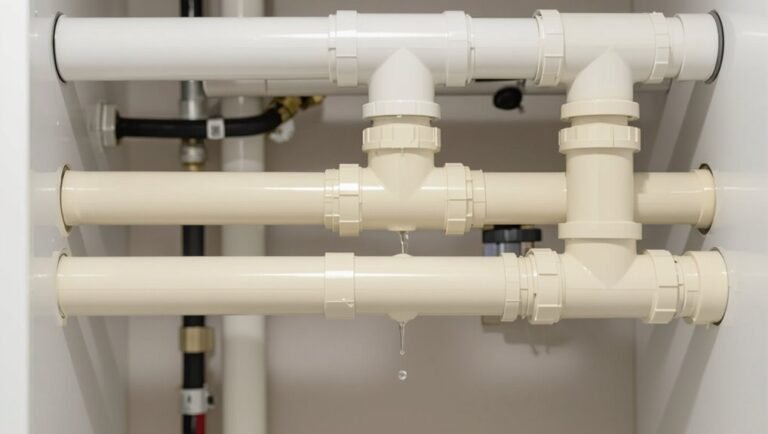
Best Affordable Insulation For Drain Pipes
Having addressed insulation and routing strategies to lower freeze risk, attention turns to affordable materials that reliably protect drain pipes. Options balance cost, ease, and performance.
Foam pipe sleeves slip on for straightforward coverage; adhesive-backed foam tape fills gaps on irregular runs. Fiberglass wrap offers higher temperature tolerance for exposed sections, secured with foil tape. Reflective bubble insulation can wrap larger assemblies and resists moisture.
Consider accessibility for inspection and future repairs.
- Foam sleeves – quick, low-cost, best for straight runs.
- Fiberglass wrap – durable, heat-resistant for exposed pipes.
- Reflective bubble – versatile, moisture-resistant for complex configurations.
Seasonal Checklist To Reduce Freezing Risk
In preparation for cold months, a concise seasonal checklist helps homeowners systematically reduce the risk of frozen drain pipes by prioritizing insulation checks, outdoor fixture protection, and controllable heat paths. The checklist itemizes quick inspections, functional tests, and preventive actions: verify pipe wrap integrity, clear gutters and downspouts, and test indoor thermostats and exterior hose valves. Schedule a pre-winter walkthrough and note vulnerable locations. Keep emergency thaw tools accessible and record last servicing dates for plumbing. Use the table below for a compact reminder.
| Task | Frequency |
|---|---|
| Inspect insulation | Annually |
| Protect outdoor fixtures | Before freeze |
| Test heat sources | Monthly |
Low‑Cost Upgrades For Vulnerable Areas (Basement, Attic, Exterior)
Targeted low-cost upgrades focus on sealing heat leaks and protecting exposed pipe runs in basements, attics, and along exterior walls to reduce freeze risk without major renovation. Simple, affordable measures improve resilience: add foam pipe insulation to exposed runs; install inexpensive self-adhesive weatherstripping around rim joists and access panels; and use reflective foil or batt insulation to block drafts.
Routine checks identify vulnerable spots. Small electric heat tape with thermostat control can be applied where permitted. All work follows local codes and safety guidelines, prioritizing dry, ventilated areas and avoiding contact between heat tape and combustible materials.
- Add foam pipe insulation
- Seal rim joists and access panels
- Apply reflective or batt insulation
Time & Cost: DIY Thaw Vs. Pro
Compared to hiring a professional, a DIY thaw typically costs less in cash outlay but can take more time and carries greater risk of missed damage.
DIYers spend on heat sources, insulation, and minor tools; time invested varies with access and skill.
Professionals charge labor and service fees but deliver faster diagnostics, safer electrical and plumbing handling, and warrantyed repairs.
For simple, accessible freezes a competent homeowner may save money; for complex systems, hidden bursts, or limited time, pros reduce downstream costs and water damage risk.
Decision balances budget, technical comfort, urgency, and potential repair liabilities.
Conclusion
A frozen drain pipe need not spell disaster; with quick, informed action and basic tools, most freezes can be relieved before damage occurs. Like a patient clock unwinding, gradual, cautious thawing restores flow without sudden stress. Prioritize safety, identify true freezes versus clogs, insulate vulnerable runs, and consider low‑cost upgrades for recurring trouble spots. When unsure or when pipes are inaccessible, enlist a professional to prevent costly failures.