How to Thaw Drain Pipes Quickly and Safely: Step-by-Step Methods to Prevent Bursts
To quickly and safely thaw frozen drain pipes, first shut off the nearest water valve and open the faucets to relieve pressure. Next, locate the frozen section and apply gradual heat from the ends toward the center using tools like a hair dryer, warm towels, or a portable heater—avoid using open flames and rapid temperature changes. As the ice melts, monitor joints for leaks and insulate the thawed area to prevent refreezing. These steps will help you address the issue effectively; further guidance is available on tools, scenarios, and long-term prevention strategies.
How to Thaw Drain Pipes Quickly and Safely: Immediate Actions to Prevent Bursts
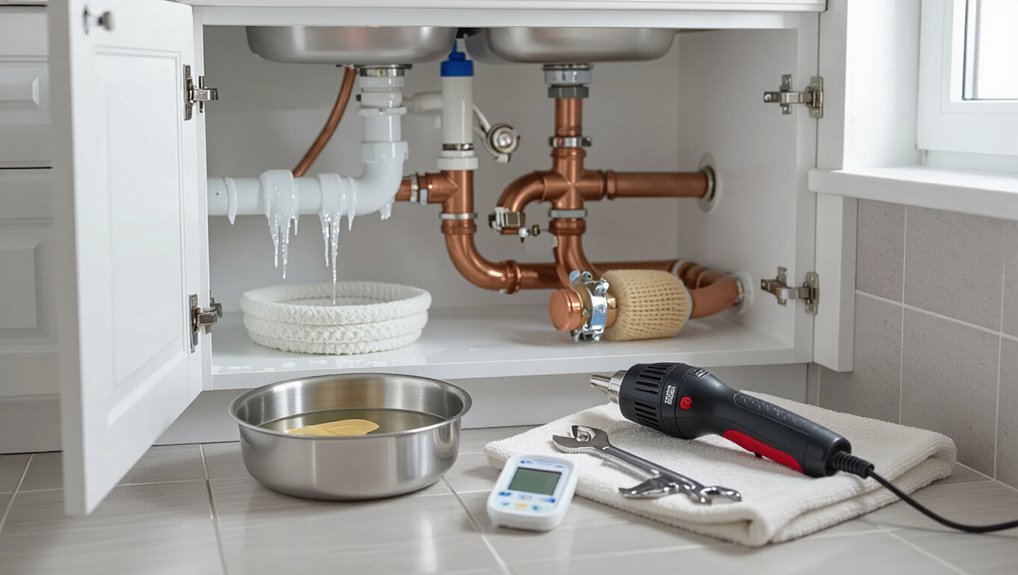
Before attempting to thaw a frozen drain pipe, the situation should be assessed for signs of freezing, the pipe location, and the materials involved.
A quick safety checklist follows: shut off relevant valves, cut power to nearby electrical sources, use protective gear, and guarantee adequate ventilation.
If cracks, major leaks, or a frozen main line are visible, a professional should be contacted immediately.
Assess the situation before thawing (signs of frozen pipes, location, materials)
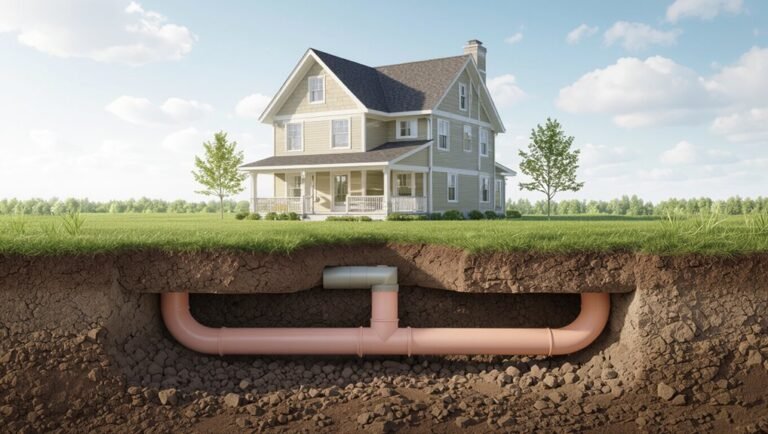
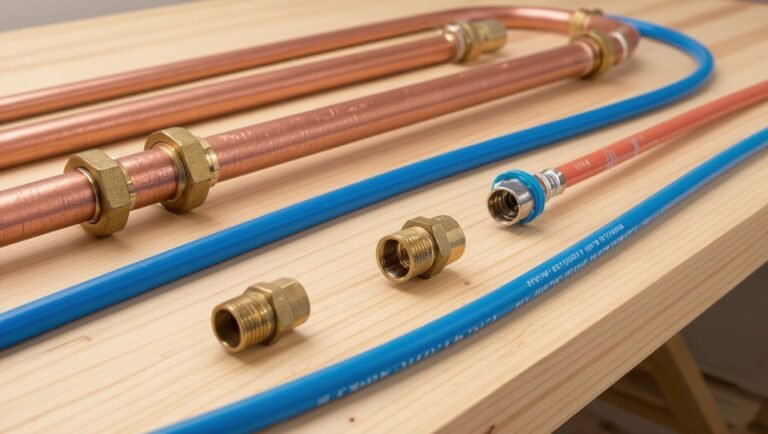
When exposed to freezing temperatures, a homeowner should first determine whether a blockage is due to ice or another cause by checking for signs such as localized lack of drainage, frost or condensation on exposed pipes, and unusual bulging or cold spots along the line; identifying the exact location, whether in an exterior wall, crawlspace, or underground run, and noting pipe material (copper, PVC, cast iron) will guide safe thawing methods and urgency.
A concise assessment logs visible indicators, maps pipe routes, and prioritizes responses, informing how to thaw drain pipes without causing damage.
Quick safety checklist (shutoff valves, electricity, protective gear, ventilation)
Having identified the likely freeze point and pipe material, the homeowner should immediately follow a compact safety checklist to reduce the risk of bursting or shock.
Close water at the nearest shutoff, isolate affected fixtures, switch off nearby electrical circuits if heaters or heat guns are used, wear gloves and eye protection, guarantee clear ventilation for fumes, and keep a phone ready to call for help if conditions worsen.
When to call a professional immediately (visible cracks, major leaks, frozen main lines)
How quickly should a homeowner call a professional if thawing attempts reveal serious damage? Immediate contact is required for visible cracks, substantial leaks, or a frozen main line.
Stop thawing, shut off water, and evacuate the area if flooding or structural risk exists.
Licensed plumbers or emergency services assess structural integrity, prevent further water damage, and perform safe repairs or controlled thawing.
Fast, Step-by-Step Thawing Methods for Different Scenarios
A concise set of step-by-step procedures addresses thawing for specific pipe locations and configurations.
It covers exposed pipes with the quickest safe techniques, methods for crawlspaces, basements, unheated areas, and approaches for pipes inside walls or ceiling cavities that avoid demolition.
The guidance also includes strategies for outdoor drain and yard sewer lines and precautions for safely thawing multi-branch drain systems.
Thawing exposed pipes (basics and fastest techniques)
Begin by identifying the frozen section and shutting off the water supply to minimize pressure buildup.
For exposed pipes, visual inspection and gentle tapping can reveal ice-bound areas.
Apply heat gradually: use a hair dryer, heat gun on low, or electric heating pad, moving toward the faucet.
Wrap towels soaked in warm water for stubborn spots.
Never use open flame; monitor for leaks and restore water slowly.
Thawing pipes in crawlspaces, basements, and unheated areas
Move quickly but cautiously when thawing pipes in crawlspaces, basements, and other unheated areas.
Assess access, clear debris, and guarantee ventilation.
Use a hair dryer, heat gun on low, or portable heater while keeping distance to avoid overheating.
Warm progressively from faucet toward the freeze.
Monitor for leaks, keep electricity off if water is present, and call a plumber if unsure or if pipe damage appears.
Thawing pipes inside walls or ceiling cavities without demolition
When pipes freeze inside wall or ceiling cavities, access is more limited than in basements or crawlspaces, so careful non‑destructive methods are required.
Use targeted heat: space heaters, hair dryers, heat blankets, or infrared lamps aimed at access points or vents.
Open cabinets, remove trim, insulate surrounding areas, and slowly warm toward the frozen section.
Monitor for leaks and call a plumber if thawing fails.
Thawing outdoor drain lines and yard sewer pipes
Several common scenarios call for rapid, controlled thawing of outdoor drain lines and yard sewer pipes—burst mains near the foundation, driveway-routed laterals, and exposed yard runs—each requiring a distinct step-by-step approach.
Begin by isolating flow, exposing frozen section safely, applying calibrated heat (portable heaters, heat tape, warm water) outward from access points, monitor joints for leaks, and restore insulation and grading promptly.
Thawing multi-branch drain systems safely
Thawing multi-branch drain systems requires a methodical approach that isolates frozen branches, protects shared fittings, and restores flow without overstressing pipe joints.
Inspect layout, close nearby fixtures, and open vents to allow steam escape.
Apply localized heat—heated towels, hair dryers, or heat tapes—progressing from main line toward branches.
Monitor joints, avoid open flames, and test flow slowly to confirm full thaw.
Tools and Equipment: What to Use and Why
The section outlines appropriate tools and equipment for thawing drain pipes, beginning with safe heat sources such as hair dryers, heat guns, infrared lamps, and portable space heaters.
It warns against electrical heating methods that use open flames or torches and explains the hazards and reasons to avoid them.
It also covers pipe-specific tools (pipe thawing machines, heat tape, heating cables) and the monitoring equipment—thermometers, leak detectors, and moisture meters—needed to apply heat safely and verify pipe integrity.
Safe heat sources (hair dryer, heat gun, infrared lamp, portable space heater)
A few controlled heat sources—such as a hair dryer, heat gun, infrared lamp, or portable space heater—are commonly used to thaw frozen drain pipes safely when applied with care and the correct technique.
Recommended use: gentle, even heating; keep distance; monitor temperature; avoid moisture contact.
- Warm air flow
- Focused heat beam
- Radiant glow
- Controlled room warming
Electrical heating options to avoid (reasons not to use open flame or torches)
After discussing controlled electric heat sources, attention should turn to electrical options that must be avoided because they create fire, shock, or pipe-damage risks.
Space heaters with exposed elements, improvised coils, wiring splices, and DIY resistive rigs can overheat, ignite insulation, or cause electric shock.
Open flames, torches, and propane heaters risk melting pipe joints and nearby materials and must not be used.
Pipe-specific tools (pipe thawing machines, heat tape, heating cables)
Begin by selecting tools designed specifically for thawing pipes: commercial pipe-thawing machines, factory-made heat tape, and purpose-built self-regulating heating cables.
- Clamp-on induction coil warming a frozen joint
- Wrapped heat tape along a straight run
- Cartridge-style cable across a stubborn elbow
- Portable transformer unit supplying controlled current
Choose rated products, follow instructions, and prioritize insulation and safe power sources.
Monitoring equipment (thermometers, leak detectors, moisture meters)
Effective monitoring relies on three core instruments—thermometers to track pipe and ambient temperatures, leak detectors to identify escaping water or steam, and moisture meters to spot concealed dampness—each providing distinct, actionable data during thawing operations.
Technicians use infrared or contact thermometers for hotspots, electronic leak detectors for early breaches, and pinless moisture meters to locate hidden saturation, enabling timely adjustments and damage prevention.
Detailed Step-by-Step Procedure for a Common Case (Indoor Copper or PVC Drain Pipe)
The procedure begins with preparatory steps: isolate the affected section, open nearby faucets to relieve pressure, and protect floors and finishes.
Heat should then be applied steadily and evenly to the pipe—following a consistent pattern, maintaining safe distance, and allowing sufficient duration for gradual warming.
After flow is restored, confirm there are no leaks and complete post-thaw actions such as insulating the pipe, performing a slow warm-up cycle, and checking the system for proper operation.
Preparatory steps (isolate affected section, open faucets, protect surroundings)
Before applying heat to a frozen indoor copper or PVC drain, isolate the affected section by shutting off valves or capping adjacent fittings.
Open nearby faucets to relieve pressure and allow meltwater to flow.
Protect walls, floors, and fixtures with towels or heat-resistant barriers to prevent water damage and accidental heat contact.
Confirm power sources for electric tools are off and clear the immediate area of combustibles.
Applying heat steadily and evenly (pattern, distance, duration)
Apply heat gradually along the frozen section, moving steadily from the pipe ends toward the center to encourage melted water to drain rather than refreeze.
Maintain a consistent distance (typically 2–4 inches for a hair dryer, 6–12 inches for a heat gun on low) and keep the heat source in motion so no single spot exceeds safe temperature for copper (avoid rapid overheating) or the softening point of PVC.
Move methodically, pausing briefly at each inch, monitoring pipe warmth by hand.
Confirming flow restoration and checking for leaks
Check for restored flow by running water through the fixture and watching the drain and nearby joints for steady movement rather than sputtering or pooling.
If flow appears normal, inspect all accessible fittings, soldered joints (copper), and glued or threaded connections (PVC) for drips, dampness, or hairline wet trails.
Continue testing multiple fixtures served by the same stack, note any slow drains, and tighten or mark suspect connections for repair.
Post-thaw actions (insulation, slow gradual warming, system check)
With flow confirmed and leaks noted, attention turns to post-thaw measures that prevent refreezing and protect pipe materials.
Insulate exposed sections with foam sleeves or wrap, secure joints, and restore slow, gradual warmth using low-output heat tape or thermostatic cable.
Monitor for residual moisture, tighten fittings if needed, and run system checks over 24–48 hours to verify stable flow and no delayed leakage.
Preventing Pipe Bursts During and After Thawing
Frozen sections can burst because expanding ice and trapped liquid create pressure differentials that exceed pipe strength.
To reduce that risk during thawing, pressure should be relieved by opening nearby faucets and checking for trapped pockets so flow can resume as ice melts.
After thawing, joints and fittings—especially soldered seams and solvent-welded connections—should be inspected for leaks or damage.
Why frozen pipes burst (pressure dynamics explained simply)
When water inside a pipe freezes, the resulting ice increases internal pressure because expanding solid ice and trapped liquid both push against the pipe walls.
Ice formation can block flow, creating isolated liquid pockets that pressurize as freezing continues or as temperature fluctuates.
Weak points—joints, fittings, corrosion—fail first.
Material brittleness and differential expansion further concentrate stress, producing cracks or bursts.
Pressure-relief techniques during thawing (open faucets, relieve trapped pockets)
Because pressure concentrates at blockages and weak fittings, controlled pressure relief during thawing reduces the chance of a burst.
Technicians open nearby faucets and fixtures to allow trapped water and steam to escape, reducing upstream pressure. Slow, sequential opening prevents sudden surges.
Air vents or temporary relief valves may be used where appropriate. Continuous monitoring guarantees steady flow until full thaw is confirmed.
Inspecting joints and fittings after thaw (common weak points)
After thawing, a focused inspection of joints and fittings is essential because these locations are the most common weak points; any residual stress, corrosion, or hairline cracks can lead to delayed leaks or sudden bursts under pressure.
Technicians should visually examine soldered, threaded, and compression connections, feel for dampness, and apply moderate pressure tests. Replace or tighten compromised fittings and monitor for several hours.
Comparison of Thawing Methods: Speed, Safety, Cost, and Best Use Cases
Different thawing options vary markedly in speed, safety, cost, and ideal applications, so a concise comparison helps select the right approach.
| Method | Notes |
|---|---|
| Hair dryer | Slow, very safe, low cost, best for small exposed sections |
| Heat gun | Fast, higher risk, moderate cost, for short controlled use |
| Portable heater | Moderate speed, safer than gun, moderate cost, for larger spaces |
| Pipe thaw machine | Fastest, professional use, high cost, for frozen mains or inaccessible pipes |
Temporary measures like heat tape and insulation offer immediate protection, while permanent fixes such as rerouting reduce recurrence and long-term expense.
Hair dryer vs. heat gun vs. portable heater vs. pipe thaw machine
When choosing a thawing method, homeowners and technicians must weigh speed, safety, cost, and suitability for pipe material and location.
Hair dryers are safe and cheap but slow. Heat guns thaw quickly yet risk damaging plastic and finishes.
Portable heaters balance speed and safety for accessible areas. Pipe thaw machines offer fastest, professional-grade results for metal mains but cost more and require trained use.
Temporary vs. permanent solutions (heat tape, insulation, rerouting)
Several common fixes fall into two categories: temporary measures that provide quick, short-term protection and permanent changes that prevent recurrent freezes.
Temporary options—heat tape, portable heaters, and towels—offer fast thawing but require monitoring and pose fire risk.
Permanent solutions—pipe insulation, relocating lines, and rerouting into conditioned space—cost more upfront but eliminate repeat freezes, lower long-term risk, and reduce maintenance.
Common Mistakes and How to Avoid Them
Common errors in thawing drain pipes include applying open flame or concentrated heat to plastic, which can warp or melt the pipe.
Rapid temperature changes also risk cracking pipes and loosening fittings.
Additionally, using electrical heaters or extension cords near water creates shock and fire hazards unless equipment and connections are rated for wet conditions and handled with care.
Avoiding open flame and concentrated heat on plastic pipes
Apply heat carefully: using open flames or highly concentrated heat sources on plastic drain pipes risks melting, warping, or igniting the material and compromising joints.
Practitioners should choose low, diffuse heat—space heaters, warm towels, or hair dryers—maintain distance, move heat continuously, and monitor pipe temperature.
If unsure, consult a plumber.
Never leave heat sources unattended near insulation, wood, or plastic fittings to prevent fire and damage.
Risks of rapid temperature changes (cracking, fittings failure)
After emphasizing gentle, diffuse heat to prevent melting or fire, attention must shift to the opposite problem: rapid temperature swings.
Sudden warming can crack brittle pipe walls, loosen solvent-welded joints, and stress metal-to-plastic connections.
Gradual, uniform thawing reduces thermal gradients.
Inspect fittings afterward for leaks or distortion, and reheat slowly if necessary to avoid creating concealed failures that lead to bursts.
Electrical hazards and safe power use near water
Handle electrical equipment with extreme caution around thawing drains, since water and electricity together create immediate shock and fire risks.
Practitioners should unplug tools, use GFCI-protected outlets, keep cords dry and elevated, and avoid improvised heating devices.
Inspect cords for damage, wear rubber-soled shoes, and shut power to affected circuits when possible.
Call a qualified electrician for uncertainty or visible wiring issues.
Long-Term Prevention Strategies to Stop Re-Freezing
Long-term prevention focuses on keeping vulnerable drain lines continuously above freezing through targeted insulation and heat-tracing—selecting appropriate materials, placement, and R-values for the job.
Where insulation is impractical, rerouting or relocating exposed sections to warmer, more accessible spaces reduces risk.
Integrating smart controls and sensors with remote alerts allows proactive temperature monitoring and automatic heat activation to prevent re-freezing.
Insulation and heat-tracing installations (materials, placement, R-values)
When preventing repeat freezing, properly selected insulation and heat-tracing systems form the cornerstone of a reliable strategy. Materials, placement, and appropriate R-values must be matched to pipe size, exposed length, and local climate to verify continuous protection.
Closed-cell foam, fiberglass with vapor barrier, and mineral wool suit different conditions. Self-regulating cable along cold spots, secure spacing, and tested thermal resistance assure sustained freeze prevention.
Pipe rerouting and relocation options for vulnerable sections
After insulation and heat-tracing address immediate thermal control, rerouting or relocating vulnerable pipe runs offers a more permanent remedy for recurring freezes.
Contractors may move lines away from exterior walls, elevate runs above crawlspaces, consolidate pipes into conditioned areas, or replace long exterior sections with buried, frost-protected piping.
Costs, structural constraints, and code compliance determine the best approach for long-term freeze prevention.
Smart home controls and monitoring to prevent re-freezing (sensors, remote alerts)
Although traditional insulation and heat tracing reduce freeze risk, integrating smart sensors and remote alerts provides continuous oversight that prevents re-freezing before damage occurs.
Temperature and moisture sensors along vulnerable drains feed a hub that triggers heaters or notifies owners.
Geofencing, schedules, and automated valves enable proactive responses.
Logged data supports maintenance decisions, reducing emergency thawing and preventing costly bursts through timely intervention.
Cost Estimates and When Professional Service Is Worth It
Typical DIY thawing projects often cost under $100 in materials and can take one to several hours depending on access and severity.
Professional services commonly range from $150 to $600 or more, often including inspection, targeted thawing equipment, and repairs or preventative upgrades.
Homeowners should document damage, save receipts, and check policy coverage before hiring pros to guarantee insurance claims are supported.
Typical DIY cost ranges and time estimates
Cost and time for thawing frozen drain pipes vary with method, pipe location, and severity of the freeze:
Typical DIY options cost $5–$60 for heat tape, hair dryers, portable heaters, or plumbing snake accessories.
Short, accessible freezes often take 30–90 minutes; deeper, insulated, or multi-section freezes can require several hours across attempts.
Safety pauses and monitoring add time; preparation reduces repeat efforts.
Professional service costs and what they include
When DIY methods are insufficient or the freeze is extensive, homeowners often call a licensed plumber or emergency thawing service.
Professional visits generally run from about $150 to $500 for a standard callout and localized thawing, while complex jobs—multiple frozen sections, buried lines, or repairable freeze damage—can rise to $500–$1,500 or more.
Services typically include assessment, targeted heat application, leak prevention, temporary repairs, and guidance on follow-up repairs or insulation upgrades.
Insurance considerations and documenting damage
Documenting freeze-related damage promptly and thoroughly helps determine coverage and expedite claims: homeowners should photograph and video each affected area, record dates and times, keep receipts for emergency repairs and thawing services, and obtain written estimates from licensed plumbers to establish cause and extent of loss.
Insurers may require mitigation proof; file claims quickly, provide clear itemized estimates, and consult agents about policy limits, exclusions, and preferred contractors.
Real-World Scenarios and Practical Checklists
The section presents concise, actionable checklists and common scenarios to help readers respond quickly during a freeze.
It outlines a homeowner’s step-by-step checklist, clarifies landlord and tenant responsibilities for a frozen drain in rental properties, and provides an emergency winterization checklist for unattended vacation homes.
Each item focuses on practical actions, safety priorities, and when to call a professional.
Quick checklist for homeowners to follow during a freeze event
One clear checklist helps homeowners act quickly and safely during a freeze event to prevent or mitigate frozen drain pipes.
Follow concise steps to reduce risk and restore flow:
- Open faucets and locate cold spots.
- Apply gentle heat to accessible pipes.
- Insulate exposed piping and seal drafts.
- Monitor for leaks and call a plumber if swelling or persistent blockage occurs.
Scenario: Frozen drain in rental property landlord vs. tenant responsibilities
Address responsibility clearly when a drain freezes in a rental property: landlords are generally accountable for maintaining plumbing and remedying defects that predate a tenancy or stem from inadequate maintenance.
Tenants must take reasonable steps to prevent damage, such as keeping heat on and reporting issues promptly.
Lease terms, local laws, and documented communication determine who arranges emergency thawing, covers repairs, and handles temporary relocation if necessary.
Scenario: Vacation home left unheated emergency winterization checklist
When a rental property discussion shifts from landlord–tenant thawing responsibilities to a vacation home left unheated, priorities change toward preemptive winterization and an emergency checklist for remote owners.
The owner arranges remote monitoring, drains systems, and secures heating backups.
Suggested actions:
- Shut off and drain water main.
- Insulate exposed pipes.
- Install smart temperature sensors.
- Arrange local emergency contacts for thawing.
Final Safety Reminders and Recommended Next Steps
After thawing, the homeowner should inspect joints and fixtures for leaks and run water through affected drains to confirm full flow.
A simple seasonal maintenance schedule—insulating vulnerable pipes, checking heat tapes, and clearing gutters—can greatly reduce future freezing risk.
If damage or uncertainty remains, contact a licensed plumber and consult reputable guides or local utility resources for further instruction.
Immediate actions after thawing to ensure system integrity
Inspect the thawed pipes and surrounding fixtures immediately to confirm there are no leaks, weakened joints, or residual ice that could refreeze.
A careful visual check combined with a gentle run of water through each line will reveal pressure loss, slow drains, or moisture that indicate damage.
Document any issues, tighten loose fittings, isolate and repair compromised sections, and monitor flow and temperature for several hours.
Seasonal maintenance schedule to reduce future risk
To minimize the likelihood of future freezes and associated damage, establish a seasonal maintenance schedule that targets inspection, insulation, and system testing at regular intervals—ideally before the onset of cold weather and again mid-winter.
- Inspect exposed pipes and joints for wear.
- Add or replace insulation and heat tape.
- Test shutoff valves and emergency access.
- Clear outdoor drains and check grading.
Resources for professional help and further learning
With a seasonal maintenance routine in place, homeowners can next identify professional resources and learning materials to handle complex freezes or to improve their preventive skills.
Recommended steps and contacts include:
- Licensed plumber for emergency thawing and repairs.
- HVAC/insulation contractor for heat tracing and insulation upgrades.
- Local building department for code guidance and permits.
- Accredited courses and manufacturer guides for safe techniques and tools.
Conclusion
Thawing frozen drain pipes quickly and safely reduces immediate burst risk and restores use. Even worried homeowners who lack plumbing experience can follow simple, low-risk steps—shut off water, apply controlled heat, and monitor fittings—and then call a pro if unsure. Taking swift, cautious action prevents larger damage; combining immediate thawing with insulation and heat tape provides lasting protection. Act early, prioritize safety, and schedule professional inspection for persistent or complex freezes.