How to Clean a Plunger Properly: Step-by-Step Guide to Sanitize and Deodorize It
To properly clean a plunger after each use, follow these steps to remove waste, bacteria, and odors effectively. Start by wearing gloves for safety. Rinse the plunger under warm water, then scrub it with a mild detergent. Next, soak the cup and shaft in a diluted bleach solution or an EPA-registered disinfectant for the recommended contact time. Rinse thoroughly and let it air-dry upright on a clean surface. If you have accordion, flange, or extendable models, make sure to flush the folds and disinfect any moving parts. For more detailed steps, tool suggestions, and storage tips, continue reading.
Why Properly Cleaning a Plunger Matters
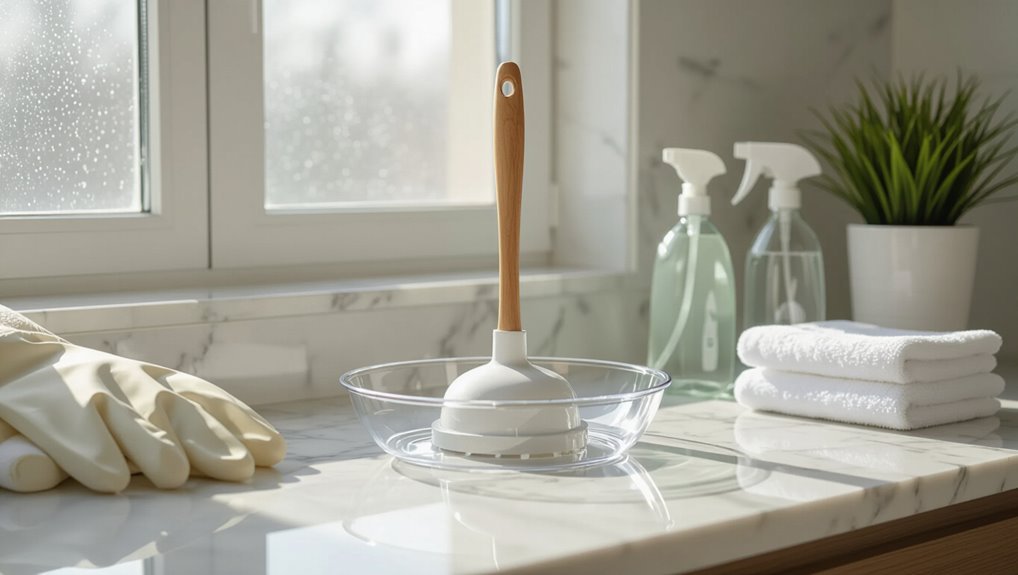
A dirty plunger can harbor bacteria and pathogens that pose health and hygiene risks to household members.
Proper cleaning reduces the chance of cross-contamination between bathroom surfaces and fixtures.
Regular maintenance also helps preserve the rubber and handle, extending the plunger’s useful life.
Health and hygiene risks of a dirty plunger
Because plungers routinely contact contaminated wastewater and fecal matter, they can harbor harmful bacteria, viruses, and parasites that pose real risks to household health.
Contaminated tools may spread pathogens via surfaces, hands, or aerosols. Understanding how to clean a plunger limits infections, odors, and environmental contamination.
Regular sanitizing reduces gastrointestinal, skin, and respiratory risks for occupants and visitors.
Preventing cross-contamination in bathrooms
Preventing cross-contamination in bathrooms requires treating a plunger as a potential vector rather than just a tool, since pathogens transferred from its rubber cup or handle can contaminate sinks, towels, and frequently touched surfaces.
Regular disinfection, designated drying areas, and isolating the plunger from toiletry storage reduce spread.
Gloves and handwashing after use further limit transmission to users and household items.
Extending the life of the plunger
Regular cleaning and proper drying keep a plunger functional longer by preventing rubber degradation, odor buildup, and mechanical wear.
Routine rinsing, disinfecting with diluted bleach or vinegar, and air-drying prevent cracks and microbial growth.
Storing the plunger off the floor and replacing worn seals or handles as needed preserves suction and safety.
Timely maintenance reduces costs and extends usable life.
Quick Answer: Safe and Effective Way to Sanitize a Plunger
The simplest cleaning method uses hot water, dish soap, and a bleach solution to kill germs and remove residue.
It typically takes about 10–15 minutes and requires gloves, a bucket, and a disinfectant.
This approach is safe when performed with ventilation and proper protective steps.
Summary of the simplest cleaning method
Follow a straightforward, two-step process to sanitize a plunger quickly and safely: rinse away debris, then disinfect with a household bleach solution or an EPA-registered disinfectant.
After rinsing, immerse or thoroughly coat the cup and handle, allow contact time per product instructions, then rinse and air-dry upright.
Dispose of gloves and wash hands. Store the plunger in a ventilated holder.
Estimated time and materials required
After rinsing and disinfecting, estimating required time and gathering materials guarantees the process stays quick and effective.
Expect 15–25 minutes total: 5–10 minutes for setup and rinsing, 5–10 minutes for soaking with disinfectant, and 5 minutes for final rinse and drying.
Needed materials: rubber gloves, disinfectant (bleach or hydrogen peroxide), bucket or trash bag, scrub brush, clean water, and paper towels.
Materials and Tools You’ll Need
This section lists the disinfectants, cleaners, and other supplies recommended for safely sanitizing a plunger, including bleach solutions and EPA‑registered bathroom cleaners.
It also outlines essential protective gear and accessories such as gloves, eye protection, and a bucket or hose for rinsing.
Finally, guidance is provided on signs that indicate a plunger should be replaced instead of cleaned, like cracked rubber or persistent odors.
Recommended disinfectants and cleaners
When selecting disinfectants and cleaners for a plunger, prioritize products that combine proven antimicrobial effectiveness with compatibility with rubber and plastic components.
Recommended options include mild bleach solutions, EPA-registered disinfectant sprays, hydrogen peroxide-based cleaners, enzyme-based degreasers for organic residue, and non-abrasive antibacterial detergents.
Confirm dilution follows label instructions and avoid corrosive or solvent-based formulas that can degrade the plunger.
- Mild bleach solution
- EPA-registered disinfectant spray
- Hydrogen peroxide cleaner
- Enzyme-based degreaser
- Non-abrasive antibacterial detergent
Protective gear and accessories
A few basic items protect the cleaner and preserve the plunger during sanitizing: chemical-resistant gloves, eye protection, a disposable mask, absorbent towels or disposable rags, a bucket or basin, and a scrubbing brush with soft-to-medium bristles suited for rubber.
These accessories enable safe, effective cleaning while minimizing damage and contamination.
- Gloves (chemical-resistant)
- Safety glasses
- Disposable mask
- Bucket or basin
- Soft-medium scrubbing brush
When to replace rather than clean a plunger
After listing protective gear and cleaning tools, attention shifts to recognizing when replacement is safer than salvage.
A plunger should be replaced if the rubber cup is cracked, warped, permanently stained, or emits persistent odors after disinfection.
Wooden handles that splinter or show rot, loose fittings, or chronic mold indicate disposal.
Frequent heavy use also warrants periodic replacement for hygiene and effectiveness.
Step-by-Step Cleaning Process
The step-by-step cleaning process begins with simple preparatory measures to protect hands and contain splashes.
It then outlines a basic rinse in a sink or tub, followed by a deep-disinfection option using bleach or EPA-approved products and eco-friendly alternatives for those who prefer them.
Finally, proper drying and storage practices are covered to prevent odor and contamination.
Preparatory steps before cleaning the plunger
Before any scrubbing begins, gather protective gloves, eye protection, a bucket, disinfectant, and access to running water to minimize contamination and streamline the process.
Inspect the plunger for damage, remove excess debris with disposable paper towels, and seal waste in a plastic bag.
Choose a well-ventilated area, lay down newspapers or disposable liners, and ready tools for safe, efficient cleaning.
Basic in-sink or tub rinse method
With protective gear on and debris removed, attention shifts to the basic in-sink or tub rinse method for cleaning the plunger.
Rinse the cup under warm running water, agitating to dislodge residue. Use a mild detergent on a scrub brush to clean all surfaces, then rinse thoroughly.
Allow excess water to drain and air-dry the plunger upright on a washable surface.
Deep-disinfection method using bleach or EPA-approved products
Begin by preparing a well-ventilated area and gathering bleach or an EPA-registered disinfectant, a nonmetallic bucket or container large enough to submerge the plunger cup, protective gloves and eye protection, and measuring tools for accurate dilution.
Mix disinfectant per label, submerge cup and handle, soak for recommended contact time, agitate briefly, rinse thoroughly with clean water, and air-dry on a clean surface.
Alternative eco-friendly sanitizing options
Several practical, eco-friendly alternatives can sanitize a plunger effectively without harsh chemicals.
Vinegar or hydrogen peroxide diluted with water and a short soak neutralize many microbes.
Baking soda paste removes residues and odors when scrubbed.
Steam cleaning or boiling water (rubber-tolerant plungers only) disinfects without residues.
Allow adequate contact time and rinse thoroughly after treatment.
Drying and storing the plunger properly
After rinsing and sanitizing, the plunger must be dried and stored to prevent mold, odors, and damage.
Air-dry the rubber and handle outdoors or in a well-ventilated area, upside down on a disinfected rack to drain.
Once fully dry, store in a ventilated container or hanging holder away from living spaces and heat sources.
Check periodically for deterioration and replace if cracked.
Special Instructions for Different Plunger Types
Cleaning methods should be adjusted to the plunger style, since cup plungers, flange plungers, accordion and bell-shaped models, and extendable-handle or industrial plungers have different materials and crevices.
Rinse and disinfect cup and flange plungers with a bleach solution, while accordion and bell-shaped heads require careful flushing of internal folds to remove trapped residue.
For extendable or industrial plungers, focus on disinfecting the shaft and mechanism in addition to the head, and allow all parts to air-dry fully before storage.
Cup plungers (standard sink/toilet)
Cup plungers, the common bell-shaped models used on sinks and toilets, require different care than flange or accordion types because their rubber cup and straight handle design expose fewer crevices but still trap waste and bacteria along the rim and inside the cup.
Rinse immediately, scrub cup interior and rim with brush and detergent, disinfect with bleach solution, air-dry inverted, and store away from food areas.
Flange plungers (toilet-specific)
Because flange plungers have an extended rubber flange designed to seal the toilet drain, they require targeted cleaning of the fold and inner collar where waste and moisture collect.
Wear gloves, rinse off solids, then soak the flange and collar in a diluted bleach or disinfectant solution.
Scrub creases with a soft brush, rinse thoroughly, air-dry upright, and store separately from other cleaning tools.
Accordion and bell-shaped plungers
Handle accordion and bell-shaped plungers carefully, as their multiple folds and flexible edges trap debris and moisture in different ways than simple flange models.
Disassemble any removable parts. Rinse thoroughly, using a narrow brush to clean folds and crevices.
Soak in diluted bleach or disinfectant per label instructions, then rinse and air-dry upside down.
Inspect seals before storage to prevent mold and odors.
Extendable-handle and industrial plungers
When preparing extendable-handle and industrial plungers for cleaning, attention to telescoping joints, heavy-duty seals, and attachment points is essential.
Inspect for corrosion or trapped debris, retract and lock mechanisms, and protect seals before soaking.
Use diluted disinfectant, a stiff brush for threads, and compressed air to dry joints.
Re-lubricate moving parts with a water-resistant lubricant and reassemble securely.
Common Mistakes and How to Avoid Them
Common errors include using the wrong disinfectant or incorrect dilution, which can render cleaning ineffective or damage materials.
Cleaning in unsafe locations or on surfaces that can be contaminated spreads germs and increases exposure risk.
Failing to dry the plunger properly allows mildew to form and shortens its usable life.
Using the wrong disinfectant or dilution
Choosing an inappropriate disinfectant or incorrect dilution can render cleaning ineffective and damage the plunger’s material.
Harsh bleach at full strength, alkaline cleaners, or undiluted acids can degrade rubber or loosen adhesive parts. Conversely, under-diluted solutions fail to kill pathogens.
Use manufacturer-recommended agents, follow label dilution instructions, and test a small area first to guarantee compatibility and effectiveness.
Cleaning in unsafe locations or contaminating surfaces
Many people clean a plunger in unsuitable areas—bathroom sinks, kitchen counters, or laundry tubs—risking cross-contamination of surfaces and fixtures.
Cleaning should occur in a designated utility area or outdoors, using a bucket and disposable gloves.
Protect nearby surfaces with disposable towels, seal and dispose rinse water appropriately, and disinfect any accidental splashes immediately to prevent pathogen spread and lingering odors.
Improper drying leading to mildew
After cleaning in a protected area and properly disposing of rinse water, attention must turn to drying: a plunger left damp or stored inside a closed, humid space will quickly develop mildew.
To prevent this, the plunger should be shaken free of excess water, placed on a ventilated rack or hung with the cup facing down, and stored in a dry, airy location.
Safety Precautions and Protective Measures
When cleaning a plunger, the user should handle bleach and other chemical disinfectants with care, following label instructions and avoiding mixing products.
Adequate ventilation and appropriate PPE—such as gloves and eye protection—reduce inhalation and contact risks.
Contaminated rinse water and cleaning solutions should be disposed of safely according to local guidelines to prevent contamination.
Handling bleach and chemical disinfectants safely
Treat bleach and chemical disinfectants with caution, using only the concentration and contact time recommended for the task.
Store chemicals upright in labeled containers, away from food and children.
Never mix bleach with ammonia or acids.
Rinse tools after disinfection to remove residues.
Dispose of unused solutions per label instructions.
Report spills promptly and follow local disposal regulations to prevent environmental harm.
Proper ventilation and PPE recommendations
Although the task is routine, proper ventilation and personal protective equipment (PPE) are essential to minimize inhalation and contact risks when cleaning a plunger.
Work in a well-ventilated area or open windows; use an exhaust fan if available.
Wear chemical-resistant gloves, eye protection, and a mask if splashing or fumes occur.
Remove PPE carefully and wash hands afterward.
Safe disposal of contaminated water and rinse solution
A small amount of contaminated water and rinse solution must be disposed of in a way that prevents pathogen spread and environmental harm.
The user should pour diluted bleach or disinfectant solution into the toilet; flush to send contaminants to wastewater treatment.
For larger volumes, contact local hazardous-waste guidelines. Avoid draining into storm sewers, soil, or surface water.
Wear gloves and wash hands afterward.
Maintenance Tips to Keep a Plunger Fresh Between Uses
A few simple maintenance steps can keep a plunger sanitary and ready between uses. A quick rinse and brief disinfectant soak after each use, occasional deodorizing with baking soda or vinegar, and storing the tool in a ventilated holder or on a drip tray all reduce bacteria and odors.
Implementing these habits minimizes contamination and extends the plunger’s usable life.
Quick rinse routines after each use
Several simple steps will keep a plunger sanitary between uses: immediately rinse off solids and residue with hot water, briefly scrub the rubber cup with a nonabrasive brush or disposable cloth, and shake off excess water before storing.
Allow the plunger to air-dry upright on a drip tray, inspect the handle and seal for buildup, and replace damaged parts promptly to maintain hygiene and function.
Deodorizing tricks to neutralize odors
When lingering odors persist despite routine rinsing, targeted deodorizing keeps a plunger smelling neutral and prevents odor transfer to storage areas.
Recommended techniques include sprinkling baking soda on the cup, using a diluted white vinegar spray, or briefly soaking in a mild enzymatic cleaner.
Allow thorough air drying in a well-ventilated spot; repeat treatments weekly or after foul exposures to maintain freshness.
Storage solutions to reduce contamination
Many households benefit from dedicated storage that isolates the plunger from other cleaning tools and living spaces.
A vented plastic holder or wall-mounted bracket keeps the head elevated to drain and air-dry, reducing odor and bacterial growth.
Store in a utility closet or under-sink caddy away from food and towels.
Clean and dry the holder regularly to maintain hygiene.
Signs It’s Time to Replace Your Plunger
Visible structural damage such as cracks, splits, or a noticeable loss of suction indicates the plunger no longer functions effectively.
Stubborn odors or permanent staining that cleaning cannot remove suggest the material has degraded and may harbor bacteria.
When repair or cleaning offers diminishing returns, weighing the modest cost of a new plunger against ongoing performance and hygiene concerns is sensible.
Structural damage, cracks, or loss of suction
Inspect the plunger for structural damage, such as cracks in the rubber cup, splits in the wooden or plastic handle, or any deformities that compromise its shape.
Cracks, hardened or warped rubber, and loose connections reduce suction and can cause leaks or breakage during use.
If the cup fails to seal or the handle flexes excessively, replacement is recommended to guarantee effective, safe plunging.
Persistent odors or staining that won’t come out
Persistent, embedded odors or staining that resist thorough cleaning indicate the plunger has absorbed contaminants beyond surface level.
Such persistent discoloration or foul smells can signal material degradation or bacterial buildup inaccessible to sanitizers.
When repeated deep cleaning, bleaching, and drying fail to restore a neutral appearance or odor, replacement is recommended to prevent ongoing hygiene and odor issues.
Cost vs. benefit of replacing
Weighing the cost versus the benefit of replacing a plunger involves comparing the price and inconvenience of a new unit against the risks and diminished performance of continued use.
If a plunger shows material cracks, hardened rubber, lost suction, or irreversible contamination, replacement typically provides better hygiene, effectiveness, and long-term value than repeated attempts at repair or deep cleaning.
Budget a modest replacement when safety and performance decline.
Comparison of Disinfectants and Sanitizing Methods
A concise comparison of common disinfectants and sanitizing methods helps determine the best option for cleaning a plunger based on effectiveness, safety, cost, and environmental impact. The following table summarizes key trade-offs to guide a practical choice. Readers can weigh these factors against personal priorities such as household safety and sustainability.
| Method | Notes |
|---|---|
| Bleach solution | Highly effective against pathogens; corrosive and emits fumes. |
| Hydrogen peroxide | Effective with lower fumes; less corrosive but can be pricier. |
| Vinegar (acetic acid) | Mild, inexpensive, and eco-friendly; less effective against some viruses/bacteria. |
| Alcohol (70% isopropyl) | Rapid action and low residue; flammable and can be costly. |
| Steam or hot water | Chemical-free and eco-friendly; effectiveness depends on temperature and contact time. |
Effectiveness, safety, cost, and environmental impact
Numerous disinfectants and sanitizing methods offer varying balances of effectiveness, safety, cost, and environmental impact, so selecting one for plunger cleaning requires comparing those trade-offs directly.
Bleach is highly effective and cheap but hazardous and pollutant; hydrogen peroxide is safer yet costlier; vinegar is low-toxicity and eco-friendlier but less potent; steam or boiling water avoids chemicals but uses energy and may damage rubber.
Troubleshooting: Stains, Odors, and Residue After Cleaning
Stubborn stains on rubber or plastic may require targeted scrubbing with a soft brush and a mild abrasive or a diluted bleach solution, taking care not to damage the material.
Lingering chemical odors can often be neutralized by airing the plunger, rinsing thoroughly, and using baking soda or white vinegar before final drying.
If stains, persistent smells, or degraded material remain after these steps, professional cleaning or safe disposal should be considered.
Removing stubborn stains from rubber and plastic
When discoloration or set-in marks persist on a plunger’s rubber or plastic components after routine cleaning, targeted treatments restore appearance and prevent lingering odors.
Gentle abrasion with a soft brush and baking soda paste lifts surface stains, while diluted hydrogen peroxide or isopropyl alcohol removes organic residue.
Rinse thoroughly, air-dry, and inspect.
Repeat cautiously to avoid degrading rubber; replace the plunger if damage appears.
Eliminating residual chemical smells
Neutralize lingering chemical odors by airing and rinsing the plunger immediately after cleaning to prevent trapped vapors from concentrating in rubber creases.
If smell persists, soak in a baking soda and water solution for 30 minutes, then rinse thoroughly. Allow full air-dry in sunlight if possible.
Repeat mild vinegar rinse to neutralize alkaline residues; avoid mixing chemicals and ventilate the area.
When to seek professional cleaning or disposal
If lingering stains, persistent odors, or embedded residue remain after the steps above, professional cleaning or disposal should be considered.
A restoration or biohazard service can assess material degradation, bacterial contamination, or chemical absorption.
Replace heavily damaged plungers or those used with hazardous substances. Retain proof of disposal when required.
Cost versus replacement, safety, and local regulations guide the decision.
Quick Reference: Cleaning Checklist and Timetable
A concise checklist and timetable provides a step-by-step plan for cleaning a plunger safely and efficiently, listing materials, actions, contact time for disinfectants, and recommended frequency.
A detached, practical schedule outlines immediate rinse, disinfectant soak, scrub, rinse, and dry steps with specific contact times and weekly or after-use frequencies.
- Prepare PPE and disinfectant
- Rinse and remove debris
- Soak (e.g., 10 minutes)
- Scrub and rinse thoroughly
- Air-dry and store properly
Conclusion
Proper cleaning keeps a plunger hygienic and ready for duty, like a polished tool on a craftsman’s bench. After following the outlined steps—protective gear, hot water rinse, disinfectant soak, scrubbing, thorough drying—contamination risks shrink and odors fade. Different plungers may need tailored care, and replacement is advisable when rubber cracks or deformities appear. Regular maintenance preserves effectiveness, safeguards household health, and makes unforeseen clogs less of a chore.