How to Install a Coupler on a Bathtub Faucet: Step-by-Step DIY Guide
To install a coupler on a bathtub faucet, follow these steps: First, turn off the water supply to prevent leaks. Next, remove any trim around the faucet to access the coupler. Clean the mating surfaces thoroughly to ensure a proper seal. Choose the right type of coupler—compression, threaded, or push-fit—based on your setup. Apply PTFE tape or compound to the threads for a watertight seal. Hand-thread the coupler, align it properly, and then tighten it to the specified torque using a wrench. Replace the trim and test for leaks by running both hot and cold water. For detailed troubleshooting tips, continue reading.
What a Bathtub Faucet Coupler Is and Why It Matters
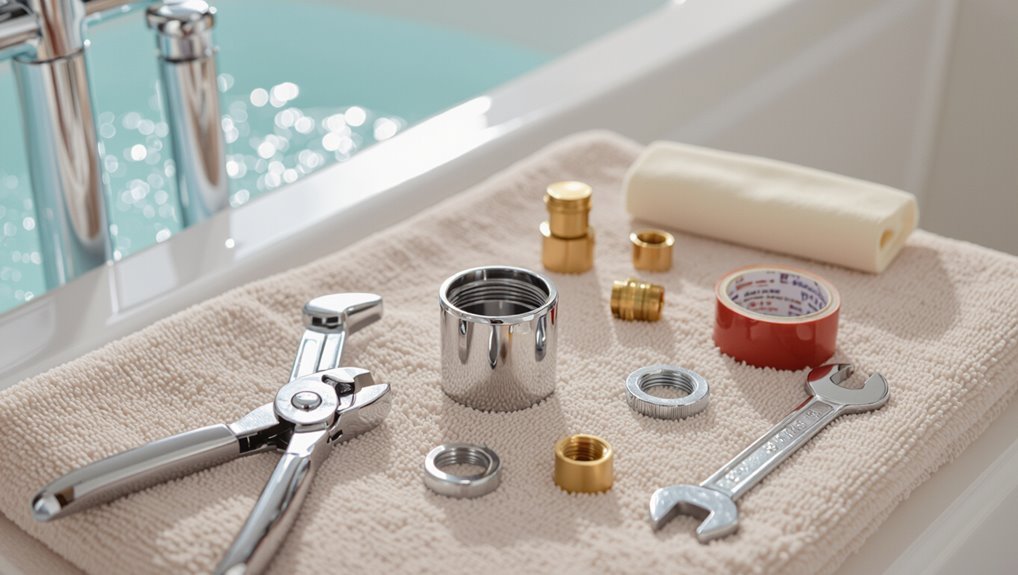
A bathtub faucet coupler is a small fitting that connects the faucet to the water supply or to a shower diverter, allowing flow control and a watertight seal.
Common coupler types include threaded, compression, and push-fit varieties, each suited to different pipe materials and installation methods.
Signs that a coupler needs installation or replacement include leaks at the joint, reduced water pressure, or visible corrosion and wear.
Definition and function of a coupler in bathtub plumbing
In bathtub plumbing, a coupler is a short fitting that joins two sections of piping or connects the faucet assembly to the supply line, providing a sealed pathway for water flow.
It stabilizes alignment, prevents leaks, and allows component replacement without extensive rework.
Understanding this fitting is central to how to install a coupler on bathtub faucet and to guarantee reliable, watertight connections.
Common types of couplers for tub faucets
Following the overview of a coupler’s role in joining piping and preventing leaks, the discussion now turns to the common types of couplers used with bathtub faucets and how they differ in form and function.
Typical options include compression couplers for copper or PEX, threaded brass adapters for mixed-metal connections, push-fit quick-connects for tool-free installs, and soldered or sweat couplers for permanent joins.
Signs that you need to install or replace a coupler
When should a homeowner consider installing or replacing a coupler on a bathtub faucet?
Visible leaks at joints, persistent dripping despite cartridge replacement, reduced water flow, loose or wobbly spout, corrosion or mineral buildup around the coupler area, and incompatible or damaged connections after fixture upgrades.
These signs indicate coupling failure or mismatch and justify inspection and replacement to restore function and prevent water damage.
Tools and Materials Required
The following section lists the essential tools—adjustable wrench, Phillips and flathead screwdrivers, plumber’s tape, and pliers—needed to install a bathtub faucet coupler.
It also identifies recommended materials and replacement parts such as a compatible coupler, O-rings, replacement cartridges, and thread sealant.
Safety equipment and preparatory steps, including shutting off water, wearing eye protection, and laying down towels to protect the tub, are summarized before beginning work.
Essential tools list
A compact kit of the right tools makes installing a coupler on a bathtub faucet straightforward and reduces the risk of damage.
The installer should prepare precise, durable tools to guarantee correct alignment and secure fittings without harming fixtures.
- Adjustable wrench (smooth-jaw or strap)
- Slip-joint pliers with padding
- Phillips and flathead screwdriver set
Recommended materials and replacement parts
Alongside the compact tool kit, a curated set of materials and replacement parts guarantees the coupler installation proceeds smoothly and creates a watertight, long-lasting connection.
- PTFE tape, quality grade, for threaded seals
- Brass or stainless coupler matching faucet threads and pipe size
- Compression rings and replacement O-rings sized to the existing fixture
Safety equipment and preparation steps
Several essential safety items and preparatory steps secure a safe, efficient coupler installation on a bathtub faucet: Protective gloves, safety glasses, and non-slip footwear protect the installer; a shutoff valve and bucket control water; workspace lighting and ventilation guarantee visibility and comfort.
- Turn off water supply and drain lines.
- Gather hand tools and replacement parts.
- Clear and clean the workspace before starting.
Preparing the Work Area and Turning Off Water
Before beginning, the technician locates and shuts off the correct water supply—either the local shutoff valves or the main supply—to prevent accidental flow.
Any residual water is drained from the lines and the tub area is protected with towels or a drop cloth to catch spills.
Faucet handles and trim are removed carefully with the proper tools to avoid scratching or bending components.
How to locate and shut off the correct water supply
Begin by identifying which valves control the bathtub’s hot and cold lines—typically the shutoffs under the sink, behind an access panel, or the house’s main water valve—and confirm which serves the tub by tracing pipes or feeling for warm/cold flow.
Close the appropriate valves firmly, then test nearby fixtures to verify flow has stopped.
Label valves if needed for future work.
Draining residual water and protecting the tub area
Drain the remaining water from the bathtub and adjacent lines to prevent spills and minimize pressure when working on the coupler.
Use a bucket and towels to catch runoff, open faucets briefly to clear lines, then plug the drain to stop debris.
Lay down waterproof drop cloths and silicone-safe tape around the tub edge to protect surfaces from scratches and stains.
Removing faucet handles and trim without damage
Turn off the main water supply and open the faucet briefly to relieve any trapped pressure. Then close the valves and lay out tools and protective coverings so the work area stays organized.
Remove decorative caps, unscrew handles using the correct screwdriver or hex key, and gently pry trim with a plastic tool to avoid scratching.
Label parts and store screws in a container for reassembly.
Identifying Your Existing Faucet and Coupler Type
The technician inspects the valve cartridge and coupler connection to determine how components fit and where seals contact.
Measurements of fittings and an assessment of thread types are recorded to match replacement parts accurately.
A decision is then made whether existing parts are sound for reuse or whether full replacement is required.
How to inspect the valve cartridge and coupler connection
Begin by visually evaluating the faucet assembly to determine the valve cartridge and coupler type before disassembly.
Inspect visible cartridge shape, retaining clip or bonnet nut, and coupler attachment method. Note corrosion, mineral buildup, and damaged seals.
Gently wiggle the coupler to check for play or looseness.
Photograph connections for reference and safety, and record any part markings for replacement.
Measuring fittings and noting thread types
After documenting the cartridge and coupler condition, attention shifts to measuring fittings and identifying thread types to guarantee correct replacements.
Measure outer diameter with calipers, count threads per inch or millimeter, and note pitch direction.
Record whether threads are male or female, tapered (NPT) or straight (BSP/metric), and any flange or compression features.
Photograph fittings for reference when sourcing parts.
When to reuse existing parts vs. replace entirely
A careful assessment determines whether components can be reused or must be replaced. The inspector compares materials, thread condition, corrosion, and wear against manufacturer specs.
If threads are intact, seals pliable, and materials match the new coupler, reuse is acceptable.
Replace when corrosion, stripped threads, persistent leaks, or mismatched standards (metric vs. imperial) compromise fit or longevity.
Step-by-Step Coupler Installation
The installer begins by removing the old coupler and thoroughly cleaning the mating surfaces to guarantee a proper seal.
Next, the new coupler is prepared with thread tape or sealant as required, aligned, and hand‑threaded into place before being tightened to the specified torque without over‑tightening.
Finally, the faucet trim and handles are reassembled and the installation is checked for leaks.
Step 1: Remove the old coupler and clean mating surfaces
Begin by cutting off water supply lines and opening the faucet to relieve any residual pressure.
The technician loosens retaining nuts or set screws, removes the old coupler, and inspects threads and flats.
Corrosion, sealant residue, and debris are scraped or brushed away with a wire brush and solvent.
Surfaces are dried and rechecked for nicks or damage before proceeding.
Step 2: Prepare new coupler (apply tape/sealant as needed)
Prepare the new coupler by inspecting its threads and seating surfaces for manufacturing debris, burrs, or damage.
Then choose the appropriate sealant—PTFE tape for tapered pipe threads or a compatible pipe thread compound for straight threads—and apply it uniformly.
Ensure tape is wrapped clockwise (as viewed from the mating end) in two to three snug turns or that compound is thinly and evenly coated to avoid excess that could contaminate the valve.
After sealing, wipe any residue and verify threads remain clean and undamaged before proceeding.
Step 3: Align and hand-thread the coupler into place
Align the coupler squarely with the faucet inlet, ensuring threads meet straight and the seating surfaces are flush to prevent cross-threading.
With light, steady pressure, rotate the coupler clockwise by hand until initial engagement is secure.
Confirm alignment visually and by feel; the coupler should advance smoothly without resistance.
Stop when hand threads are fully engaged and the part sits evenly against the mating surface.
Step 4: Tighten to specification without over-torquing
With hand threads fully engaged and the coupler seated evenly, the next step is to tighten it to the manufacturer’s torque specification while avoiding over-torquing.
Use a calibrated torque wrench or adjustable tool set to the specified value. Apply steady, even force; stop as soon as the wrench clicks.
Inspect for proper seating and slight thread exposure; do not exceed the specified torque.
Step 5: Reassemble faucet trim and handles
Begin by reinstalling the trim plate and handles in the reverse order of removal, ensuring each part seats squarely and screw holes line up before tightening.
Align decorative escutcheons, position cartridges or stems, and hand-thread mounting screws.
Use a screwdriver to snug fasteners evenly; avoid over-tightening.
Reattach trim caps and handle set screws, confirming smooth operation and correct alignment before proceeding.
Step 6: Restore water and test for leaks
After the trim and handles are reinstalled and secured, water can be turned back on to check the coupler and connections for leaks.
Open the main supply slowly, then operate the faucet and diverter through hot and cold cycles.
Inspect all joints and the coupler for drips.
If any leak appears, shut off water, tighten fittings or replace seals, then retest until dry.
Troubleshooting Common Problems During Installation
Common installation issues include leaks at the coupler connection, cross-threading, seized or corroded couplers, and mismatched sizes or fittings.
Each problem requires specific corrective steps, from resealing or retapping threads to using penetrating oil or proper adapters.
The following section outlines diagnosis and practical solutions for these common faults.
Leaks at the coupler connection and how to fix them
Leaks at the coupler connection typically manifest as slow drips or steady streams where the coupler meets the faucet body or supply line; these failures most often result from improper seating, worn seals, or insufficient thread sealant.
To fix, shut off water, disassemble the joint, inspect and replace O-rings or gaskets, clean mating surfaces, apply fresh plumber’s tape or liquid sealant, then reassemble and test under pressure.
Cross-threading and corrective steps
Inspect the threads carefully before starting to avoid cross-threading, a misalignment that can strip threads, damage sealing surfaces, and prevent a watertight connection.
If resistance occurs, stop, back off, and realign by hand. Clean debris and inspect for burrs; use a thread chaser or file lightly if damaged.
Reapply plumber’s tape and hand-start before final tightening with proper tools to guarantee correct engagement.
Stuck or corroded couplers and removal techniques
When a coupler is seized by corrosion or mineral buildup, removal requires patience and the right tools to avoid further damage to the faucet assembly.
Apply penetrating oil, let it soak, then use appropriate-size wrenches or strap pliers. Tap gently with a mallet to break corrosion bonds.
If unsuccessful, heat the area cautiously or cut the coupler, protecting surrounding finishes and plumbing.
Handling mismatched sizes or fittings
If corrosion or seized fittings have been freed without damaging adjacent parts, the installer next encounters a different common obstacle: mismatched sizes or incompatible fittings.
Assess thread type and diameter, measure with calipers, and compare to replacement coupler. Use adapters or union fittings rated for plumbing if necessary.
When uncertainty persists, consult manufacturer specs or a plumbing supplier to avoid leaks and pressure issues.
Best Practices and Tips for a Durable Installation
For a long-lasting coupler installation, select corrosion-resistant materials and apply appropriate sealants, PTFE tape, or thread compounds to threaded connections.
Adhere to recommended torque specifications to secure fittings without over-tightening.
If fittings are corroded, misaligned, or leaks persist despite correct technique, consult a professional plumber.
Choosing corrosion-resistant materials
Several key material choices markedly extend the lifespan of a bathtub coupler assembly by resisting electrochemical and mechanical degradation.
Prefer stainless steel (316) or brass with proper plating for bodies and fittings. Use dezincification-resistant alloys where water chemistry is aggressive.
Choose corrosion-resistant fasteners and washers (stainless or polymer).
Avoid mixed metals without dielectric breaks to prevent galvanic corrosion and premature failure.
Proper use of sealants, PTFE tape, and thread compounds
Apply appropriate sealants and thread compounds with care to guarantee leak-free, long-lasting coupler connections.
Use PTFE tape on tapered threads, wrapping clockwise three to five times, smoothing edges to prevent shredding.
For metal-to-metal or parallel threads, select a compatible pipe dope.
Avoid excess compound that can contaminate cartridges.
Allow curing per manufacturer instructions and clean mating surfaces before application.
Torque guidelines and avoiding over-tightening
Any installer should follow specific torque guidelines and resist the urge to over-tighten coupler fittings to prevent thread damage, gasket distortion, and premature leaks.
Use a calibrated torque wrench when specified, tighten to manufacturer torque values, and apply incremental turns. Stop when resistance increases noticeably.
Inspect seals and test under pressure; back off slightly if leaks appear. Over-torquing ruins fittings and voids warranties.
When to call a professional plumber
When should a professional plumber be called? A professional should be contacted for persistent leaks, damaged or corroded pipes, unclear valve configurations, water pressure anomalies, or if soldering or pipe replacement is required.
Call also when local code compliance, complex fittings, or concealed access panels are involved.
Safety concerns, lack of tools, or uncertain diagnosis justify hiring a licensed plumber for reliable, durable results.
Comparison of Popular Coupler Types and Materials
A concise comparison highlights how material and connection type affect performance and installation choices for bathtub faucet couplers. Brass, stainless steel, and plastic differ in durability, cost, and typical use cases, while compression, threaded, and slip-on connections vary in ease of install and long-term reliability. The following table summarizes key attributes to guide selection.
| Feature / Type | Materials (Brass / Stainless / Plastic) | Connection (Compression / Threaded / Slip-on) |
|---|---|---|
| Durability | High / Very high / Moderate | Moderate / High / Low |
| Cost | Medium / High / Low | Low / Medium / Low |
| Typical use case | Residential repairs / Corrosive environments / Temporary or low-cost | Retrofit / Permanent fixtures / Quick, temporary joins |
| Ease of installation | Moderate / Moderate / Easy | Easy / Moderate / Easiest |
| Reliability over time | Very good / Excellent / Variable | Good / Very good / Less reliable |
Brass vs stainless steel vs plastic couplers (durability, cost, use cases)
Choosing the right coupler material—brass, stainless steel, or plastic—depends on the balance of durability, cost, and application.
Brass offers excellent corrosion resistance, machinability, and longevity at moderate cost, ideal for frequent use.
Stainless steel is pricier but provides superior strength and corrosion resistance in harsh or salty environments.
Plastic is inexpensive and corrosion-proof but less durable, best for low-pressure or temporary setups.
Compression vs threaded vs slip-on connections (ease of install, reliability)
Beyond material choice, the method of joining a coupler to the faucet influences installation time, leak resistance, and long-term reliability.
Compression fittings are straightforward, require minimal tools, and seal well if tightened properly but can loosen over time.
Threaded connections offer strong, reusable joints but need tape or sealant and careful alignment.
Slip-on (push-fit) is fastest and user-friendly but may be less durable under high stress.
Preventive Maintenance After Installation
After installation, routine inspections of the coupler and surrounding seals help guarantee leak-free performance and identify mineral buildup early.
The homeowner should watch for signs of wear such as corrosion, cracking, loosening, or reduced water flow that may indicate the need for repair or replacement.
Seasonal checks and attention to local water quality—flushing, descaling, or replacing sacrificial components as needed—will extend the coupler’s service life.
How to inspect and maintain the coupler periodically
Establishing a regular inspection routine guarantees the coupler remains secure and leak-free over time.
Inspect connections monthly, tighten fittings with the correct tool, and verify seals and washers sit properly.
Run water to confirm proper flow and check for minor drips.
Clean accessible surfaces to prevent buildup, and document maintenance actions and dates to track performance and schedule replacements as needed.
Signs of wear to watch for over time
Monitor the coupler for early signs of deterioration to prevent leaks and failures.
Look for visible corrosion, hairline cracks in metal or plastic, loose or stripped threads, and persistent mineral buildup that resists cleaning.
Note decreased water pressure, intermittent dripping after shutoff, or movement at joints.
Record findings and schedule prompt repairs or part replacement to avoid more extensive damage.
Seasonal or water-quality related maintenance tips
Regular seasonal checks and water-quality inspections help preserve coupler function and extend service life.
Inspect for mineral buildup, corrosion, and loosened fittings every three months; flush lines after winter stagnation.
Test water hardness and install a softener or inline filter if scaling recurs.
Replace washers and O-rings proactively when deposits appear.
Record maintenance dates and observations for trend tracking.
Resources and Replacement Part Reference
The article outlines how to identify part numbers and verify compatible replacements by comparing stampings, thread sizes, and manufacturer catalogs.
It then notes reputable sources for purchasing quality couplers and related parts, including plumbing supply stores, authorized dealers, and major online retailers.
Finally, it points to helpful online guides and manufacturer manuals for installation specs and troubleshooting.
How to identify part numbers and compatible replacements
Several reliable methods exist for identifying coupler part numbers and matching replacements, starting with visual inspection of stamped or molded identifiers on the coupler body and moving to measurement and model cross-referencing when marks are absent.
Photographs, caliper measurements (diameter, spline count, thread pitch), maker and faucet model records, and OEM cross-reference charts enable precise identification and guarantee functional compatibility.
Where to buy quality couplers and parts
Where can one find reliable couplers and replacement parts? Trusted sources include specialty plumbing stores, OEM distributors, and reputable online retailers.
Selection should match identified part numbers and material specifications; verify return policies and warranties before purchase.
- Local plumbing supply houses with expert staff
- Manufacturer or OEM parts departments
- Established online retailers with verified reviews and clear return terms
Helpful online guides and manufacturer manuals
Because accurate installation depends on exact dimensions and procedures, installers should consult manufacturer manuals and reputable online guides that provide model-specific diagrams, torque values, and part numbers.
These resources reduce error, verify compatibility, and outline safety steps.
Recommended references include:
- Manufacturer installation manual with exploded diagrams and part codes
- OEM replacement part catalogues and torque specs
- Trusted DIY tutorials and factory service bulletins
Conclusion
In a world where dripping faucets provide the soundtrack to domestic despair, the humble bathtub coupler emerges as an unlikely hero. The DIYer, armed with wrench and faux confidence, installs it with all the solemnity of a surgeon and the humility of someone who reads YouTube comments as instruction manuals. Proper tools, patience, and a rubber washer spared from doom guarantee the bath remains a refuge — not a miniature indoor waterfall.