How to Hang a Wall-Mounted Sink: Step-by-Step Guide for DIY Success
To successfully hang a wall-mounted sink, ensure you have sturdy wall reinforcement and proper plumbing alignment. Start by locating studs, then install blocking or a manufacturer bracket. Next, mount hanger bolts or a cleat, level the sink, and attach the supply lines and P-trap. Don’t forget to seal joints, test for leaks, and adjust fasteners as needed. Always adhere to local codes and ADA clearances. For a detailed guide, including tools and troubleshooting tips, read on.
Overview of Wall-Mounted Sinks and When to Choose Them
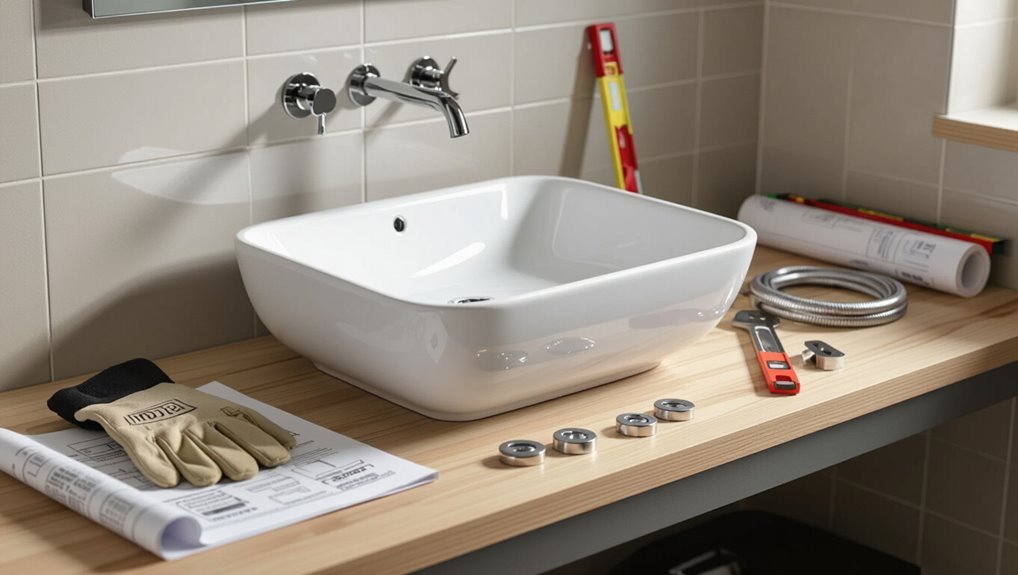
Wall-mounted sinks offer space-saving, streamlined aesthetics and easier floor cleaning, making them a popular choice for small bathrooms and powder rooms.
They are also well-suited to accessible design when mounted at appropriate heights and paired with suitable plumbing.
Selecting one requires attention to sink weight, wall framing or reinforcement, and the location and type of supply and waste plumbing to guarantee a secure, code-compliant installation.
Benefits of wall-mounted sinks
Functionality and space-efficiency make wall-mounted sinks an attractive option for bathrooms where footprint and accessibility matter. They free floor area, simplify cleaning, and create a minimalist aesthetic.
Installation offers flexible height and improved ergonomics; learning how to hang a wall mounted sink empowers customization. Durable materials and concealed plumbing enhance visual simplicity while facilitating maintenance and occasional repairs without large-scale demolition.
Common applications (bathrooms, powder rooms, accessible design)
A slim-profile sink suits a range of settings—bathrooms, powder rooms, and accessible wash areas—where space, circulation, or code-compliance are priorities.
It fits small urban baths, minimalist guest powder rooms, and retrofit accessible designs requiring clear knee space.
Wall-mounted units also enable flexible height placement, simplify cleaning, and support varied aesthetics from utilitarian to high-end, making them a practical, versatile choice.
Weight and plumbing considerations that affect installation
Having noted where slim-profile sinks excel, attention shifts to the structural and plumbing demands that determine suitability.
Wall-mounted sinks require studs or reinforcement to bear 100–300+ pounds; ceramic heavier than resin.
Plumbing access must allow wall-hung trap and shutoff valves; supply and drain alignment dictates mounting height.
Consider load-bearing wall, blocking, and contractor inspection for heavy fixtures or retrofit situations.
Quick checklist: Tools, Materials, and Measurements Needed
A concise checklist outlines the essential tools—such as drill, level, adjustable wrench, and stud finder—required for installation.
It also lists necessary materials and hardware, including mounting brackets, anchors, supply lines, and appropriate sealants.
Clear measuring guidance covers sink height, centerline placement for drain and faucet, and minimum clearance for user comfort and code compliance.
Essential tools list
Essential tools and accurate measurements guarantee the wall-mounted sink is secure, level, and plumb. The technician relies on precise instruments to locate studs, set heights, and align fittings.
Essential items include measuring, cutting, and fastening tools plus leveling devices:
- Stud finder
- Spirit level (torpedo or longer)
- Tape measure and pencil
- Drill with masonry and wood bits
Required materials and hardware
Several specific materials and pieces of hardware are required to install a wall-mounted sink safely and reliably; these items cover mounting support, water and waste connections, and finishing trim.
A concise checklist helps prevent omissions:
- Mounting bracket or rail and heavy-duty anchors
- P-trap and tailpiece
- Shutoff valves and supply lines
- Silicone sealant and escutcheons
Measuring guide: height, centerline, and clearance requirements
One clear measuring plan guarantees the wall-mounted sink is positioned for comfort, plumbing alignment, and building-code compliance.
Measure rim height (standard 32–36 inches), mark centerline from floor and adjacent fixtures, confirm stud locations and anchor points, and check P-trap and supply line offsets.
Allow clearances: 20–30 inches knee space, 15 inches side clearance from centerline to obstruction.
Tools: tape, level, stud finder.
How to Prepare the Wall and Plumbing for Installation
Before any hardware is mounted, the wall structure must be inspected for studs, blocking, and sufficient load capacity to support a wall-mounted sink.
The existing plumbing should be assessed and rough-in locations adjusted as needed for drain and supply alignment.
The chosen mounting location must balance ergonomic height, clearances, and local code requirements.
Inspecting wall structure: studs, blocking, and load capacity
A thorough inspection of the wall structure determines whether studs, blocking, and overall load capacity can safely support a wall‑mounted sink.
The installer locates stud spacing with a detector, verifies timber condition, and measures thickness of sheathing.
If studs are insufficient, install solid blocking between studs or a reinforced backing.
Calculate load capacity including anticipated dynamic forces before fastening mounting hardware.
Assessing existing plumbing and making rough-in adjustments
With the wall structure confirmed to support the sink, attention turns to the plumbing rough-in: locating and evaluating existing supply lines, drain piping, and shutoffs relative to the sink’s mounting height and centerline.
Verify pipe materials, condition, and alignment; measure distances for trap and tailpiece clearance.
Plan necessary reroutes, extensions, or new shutoffs. Ascertain accessible isolation valves and proper slope for drainage.
Choosing mounting location for ergonomics and code compliance
How high and where the sink will sit should balance user ergonomics, fixture specifications, and local code requirements.
Measure standard rim heights (usually 32–36 inches), allow knee clearance for accessible installations, and align water supply and drain rough-ins with bracket locations.
Verify stud positions, mounting hardware ratings, and local setback, trap arm, and venting codes before finalizing placement to avoid rework and guarantee compliance.
Step-by-Step Installation Process
The installer begins by marking mounting points and confirming stud alignment to guarantee the sink will sit level and be fully supported.
Next, internal blocking or mounting brackets are installed and hanger bolts or wall cleats are secured to the structure.
Finally, the sink is set onto the mounts, fastened in place, and the drain and supply lines are connected and tested.
Marking mounting points and verifying stud alignment
Measure and transfer the sink’s mounting template to the wall, ensuring its centerline and rim height match the planned layout.
Locate studs with a reliable stud finder, mark their edges and centerlines, and confirm spacing matches the template’s anchor points.
Check vertical plumb and horizontal level lines.
If studs miss anchor locations, note offsets for alternative anchoring strategies without yet installing brackets.
Installing internal blocking or mounting brackets
With stud locations confirmed and any offsets noted, attention shifts to installing the internal blocking or mounting brackets that will carry the sink’s load.
Install solid blocking between studs at the marked heights or securely fasten metal brackets to studs using appropriate structural screws.
Verify brackets are level, plumb, and flush with finished wall plane.
Reinforce connections and inspect for stability before wall closure.
Attaching hanger bolts or wall cleats to structure
Begin by locating the previously installed blocking or mounting brackets and marking the exact positions for hanger bolts or cleat fasteners based on the sink’s manufacturer template and transfer dimensions from the fixture.
Drill appropriate pilot holes through wall covering into blocking, insert rust-resistant hanger bolts or secure a steel cleat with structural screws or lag bolts, ensuring alignment, level, and full thread engagement.
Setting and securing the sink on the mounts
Lower the sink onto the prepared hanger bolts or cleat, aligning the fixture’s mounting holes or keyways with the fasteners and confirming it seats flush against the wall.
Secure with washers and nuts, tightening evenly to avoid stress.
Check level and adjust shims if needed.
Torque to manufacturer specs, trim exposed bolt threads, and apply a bead of sealant where sink meets wall for a neat, stable installation.
Connecting drain and supply lines
Proceed to connect the drain and water supply lines once the sink is securely mounted and sealed to the wall.
Install the tailpiece and P-trap, aligning with wall drain stub; tighten slip nuts hand‑firm then quarter turn with wrench.
Attach supply flex lines to shutoff valves and faucet, using appropriate adapters and thread sealant where required.
Verify connections are properly seated before proceeding.
Sealing joints and testing for leaks
After mounting and connecting the sink, the installer should seal all exposed joints and test for leaks to guarantee a watertight installation.
Apply plumber’s putty or silicone to faucet bases and trap connections, wipe excess, then tighten fittings.
Turn on water, check supply and drain for drips.
Inspect after several minutes and re-tighten or re-seal any leaks until completely dry.
Alternatives and Variations
Different wall types and substrates—tile, masonry, or concrete—require specific anchors and drilling techniques.
A mounting rail can distribute load more evenly than individual hangers, while individual hangers offer greater adjustability.
Options also include attaching a vanity or shelf to conceal plumbing and add storage without compromising wall support.
Installing on tile, masonry, or concrete walls
When installing a wall-mounted sink on tile, masonry, or concrete, the installer must use anchors and fasteners rated for brittle or dense substrates and adjust techniques to account for limited screw holding power and drilling challenges.
Use carbide masonry bits, hammer drills at proper speed, and epoxy or sleeve anchors sized for load.
Protect tile with masking, avoid overtightening, and verify anchor pullout capacity before final mounting.
Using a mounting rail vs. individual hangers
Choose between a continuous mounting rail and individual hangers based on load distribution, wall conditions, and ease of alignment: a rail spreads the sink’s weight across multiple anchors and simplifies positioning for heavier or longer basins, while individual hangers offer flexibility for irregular walls or retrofit installations where anchor locations must avoid studs or obstructions.
Consider corrosion resistance, anchor type, and future removal access when deciding.
Integrating a vanity or shelf with a wall-mounted sink
Although a wall-mounted sink emphasizes open space, pairing it with a vanity or shelf can add storage and conceal plumbing without undermining the minimalist look.
Choices include floating shelves, slim cabinets, or custom panels that attach beneath the sink. Select moisture-resistant materials, guarantee access panels for plumbing, and confirm wall anchors support combined load.
Maintain clearances for user comfort and cleaning.
Common Problems and How to Fix Them
Common issues that can arise after installing a wall-mounted sink include sagging or loosening over time, leaks at the drain or supply connections, misaligned mounting holes or an uneven sink, and insufficient wall support.
Each problem has specific causes and fixes, from tightening or replacing anchors and fittings to realigning mounts or reinforcing the wall with blocking or a carrier.
The following guidance outlines practical troubleshooting steps and repair options for these situations.
Sink sagging or loosening over time
Sinks mounted to walls can gradually sag or loosen as fasteners shift, anchors deform, or the wall material deteriorates under load.
Inspect mounting bolts, hangers, and anchor plates for corrosion, pull-out, or elongation.
Tighten or replace damaged hardware, upgrade to stronger anchors or a plywood backing between studs, and guarantee load distributes to studs or a reinforced mounting bracket to restore secure support.
Leaks at drain or supply connections
Check for drips around the drain tailpiece, P-trap connections, and supply lines, since most leaks originate at poorly seated fittings, deteriorated washers, or loose compression nuts.
Tighten fittings, replace worn rubber or nylon washers, and reinstall slip nuts with plumber’s tape where appropriate.
Inspect flexible supply hoses for cracks and replace if necessary.
Test with water and retighten minor leaks until dry.
Misaligned mounting holes or uneven sink
Discovering that a wall-mounted sink sits crooked or that its mounting holes don’t line up with the wall studs is a frequent installation snag that can compromise function and appearance.
To correct, verify level with a spirit level, loosen fasteners, shim behind the sink using noncompressible plastic or metal shims, and retighten evenly.
If holes are off, enlarge mounting slots or install a metal mounting bracket to realign attachment points.
Dealing with insufficient wall support
Many wall-mounted sinks fail because the wall behind them lacks adequate backing or the studs are too far apart to carry the load.
The remedy involves installing a plywood or blocking backer between studs, using a steel mounting bracket tied to studs, or relocating to a load-bearing wall.
Confirm weight ratings, fasten with appropriate lag bolts or anchors, and consult a professional for masonry or complex repairs.
Safety, Code, and Accessibility Considerations
Before beginning installation, the author notes that compliance with local building codes and any required permits should be confirmed.
Mounting heights and clearances must consider ADA guidelines to guarantee accessibility for users with disabilities.
Additionally, sink brackets and wall structure should meet specified load ratings, and a qualified professional should be engaged for insufficient structural support or complex installations.
Local code requirements and permits
Local building codes and permit requirements govern the installation of a wall-mounted sink, dictating structural, plumbing, and accessibility standards that must be met before work begins.
Contractors or homeowners should verify local jurisdiction rules, obtain necessary permits, schedule inspections, and guarantee plumbing and load-bearing modifications comply.
Failure to secure permits risks fines, failed inspections, and insurance denial; documentation preserves resale value and safety.
ADA guidelines and recommended mounting heights
Several key ADA requirements govern wall-mounted sink installation, specifying mounting heights, clearances, and knee/toe space to guarantee wheelchair accessibility and safety.
Mount the sink rim or counter surface no higher than 34 inches (864 mm) above the finished floor.
Provide 27 inches (685 mm) minimum knee clearance under the sink and 30 by 48 inches clear floor space for forward approach.
Load ratings and professional help thresholds
After meeting ADA mounting heights and clearances, attention shifts to the structural capacity of the wall assembly and sink fixtures: wall-mounted sinks rely on anchors, carrier frames, or blocking to support static loads and dynamic forces from use.
Verify manufacturer load ratings, factor in user and equipment loads, and engage a licensed structural or plumbing professional when loads exceed rated capacity, wall integrity is uncertain, or local code requires certified installation.
Maintenance, Care, and Long-Term Tips
A simple routine inspection checklist helps identify leaks, loose fasteners, and frame corrosion before problems escalate.
Regular cleaning and periodic sealing of grout and fittings will preserve finishes and prevent water intrusion.
The guide also explains when to tighten or reinforce mounts and when replacement is the safer option.
Routine inspection checklist
Regular inspections help catch small issues before they become costly repairs; a concise checklist guides what to look for and how often.
Inspect mounting bolts and bracket tightness, check for leaks at connections, assess wall and tile integrity, and verify drain and trap function.
Suggested routine:
- Mounting hardware tightness
- Visible leaks or moisture
- Wall/floor damage near sink
- Drain/trap operation
Cleaning and sealing recommendations
Maintain a consistent cleaning and sealing routine to protect the sink, mounting hardware, and surrounding wall from moisture, stains, and mineral buildup.
Use mild, nonabrasive cleaners and soft cloths; avoid acidic or bleach-based products on finishes.
Reseal grout and any exposed caulk annually with appropriate bathroom-grade sealant.
Wipe dry after use to reduce water spots and slow mineral accumulation.
When to tighten, reinforce, or replace mounts
Inspect the sink mounts periodically and after any unusual stress (heavy impact, shifting tile, or plumbing work) to determine whether tightening, reinforcement, or replacement is required.
Tighten loose bolts immediately.
Reinforce if minor movement persists: add backing, longer anchors, or a support bracket.
Replace mounts showing corrosion, cracks, stripped threads, or repeated failure.
Test load-bearing stability before regular use.
Cost Estimates and Timeframe
Typical DIY cost components—sink, brackets, fasteners, plumbing fittings, and sealants—are briefly outlined to give readers a realistic budget range.
A concise breakdown shows which items represent the largest expenses and where savings are possible.
Estimated time for each stage (preparation, mounting, plumbing, and cleanup) is presented so readers can plan the project schedule.
Typical DIY cost breakdown
A straightforward DIY wall-mounted sink project generally ranges from $150 to $600 in materials and basic tools, with labor time for a competent DIYer running 3 to 6 hours; variance depends on sink type, mounting hardware, faucet and drain selection, and whether wall reinforcement or plumbing modifications are required.
| Item | Typical Cost | Notes |
|---|---|---|
| Sink | $50–$250 | Basic to designer |
| Mounting kit | $10–$80 | Anchors, brackets |
| Faucet/drain | $40–$200 | Range affects cost |
| Misc supplies | $10–$70 | Sealant, fittings |
Estimated time for each installation stage
Having outlined the material costs and labor estimate, the next focus is breaking the project into timed stages so homeowners can plan work and potential interruptions.
Measure and prep: 30–45 minutes.
Wall reinforcement and bracket installation: 1–2 hours.
Mount sink and secure plumbing: 1–1.5 hours.
Seal, test, and cleanup: 30–45 minutes.
Allow extra time for unforeseen adjustments.
Project Troubleshooting Flowchart
The guide presents a concise, stepwise decision chart for diagnosing common installation failures.
Each branch directs the reader through checks for mounting integrity, plumbing leaks, and alignment issues.
Clear corrective actions follow each identified problem to restore a safe, level installation.
Stepwise decision guide for common failures
Begin by isolating the problem area and verifying basic conditions—secure mounting hardware, intact wall studs, and proper plumbing connections—before progressing to more involved diagnostics.
A stepwise decision guide directs inspection, testing, and corrective action: consult fastener integrity, check level and alignment, test water supply and drainage, and reassess load distribution.
Prioritize safety, document findings, and escalate to professionals if unresolved.
- Fasteners
- Alignment
- Plumbing
- Load
Conclusion
Like a craftsman setting a single anchor into a cliff, the installer secures the sink and the room’s purpose with careful hands and quiet tools. When studs meet fittings and water learns new paths, the wall becomes both stage and shelter. The finished basin, hovering like a small harbor, invites use and ease—proof that measured planning, steady work, and respect for structure turn raw materials into lasting utility and calm.