
How to Disable Humidity Sensor on Bathroom Fan: Step-by-Step Guide for Any Model
To disable the humidity sensor on your bathroom fan, follow these steps: safely cut power to the fan, document the wiring setup, and either disconnect or bypass the sensor lead so the fan operates solely from the switched hot wire. This process requires basic electrical tools and insulated connectors, while also adhering to local codes and warranties. Be aware that bypassing the sensor may increase the risk of mold growth, void warranties, and lead to code violations, so noninvasive methods are recommended. Remember to label connections clearly, use proper insulation, and test the setup afterward. Continue for detailed step-by-step instructions, alternatives, and safety precautions.
What disabling a humidity sensor on a bathroom fan means and when to consider it
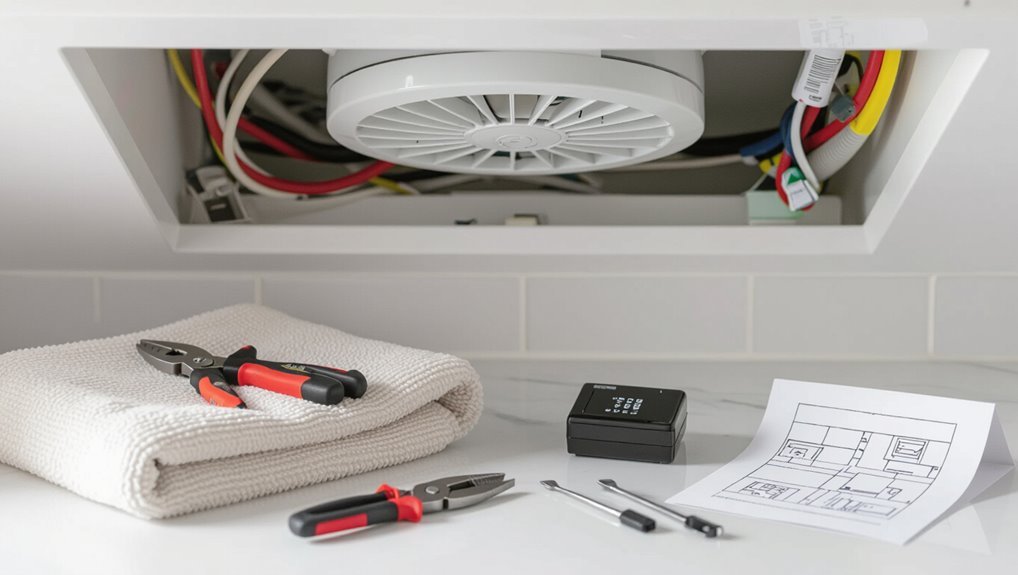
A humidity sensor in an exhaust fan monitors moisture levels and automatically runs the fan until a set threshold is reached.
Homeowners sometimes disable the sensor to avoid unwanted runtime, simplify controls, or because of sensor malfunction.
Doing so removes automatic moisture control and can increase mold, ventilation problems, or code noncompliance, so the trade-offs should be weighed carefully.
How humidity sensors work in exhaust fans
Understand the function of humidity sensors before deciding to disable one: these small devices monitor relative humidity and automatically trigger the exhaust fan when moisture exceeds a set threshold, then turn the fan off once levels drop.
Humidity sensors use capacitive or resistive elements, signal a control board, and adjust runtime.
For guidance on modification steps, search how to disable humidity sensor on bathroom fan.
Common reasons homeowners disable the sensor
Homeowners disable a bathroom fan’s humidity sensor when automatic cycling no longer matches household needs or when sensor faults cause persistent false triggers.
Reasons include frequent unnecessary run cycles, incompatible settings with occupants’ routines, chronic sensor drift or failure, and retrofit situations where manual control integrates with smart home schedules.
Temporary disabling also occurs during renovation or testing to isolate electrical or ventilation issues.
Risks and consequences of disabling the sensor
Disabling the humidity sensor alters the fan from an automated moisture-control device to a manually operated fixture. This increases the risk of unnoticed dampness, mold growth, and lingering odors if users forget to run the fan after showers.
It may void warranties, violate local building codes, reduce indoor air quality, and raise long-term repair or remediation costs; weigh these hazards against perceived convenience.
Quick overview: Can you disable any model and legal/safety considerations
Not all bathroom fan models can be safely or legally modified, and disabling a humidity sensor may void manufacturer warranties or violate local electrical or building codes.
A quick compliance checklist—covering warranty terms, code requirements, and whether the unit is hardwired or integrated with a ventilation system—helps determine if modification is permissible.
If repair or replacement can restore proper function without risking safety or compliance, those options are generally preferable to disabling the sensor.
Manufacturer warranty and code compliance checklist
Warranty terms and local building codes determine whether a humidity sensor can be disabled and how it must be done.
Verify warranty voidance clauses, authorized-service requirements, and any required documentation before altering equipment.
Confirm that local electrical and ventilation codes permit modification, maintain required ventilation rates, and record changes for inspections.
If uncertain, consult the manufacturer or a licensed electrician to guarantee compliance and preserve safety.
When to choose repair or replacement instead of disabling
Evaluate whether repair or replacement is a better option before attempting to disable a humidity sensor, because some models cannot be safely or legally modified and doing so may compromise ventilation performance or void obligations.
Choose repair when sensors or wiring are faulty but parts exist.
Opt for replacement if units are old, fail code or warranty, or lack safe modification instructions.
Consult local codes and a professional.
Tools, parts, and safety preparations needed
A concise list of required tools and replacement parts is presented before any work begins, including screwdrivers, wire strippers, connectors, and a compatible sensor bypass or cap.
The text emphasizes personal protective equipment and electrical safety precautions such as shutting power at the breaker, using a noncontact voltage tester, and wearing gloves and eye protection.
Guidance is provided on how to identify the fan model and sensor type via labels, manuals, or photos to guarantee correct parts and procedures.
Required tools and materials
Gather the necessary tools, replacement parts, and safety gear before beginning work on a bathroom fan’s humidity sensor.
A concise checklist guarantees efficiency and prevents mistakes. Essential items include basics for access, removal, and electrical connection verification.
- Screwdrivers (Phillips and flat)
- Wire strippers and connectors
- Replacement sensor or jumper wire
- Multimeter for voltage checks
Personal protective equipment and electrical safety precautions
Before any electrical work begins, the technician must don appropriate personal protective equipment and confirm all power sources are secured.
Essential PPE includes insulated gloves, safety glasses, and non-conductive footwear. A voltage tester, lockout/tagout kit, and insulated hand tools guarantee safe isolation.
Verify circuit breakers with a tester, post warning notices, and keep a clear, dry workspace to minimize shock and trip hazards.
How to identify your fan model and sensor type
How can the technician quickly determine the fan model and sensor type to plan the job efficiently?
The technician inspects the housing for labels, serial numbers, and manufacturer marks, photographs them, and notes grille and motor styles.
Tools: flashlight, screwdriver, and camera.
Consults the manual or manufacturer website with recorded codes.
Identifies sensor: integrated humidity probe, separate humidity switch, or electronic control module.
Step-by-step procedure to disable a humidity sensor (general method)
The procedure begins by cutting power to the fan and verifying the circuit is dead with a tester.
Next, the cover is removed to identify the humidity sensor and related controls before choosing either non‑permanent disabling options or, for those experienced, safe wiring changes.
Finally, the fan is reassembled and power is restored after confirming the chosen method functions as planned.
Turn off power and verify circuit is dead
Shut power at the appropriate breaker and confirm the circuit is de-energized before touching any wiring.
Verify by switching the fan and lights off, then test the fan circuit with a non-contact voltage tester and a multimeter at the fan leads or junction box.
Lockout/tagout the breaker if possible.
Recheck voltage zero before proceeding to access the fixture or controls.
Remove fan cover and locate sensor and control components
With power confirmed off, remove the grille or cover by twisting, pulling, or unscrewing the mounting screws to expose the fan housing and internal components.
Inspect the interior for the humidity sensor—often a small circuit board, probe, or photoetched element near the motor or duct inlet.
Identify wiring, control board, and connectors; document positions and take photos for reference before any intervention.
Methods to disable the sensor without permanent modification
Begin by confirming power remains off and that photos and notes from the earlier inspection are accessible; this guarantees the following nonpermanent methods can be executed safely and reversed if needed.
Temporarily cover sensor with removable tape or plastic, gently lift and disconnect plug if present, or use a jumper adapter supplied by manufacturer.
Reassemble and test; retain original parts and documentation for restoration.
Methods to disable the sensor by wiring changes (for those comfortable with electrical work)
Proceed only if the circuit is de-energized, the installer is experienced with household wiring, and local codes permit modification.
Identify sensor wires (often two: signal and neutral). Disconnect sensor lead and cap with a wire connector, or bypass by joining fan’s power lead directly to switched hot per wiring diagram.
Insulate all connections, secure strain relief, and label modified wiring for future reference.
Reassembling the fan and restoring power
Carefully reassemble the fan housing and grille, ensuring all internal wiring remains secure and insulated before restoring power.
Verify screws and clips are tight, motor and sensor modules sit correctly, and any access panels are closed.
Restore circuit power at the breaker, then switch the fan on to confirm normal function.
Monitor for unusual noise, vibration, or smells; cut power and recheck if detected.
Model-specific variations and examples
Different fan designs require different approaches: inline or ceiling units with built-in sensors often require access behind the grille, while systems with separate wall-mounted humidity controls may be adjusted or bypassed at the wall.
Smart or connected fans can sometimes disable the humidity function through their app or firmware settings, which may involve account or update steps.
Common brands (e.g., Panasonic, Broan, Delta) each place sensors and controls in different locations, so consulting model-specific guides or manuals is recommended before proceeding.
Inline/ceiling fans with built-in humidity sensors
Manufacturers implement humidity sensors in inline and ceiling bathroom fans with notable variation: some use adjustable sensitivity dials, others rely on fixed thresholds or DIP switches, and a few integrate smart controls tied to home automation platforms.
Models differ in sensor placement, wiring accessibility, and firmware behavior; some allow simple jumper changes or internal potentiometer adjustments, while others require module replacement or firmware configuration via the manufacturer app.
Fans with separate wall-mounted humidity controls
Whereas some fans house the humidity sensor within the unit, many systems place the humidity control in a separate wall-mounted device.
These configurations change how users adjust sensitivity, how installers troubleshoot, and what parts must be replaced when malfunction occurs.
Models vary: rotary dials, digital hygrostats, or combined timer-humidity switches.
Disabling typically requires wiring changes at the switch or replacement with a plain on/off control, observing safety.
Smart fans or connected models software/firmware disable options
Explore firmware and app settings when addressing smart or connected bathroom fans, since many models provide software-based options to disable or adjust the humidity sensor without altering wiring.
Check companion apps, device web interfaces, or cloud dashboards for humidity sensor toggles, sensitivity sliders, or automation rules.
Firmware updates can add or remove controls; consult release notes and backup settings before changing to prevent unintended behavior.
Examples of common brands and how their sensors are accessed
Brands vary in how and where the humidity sensor settings are exposed: some place controls in the mobile app, others use a physical DIP switch or jumper inside the fan housing, and a few require accessing a web interface or cloud dashboard.
Examples include:
- Broan: internal DIP or jumper access
- Panasonic: dedicated wall control or app
- Delta: hidden menu in app firmware
- NuTone: web/cloud dashboard options
Troubleshooting after disabling the sensor
After disabling the humidity sensor, a concise checklist should be used to confirm proper reassembly and power connections when the fan fails to run.
If the fan runs intermittently or responds to false triggers, simple wiring checks and isolation of the sensor circuit can help identify the cause.
If problems persist, instructions for restoring the sensor to its original configuration should be followed to return the fan to factory operation.
Fan not running after reassembly checklist
Begin troubleshooting the reassembled bathroom fan by confirming basic power and wiring integrity before assuming the humidity sensor modification caused the issue.
Check circuit breaker, switch function, and tightness of wire connections.
Make certain motor and capacitor are properly seated, blades spin freely, and safety ground is intact.
Verify that any disconnected connectors or jumpers are restored per original wiring diagrams.
Intermittent operation or false triggers
Troubleshoot intermittent operation or false triggers by systematically isolating the fan’s control and sensing circuits to determine whether the issue arises from the disabled humidity sensor, residual wiring changes, or an unrelated component.
Inspect connections, test continuity, and verify switch and timer function.
Check for electromagnetic interference, moisture ingress, or a failing relay.
Log symptoms, reproduce conditions, and replace faulty connectors or modules as indicated.
Restoring the sensor if problems occur
If problems persist following isolation of the control and sensing circuits, restoring the humidity sensor should be approached methodically to confirm whether the disablement caused the failure or merely revealed an existing fault.
Reconnect sensor wiring per manufacturer diagrams, secure connectors, and reset power. Test operation under varying humidity.
If faults continue, swap with a known-good sensor or consult schematic and replace defective components before re-enabling automatic control.
Safer alternatives to disabling the sensor
Rather than permanently disabling the humidity sensor, the author recommends first exploring adjustments to sensitivity or timer settings to reduce false triggers.
If those changes are insufficient, installing a manual switch or override provides user control without removing safety features.
As an alternative, replacing the unit with a non-sensor fan or a more compatible model can resolve issues while preserving proper ventilation.
Adjusting sensitivity or timer settings
Many bathroom fans include adjustable humidity sensitivity and run-time timers that provide a safer alternative to disabling the sensor entirely.
Users can consult the manual or access internal controls to raise the humidity threshold, reducing unnecessary cycling, or extend timer duration so the fan runs longer after use.
These adjustments maintain moisture control while avoiding permanent sensor deactivation and preserving automation.
Installing a manual switch or override
After adjusting sensitivity or timer settings to reduce unwanted cycling, installing a manual switch or override offers a controllable alternative that preserves the humidity sensor while giving occupants direct control.
A hardwired override or wired switch wired to fan power lets users force operation when desired. Installation requires basic wiring knowledge, secure connections, and adherence to electrical codes; consult a professional if uncertain.
Replacing with a non-sensor fan or a more compatible model
Consider replacing the sensor-equipped unit with a non-sensor fan or a model whose humidity controls better match the household’s needs; this preserves safe, code-compliant ventilation while eliminating unwanted automatic cycling.
Selecting a straightforward timer or manual-only exhaust fan reduces maintenance and wiring complexity.
Alternatively, choose a fan with adjustable sensitivity, quieter operation, and compatible mounting to guarantee effective moisture control without compromising safety or performance.
Maintenance tips and long-term considerations
The section outlines practical ways to maintain adequate ventilation without a humidity sensor, including scheduled fan use and periodic inspections.
It also notes indicators for re-enabling or servicing the sensor and recommended service intervals.
Finally, it highlights potential energy trade-offs and indoor air quality consequences to weigh when choosing long-term settings.
How to maintain optimal ventilation without a sensor
Maintain regular airflow checks and a simple schedule to keep a sensorless bathroom fan effective:
Inspect and clean the grille and blades every three months.
Verify ductwork is unobstructed and properly sealed annually.
Run the fan for at least 20–30 minutes after showers to remove moisture.
Monitor humidity with a handheld hygrometer.
Confirm proper intake vents.
Replace filters annually.
Lubricate moving parts per manufacturer intervals.
When to re-enable or service the humidity sensor
When should the humidity sensor be re-enabled or professionally serviced depends on both performance indicators and time: if persistent condensation appears on walls or mirrors, the fan cycles irregularly, or a handheld hygrometer shows humidity consistently above 60% after showers, reactivation or inspection is warranted.
Additionally, plan a sensor check every 2–3 years or sooner if the sensor was disabled for cleaning, renovations, or repeated mechanical issues.
Routine signs: erratic operation, corrosion, or visible dust buildup.
Energy and indoor air quality implications
After re-enabling or servicing a humidity sensor, attention should shift to how that sensor affects energy use and indoor air quality over time.
Properly calibrated sensors minimize unnecessary fan runtime, reducing energy consumption while maintaining moisture control.
Regular checks prevent persistent dampness or overventilation.
Track runtime patterns, clean components, and replace aging units to balance efficiency with mold prevention and occupant comfort.
Comparison of approaches: temporary disable vs permanent modification
Weighing the options requires comparing short-term methods that temporarily bypass a humidity sensor with long-term changes that alter or remove the sensor entirely. Temporary disablement is reversible, lower risk, but may mismanage moisture. Permanent modification is stable, may void warranty, and needs technical skill. Choose based on risk tolerance, ventilation needs, and code compliance.
| Temporary | Permanent |
|---|---|
| Reversible | Irreversible |
| Low skill | Higher skill |
| Lower cost | Higher cost |
Conclusion
Disabling a bathroom fan’s humidity sensor removes automatic moisture control, often chosen when sensors misbehave or retrofit wiring prevents proper function. Safety and code compliance must guide decisions; roughly 30% of homeowner fan complaints involve sensor faults. After careful preparation, many models can be temporarily bypassed or permanently modified, but alternatives like sensor replacement or smart timers are safer. Regular maintenance guarantees ventilation effectiveness and prevents moisture-related damage over time.
