How to Fix the Toilet Handle: Easy DIY Repairs for Common Flush Problems
A faulty toilet handle can often be fixed quickly with a few simple adjustments. To resolve common flush problems, first check for loose or stripped mounting nuts, corroded levers, or a detached or stretched chain. Tighten or replace any nuts, straighten or swap out the lever, and adjust or replace the chain to ensure the flapper lifts and returns smoothly. If you notice any mineral buildup, clean it off and lightly lubricate any stiff pivots. Most of these DIY repairs can be completed in under an hour with basic tools. Follow the step-by-step adjustments and troubleshooting tips for a successful fix.
What Causes a Toilet Handle to Malfunction
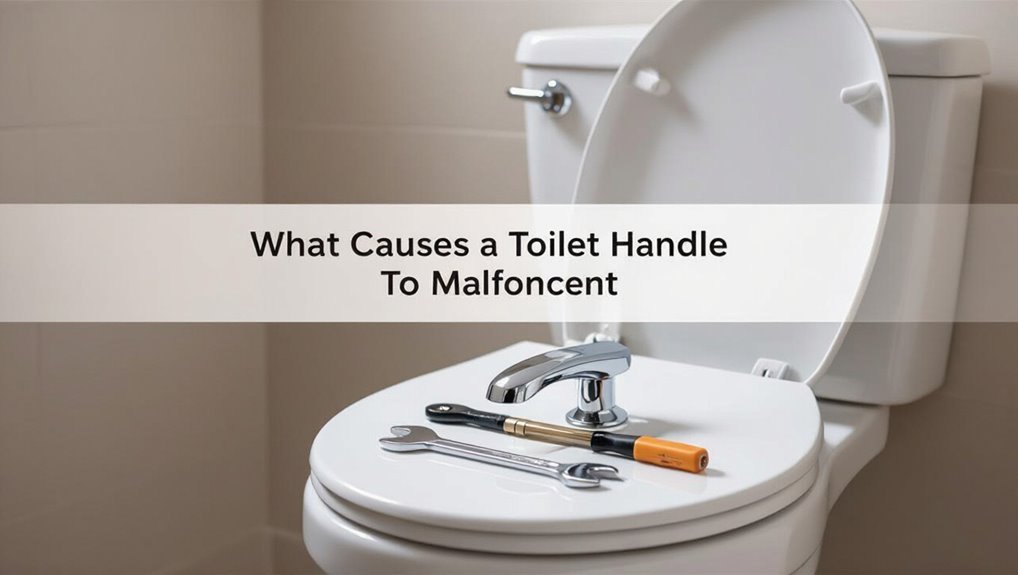
Common causes include worn or misaligned levers, corroded chain or lift wire, and failing flapper or trip assembly inside the tank.
Visible signs that the handle itself is damaged include looseness, bending, or excessive play when pressed.
Mineral deposits and hard-water buildup can impede lever movement and corrode metal parts, reducing responsiveness.
Common mechanical failures inside the tank
Inside the tank, a small set of parts bears the brunt of daily use, and when any of them wears, corrodes, or misaligns the handle can stick, slip, or fail to trigger a flush.
Common failures include a corroded lever, a detached or stretched chain, a warped lift arm, or a stuck flapper seal.
Knowing how to fix the toilet handle speeds simple repairs.
Signs the handle itself is damaged
A loose, stiff, or snapping toilet handle usually signals damage to the handle itself rather than to internal tank components.
Visible cracks, bent or corroded lever arms, stripped threads where the handle meets the mounting nut, or a wobbling escutcheon indicate replacement is needed.
Persistent play after tightening, rough movement, or broken pivot points confirm handle failure rather than linkage or flapper issues.
How water mineral buildup affects handle operation
When a handle appears intact but still moves stiffly or snaps back unpredictably, mineral deposits from hard water are often implicated.
Scale accumulates around pivot joints, the chain connection, and inside the lever cavity, restricting movement and altering leverage.
Corrosion pairs with buildup to seize fittings, cause irregular return, and increase required force.
Regular descaling and gentle scraping restore smooth operation.
Quick Assessment: Determine the Problem in Under 5 Minutes
A quick assessment begins with a focused visual inspection checklist: look for a loose handle, a disconnected lift chain, mineral buildup, or cracked parts.
Perform simple tests—feel for resistance when operating the handle and observe whether the flapper responds—to isolate the issue to the handle or internal components.
If a leak, major corrosion, or risk of water flow is observed, shut off the toilet water supply before proceeding.
Visual inspection checklist
Several quick observations can reveal the most common causes of a malfunctioning toilet handle: check that the handle itself is secure and moves smoothly, confirm the chain from the handle to the flapper is neither slack nor taut, inspect the flapper for tears or mineral buildup, verify the lift arm and clip are intact and properly aligned, and look for corrosion or loose nuts at the handle assembly.
Note hinge wear, warped plastics, and debris.
Simple tests to isolate handle vs. internal parts
Start by actuating the handle and observing whether movement at the lever produces corresponding motion at the lift chain and flapper; this simple push-pull check distinguishes external handle faults from internal tank issues.
Next, press the flapper directly with a stick: if the flush works, the handle/linkage is at fault.
Finally, wiggle the handle and inspect for looseness, broken clips, or slipped chain.
When to shut off water before working
Before touching any tank components, the water supply should be shut off when leaks, overflowing, or major internal repairs are likely—if the toilet continues to run after lifting the lid, water sprays when parts are moved, or a faulty fill valve causes a steady rise toward the overflow tube.
Turn the shutoff clockwise, verify flow stops, then proceed.
Restore supply only after confirming repairs and no leaks.
Tools and Replacement Parts You May Need
A concise list of basic tools—adjustable wrench, pliers, screwdriver, and possibly a hacksaw—prepares the reader for most toilet-handle repairs.
Common replacement parts include a new flush lever, chain or lift wire, and flapper; guidance on choosing materials and sizes helps match the existing hardware.
A single broken lever usually needs only a replacement handle, while corroded or repeatedly failing linkages often warrant a full repair kit.
Basic tools for toilet-handle repairs
Repairing a toilet handle typically requires only a handful of basic tools and a few common replacement parts.
Essential tools include an adjustable wrench, flathead and Phillips screwdrivers, pliers, and a small flashlight. A utility knife and channel-lock pliers are helpful for stubborn components.
A bucket and towel protect against spills. Extra screws, slip-joint pliers, and a silicone rag complete a minimalist toolkit.
Common replacement parts and how to choose them
With the basic tools assembled, attention turns to the replacement parts most commonly needed for toilet-handle repairs.
Select parts by compatibility, material, and adjustability: choose corrosion-resistant finishes, confirm handle-to-lever fit, and prefer adjustable-length lift wires or chains.
Typical replacements include:
- Chrome or plastic handle lever
- Adjustable lift wire or chain
- Tank-side mounting nut and grommet
When to bring a replacement flush lever vs. full kit
Deciding between carrying just a replacement flush lever or a full repair kit hinges on the visible damage and the toilet’s age: if the handle moves freely but is corroded or broken at the lever, swapping the single lever usually suffices;
if internal components—like the lift wire, chain, or tank-side nut—show wear, looseness, or multiple failed parts, bringing a full kit prevents repeat trips and guarantees all connections match.
Step-by-Step Repairs for a Loose or Wobbly Handle
A loose or wobbly toilet handle is typically addressed by inspecting the nut inside the tank and tightening it with an appropriate wrench.
If tightening does not restore alignment, the lever can be repositioned to guarantee smooth operation.
When the handle is stripped or corroded, replacement of the handle assembly is recommended.
Tightening the handle nut inside the tank
Locate the loose handle nut inside the tank and prepare to tighten it to stop the handle from wobbling.
With the water off, reach inside and hold the handle shaft steady while turning the nut clockwise using pliers or a wrench.
Tighten until snug but avoid overtightening to prevent cracking plastic.
Test the handle for stable movement and proper return after flushing.
Repositioning the lever to restore alignment
Reposition the lever by detaching the chain or lift wire from the flush arm, then rotate the arm to align the handle shaft so the lever moves freely without rubbing the tank or other parts.
Check that the arm clears the tank and the flapper chain has slight slack at rest.
Reattach the chain, test the motion, and fine-tune arm angle for smooth, centered operation.
Replacing a stripped or corroded handle
Begin by removing the tank lid and inspecting the handle assembly to confirm the handle or its mounting nut is stripped, corroded, or otherwise compromised; evidence includes a loose shaft that spins without moving the flush arm, visible thread damage on the nut, or heavy rust on the lever.
Shut off water, disconnect the chain, hold the handle from inside, loosen and remove the nut, install matching replacement, reattach chain, test operation.
Fixes for a Handle That Won’t Return After Flushing
When a toilet handle fails to return after flushing, common causes include an improperly adjusted lift chain, a bent or blocked flush lever, or a flapper that does not settle correctly.
The lift chain should be checked for proper slack or replaced if damaged, while the lever should be inspected and straightened or cleared of obstructions.
Finally, the flapper and its seat should be examined and adjusted to guarantee it closes fully and does not hold the handle down.
Adjusting or replacing the lift chain
Inspect the lift chain connecting the handle lever to the flapper to determine if its length or attachment is causing the handle to stick up after a flush.
Adjust chain length so there is slight slack when the flapper rests, avoiding kinks.
If links are corroded or clipped poorly, replace with a new chain or plastic strap, ensuring secure clips at both ends and smooth operation.
Fixing a bent or obstructed flush lever
If the chain adjustment does not free the mechanism, attention should turn to the flush lever itself, which can become bent or blocked by mineral buildup, loose mounting nuts, or interference from the tank lid or other internal parts.
Inspect the lever for bends, tighten or replace the mounting nut, clean mineral deposits with vinegar, and verify no internal parts or the lid obstruct full return.
How to check and adjust the flapper for proper closure
Begin by lowering the tank lid and observing the flapper as the tank refills to confirm it seats fully and seals without delay; a flapper that is warped, coated with mineral deposits, or misaligned can prevent full closure and cause delayed or continuous flow.
If it fails, clean or replace the flapper, adjust chain length to allow full drop without slack, and reposition the seat for an immediate seal.
Repairing a Handle That Feels Stiff or Hard to Push
When a toilet handle feels stiff or difficult to push, inspecting and servicing the moving parts often restores smooth operation.
Cleaning and safely lubricating the lever, pivot, and linkages can remove friction, while targeted removal of mineral deposits from the pivot points improves movement.
If components are seized or visibly corroded, replacing them is usually the most reliable solution.
Cleaning and lubricating moving parts safely
Start by shutting off the water supply and flushing to drain the tank so access to the handle linkage is clear and the mechanism is dry.
Inspect pivot, chain, and clips for corrosion or debris.
Wipe parts with a damp cloth and mild detergent, dry thoroughly, then apply a small amount of silicone-based lubricant to moving joints.
Reassemble, restore water, and test for smooth operation.
Removing mineral deposits from the lever and pivot
Loosen the stiff handle by removing mineral buildup from the lever and pivot, a common cause of hard-to-push toilet handles.
Turn off water, flush to empty the tank, and inspect the lever and pivot for white or crusty deposits.
Apply a vinegar-soaked cloth or use a soft brush to dissolve and scrub deposits.
Rinse, dry thoroughly, and test handle movement before reassembling.
Replacing seized or corroded components
If mineral removal fails to restore smooth movement, seized or corroded parts should be replaced to eliminate persistent stiffness.
Turn off water, flush to empty the tank, then remove the handle assembly.
Inspect lever, pivot, and connecting chain for rust or deformation.
Match replacement parts to the fixture, install new components, lubricate pivot with silicone grease, reassemble, and test for free, reliable operation.
Replacing the Entire Handle and Lever Assembly
When the handle is beyond simple repair, the old handle and lever assembly should be removed step by step, noting fastener types and link connections.
The new assembly is then installed, adjusted, and tested to guarantee smooth flushing and proper chain length.
Finally, the replacement handle should be chosen to match the toilet’s style and finish for a cohesive appearance.
Step-by-step removal of the old handle
Begin by shutting off the toilet’s water supply and flushing to drain the tank so the working area is dry and visible.
Remove the decorative cap from the handle, then use pliers or a screwdriver to loosen and remove the retaining nut inside the tank.
Withdraw the handle and attached lever, detach any connected chain or lift wire, and clear away corrosion or buildup before disposal.
Installing and testing the new handle assembly
With the old handle and lever removed and the tank cleared of debris, the new handle assembly can be positioned for installation.
Insert the lever through the tank hole, seat the gasket, and secure the mounting nut finger-tight, then snug with a wrench without overtightening.
Reattach the chain to the flapper with correct slack, restore water, test multiple flushes, and adjust until operation is smooth.
Matching handle styles and finishes to your toilet
Selecting a replacement handle requires matching both the style and finish to the toilet and bathroom decor so the new assembly looks intentional and functions correctly.
Choose a handle shape that complements existing fixtures—rounded, lever, or vintage—and a finish that resists corrosion, such as chrome, brushed nickel, or oil-rubbed bronze.
Confirm mounting type and clearance to guarantee proper fit and operation.
Troubleshooting Less Common Issues
Occasional problems require looking beyond the handle itself, such as when the handle moves but the toilet does not flush due to a disconnected or worn internal linkage.
Intermittent flush failures often trace to incorrect chain length or a deteriorating flapper that no longer seals reliably.
Less common but serious issues include a cracked tank or damaged mounting hole, for which temporary seals or shims can be used until a proper repair or replacement is arranged.
Handle moves but toilet doesn’t flush internal linkage problems
When the handle moves but the toilet does not flush, the problem often lies in the internal linkage—disconnected, broken, or improperly adjusted components that fail to lift the flapper or activate the flush valve.
Inspect the arm, lift wire or rod, and connection clips for breaks, bends, or dislodgement.
Tighten or replace worn parts, reattach clips securely, and test movement until the flapper lifts fully.
Intermittent flushs diagnosing chain length and flapper wear
Diagnose intermittent flushes by checking two common culprits: chain length and flapper wear.
Confirm the chain has slight slack—too tight prevents full flapper rise, too long allows tangles under the flapper.
Inspect the flapper for warping, mineral buildup, or softening; even small leaks stop reliable flushing.
Replace a damaged flapper or adjust chain length to restore consistent flush performance.
Cracked tank or mounting hole damage and temporary fixes
After ruling out chain length and flapper issues, attention should shift to less common but more serious problems: hairline cracks in the tank or damage around the mounting holes where the tank meets the bowl.
Small cracks can be sealed temporarily with waterproof epoxy; damaged mounting holes may accept a rubber washer or tank-to-bowl repair kit.
Advise replacement promptly to avoid leaks or catastrophic failure.
Preventive Maintenance to Keep the Handle Working
A regular inspection schedule helps identify wear on the handle, linkage, and mounting hardware before failures occur.
Simple maintenance—tightening loose screws, lubricating pivot points, and replacing corroded clips—can prevent most common problems.
If recurring issues persist or parts are repeatedly failing, upgrading to a stronger or one-piece lever is recommended.
Routine inspection schedule
When establishing a routine inspection schedule for a toilet handle, owners should set simple, regular checkpoints—monthly for busy households, quarterly for light-use bathrooms—to verify tightness, linkage alignment, and smooth operation.
Documenting findings and any minor adjustments prevents small issues from escalating into sticking handles or failed flushes. Inspections should note corrosion, worn clips, and unexpected play, and schedule professional service if recurring faults appear.
Simple maintenance tasks to prevent future failures
Perform basic upkeep regularly to extend a toilet handle’s service life and reduce unexpected failures.
Inspect for looseness, tighten mounting nuts, and check the linkage for wear. Lubricate pivot points sparingly with silicone spray and replace corroded clips.
Clean around the handle to prevent grime buildup and guarantee smooth motion.
- Tighten mounting nut
- Lubricate pivot
- Replace corroded clip
When to upgrade to a stronger or one-piece lever
Consider upgrading to a stronger or one-piece lever when recurring looseness, bending, or breakage appears despite routine tightening and minor repairs.
A sturdier lever reduces repeat failures, improves leverage for low-force flushes, and resists corrosion.
Choose compatible materials and lengths to match the flush arm and tank aesthetic.
Professional installation may be warranted if alignment or clearance issues persist, ensuring reliable long-term operation.
Cost, Time, and When to Call a Professional
Typical DIY repairs to a toilet handle usually take 15–45 minutes and cost between a few dollars for parts and under $50 for common replacements.
If the handle repeatedly sticks, the flush mechanism breaks, or there is leaking beyond the tank, these are signs a plumber may be needed.
Before hiring, ask about estimated total cost, warranty on work and parts, and whether the plumber is licensed and insured.
Typical DIY time and cost estimates
Most simple toilet-handle repairs take 15–45 minutes and require only basic tools and inexpensive parts.
Replacement handles, lift chains, or clips typically cost $5–$25. Labor is usually homeowner time; saved service fees range $50–$150 if professional help is avoided.
Complex mechanisms or hard-to-access tanks may increase time and expense, prompting consideration of paid assistance.
Signs this repair needs a plumber
Several clear signs indicate when a toilet-handle problem exceeds DIY scope and warrants a plumber: persistent flushing failure despite replacing the handle or chain, repeated tank leaks around the handle or bolts, a handle that is loose or wobbly because of corroded fittings, or inaccessible hardware in older or wall-mounted tanks.
Additional red flags include continuous running, multiple failed repairs, visible tank-crack, or uncertain internal damage requiring specialized tools.
Questions to ask a plumber before hiring
After recognizing signs that a toilet-handle problem requires professional help, a homeowner should prepare key questions about cost, time, and when to call a plumber.
Ask for an estimate, flat fees versus hourly rates, parts and labor coverage, typical repair duration, availability, emergency or same-day service, licensing and insurance proof, warranty terms, and whether a diagnostic fee applies.
Clarify payment methods and cleanup.
Quick Reference Repair Checklist
Begin with a brief inspection checklist that covers the common causes of a malfunctioning toilet handle: loose nut, worn lever, broken chain, or misaligned flapper. The checklist guides quick fixes, required tools, and estimated time for each step, enabling efficient assessment and repair decisions.
| Issue | Fix | Time |
|---|---|---|
| Loose nut | Tighten | 5 min |
| Worn lever | Replace | 10 min |
| Broken chain | Reattach | 5 min |
| Misaligned flapper | Adjust | 7 min |
Conclusion
The article concludes that a faulty toilet handle is often a small, solvable nuisance rather than a catastrophe. Like a loose gear in a well-oiled clock, the mechanism can usually be tightened, realigned, or replaced with minimal time and cost. Homeowners will find that quick assessment, basic tools, and simple parts address most problems. Regular inspection and gentle maintenance prevent recurrence, while persistent or complex faults merit professional attention to guarantee reliable operation.