How to Tell If a Gas Stove Is Leaking: Signs, Tests, and What to Do Next
If you suspect your gas stove may be leaking, look for signs such as a persistent rotten-egg smell, hissing sounds, yellow or flickering flames, visible damage at connections, or symptoms like headaches or dizziness among occupants. To ensure safety, immediately extinguish any flames, ventilate the area, leave the premises, and contact the gas company from a safe location. Only shut off the gas at the stove or main if you can do so safely. For a quick home check, you can perform a soap-bubble test or use a handheld detector. Further measures, including professional inspections and repairs, are outlined in the following sections.
What to do immediately if you suspect a gas stove leak
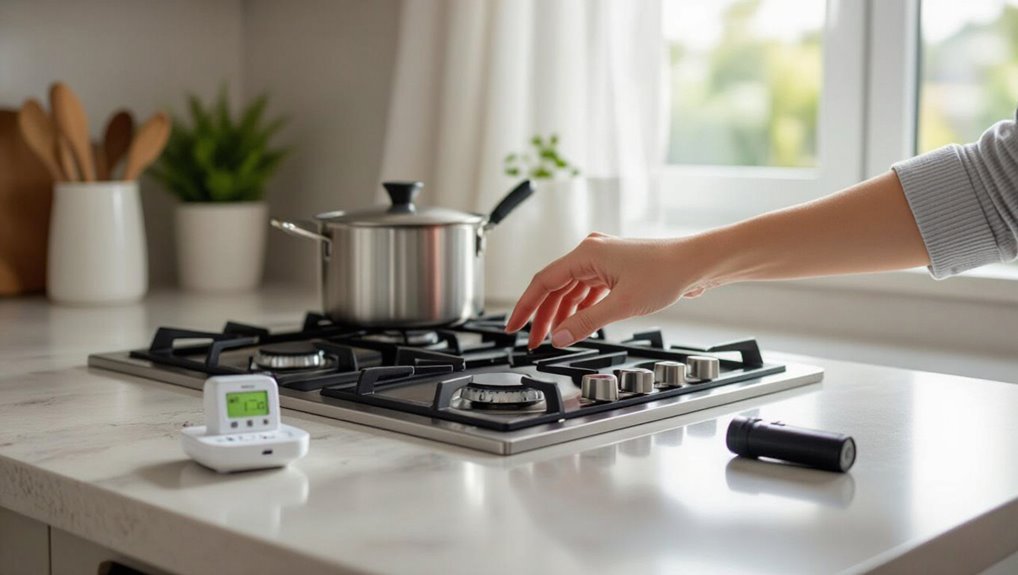
If a gas smell is detected, the first actions are to stop using open flames, open windows and doors, and leave the area immediately.
The occupant should call the gas company or emergency services from a safe location and evacuate if the odor is strong or others feel ill.
If trained and able, the person may shut off the gas at the stove’s valve and the home’s main gas shutoff before leaving, but only if it can be done without re-entering the hazardous space.
Steps to take right away to ensure safety
Move away from the stove and immediately shut off the gas supply at the range valve or main shutoff before doing anything else.
Ventilate by opening windows and doors, avoid ignition sources, and extinguish open flames.
Do not operate electrical switches or phones near the stove.
Note observations relevant to how to tell if gas stove is leaking, then wait in a safe area until the situation is assessed.
Who to call and when to evacuate
After shutting off the gas and ventilating, the next priority is to notify the proper authorities and decide whether to evacuate.
Contact the gas company emergency line and, if odor persists or sensors alarm, call emergency services.
Evacuate immediately if gas concentration, dizziness, or multiple occupants report symptoms.
Do not re-enter until professionals declare the area safe; follow their instructions.
How to turn off gas supply safely
Locate the main gas shutoff valve and close it promptly and calmly, using a wrench if necessary; this stops the flow to the stove and reduces the risk of ignition.
Open windows and doors for ventilation, avoid flames, sparks, or electronics, and evacuate if smell persists.
Notify the gas company and emergency services, and do not re-enter until professionals declare the area safe.
Clear signs that indicate a gas stove may be leaking
Recognizable signs of a gas stove leak include a persistent rotten-egg odor or other sensory cues suggesting gas presence.
Audible hissing or whistling, visible damage or loose connections, and abnormal flame color or behavior are concrete indicators to inspect.
Mild headaches, dizziness, nausea, or eye and throat irritation can also point to dangerous gas exposure and warrant immediate action.
Smell and sensory indicators
When a gas stove leaks, the most immediate clues are sensory: an acrid rotten-egg odor from added mercaptan, unusual hissing or whistling sounds near valves or connections, and sudden lightheadedness, headache, or nausea in people nearby.
Other indicators include persistent metallic or oily smells, irritation of eyes or throat, and plants wilting near the appliance; these warrant immediate ventilation and evacuation.
Audible signs hissing or whistling noises
If a persistent hissing or high‑pitched whistling is heard near the burner, valve, or supply line, it can indicate escaping gas rather than normal appliance operation.
Such noises often occur when pressurized gas leaks through small gaps or faulty fittings. They may persist when knobs are off, change with pressure, or stop after shutting the supply.
Immediate ventilating and professional inspection are advised.
Visual clues damaged connections, flame color and behavior
Rust-colored corrosion around fittings, frayed supply lines, visibly loose or cracked seals, and irregular flames are clear visual indicators that a gas stove may be leaking.
Additional signs include soot buildup on burners, persistent yellow or flickering flames instead of steady blue, scorch marks, and pooled moisture near connections.
Any of these observations warrant immediate inspection and professional service.
Health symptoms linked to gas exposure
How can occupants distinguish routine discomfort from symptoms of gas exposure?
Persistent headache, dizziness, nausea, weakness, or confusion—especially improving when leaving the home—suggest gas presence.
Eye or throat irritation, coughing, and difficulty breathing are warning signs.
Exposure to high concentrations can cause loss of consciousness.
Any combination of these symptoms warrants immediate evacuation, ventilation, and contacting emergency services or the gas utility.
Quick at-home tests to check for a gas leak
A few simple at-home tests can help determine whether a stove is leaking before calling a professional. These include applying soapy water to fittings to look for bubbles, following a safe smell-and-detect procedure, and using a handheld gas detector while noting threshold readings and alarm behaviors.
The homeowner should weigh the speed and low cost of DIY checks against their limited sensitivity and the safety and accuracy advantages of professional testing.
Soapy water bubble test
Mixing a simple soap-and-water solution and applying it to gas fittings offers a quick, low-cost way to detect leaks: bubbles form at any point where gas escapes under pressure.
The tester should visually inspect connections while slowly turning on the gas. Stop and ventilate if bubbles appear.
- Apply with a brush or spray
- Watch for steady, continuous bubbles
- Do not use open flames
Smell-and-detect method safe procedure
Vigilance is essential when using smell-and-detect methods to check for a gas leak. One must act calmly, ventilate, and avoid sparks.
Recommended quick steps:
- Open windows and doors; do not operate electrical switches.
- Sniff near burners, pipe joints, and appliance connections while staying low.
- If a strong sulfur/rotten-egg odor is present, evacuate, shut off supply if safe, and call the gas utility.
Using a handheld gas detector what to look for
After performing a smell-and-detect check and ventilating the area, a handheld gas detector offers a faster, more objective way to confirm a leak.
The device should be warmed up, calibrated if required, and swept slowly around valves, connections, and the stove base.
Note sustained or rising readings, audible alarms, and sensor response time.
Record location and level before taking action.
Pros and cons of DIY testing vs. professional testing
Weighing quick at-home tests against professional inspection helps homeowners choose the right response when a gas leak is suspected. DIY checks (soapy water, sniffing, detectors) are fast and cheap but limited and risk false negatives. Professionals provide accurate diagnostics, safety protocols, and repairs but cost more and may take scheduling time.
| DIY testing | Professional testing |
|---|---|
| Fast, low-cost | Accurate, thorough |
| Limited, risky | Costly, scheduled |
How professionals detect and confirm gas leaks
A licensed gas technician begins with a visual and functional inspection, checking connections, valves, and appliance seals for obvious faults.
They then employ electronic leak detectors and combustible gas sensors to pinpoint trace gas and confirm the presence of methane or propane.
If needed, the technician performs pressure testing and line inspections—using manometers or pneumatic tests and sometimes camera-enabled line scans—to verify integrity and locate hidden leaks.
What a licensed gas technician will do during inspection
Technicians begin by visually inspecting the appliance, connections, and venting to identify obvious signs of corrosion, loose fittings, or soot that could indicate a leak or combustion problem.
They then use specialized tools—such as combustible gas detectors, electronic manometers, and soapy-water solutions—to locate, quantify, and confirm any escaping gas before recommending repairs or shutoff procedures.
They document findings, test appliances under load, and advise next steps.
Electronic leak detection equipment used by professionals
When a potential leak is suspected, professionals rely on electronic leak detectors to quickly identify and quantify escaping gas. These handheld instruments use sensors calibrated to specific hydrocarbons to pick up concentrations far below the threshold of smell.
Devices include catalytic bead, infrared, and semiconductor types, often paired with data logging and audible/visual alarms. Calibration, zeroing, and sensor selection guarantee reliable readings.
Pressure testing and line inspection procedures
Begin by isolating the gas line and securing all appliances. Then apply a calibrated pressure gauge to pressurize the system to a specified test pressure—usually higher than normal operating pressure—to verify integrity.
Technicians monitor pressure decay, inspect joints with soapy solution and electronic sniffers, and use pipe cameras where accessible. Any drop or visual defect prompts repair, retest, and certification before returning service.
Common causes of gas stove leaks and how to identify them
Common gas stove leaks often stem from worn or loose fittings and connectors, damaged supply lines or hoses, and faulty valves, regulators, or internal components.
Installation errors and aging systems further increase the risk of failure.
Each cause has identifiable signs—visible wear, odors, hissing sounds, or irregular burner performance—that guide inspection and diagnosis.
Worn or loose fittings and connectors
Loose or deteriorated fittings and connectors are frequent sources of gas leakage around stoves, since vibration, heat cycles, and aging can weaken seals and threads.
Inspections reveal cracked or corroded fittings, finger-loose nuts, or misplaced washers. A soap-and-water test shows persistent bubbles at joints.
Tightening, replacing worn connectors, or rehousing threads with proper sealant reduces risk; always follow manufacturer guidelines and shut off gas first.
Damaged supply lines and hoses
Inspecting supply lines and hoses is essential because physical damage, aging, or improper installation can create hidden leak points that release gas before a flame is ever struck.
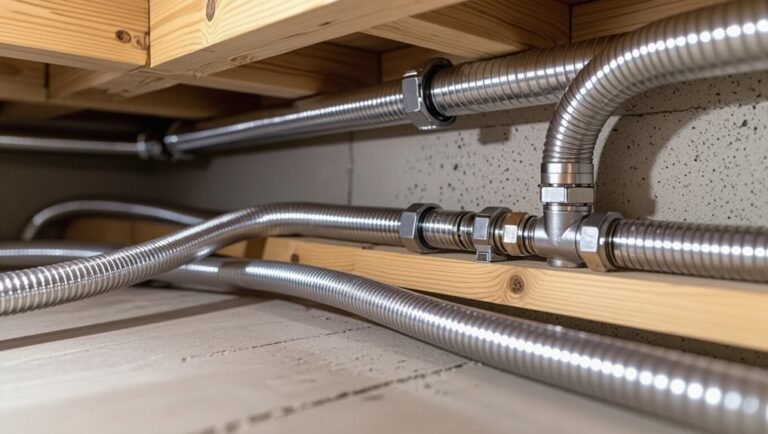
Visual checks reveal cracks, bulges, abrasions, kinks, corrosion, or brittle sections. Flexible hose fittings and clamps should be examined for fatigue.
Any suspect line warrants immediate replacement by a qualified technician to restore safe supply integrity.
Faulty valves, regulators, or appliance components
Check valves, pressure regulators, burner valves, and internal appliance components can fail or wear in ways that allow gas to escape even when controls appear off.
Symptoms include faint odor near control knobs, hissing with knobs closed, uneven burner ignition, or delayed shutoff.
Inspection requires visual checks, soap-bubble tests at fittings, and professional diagnosis for internal valve or regulator malfunction.
Installation errors and aging systems
Improper installation and aging components are frequent sources of gas leakage, often stemming from misaligned connections, incorrect fittings, or deteriorated seals and piping that develop cracks or corrosion over time.
Technicians note loose flare nuts, cross‑threaded joints, inadequate thread sealant, and brittle rubber hoses.
Regular inspections reveal discoloration, rust, hand‑tight fittings, and past repair evidence; these indicate elevated leak risk and need professional correction.
Repair options and when replacement is necessary
The article next outlines practical repair options, starting with simple, safe tasks homeowners can perform such as tightening connections or replacing a damaged hose.
It then distinguishes issues that require a licensed technician—like gas valve work, regulator replacement, or suspected line leaks—and explains criteria for when full replacement of the stove or gas line is the safer long-term choice.
Estimated costs and typical timeframes for common repairs versus replacement are provided to help weigh safety, budget, and urgency.
Simple fixes homeowners can do safely
Several straightforward repairs can be completed safely by a homeowner when a gas stove shows minor issues, such as faint odors, uneven burners, or ignition failures.
Tasks include cleaning burner ports and igniters, tightening loose fittings, replacing worn knobs, and checking hose connections for visible cracks.
Always shut off gas, ventilate, use correct parts, follow manufacturer instructions, and test for proper operation afterward.
Repairs that require a licensed technician
Call a licensed technician for any suspected gas leaks, persistent odors, damaged gas lines, or repeated ignition failures that simple cleaning and adjustments did not fix.
Qualified professionals can perform pressure tests, replace faulty valves, repair or reroute compromised piping, and service regulators or control modules.
They assess safety, obtain permits if needed, and recommend further action—repair versus professional replacement—based on code compliance and risk.
When to replace the stove or gas line entirely
When recurring leaks, extensive corrosion, or failed safety components make repairs costly or unreliable, replacement of the stove or gas line should be considered; a full swap is warranted when repair estimates approach or exceed the value of a safe, code-compliant installation or when hidden damage compromises long-term integrity.
Replacement is also appropriate after previous improper repairs, persistent odor despite fixes, or when upgrades are needed to meet current codes.
Estimated costs and timeframes for repairs versus replacement
A clear comparison of typical repair and replacement scenarios helps homeowners weigh costs, timelines, and long-term safety. Minor repairs (valve, seal) often cost $75–$300 and take 1–3 hours. Major repairs (regulator, burner assembly) run $300–$800, 2–6 hours. Full replacement typically costs $700–$2,500 and requires 1–2 days including permitting.
| Option | Typical cost/time |
|---|---|
| Minor repair | $75–$300 / 1–3 hrs |
| Major repair | $300–$800 / 2–6 hrs |
| Replacement | $700–$2,500 / 1–2 days |
Preventive maintenance to avoid future leaks
Preventive maintenance reduces the likelihood of future gas leaks through a few straightforward measures.
A regular inspection checklist and recommended intervals for professional servicing help catch wear and faults early.
Proper installation or upgrades, combined with safe storage and use practices, further minimize risk.
Regular inspection checklist
Although small issues often start unnoticed, a concise regular inspection checklist guarantees timely detection and correction of components that can lead to gas leaks.
A practical routine notes visible wear, odor, and functionality without replacing professional servicing.
Include quick checks:
- Inspect burner flames, connections, and hoses for cracks or corrosion
- Smell test for faint gas odor around joints
- Verify knobs, pilot light, and ventilation operate smoothly
Recommended frequency for professional servicing
Because gas systems can develop hidden faults over time, homeowners should schedule professional servicing at predictable intervals to catch issues before they become leaks.
Annual inspections are commonly recommended; households with older appliances, frequent use, or prior issues may require biannual checks.
Technicians should test connections, regulators and detectors, document findings, and recommend repairs or replacements to maintain safety and prevent future leaks.
Proper installation and upgrade tips
Guarantee correct installation and timely upgrades to minimize leak risk: gas lines, fittings, and appliances should be installed by licensed professionals following local codes and manufacturer instructions, using approved materials and proper pipe sizing.
Shutoff valves, flexible connectors, and pressure regulators need correct selection and secure attachment, while replacing aging components—such as corroded piping, worn connectors, or outdated valves—with modern, certified parts reduces failure points and improves overall system safety.
Regular documentation, permits, and verified pressure tests confirm integrity.
Safe storage and use practices to minimize risk
When storing and using gas-related equipment, occupants should follow clear routines that minimize accident risk:
store cylinders upright in ventilated, cool areas;
keep valves closed and caps fitted;
check hoses and fittings before each use;
avoid flammable materials nearby;
use detectors and regularly test alarms;
schedule professional inspections;
rotate older components;
and train household members on shutoff procedures and emergency contacts to reduce leak likelihood.
Legal, insurance, and regulatory considerations
Consideration of reporting requirements and local building codes is essential when addressing a suspected gas stove leak.
Homeowners should understand how leaks and repairs can influence insurance claims and coverage determinations.
Keeping clear records of inspections, notifications, and remediation work supports compliance and any future claims.
Reporting requirements and building codes
Although local ordinances and building codes vary, many jurisdictions require prompt reporting of suspected gas leaks to authorities. Compliance with these rules affects landlord, homeowner, and contractor responsibilities as well as insurance coverage.
Owners must follow mandatory notification, allow inspector access, and use licensed technicians for repairs. Failure to comply can trigger fines, mandatory remediation, occupancy restrictions, and potential liability under code enforcement.
How gas leaks affect home insurance claims
Any confirmed or suspected gas leak can greatly influence a homeowner’s insurance claim because insurers assess causation, maintenance history, and compliance with codes to determine coverage eligibility and payout amounts.
Insurers may deny claims for negligence, lack of maintenance, or unauthorized modifications.
Prompt reporting, professional inspection, and adherence to local regulations improve claim prospects; legal disputes can arise if responsibility is contested.
Records and documentation to keep after repairs
When a gas-stove leak has been repaired, homeowners should assemble clear, dated records that document the work, because those files are central to proving prompt remediation, establishing liability, and securing insurance or regulatory compliance.
Include repair invoices, technician credentials, before-and-after photos, test results, permit or inspection reports, warranty information, and correspondence with insurers or authorities.
Store copies digitally and retain originals per insurer or local-code timelines.
Common mistakes and misconceptions about gas leaks
Many people attempt quick DIY repairs that can worsen a leak or create fire hazards, so professional assessment is recommended.
Common myths—such as relying solely on added odorants, expecting the same symptoms in every case, or assuming a faint smell always indicates a serious leak—can delay appropriate action.
Confusing other appliance odors (like sewage, rotten food, or propane from outdoor lines) with a gas stove leak is a frequent source of misdiagnosis.
Dangerous DIY fixes to avoid
Attempting improvised repairs or relying on myths can transform a manageable gas leak into a life-threatening emergency.
Common dangerous DIY fixes include sealing fittings with tape, using open flames to locate leaks, and attempting to swap regulators without proper tools. Such actions risk ignition, improper pressure, or delayed detection.
Always evacuate, ventilate if safe, and call a qualified gas technician or emergency services.
Myths about odorants, symptoms, and detection
After stressing that improvised repairs can escalate danger, the discussion shifts to common misconceptions about how gas leaks are noticed and detected.
Many assume mercaptan odor is always obvious, that symptoms are uniform, or that simple sniffing suffices.
In reality, scent masks, olfactory fatigue, and subtle pressure or pilot-light issues can hide leaks; professional equipment and prompt inspection remain essential.
Misinterpreting other appliance smells for gas
How can a pungent odor be confidently attributed to a gas leak rather than a different appliance?
Observers should compare scent timing, location, and source: burning plastic, overheated insulation, or fridge coolant produce distinct smells and often coincide with device use.
Confirm by isolating appliances, ventilating, and using a gas detector or professional inspection before assuming a stove leak.
Quick reference checklist for homeowners
A concise checklist helps homeowners respond quickly and confidently to suspected stove leaks. Suggested items include immediate safety steps, simple tests to perform, and guidance on when to call a professional:
- Shut off gas, ventilate the area, and evacuate if odor is strong.
- Perform a soap-bubble test and check appliance connections; follow a basic maintenance schedule.
- Contact a licensed technician for persistent odor, confirmed leak, or annual inspections.
Immediate actions
Respond immediately and prioritize safety: leave the area, avoid flames or sparks, and do not operate electrical switches.
Close the stove’s gas valve if reachable without entering the danger zone.
Ventilate from outside by opening windows and doors.
Evacuate occupants and pets.
From a safe distance, call the gas utility or emergency services.
Do not re-enter until professionals declare it safe.
Tests to perform
After evacuating and contacting authorities, homeowners can run a short set of simple checks from a safe distance or once professionals have declared it safe. These tests help confirm a leak or rule out false alarms.
Check for persistent odor, listen for hissing, apply soapy water to connections to spot bubbles, test adjacent rooms for smell, and verify pilot lights and appliance valves are off before reinspection.
When to call a professional
If homeowners detect a strong gas odor, hear continuous hissing, find bubbles from a soapy-water check, notice multiple pilot lights failing, or experience symptoms like dizziness or nausea, they should call a licensed gas technician or emergency services immediately.
Additionally, call a professional for unexplained pressure drops, repeatedly tripped gas detectors, visible corrosion or damaged fittings, or after any repair beyond shutting valves.
Stay clear and ventilate until help arrives.
Maintenance schedule reminders
A concise maintenance checklist helps homeowners keep a gas stove safe and functional by scheduling simple inspections and routine tasks at regular intervals.
Monthly: check burner flames, clean burners and grates, inspect visible connections.
Quarterly: test carbon monoxide detector, clean vent and pilot assembly.
Annually: professional leak inspection, replace flexible supply hose if aged, review user manual for model-specific guidance.
Conclusion
When a gas stove leak is suspected, swift, calm action preserves safety: shut off the gas, ventilate, and evacuate if odor or symptoms persist. A stitch in time saves nine—small maintenance now prevents larger hazards later. Homeowners should use simple tests, seek professional leak detection, and follow legal and insurance steps. Regular inspections and cautious use mitigate risks, ensuring a household where fire and fumes are controlled rather than feared.