How to Fix a Clogged Sump Pump: Step-by-Step Troubleshooting and Repair Guide
To fix a clogged sump pump, first, shut off the power and check for signs like slow discharge, constant cycling, or unusual noises. Inspect the sump pit, float switch, intake screen, and discharge line for debris. Remove any obstructions, clean the impeller and screen, and flush the discharge pipe. Test the pump with a bucket to ensure it activates properly and check for overheating. If seals are worn or the pump is damaged, replace them. Regular maintenance and safety checks will help prevent future clogs. More detailed troubleshooting steps follow.
What a Clogged Sump Pump Looks Like and Why It Matters
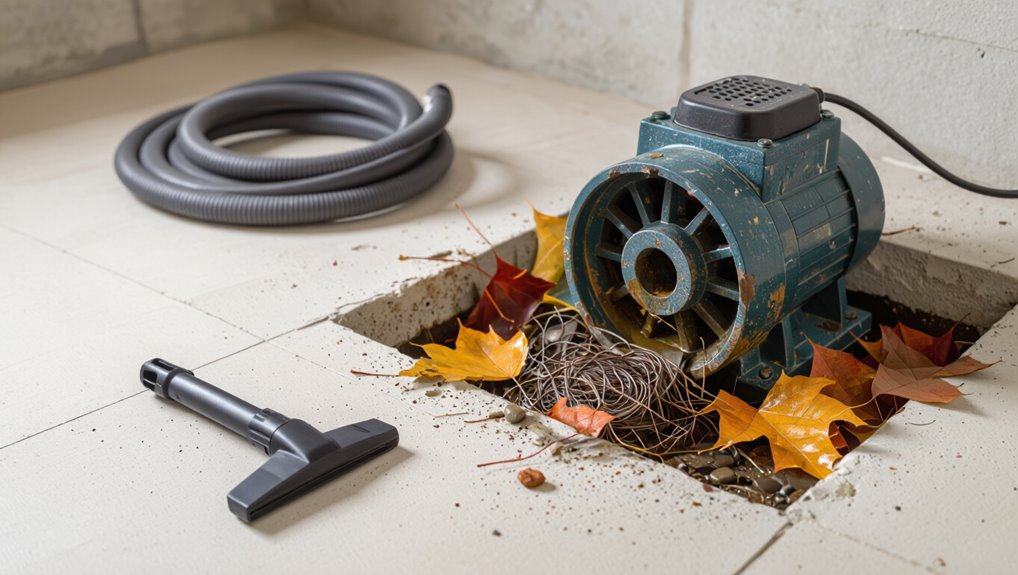
A clogged sump pump often shows clear signs such as slow discharge, continuous running, unusual noises, or standing water in the pit.
Ignoring these indicators can lead to basement flooding, irreversible motor damage, and unpleasant odors from trapped debris.
Recognizing problems early reduces repair costs and prevents property damage.
Common signs of a clogged sump pump
How can one tell when a sump pump is clogged? Common signs include slow or no water removal, continuous cycling, unusual noises, visible debris around the intake, and a stalled impeller.
Reduced discharge flow or backup in the basin often prompts inspection. These indicators guide practical steps in how to fix a clogged sump pump by identifying blockage locations and urgency.
Risks of ignoring a clogged sump pump (flooding, motor damage, odors)
When left unaddressed, a clogged sump pump can quickly escalate from a minor nuisance to a costly hazard, threatening property and health.
Unchecked clogs cause basement flooding, water damage to finishes, and ruined belongings. Persistent strain overheats and damages the motor, shortening service life.
Stagnant water and trapped debris produce foul odors and mold growth, creating health risks and costly remediation.
Quick Checklist to Confirm a Clog Before You Start
Before inspecting the sump pump, a concise checklist of safety gear and basic tools should be reviewed.
The operator must know how to shut off power and, if applicable, stop water supply to the pump to avoid shock or flooding.
If the problem involves electrical faults, persistent leaks, or inaccessible blockages, a qualified professional should be contacted immediately.
Safety precautions and tools checklist
A brief checklist helps confirm a sump pump clog while ensuring safety is prioritized:
Wear gloves, eye protection, and nonconductive footwear; use a mask if mold or debris is present.
Gather tools: flashlight, pliers, screwdriver set, wet/dry vacuum, bucket, and a long stick or drain snake.
Inspect for loose wiring or standing water before proceeding.
How to safely shut off power and water to the pump
Cut power and isolate water to the sump pump before any inspection or disassembly to eliminate shock and flooding risks.
Locate and switch off the dedicated circuit breaker or unplug the pump; verify with a noncontact voltage tester.
Close the shutoff valve on attached discharge piping or the home’s main valve if needed.
Drain residual water from the line and confirm zero power and flow before proceeding.
When to call a professional immediately
When should a homeowner stop troubleshooting and call a professional?
Immediate contact is advised if water rises uncontrollably, electrical sparks or burning smells occur, the pump doesn’t run after power checks, unusual loud grinding persists, or sewage backup is present.
Also call if wiring or control switches appear damaged, multiple failures coincide, or the homeowner lacks tools or confidence to perform safe diagnostics.
Step-by-Step Troubleshooting to Identify the Clog
The technician begins by visually inspecting the sump pit and float switch for debris or misalignment.
A bucket test is used to confirm pump activation while the discharge pipe and check valve are inspected for blockages or leaks.
Electrical tests help distinguish a switch or wiring fault from a mechanical clog.
Inspecting the sump pit and float switch
Before any repairs begin, an initial inspection of the sump pit and float switch establishes whether debris, sediment, or a jammed mechanism is causing the clog.
The inspector removes the cover, visually scans for trash, sludge, or displaced gravel, and clears obstructions with a gloved hand or wet/dry vacuum.
The float arm and switch are checked for free movement and proper alignment.
Testing pump activation with a bucket test
Begin the bucket test by pouring a measured amount of water into the sump pit to verify whether the pump and float switch activate reliably under load.
Observe pump startup, run duration, and whether the float moves freely without sticking. Note unusual noises, delayed activation, or failure to stop.
Record results to determine if internal clogging, electrical faults, or float adjustment require further inspection.
Checking the discharge pipe and check valve
One should inspect the discharge pipe and check valve next, since blockages or a failed valve commonly prevent pumped water from leaving the system.
Visually trace the discharge line for kinks, crushed sections, ice, or debris. Remove visible obstructions, flush with water, and verify proper slope.
Test the check valve for leaks or reverse flow; replace if it sticks or leaks.
Diagnosing electrical and switch issues vs mechanical clog
A systematic approach distinguishes electrical or switch failures from a true mechanical clog by isolating each component and observing the pump’s response to controlled tests.
Inspect float switch movement, test power at the outlet, and operate the pump manually.
If it runs but won’t move water, suspect impeller blockage or intake obstruction.
If it won’t run, focus on wiring, switch continuity, or a failed motor.
How to Remove Debris and Unclog the Sump Pump
The next step focuses on removing physical obstructions to restore proper pump operation. This includes extracting debris from the pit, cleaning and freeing the float switch, and inspecting the intake screen and impeller for blockages.
Finally, the discharge line should be flushed and any remaining obstructions cleared before testing the pump.
Manual debris removal from the pit
Before reaching for tools, the power to the sump pump should be switched off and the lid removed to expose the pit; this prevents accidental activation and allows clear access to accumulated debris.
Using gloves and a flashlight, hands or a small scoop remove leaves, gravel, and sludge.
Inspect the inlet screen and pump opening; clear obstructions, dispose of debris, and recheck before restoring power.
Cleaning and freeing the float switch
Power should be cut and the lid removed before examining the float switch to prevent accidental activation.
The technician inspects the float for entanglement, algae, or sediment buildup. Using gloved hands and a soft brush, debris is removed and hinge points freed.
If the float binds on the guide or cable, adjust or replace the tether. Test movement manually before restoring power.
Clearing the intake screen and impeller
Begin by cutting electrical power at the breaker and removing the pump from the basin to access the intake screen and impeller safely.
Inspect the screen for grit, hair, and sludge; rinse with a hose.
Remove trapped debris from the impeller housing, using pliers or a soft brush to avoid damage.
Reassemble, test rotation by hand, then reinstall and restore power.
Flushing the discharge line and removing blockages
With the intake screen and impeller cleared and the pump removed from the basin, attention turns to the discharge line, where clogs often prevent proper drainage.
The line is flushed with a garden hose or pressure nozzle, working from the pump toward the outlet.
Obstructions are removed with a flexible snake or brush; fittings are inspected and resealed before reinstallation.
Repair and Replacement Procedures
Guidance on repair and replacement procedures covers when to fix or replace the impeller, seals, motor, and float components.
Clear step-by-step instructions should be provided for cleaning or replacing the impeller and for replacing the float switch or switch assembly.
The section should also explain how to select an appropriate replacement sump pump and the basics of proper installation.
When to repair the impeller, seals, or motor
Evaluating the impeller, seals, and motor requires inspecting performance, noise, and visible damage to determine whether repair or replacement is appropriate.
Repair is warranted for minor corrosion, bent vanes, or localized seal wear when parts remain available and cost-effective.
Replace the unit or major components if overheating, persistent vibration, extensive erosion, cracked housings, or seized bearings indicate imminent failure or safety risk.
Step-by-step impeller cleaning or replacement
Begin by disconnecting power and removing the pump from the basin to guarantee a safe, accessible workspace.
Once isolated, document the pump model and orientation so parts can be reassembled correctly.
Drain residual water, disassemble housing, and inspect the impeller for debris or damage.
Clean with a brush and water, remove obstructions, and replace worn or broken impellers.
Reassemble seals and housing, and test operation before reinstalling.
Replacing the float switch or switch assembly
Replace the float switch or switch assembly when the pump fails to start or stops unpredictably despite a clear impeller and power supply; this procedure restores reliable automatic operation by removing a faulty or intermittent control component.
Disconnect power, remove pump from basin, and access switch housing. Inspect wiring, mounts, and float for damage or obstruction.
Replace assembly with compatible part, secure connections, reinstall pump, restore power, and test.
How to choose and install a replacement sump pump
Selecting and installing a replacement sump pump requires matching pump capacity, head height, power source, and durability to the basin and site conditions. Then, follow proper installation steps to guarantee reliable operation.
Measure basin dimensions and static/head requirements. Choose a pump with adequate GPM and vertical lift. Verify float clearance and electrical/GFCI compatibility.
Secure discharge piping with check valve, seal connections, and test automatic cycling.
Preventive Maintenance to Avoid Future Clogs
Preventive maintenance reduces the chance of repeat clogs by combining regular inspections and seasonal servicing with practical upgrades.
Simple measures include fitting a secure pit cover and debris trap, following filtration and discharge-line best practices, and considering a larger pump, basin, or battery backup where capacity is marginal.
A concise, documented schedule guarantees issues are caught early and upgrades are implemented before failures occur.
Routine inspection schedule and seasonal maintenance
Because routine checks catch minor issues before they become blockages, a clear inspection schedule and seasonal maintenance plan are essential for keeping a sump pump reliable.
Inspect monthly during wet seasons and quarterly otherwise: check float movement, test automatic activation, clear visible debris, and verify discharge line flow.
Before freeze risk, drain and insulate exposed piping; record findings and schedule repairs promptly.
Installing a sump pit cover and debris trap
A properly fitted sump pit cover and a simple debris trap greatly reduce the risk of clogs by keeping leaves, sediment, and small objects out of the pit while allowing the pump to operate and vent safely.
Install a solid, sealed cover with gasket and access panel; fit a removable debris basket or screen over the inlet.
Inspect and clean monthly to maintain flow and prevent blockage.
Upgrading to a larger pump, basin, or battery backup
Consider upgrading the sump system when recurring clogs, frequent cycling, or insufficient capacity suggest current equipment is undersized or aging.
Replacing the pump with a higher-capacity, clog-resistant model, increasing basin volume for debris clearance, and installing a reliable battery backup improve reliability during storms and power loss.
Professional sizing and proper electrical connections guarantee peak performance and longer service life.
Filtration and discharge line best practices
When routine maintenance is prioritized, proper filtration and discharge-line practices drastically reduce the risk of future clogs. Installed inlet screens, debris traps, and a coarse pre-filter prevent sediment ingestion.
Regularly inspect and flush discharge lines, secure connections, slope pipes downhill, and add check valves to prevent backflow.
Seasonal clearing of vegetation and ice protection maintains unobstructed flow and extends pump life.
Troubleshooting Scenarios and Solutions
The troubleshooting section presents common failure modes and clear remedies for each situation. It addresses cases where the pump runs without discharging, fails to start, cycles erratically, or produces unusual noises and heat.
Use the following quick reference to identify likely causes and next steps.
- Check for blocked discharge, stuck impeller, or closed/obstructed check valve.
- Inspect power source, float switch, and wiring for faults or tripped breakers.
- Look for worn bearings, motor overheating, or debris causing intermittent operation and grinding.
Pump runs but no water is discharged
A running sump pump that fails to move water indicates a hydraulic or discharge blockage rather than an electrical fault; diagnosing this requires checking the discharge line, check valve, and impeller for obstructions or damage.
Inspect the discharge hose for kinks, frozen sections, or clogs. Verify the check valve orientation and seal, and remove debris from the impeller or volute to restore flow.
Pump doesn’t start at all
Investigate power and control components first if the sump pump fails to start at all, since most no-start cases stem from electrical or switch issues rather than the pump motor itself.
Check the circuit breaker, GFCI outlet, and wiring for power.
Inspect the float or pressure switch for binding or corrosion.
Verify the timer, alarm, and control panel.
Replace faulty switches or restore power before motor diagnosis.
Intermittent cycling or short-cycling
Recognize intermittent cycling or short-cycling by frequent on/off pump operation that runs in brief bursts rather than continuous cycles, which stresses the motor and shortens its lifespan.
Inspect float switch for sticking, incorrect positioning, or debris; confirm switch wiring and alignment.
Check for an oversized pit, improper float length, or rapid inflow from discharge backflow.
Replace faulty float or install a larger basin or check valve.
Loud noises, grinding, or overheating
Frequent short cycles can strain pump components, which may lead to loud noises, grinding, or overheating during operation.
Inspect for debris, damaged impeller, or worn bearings. Disconnect power, remove obstructions, and rotate the impeller manually to check smoothness.
Replace bent or scored parts, test the motor for overheating, and verify correct float switch operation and proper electrical supply before resuming normal use.
Cost, Time, and Tools Comparison
A brief comparison helps readers weigh DIY cleaning against hiring a pro by outlining typical costs, time commitment, and needed supplies. The table below summarizes estimated expenses, task durations, and essential tools to guide decision-making. This concise checklist highlights when a homeowner can reasonably tackle the job and when to call a technician.
| Item | Typical range / example |
|---|---|
| DIY cleaning cost | $0–$75 (replacement parts, cleaners) |
| Professional repair cost | $150–$600+ (service call, labor) |
| Time required | 15–90 minutes (simple to involved) |
| Essential tools & consumables | Gloves, wet/dry vacuum, pipe brush, replacement float switch |
Typical costs for DIY cleaning vs professional repair
One clear distinction between DIY cleaning and hiring a professional is the upfront cost: homeowners typically spend $10–$100 on basic tools and materials for a do-it-yourself sump pump cleaning, while professional repairs or service calls commonly range from $150 to $600 or more depending on diagnostics and parts.
DIY saves labor costs but risks missed issues; pros add warranty, expertise, and parts guarantees.
Time required for common unclogging tasks
Typical unclogging tasks vary widely in duration: quick debris removal or float-switch freeing can take 15–30 minutes, while sediment flushing, impeller access, or full pit cleaning often requires 1–2 hours.
Diagnostic-driven repairs or part replacements can extend to half a day or more. Expected times depend on pump accessibility, severity of clog, and experience level; plan backups for unexpected complications.
Essential tools and consumables checklist
Several essential tools and a few consumables cover most sump pump unclogging jobs, and grouping them by cost, required time to use, and function helps prioritize purchases and prep.
Low-cost: gloves, rags, bucket (minutes).
Mid-cost: adjustable wrench, pliers, flashlight (10–30 minutes).
Higher-cost: wet/dry vacuum, snake/auger (30–90 minutes).
Consumables: lubricant, replacement seals, hose clamps.
Signs It’s Time to Replace the Entire System
When a sump pump approaches common service life benchmarks or shows declining discharge rates, replacement may be warranted.
Repeated clogs and malfunctions despite proper maintenance indicate underlying system failure rather than isolated incidents.
Comparing cumulative repair costs and downtime with the price of a new unit helps determine whether replacement is the more economical choice.
Age and performance thresholds
Evaluate the system’s age and documented performance to determine if replacement is warranted: most sump pumps reliably last 5–10 years depending on model and usage, but a unit exceeding that range or showing reduced pumping capacity, frequent cycling, or persistent overheating signals the need for a full-system replacement rather than repeated repairs.
Consider wear on seals, motor amperage draw, decreased flow rates, and outdated float or backup compatibility when deciding.
Recurring failures despite maintenance
Recognize recurring failures despite regular maintenance as a clear indicator that patch repairs are no longer sufficient.
Repeated clogs, frequent motor cycling, erratic float behavior, or recurrent electrical faults after servicing signal systemic wear, poor compatibility, or installation issues.
When failures persist, consider full replacement: it restores reliability, prevents repeated downtime, and guarantees proper capacity and safety rather than chasing temporary fixes.
Cost-benefit of replacement vs repeated repairs
A clear tally of repair frequency, downtime, and total expenditure over a defined period reveals whether continued fixes are fiscally sensible or if full replacement is warranted.
Consider age, reliability, parts availability, and efficiency losses.
Compare cumulative repair costs plus risk of catastrophic failure against replacement price and improved performance.
When repairs approach or exceed replacement cost or risk remains high, replacement is prudent.
Final Safety Reminders and Next Steps
After repairs, the pump should be tested under normal and simulated high-water conditions and monitored for several cycles to confirm reliable operation.
A simple routine—checking float movement, listening for unusual sounds, and recording test dates—helps catch recurring issues early.
If performance is inconsistent, noises persist, or tests fail, a professional inspection or scheduled maintenance is recommended.
Post-repair testing and monitoring routine
Begin by running the sump pump through several controlled cycles to confirm reliable operation: observe startup, check for unusual noises, verify discharge flow and float switch responsiveness.
Inspect seals and wiring for leaks or heat. Log run times and any anomalies for 48–72 hours.
Reinspect the pit and discharge path after heavy rainfall.
Maintain battery backup checks and schedule routine visual monitoring.
When to schedule professional inspection or maintenance
Homeowners should arrange professional inspection or maintenance if any of the following occur: persistent or recurring clogs, unusual noises or odors, inconsistent cycle times, visible damage to the pump, corrosion on fittings, or failure of backup power systems.
A qualified technician evaluates mechanical wear, electrical faults, float switch alignment, check valve condition, and discharge obstructions. They provide preventive servicing and recommend timely repairs or replacements to guarantee reliable sump operation.
Conclusion
A clogged sump pump can be a quiet nuisance or a sudden flood; the guide contrasts calm maintenance with urgent action to emphasize stakes. By following inspection, cleaning, and repair steps, homeowners preserve dry basements and avoid costly water damage. Small fixes restore routine; persistent failures demand replacement. Ultimately, attentive care prevents catastrophe: routine vigilance stands opposite to emergency panic, and choosing the right response keeps property safe and costs controlled.