How to Test a Float Valve: Step-by-Step Guide to Diagnose, Adjust, and Replace
To effectively test a float valve, follow these concise steps: First, shut off the supply and inspect the valve for any cracks or deposits. Next, perform a static leak test to ensure no leaks are present. Observe the valve’s movement during the refill process, then measure the shutoff level. Adjust the arm or collar in small increments as needed. If you find worn seals, clean or replace them to ensure proper function. This guide will also provide detailed troubleshooting, adjustment tips, and replacement instructions for a comprehensive understanding.
What a Float Valve Is and How It Works
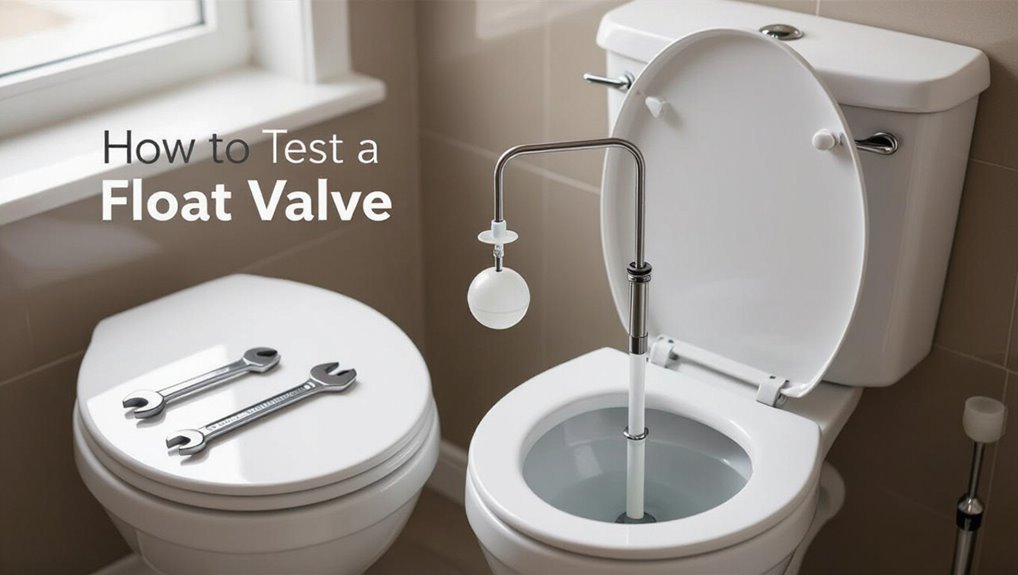
A float valve is a simple mechanical device that controls liquid level in fixtures such as toilets, water tanks, cisterns, radiators, and pools by opening or closing a valve in response to a floating element.
It typically consists of a float, an arm or lever, and a valve assembly, and operates by translating buoyant force into valve movement to admit or stop flow.
Float valves come in several types—ballcock, float-and-stem, diaphragm, and pilot-operated—each suited to specific pressures, flow rates, and installation constraints.
Definition and common applications (toilets, water tanks, cisterns, radiators, pools)
Float valves are mechanical devices that control liquid level by using a buoyant element linked to a valve mechanism to open and close the water supply as the fluid rises or falls.
They regulate tanks, cisterns, toilet fill valves, radiator header tanks, and pool skimmers.
Guidance on how to test a float valve often focuses on leak detection, responsiveness, and correct shutoff levels.
Basic components and operating principles
The float valve consists of a buoyant element connected by an arm or linkage to a valve body that opens and closes the water inlet. As liquid level rises, buoyancy lifts the float and transmits motion to the valve to reduce or stop flow, and as level falls the reverse occurs.
Key components include the float, arm/linkage, valve seat and seal, inlet assembly, and adjustment mechanism.
Types of float valves and when each is used
Varieties of float valves address different flow rates, pressures, fluids, and installation constraints, so selecting the proper type depends on the application’s specific demands.
Common types suit distinct roles:
- Ballcock: economical, household tanks and cisterns.
- Diaphragm float: precise control for moderate pressures, industrial process tanks.
- Pilot-operated: high-flow, high-pressure systems needing remote actuation and stable regulation.
Quick Diagnosis: How to Tell if a Float Valve Is Faulty
A quick diagnosis begins by noting common symptoms such as continuous tank fill, slow refill, or water running into the bowl.
A visual inspection checklist should include checking the float for cracks or waterlogging, verifying arm and valve alignment, and looking for mineral buildup or corrosion.
If symptoms persist, the article explains when to suspect related components like the fill valve, flapper, or worn seals.
Common symptoms of a failing float valve
Several telltale signs indicate a float valve is failing, and recognizing them quickly helps prevent water waste or damage.
Common symptoms include persistent running, inconsistent fill level, and unusual noises. Quick checks focus on performance rather than appearance:
- Continuous water flow after tank fills
- Water level that’s too high or low
- Hissing, clicking, or vibrating during refill
Visual inspection checklist
One brief visual sweep can often reveal whether a float valve is functioning or needs attention.
Check for visible cracks, corrosion, mineral buildup, or stuck float movement. Verify linkages and clips are intact and not bent.
Inspect seals and seat area for deposits or erosion. Confirm inlet connection is secure with no leaks or loose fittings visible.
When to suspect related components (fill valve, flapper, seals)
When unusual filling, persistent running, or intermittent flushing occur, related parts such as the fill valve, flapper, and seals should be suspected alongside the float valve.
Check for worn flapper edges, slow seat closure, and hardened or cracked seals.
Inspect the fill valve for inconsistent shutoff or surge noise.
Corrosion, mineral buildup, and loose fittings indicate component failure rather than solely float misalignment.
Tools and Materials You’ll Need
A concise list of essential tools and adjustment implements helps guarantee efficient testing and calibration of a float valve.
Common replacement parts such as seals, float arms, and washers should be on hand to complete repairs without delay.
Before beginning, basic safety precautions—shutting off water supply, wearing gloves and eye protection, and relieving system pressure—must be observed.
Essential tools for testing and adjustment
Several basic hand tools and a few diagnostic items are required to test and adjust a float valve safely and accurately.
Essential items include tools for access, measurement, and minor adjustments to diagnose operation and clear debris.
Typical selections are:
- Adjustable wrench, screwdriver set, pliers
- Small flashlight and inspection mirror
- Float level gauge or ruler, towels, bucket
Replacement parts to have on hand
Spare parts reduce downtime and simplify repairs during float-valve maintenance. Technicians should keep common replacements to address leaks, wear, and failed operation quickly.
- Replacement float assemblies (various sizes)
- Needle valves and seats
- Seals, O-rings, and gasket kits
Stocking these parts guarantees prompt restoration of proper function and minimizes service visits.
Safety precautions before starting
Before beginning work on a float valve, technicians should verify isolation of the water supply, relieve system pressure, and gather appropriate personal protective equipment and tools to prevent injury and damage.
They should confirm electrical systems are de‑energized if present, use lockout/tagout, have absorbent materials for spills, appropriate wrenches, replacement parts, a flashlight, and a containment tray to protect surrounding areas.
Step-by-Step Testing Procedure for Float Valves
The procedure begins with preparatory steps such as shutting off the supply and gaining clear access to the valve.
Then the tester performs a static leak test, observes float movement to verify the rise and shutoff point, and conducts pressure and flow checks to confirm shutoff under load.
Finally, sound and vibration are monitored for signs of internal wear or improper seating.
Preparatory steps: shutting off supply and accessing the valve
One clear step precedes any diagnostic work on a float valve: isolate the water supply and gain safe access to the mechanism.
Locate and close the correct shutoff (tank, supply stop, or main).
Drain residual water by flushing or opening a downstream tap.
Clear surrounding debris and guarantee stable lighting and workspace.
Use appropriate personal protection before proceeding with inspection.
Static leak test: checking for continuous flow
Begin by restoring supply briefly or opening the downstream tap so water reaches the float valve but the float remains in its resting (closed) position; this creates the static condition needed to observe whether any water passes the seat continuously.
Observe the outlet and surrounding fittings for steady dripping or trickle. Note flow rate, listen for hissing, and record findings to determine if seal replacement or seat cleaning is required.
Float movement test: observing rise and shutoff point
Allow the float to rise slowly by restoring normal supply while keeping downstream outlets closed so the valve can operate under typical fill conditions; observe the float’s travel, the exact point at which the valve begins to restrict flow, and the moment it achieves full shutoff.
Note any sticking, hesitations, or premature closure. Record travel distance and shutoff position relative to float arm, then compare to manufacturer specification.
Pressure and flow test: measuring shutoff under load
After recording float travel and shutoff position, proceed to test the valve under actual system load to verify leak-free closure at operating pressure and flow.
Isolate downstream if needed, apply normal supply pressure, and introduce typical demand flow.
Observe for dripping, pressure decay, or seepage over several minutes.
Note shutoff pressure, any steady leakage rate, and compare to manufacturer limits for pass/fail determination.
Sound and vibration checks
Listen for and feel any unusual noise or vibration while the float valve operates, since these signs often indicate cavitation, loose components, or flow turbulence that can shorten service life or cause failure.
Inspect mounting, linkage, and valve body for looseness. Note frequency, amplitude, and when noise occurs (startup, steady flow, shutoff).
Isolate sources using temporary damping or reduced flow to confirm origin.
Recording results and diagnostic notes
Record observations systematically, using a consistent format that captures date, tester, valve ID/location, test conditions, measured values (e.g., float travel, shutoff pressure, leak rate), and any anomalies noted.
Include clear pass/fail status, corrective actions taken, parts replaced, torque or adjustment settings, and timestamps.
Store records centrally for trend analysis, maintenance planning, and handover to stakeholders.
How to Adjust a Float Valve
Adjustment begins with identifying the valve type and the appropriate control: the float arm or collar on ball-type valves, or the float height mechanism on diaphragm and piston valves.
Small tweaks should focus on fine-tuning the shutoff level to prevent overflow while maintaining required fill height.
If proper operation is not restored after careful adjustment, replacement or deeper inspection of internal parts is likely required.
Adjusting the float arm or collar on ball-type valves
To change the shutoff level on a ball-type float valve, loosen the retaining nut or clip and reposition the float along the arm or slide the collar to the desired height; raising the float delays closure and lowering it causes the valve to close sooner.
After adjusting, secure the nut or clip, cycle the supply slowly, observe water level and valve response, and fine-tune until reliable shutoff occurs.
Adjusting the float height on diaphragm/piston valves
Begin by identifying the adjustment mechanism on the diaphragm or piston float valve—typically a threaded rod, set screw, or shank that changes the float assembly’s vertical position—and confirm the water supply is off or flowing slowly before making changes.
Loosen the lock, rotate or slide the float to the desired height, retighten securely, cycle the valve to check operation, and recheck for leaks.
Fine-tuning shutoff level and overflow prevention
Fine-tuning a float valve’s shutoff level requires small, deliberate changes and repeated testing to balance full tank capacity with reliable overflow prevention.
Adjust increments, record each change, then cycle refill and observe shutoff point. Ascertain clearance from fittings and avoid excessive buoyancy.
Confirm valve seats fully without flutter. Repeat until consistent shutoff occurs at desired level, with no siphoning or overflow.
When adjustment resolves the issue vs when it does not
One clear sign that an adjustment has resolved a float valve problem is consistent shutoff at the desired water level across several fill cycles without leaks, drips, or intermittent seating.
If leaks, slow fill, or erratic behavior persist, replacement or cleaning is required.
Persistent corrosion, warped components, or internal seat damage indicate adjustment failed; repair or full valve replacement follows diagnostic confirmation.
Cleaning and Minor Repairs
The section outlines practical steps for removing mineral buildup and trapped debris from the valve assembly.
It also covers replacing worn seals, washers, and seats, plus lubrication and careful reassembly.
Finally, it explains simple tests to verify proper operation after repairs.
How to remove and clean mineral deposits and debris
Begin by shutting off the water supply and draining the tank to expose the float valve assembly.
Inspect for crusted mineral buildup and trapped debris. Remove the float valve per manufacturer instructions.
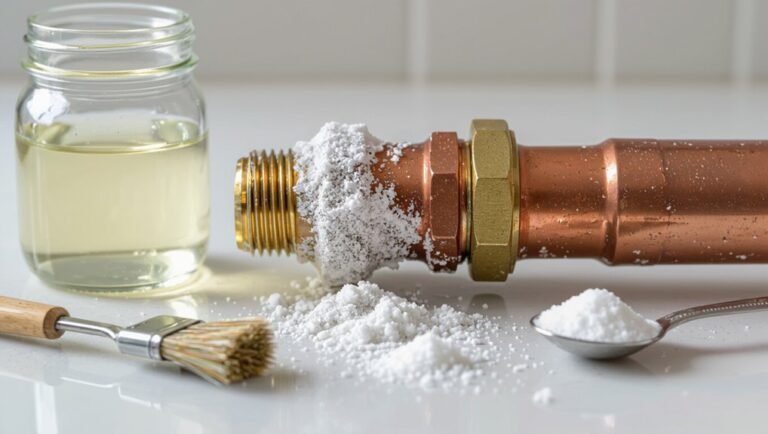
Soak metal parts in a vinegar solution to dissolve deposits, brush with a soft brush, rinse thoroughly, and clear passages with compressed air or a soft wire.
Reassemble and test for smooth operation.
Replacing seals, washers, and seats
Proceed to replace worn seals, washers, and seats to restore reliable sealing and prevent leaks.
Inspect components for cracking, flattening, or hardening. Match replacements to valve model and material.
Remove old parts carefully, seat new components evenly, and confirm proper alignment.
Test for leaks at low pressure, then under normal supply. Dispose of degraded parts responsibly.
Lubrication and reassembly tips
Reassemble components only after thoroughly cleaning mating surfaces and removing debris, corrosion, or old lubricant that could impair seals or movement.
Apply a thin film of compatible, non-petroleum lubricant to pivot points, O-rings, and threads to prevent sticking and protect rubber.
Hand-tighten fittings to specified torque, align float arm free of rub points, and replace fasteners with corrosion-resistant hardware where needed.
Testing after repair
Once cleaned and reassembled, the float valve should be tested methodically to confirm proper sealing, movement, and adjustment under normal operating conditions.
The technician slowly restores supply, observes fill rate, checks for leaks at seat and connections, and verifies float travel stops at the set shutoff.
Final checks include repeated cycles, listening for intermittent drips, and confirming steady closed position under pressure.
When and How to Replace a Float Valve
When a float valve shows persistent leaks, corrosion, or mechanical failure, replacement becomes necessary rather than repair.
Selection should match the application’s material, size, and compatibility requirements to guarantee reliable operation.
A clear replacement procedure for toilets, overhead tanks, and pools followed by post-installation testing and adjustment prevents recurrent issues.
Signs replacement is necessary
If persistent leaking, irregular float movement, or constant tank refilling occurs despite basic adjustments and cleaning, the float valve should be considered for replacement; these symptoms indicate internal wear, corrosion, or seal failure that cleaning cannot reliably fix.
Additional signs include visible cracks, warped or sticky floats, mineral buildup compromising actuation, repeated temporary fixes, and water hammer-related damage—any combination warrants replacement.
Choosing the right replacement valve (materials, size, compatibility)
Select a replacement float valve that matches the original system’s materials, inlet size, and mounting style to guarantee reliable operation and long service life. Consider corrosion resistance, float type, thread standard, pressure rating, and seal materials for compatibility. Confirm dimensions and connection types before purchase to avoid leaks or failures.
| Attribute | Consideration |
|---|---|
| Material | Brass, PVC, stainless |
| Size | Inlet diameter |
| Float | Ball, cup, arm |
| Seal | Rubber, EPDM |
| Pressure | Max operating psi |
Step-by-step replacement procedure for common installations (toilet, overhead tank, pool)
Begin by confirming that the supply is shut off and the system is depressurized. Then gather the correct replacement valve, basic hand tools, and any seals or mounting hardware.
For toilets: drain tank, remove old valve, fit new valve with new gasket, hand-tighten locknut.
For overhead tanks and pools: isolate, lower water level, detach float assembly, install replacement, secure fittings and restore supply.
Post-installation testing and adjustments
After reinstalling the float valve and restoring supply, testing and fine-tuning guarantee reliable operation and prevent leaks or overflow.
Inspect for visible leaks, then cycle fill and shutoff multiple times.
Adjust float height or arm to meet desired shutoff level.
Verify valve seats without drips.
Recheck connections and retorque if needed.
Document settings and monitor performance for 24–48 hours.
Troubleshooting Specific Scenarios
The guide now addresses common malfunction patterns to pinpoint causes and corrective actions.
It covers persistent flow after adjustment, intermittent leaks or slow fills, and cases of no or reduced water delivery.
Additional focus is given to noise and hammering issues as well as visible corrosion or freeze-related damage.
Valve won’t shut off despite adjustment
When a float valve continues to flow despite repeated adjustments, the issue usually stems from mechanical wear, debris interference, or incorrect seating rather than a misaligned float arm.
Inspect the valve seat, inlet seal, and float for cracks or mineral buildup.
Clean passages, replace worn seals or the entire valve assembly if deformation or corrosion prevents a proper seal, then retest under normal supply pressure.
Intermittent leaking or slow fill
If a float valve has been adjusted or replaced but does not maintain a steady seal, intermittent leaking or a slow fill can point to other causes that require targeted troubleshooting.
Inspect inlet screens for debris, confirm supply pressure, and check for partial obstructions in feed lines.
Examine seat and seal wear, and test for vibration-induced flutter.
Replace worn components or clear blockages.
No water flow or weak flow
Any instance of no water flow or a weak trickle at a float valve indicates a supply-side or valve-internal restriction that requires systematic isolation.
Inspect upstream shutoffs, supply strainer/screens, and branch shutoffs for closure or blockage.
Test supply pressure and flow at an upstream tap.
Disassemble valve to check debris, corroded parts, or clogged pilot/seat.
Replace faulty components or clean passages to restore full flow.
Noise, hammering, or water hammer issues
After ruling out supply restrictions and clearing internal blockages that cause weak or no flow, attention shifts to dynamic issues that produce noise, hammering, or water hammer.
Inspect for loose mounting, worn valve seat or pin, and rapid shutoff causing pressure spikes.
Test with a pressure gauge and slow-closing test.
Add arrestors or damping springs, replace faulty float valve components, and retest for repeat occurrences.
Corrosion or freeze damage
When temperatures plunge or corrosive water chemistry persists, float valves can suffer seized linkages, pitted seats, and cracked housings that compromise sealing and operation.
Inspect for mineral buildup, rust, and fracture lines; verify movement and seat contact.
Clean with appropriate descalers, replace corroded components, and drain/protect lines against freezing.
Confirm restored operation and consider material upgrades or corrosion inhibitors to prevent recurrence.
Preventive Maintenance and Longevity Tips
A regular inspection schedule with a concise checklist helps identify wear and functional drift before failures occur.
Attention to water quality and corrosion prevention, plus seasonal care and winterizing, extends component life and maintains reliable operation.
Professional service should be scheduled when corrosion, persistent leaks, or complex valve mechanisms exceed routine maintenance capabilities.
Routine inspection schedule and checklist
Establishing a routine inspection schedule guarantees the float valve remains functional and prevents costly downtime. Inspections should be performed at defined intervals based on operating conditions—monthly for high-use systems, quarterly for normal service, and semiannually for low-use installations.
A concise checklist guarantees consistency and early fault detection:
- Visual condition: leaks, deposits, loose fittings
- Functional test: smooth float movement, proper shutoff
- Adjustment and documentation: setpoints, corrective actions recorded
Water quality and corrosion prevention
Because water chemistry directly affects metal and rubber components, maintaining appropriate water quality is essential to prevent corrosion and extend float valve life.
Regularly monitor pH, hardness, and chloride levels; reduce dissolved oxygen and aggressive ions.
Use corrosion inhibitors, sacrificial anodes, or protective coatings where appropriate.
Flush sediment, replace degraded elastomers, and document treatments to inform future maintenance decisions.
Seasonal care and winterizing systems
When temperatures drop, routine winterizing preserves float valve function and prevents freeze damage by draining, insulating, and securing system components.
Inspect and drain exposed lines, clear debris from tanks, and replace deteriorated seals.
Apply insulation to vulnerable valves and fittings, use non-toxic antifreeze where appropriate, and secure floats against wind or vibration.
Document actions and schedule spring reinspection for safe restart.
When to call a professional
Recognize situations where a professional’s expertise prevents costly failures: persistent leaks, erratic float movement, corrosion or damage to valve bodies, repeated adjustments that fail to hold settings, and electrical or complex pneumatic control issues.
A technician assesses root causes, performs safe repairs or replacements, verifies system calibration, and recommends upgrades or maintenance schedules.
Engage professionals for warranty-sensitive or critical system applications to guarantee reliability.
Cost, Time Estimates, and DIY vs Professional Repair
Typical replacement parts for a float valve—seals, floats, and refill valves—usually cost between $5 and $50 depending on model and quality.
Routine inspection, adjustment, or cleaning can take 15–45 minutes, while full replacement often requires 30–90 minutes.
The decision to proceed as a DIY hinges on basic plumbing skill and access to tools; complex fittings, persistent leaks, or uncertainty about water shutoff are indicators to hire a plumber.
Typical costs for parts and common replacements
Often, costs for float valve parts and common replacements are modest, with individual components like rubber flappers, refill tubes, or float assemblies ranging from a few dollars to about $30, while complete replacement kits or premium valves can run $40–$100. Typical choices, cost range, and DIY versus pro considerations:
| Item | Typical cost |
|---|---|
| Flapper | $3–$15 |
| Refill tube | $2–$10 |
| Float assembly | $10–$30 |
| Replacement kit | $40–$100 |
Estimated time for inspection, adjustment, cleaning, and replacement
A routine inspection and basic adjustments of a toilet float valve generally take 10–30 minutes for someone with modest DIY experience.
Cleaning or replacing seals and minor components typically requires 30–60 minutes.
Full valve replacement, including shutoff, drain, fitment, and testing, usually takes 45–90 minutes.
Allow extra time for ordering parts or troubleshooting unusual issues; professionals may be faster.
Risk assessment: DIY suitability vs hiring a plumber
When weighing whether to tackle a float valve issue oneself or hire a plumber, consider the scope of the problem, the person’s skill level, and the potential costs of mistakes.
Simple inspections, seal cleanings, and minor adjustments are well within reach for a homeowner with basic tools.
However, corroded assemblies, hard-to-access tanks, or uncertain diagnoses can quickly escalate time and expense and warrant professional help.
Estimate DIY parts: $5–40; plumber service: $75–300+.
Quick Reference: Checklist for Testing and Fixing a Float Valve
Several clear steps guide a quick checklist for testing and fixing a float valve, focusing on inspection, simple diagnostics, adjustment, cleaning, and replacement.
A technician or DIYer follows a concise sequence: verify shutoff, observe fill behavior, test float movement, clean debris, tighten or replace parts as needed, and confirm leak-free operation.
- Inspect and observe operation
- Clean and test components
- Adjust or replace valve
Conclusion
To sum up, the guide empowers readers to diagnose, adjust, or replace a float valve confidently, restoring reliable water control. One striking statistic underscores the importance: 1 in 5 household leaks originate at valve fittings, wasting thousands of gallons annually. This fact highlights how a small, inexpensive repair can prevent significant water loss and costly damage. Taking timely action preserves plumbing function, saves money, and reduces environmental impact.