How to Fix a Squeaky Toilet: Easy DIY Repairs to Stop the Noise Quickly
If you’re dealing with a squeaky toilet, the good news is that it’s usually a quick fix. Most noises come from loose hardware, worn seals, or vibrating parts. Start by tightening the seat bolts, tank-to-bowl nuts, and floor flange screws. Lubricate hinges and pivot points, replace any degraded flappers or gaskets, and secure any wobbling with shims or a new wax ring. Most repairs can be completed in 15–60 minutes with basic tools. Follow the step-by-step guidance below for detailed troubleshooting tips.
What Causes a Toilet to Squeak or Creak
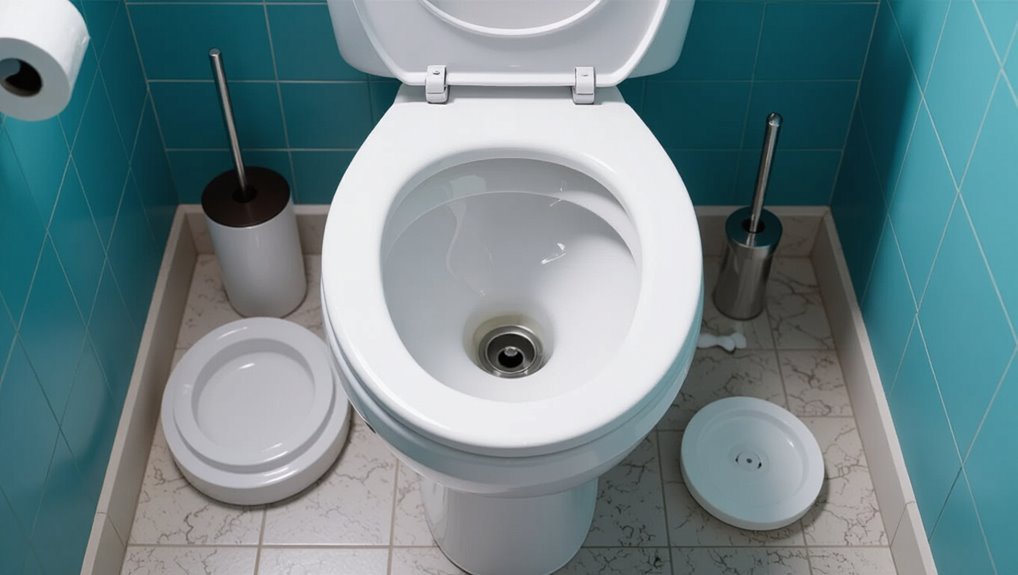
A variety of mechanical issues can produce squeaks or creaks, from worn bolts and loose seat hinges to failing tank components.
Changes in water flow or pressure often cause vibrating parts or rapid valve movement that generate high-pitched noises.
In some cases the sound stems from structural problems—loose mounting or an uneven floor—rather than the toilet’s internal hardware.
Common mechanical sources of toilet noise
When plumbing fixtures produce squeaks or creaks, the sounds usually originate from a few predictable mechanical issues: worn or loose bolts, deteriorated rubber seals, corroded metal parts, or improperly fitted supply connections.
Common sources include loose tank-to-bowl bolts, failing flapper seals, degraded fill valve components, and vibrating supply lines.
Identifying these parts guides how to fix a squeaky toilet quickly and effectively.
How water flow and pressure create squeaks
Several plumbing noises stem from moving water and fluctuating pressure within the toilet’s supply and refill system.
Rapid valve opening, turbulent flow through narrow passages, or partial blockage can produce high-frequency vibrations in plastic and metal parts.
Pressure spikes from nearby fixtures or a worn fill valve diaphragm cause transient squeaks.
Diagnosing flow-related noise focuses on supply pressure, valve operation, and internal component wear.
When the problem is structural or mounting-related
If mounting points, bolts, or the bowl-to-floor connection are loose or misaligned, the toilet can emit creaks and squeaks under normal use.
Structural movement transfers stress to porcelain and seat fittings, causing noise. Common causes include loose flange bolts, degraded wax rings, uneven flooring, or rusted hardware.
Tightening, shimming, replacing anchors, or resetting the bowl usually resolves mounting-related sounds.
Quick Checks to Diagnose a Squeaky Toilet
A brief safety and tools checklist should be reviewed before any inspection to guarantee the correct wrenches, gloves, and a flashlight are on hand.
The source of the noise is then isolated by listening and testing—whether it comes from the tank, the bowl, or movement at the floor.
If the cause is unclear or involves plumbing inside walls or a damaged flange, a professional should be contacted.
Safety and tools checklist
Before beginning diagnostics, the technician should assemble a concise safety and tools checklist to minimize risk and speed troubleshooting.
Required items: safety glasses, gloves, adjustable wrench, screwdriver set, flashlight, lubricant (silicone or plumber’s grease), plumber’s tape, rags, and a small container for fasteners.
Confirm water shutoff location, stable footwear, good lighting, and ventilation before proceeding.
How to isolate the noise (tank vs bowl vs floor)
Several quick checks help determine whether the squeak originates in the tank, bowl, or floor by isolating sound sources and observing responses to simple actions.
Tap tank walls, then bowl, listening for resonance. Press the seat and hinges while flushing to see if noise shifts.
Rock the bowl gently to test floor movement. Note when squeak occurs—during refill, flush, or constant—to pinpoint the component.
When to call a professional
When should a homeowner stop troubleshooting and call a pro? If the squeak persists after tightening bolts, replacing wax ring or shims, or isolating tank versus bowl, professional help is advised.
Also call a plumber if there’s leaking, cracked porcelain, wobbling that resists stabilization, or unfamiliar internal mechanisms.
A technician prevents damage, guarantees proper seals, and addresses structural or complex component failures safely and efficiently.
Fast Fixes to Stop a Squeaky Toilet
Fast, targeted actions often stop toilet noises without a full repair. Common remedies include tightening loose bolts, lubricating tank parts, and replacing worn gaskets or seals to remove vibration and leaks.
If needed, adjusting or replacing the fill valve and fixing a squeaky seat finish the job.
- Tighten loose connections and bolts
- Lubricate moving parts in the tank; adjust or replace the fill valve to eliminate vibration
- Replace worn tank-to-bowl gaskets and seals; fix a squeaky seat and lid
Tighten loose connections and bolts
Inspecting and tightening the toilet’s visible connections often stops squeaks quickly. The homeowner checks seat bolts, tank-to-bowl nuts, and floor flange screws.
Using appropriate wrenches and screwdrivers, each fastener is snugged—avoid overtightening porcelain. Replace any stripped washers or worn bolts.
After tightening, the toilet is tested for movement; remaining play indicates need for replacement parts or flange repair.
Lubricate moving parts in the tank
Check the tank’s moving parts for dry spots and mineral buildup, then apply a plumber-safe silicone or Teflon-based lubricant to pivots, flapper hinges, and the fill valve linkage.
Work sparingly, wipe excess, and cycle the handle several times to distribute lubricant.
Avoid petroleum-based products that damage rubber.
Inspect for continued rubbing or squeaks and relubricate as needed after several flushes.
Replace worn tank-to-bowl gaskets and seals
Replace the tank-to-bowl gaskets and seals when leaks, persistent squeaks, or visible deterioration appear; worn rubber or compressed washers can allow metal-on-metal contact or movement that causes noise and poor sealing.
Shut off water, drain the tank, unbolt the tank from the bowl, remove old gaskets, and install correct replacement parts.
Tighten bolts evenly to prevent cracking and retest for leaks and noise.
Adjust or replace the fill valve to eliminate vibration
Adjusting or replacing the fill valve often stops vibration-related squeaks by eliminating rattling or high-pitched noise caused by worn parts or improper water flow.
Inspect the valve for cracks, loose mounting, or a worn diaphragm.
Tighten or replace the valve, adjust float height to reduce turbulence, and guarantee secure connection to the supply line.
Test flushes and fine-tune until noise ceases.
Fix a squeaky seat and lid
Tighten loose seat hinges and lubricate pivot points to stop the common creaks from a toilet seat and lid.
Inspect hinge bolts and plastic anchors, replacing stripped fasteners with new kits if needed.
Apply a small amount of silicone grease or petroleum jelly to metal or plastic pivots.
Recheck alignment and torque bolts evenly.
Test by lowering and lifting the seat to confirm squeak elimination.
Secure or replace wax ring and flange if floor movement causes noise
If floor movement or rocking causes the toilet to squeak, the wax ring or the flange may be compromised and should be secured or replaced.
Inspect for wobble, water stains, or odor.
Tighten mounting bolts with care, using shims to level the bowl.
Replace a torn wax ring and a cracked flange; reseat the toilet and torque bolts evenly to restore stability and silence.
Detailed How-To: Replacing the Fill Valve
The section lists the tools and replacement parts required for a fill valve swap, including wrench, bucket, new valve assembly, and supply line components.
It then outlines clear steps to remove the old fill valve, from shutting off the water and draining the tank to loosening the retaining nut and lifting out the unit.
Finally, it describes installing the new fill valve, reconnecting fittings, restoring water, and testing for proper operation and leaks.
Tools and replacement parts needed
A compact kit and a few basic tools make replacing a toilet fill valve straightforward: a new fill valve compatible with the toilet model, an adjustable wrench or channel-lock pliers, a flathead screwdriver, plumber’s tape (Teflon tape), a sponge or towel for water cleanup, and a small bucket to catch drips.
Also include a new refill tube, replacement tank-to-bowl gasket, and replacement locknut; optional needle-nose pliers.
Step-by-step removal of the old fill valve
Shut off the water supply, flush the toilet to drain most of the tank, and blot remaining moisture with a sponge to prevent spills.
Disconnect the refill tube and unscrew the water supply line at the tank.
Remove the locknut beneath the tank with a wrench, lift out the old fill valve, and clear any residual debris or mineral buildup from the tank inlet before proceeding.
Installing and testing the new fill valve
Begin by inserting the new fill valve into the tank inlet and seating it squarely so the rubber washer aligns with the hole.
Secure the locknut underneath, hand-tightening then a quarter turn with a wrench.
Reattach the refill tube to the overflow pipe, reconnect the water supply, and open the shutoff valve.
Observe filling, adjust float for correct water level, and check for leaks.
Detailed How-To: Lubricating and Replacing Flapper/Chain Components
The section covers selecting suitable lubricants and replacement parts for rubber flappers and metal chains.
It outlines a concise inspection routine to clean or replace a worn flapper and clear mineral buildup that can prevent proper seating.
It also explains how to set chain length so the flapper seals reliably without excess slack or tension.
Choosing the right lubricant and parts
Several common causes of a squeaky toilet seat hinge and noisy flapper chain can be resolved by choosing appropriate lubricants and replacement parts; selecting materials rated for water exposure and chemical resistance guarantees longer-lasting repairs.
Use silicone-based or plumber’s grease for hinges, avoid petroleum on rubber flappers, and pick stainless or plastic chains and corrosion-resistant clips.
Match flapper size and seat hardware fittings.
Step-by-step flapper inspection, cleaning, and replacement
After selecting water-safe lubricants and corrosion-resistant parts, attention shifts to inspecting and servicing the flapper and its chain.
Drain tank, lift flapper, check for warping, mineral buildup, or cracks.
Clean with vinegar and a soft brush, apply a thin lubricant to hinge areas, test seal.
Replace a damaged flapper and attach a new corrosion-resistant chain, ensuring smooth movement.
Adjusting chain length and flapper seating
Begin by positioning the flapper at its resting seat and observing the slack in the chain with the tank lid removed.
Adjust chain length so slight slack remains—about 1/2 inch—preventing dragging or binding.
Verify the flapper seals evenly; reposition or replace if warped.
Lubricate contact points with silicone grease, reattach chain to flush lever, test multiple flushes, and confirm quiet, watertight operation.
Fixing Structural and Mounting-Related Squeaks
Next, the article addresses squeaks that originate from the toilet’s structure and mounting.
It covers tightening or replacing tank-to-bowl bolts and washers, stabilizing a rocking toilet without full removal, and replacing a damaged flange or wax ring.
Practical steps and safety notes for each repair are provided.
Tightening and replacing tank-to-bowl bolts and washers
Addressing tank-to-bowl bolts and washers often resolves squeaks caused by slight movement between the toilet tank and bowl; tightening or replacing these fasteners restores a firm connection and eliminates noise from shifting parts.
Shut off water, drain the tank, then use a screwdriver and wrench to snug nuts evenly.
Replace corroded bolts and deteriorated rubber or nylon washers to prevent recurrence.
Stabilizing a rocking toilet without removing it
Stabilizing a rocking toilet without removing it requires identifying the source of play—loose flange, uneven floor, or degraded wax ring—and applying targeted fixes that restore a solid, noise-free mount.
Use shims under the base (plastic or composite), secure with waterproof caulk, tighten closet bolts cautiously with nylon spacers to prevent cracking, and add a foam gasket or noninvasive flange extender to absorb movement.
Replacing a damaged flange or wax ring
If shimming and tightening fail to stop movement or the toilet rocks despite added support, the problem often lies at the flange or wax ring beneath the bowl.
Replace the wax ring and inspect the flange for cracks or corrosion; repair or install a flange repair ring as needed. Secure the toilet with new bolts and re-seal.
- Remove toilet
- Replace parts
- Reinstall and test
Comparison of Replacement Parts and Materials
A brief comparison of common replacement parts helps inform choices that affect longevity, noise, and cost. The table below summarizes typical options for fill valves, flappers, and seats with mounting hardware. Attention to material trade-offs can prevent recurring squeaks and leaks.
| Part | Material Option A | Material Option B |
|---|---|---|
| Fill valve | Plastic — economical, corrosion-resistant | Brass — durable, pricier |
| Flapper | Rubber — flexible, affordable | Silicone — longer-lasting, less deforming |
| Seat & hardware | Plastic seat, standard bolts | Metal seat/hinges, stainless or brass bolts |
Fill valves: plastic vs brass
Fill valves come in two common materials—plastic and brass—each offering distinct advantages and trade-offs in durability, cost, and corrosion resistance.
Plastic valves are lightweight, affordable, and resistant to many minerals but may wear faster.
Brass valves cost more, resist impact and high temperatures, and last longer in harsh water, though they can corrode over time and increase initial expense for replacements.
Flappers: rubber vs silicone
Flappers control the seal between tank and bowl, and their material—rubber or silicone—directly affects longevity, sealing performance, and responsiveness to water chemistry.
Rubber flappers are economical and compress well but degrade faster with chlorine and hard water.
Silicone resists chemicals, maintains elasticity longer, and provides more reliable long-term seals; they cost more but reduce replacement frequency and leak-related noises.
Seat materials and mounting hardware options
When choosing a replacement toilet seat, material and mounting hardware determine durability, comfort, and noise during use.
Plastic seats resist stains and are lightweight; molded wood adds warmth but can chip.
Soft-close hinges reduce slamming; stainless steel bolts resist corrosion.
Quick-release fittings simplify removal for cleaning.
Choose compatible hinges and durable fasteners to minimize movement, squeaks, and long-term maintenance.
Common Mistakes to Avoid When Repairing a Squeaky Toilet
Repair guidance should highlight common mistakes that can turn a minor squeak into a larger problem.
Over-tightening bolts risks cracking porcelain, while using inappropriate lubricants or sealants can damage parts or prevent proper sealing.
Additionally, failing to address underlying plumbing or floor issues can leave the noise and instability unresolved.
Over-tightening bolts and cracking porcelain
Tightening the toilet bowl bolts too aggressively can split glazed porcelain or strip threads, turning a routine squeak fix into a costly replacement.
Technicians recommend gradual, even tightening with a torque-limited approach or hand tools and felt washers to distribute pressure.
Inspect for hairline cracks before reassembly; stop at firm resistance.
Replace damaged bolts or bowl rather than forcing repairs that worsen structural failure.
Using wrong lubricants or sealants
After addressing hardware damage from over-tightening, attention turns to chemicals that can worsen seals or finish.
Using petroleum-based lubricants, household oils, or non-plumbing sealants can degrade rubber gaskets, swell or crack flappers, and ruin porcelain coatings.
Proper silicone-based or plumber-approved lubricants and NSF-listed sealants preserve components.
Always check product compatibility and manufacturer recommendations to avoid accelerating leaks or causing recurring squeaks.
Ignoring underlying plumbing or floor issues
Although a loose bolt or worn washer may seem like the obvious culprit, failing to investigate underlying plumbing or floor problems often leaves the real cause unaddressed.
Structural issues, warped subflooring, leaking flange seals, or shifting pipes can produce recurrent squeaks.
Proper diagnosis includes inspecting the flange, floor stability, and plumbing alignment; repairing these prevents repeat noise and avoids wasted temporary fixes.
Preventive Maintenance to Keep Your Toilet Quiet
A brief preventive plan keeps a toilet quiet and reduces repairs.
The article recommends a simple routine inspection schedule, a few monthly care tasks like tightening bolts and lubricating hinges, and guidance on when preventative replacement of worn parts is more cost-effective than repeated fixes.
Following these steps minimizes squeaks and extends fixture life.
Routine inspection schedule
When preventive checks are scheduled at regular intervals, small issues that cause toilet squeaks—loose bolts, worn washers, or mineral buildup—can be identified and corrected before they worsen.
A quarterly inspection checklist should note seat and tank fasteners, supply-line connections, and flange stability.
Record findings, date actions, and schedule repairs or parts replacement promptly to prevent noise recurrence and more extensive damage.
Simple monthly care tasks
Following the quarterly inspection schedule, simple monthly care tasks help prevent the minor problems that lead to squeaks from developing between formal checks.
Wipe exposed bolts and hinge points, apply a small amount of plumber-safe lubricant to seat hinges, check and tighten loose tank-to-bowl and seat fasteners, clear mineral buildup around moving parts with vinegar, and run a test flush to confirm quiet operation.
When preventative replacement is cost-effective
Several circumstances make preventative replacement more cost-effective than repeated repairs: persistent squeaks after routine maintenance, corroded or stripped fasteners, cracked or warped seats and hinges, and toilets older than 10–15 years with recurring component failures.
Replacing worn assemblies, fasteners, and seals in one intervention reduces labor, prevents vandalized finishes from recurring, and lowers long-term parts costs compared with frequent spot fixes.
Cost and Time Estimates for DIY vs Professional Repair
A brief comparison of typical parts costs and expected labor time helps homeowners decide between DIY repairs and hiring a professional. The table below summarizes common parts and estimated labor time for frequent squeak fixes. These figures give a practical starting point for budgeting and scheduling repairs.
| Item | Typical Parts Cost | Labor Time Estimate |
|---|---|---|
| Wax ring / seal | $5–$20 | 0.5–1.5 hrs (DIY) / 0.5–1 hr (pro) |
| Toilet seat / bolts | $10–$40 | 0.25–0.5 hrs (DIY) / 0.25–0.5 hrs (pro) |
| Tank-to-bowl bolts | $5–$15 | 0.25–1 hr (DIY) / 0.25–0.75 hr (pro) |
| Flapper / flush valve | $5–$25 | 0.25–0.75 hrs (DIY) / 0.25–0.5 hr (pro) |
| Professional service call | $75–$200+ | 0.5–2 hrs (including travel) |
Typical parts cost breakdown
Repair costs for a squeaky toilet vary by the faulty component and whether the homeowner tackles the job or hires a plumber.
Typical part prices:
- wax ring $5–15
- flange $10–40
- tank-to-bowl bolts $5–15
- seat hardware $5–25
- shims or felt pads $2–10
- tank gasket $3–20
- new seat $15–50.
Specialty or high-end components raise material costs accordingly.
Labor time estimates for common fixes
Estimate labor time by task and skill level to set realistic expectations for cost and scheduling.
Simple fixes—tightening bolts, lubricating hinges, replacing wax rings—typically take 15–45 minutes for a homeowner, 15–30 minutes for a pro.
Moderate repairs—replacing fill valves or flappers—take 30–60 minutes DIY, 20–40 minutes professionally.
Complex tasks like flange replacement may require 1–3 hours and specialized skills.
Signs the Problem Is More Serious Than a Squeak
Visible water leaks, staining around the base, or soft or warped flooring suggest damage beyond a simple squeak.
If the noise occurs alongside flushing failure, gurgling, or continues after multiple adjustments, the underlying mechanism or seal may be compromised.
These signs typically warrant prompt inspection or professional repair rather than simple DIY tightening.
Water leaks, staining, and floor damage indicators
When a squeak is accompanied by water stains, persistent dampness, or soft spots in the floor, it signals a problem beyond simple hinge lubrication.
These signs indicate leaking at the base, failed wax ring, or flange decay.
Inspect for discolored grout, peeling flooring, or musty odor.
Immediate repair prevents mold, structural rot, and costly subfloor replacement.
When squeaking accompanies flushing failure or persistent noise
Noticeable flushing failure or a persistent, rhythmic noise alongside a squeak often points to malfunctioning internal components rather than a simple hinge issue.
The article advises inspecting the flush valve, flapper, fill valve, and overflow tube for wear, mineral buildup, or misalignment.
If parts are damaged or seals fail, recommend replacement or professional service to prevent complete flushing failure and water waste.
Tools and Parts Shopping Checklist
A concise shopping checklist helps the reader gather what’s needed to stop a toilet from squeaking.
It covers essential tools, common replacement parts to keep on hand, and tips for reading specifications to guarantee compatibility.
The list below identifies the key items and considerations.
- Basic tools: adjustable wrench, screwdrivers, plumber’s tape, and gloves.
- Replacement parts: seat bolts, wax ring, tank-to-bowl gaskets, and replacement shims.
- Compatibility tips: match bolt sizes, check toilet model numbers, and verify material/type in product specs.
Essential tools for DIY toilet quieting
Most DIY toilet quieting projects require a small set of common tools and a few replacement parts to diagnose and fix typical causes of squeaks and slaps.
Essential items include an adjustable wrench, pliers, screwdriver set (flat and Phillips), silicone lubricant, utility knife, bucket, towel, and flashlight.
A small assortment of replacement bolts, washers, and felt or rubber shims aids adjustments.
Replacement parts to keep on hand
Preparation for quick fixes begins with a compact stash of common replacement parts that address the usual sources of toilet noise.
Include extra tank-to-bowl gaskets, flapper valves, fill valves, float assemblies, and wax rings.
Add tank bolts, rubber washers, and a flexible supply line.
Keep a small tube of plumber’s grease and a spare toilet seat hinge kit for quick, quiet restorations.
How to read part specifications and compatibility
When shopping for replacement parts, the homeowner should match model numbers, dimensions, and connection types to guarantee compatibility. Manufacturers often list part numbers, dimensions (bolt spacing, flange diameter, and thread size), and inlet/outlet fittings that must align with the toilet’s existing hardware.
Verify material, pressure ratings, and mounting styles. Check OEM cross-references and confirm return policies before purchasing to avoid mismatches and delays.
Troubleshooting Guide: If the Noise Persists
If the squeak continues after basic fixes, the sequence of adjustments should be re-checked and more advanced diagnostics performed.
Simple tests—such as isolating the tank, listening for vibration while flushing, and feeling for loose mounting points—can help identify hidden sources.
If the problem persists or involves plumbing or structural issues beyond DIY scope, a licensed plumber or contractor should be contacted.
Re-check sequence and advanced diagnostics
Start by retracing the inspection steps and confirming each component’s condition before moving to advanced testing.
Systematically verify tank-to-bowl bolts, seat mounts, hinge hardware, and supply-line connections. Note any looseness, wear, or mineral buildup. Document findings and repeat simple adjustments.
If noise continues, escalate to targeted diagnostics: isolate vibration paths, check mounting flange integrity, and prepare for component replacement or plumber consultation.
Tests to identify hidden vibration sources
Begin methodically isolating potential vibration sources by dividing the toilet assembly and surrounding fixtures into testable zones: tank internals, seat and lid, tank-to-bowl connections, mounting flange and closet bolts, supply line and shutoff, and nearby cabinetry or piping that could couple noise.
Use fingertip pressure, narrow picks, and a screwdriver handle to localize rattles; tighten, dampen, or temporarily brace each zone and retest after each change.
When to escalate to a plumber or contractor
When should a homeowner call a professional? If diagnosing and basic repairs (tightening bolts, replacing wax ring, adjusting fill valve, adding shims) fail to stop noise, or if leaks, cracked porcelain, unstable floor, or recurring vibrations occur, escalate.
A plumber or contractor can inspect concealed damage, plumbing misalignment, or structural issues, provide proper replacement, and guarantee safe, lasting repairs beyond DIY scope.
Conclusion
A squeaky toilet often signals simple wear or loose parts, and this guide arms readers with quick checks, straightforward fixes, and clear replacement steps. With a little patience and basic tools, creaks can usually be silenced in an afternoon; if not, the checklist helps decide when to call a pro. Like tuning a stubborn violin, small adjustments restore harmony to the bathroom, preventing minor noises from growing into costly, disruptive problems.