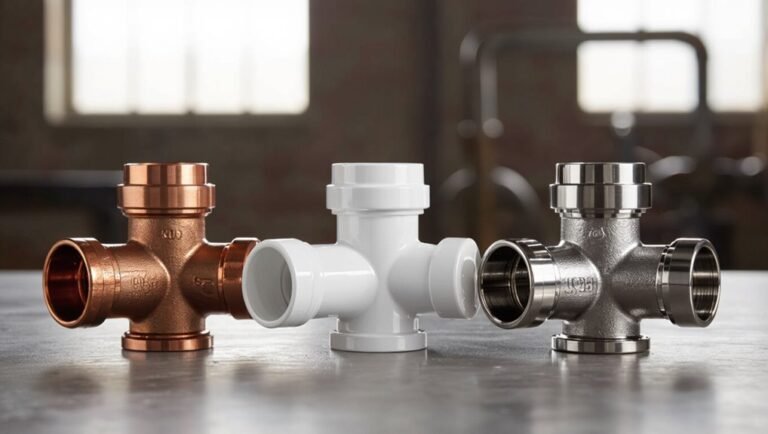
How to Replace an Electric Hot Water Heater: Step-by-Step DIY Guide for Homeowners
To replace an electric hot water heater, start by shutting off the power and water supply. Next, drain the old tank and disconnect the electrical and plumbing connections while wearing appropriate safety gear. Position the new unit and connect it using dielectric unions, ensuring it’s wired according to local codes and fitted with a tested pressure-relief valve. After slowly refilling the tank and restoring power, inspect the system for leaks and verify that it heats properly. For detailed step-by-step procedures, required tools, and compliance tips, continue reading.
Overview of Replacing an Electric Hot Water Heater
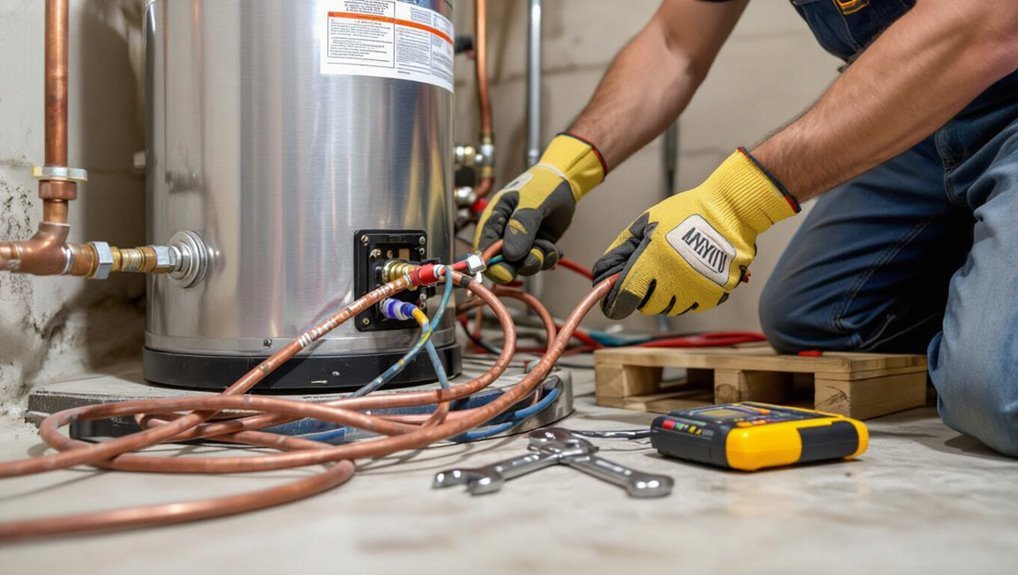
Replacing an electric hot water heater typically involves draining and disconnecting the old tank, installing the new unit, and reconnecting water and electrical supplies while ensuring proper grounding and leaks-free fittings.
Decisions to replace rather than repair depend on age, frequency of failures, and the extent of damage to elements or the tank itself.
Homeowners can expect varied costs, a half-day to full-day project for experienced DIYers, and moderate electrical/plumbing skills or the option to hire a licensed professional.
What replacing an electric hot water heater entails
Installing a new electric hot water heater involves removing the old unit, preparing the plumbing and electrical connections, setting the replacement in place, and testing for leaks and proper operation.
The process covers draining and disconnecting, handling wiring and circuit updates, securing inlet/outlet fittings, installing safety devices, and following code requirements.
A clear plan and proper tools simplify how to replace electric hot water heater safely and efficiently.
When to replace instead of repair
When is repair no longer practical and replacement becomes the wiser choice?
Frequent failures, repeated costly repairs, rusted tank, leaking seams, or loss of heating efficiency indicate imminent replacement.
If the unit is over 10–15 years old, parts are obsolete, or safety risks (electrical faults, burst risk) exist, replacement is typically more reliable and cost-effective than continued repair.
Estimated cost, time, and skill level
Several factors determine the overall cost, time, and required skill level for swapping an electric hot water heater: unit size and type, local labor rates, permits, hookup complexity, and disposal of the old tank.
Typical DIY costs range $400–$1,200 for a basic tank; pro installs $800–$2,500 including labor.
DIY time: 4–8 hours; professional: 2–4 hours.
Moderate plumbing and electrical skill recommended.
Tools, Materials, and Safety Equipment Needed
The section lists the essential hand and power tools required for removal and installation, such as wrenches, pipe cutters, and a multimeter.
It then identifies replacement parts and materials commonly needed—new tank, heating elements, thermostat, and fittings.
Finally, it outlines necessary safety gear and electrical precautions, including gloves, eye protection, and proper lockout/tagout of the electrical supply.
Required tools
Preparation begins with assembling the right tools, materials, and safety equipment to guarantee the replacement proceeds safely and efficiently.
Essential hand tools include adjustable and pipe wrenches, screwdrivers, pliers, tubing cutter, and socket set.
Additional items: voltage tester, multimeter, drain bucket, garden hose, Teflon tape, pipe sealant, pipe insulation, and work gloves with safety glasses.
Closed-toe shoes recommended.
Replacement parts and materials (tank, elements, thermostat, fittings)
Select replacement parts that match the home’s plumbing and electrical specifications to guarantee a reliable, code-compliant installation.
Choose a tank with appropriate capacity and inlet/outlet orientations. Match heating elements and thermostats to voltage and wattage ratings.
Include dielectric unions, shutoff valve, T&P relief valve, proper fittings, pipe connectors, and mounting hardware.
Use compatible electrical connectors and thread sealant rated for potable water.
Safety gear and electrical precautions
Having gathered compatible replacement parts and verified their ratings, attention turns to the tools, materials, and safety equipment required to perform a safe electrical and plumbing shutdown and replacement.
Required items include insulated screwdrivers, voltage tester, lockout/tagout kit, GFCI tester, rubber-soled boots, safety glasses, heavy gloves, pipe wrench, Teflon tape, bucket, and a fire extinguisher.
Verify circuit isolation before proceeding.
Preparing for the Replacement
Before beginning work, the homeowner should verify the correct replacement unit by matching tank size, capacity, and energy efficiency to household needs.
They must confirm local codes and obtain any required permits, then shut off the electrical supply and water to the tank following safe procedures.
Finally, the old heater should be drained systematically—attach a hose to the drain valve, open a hot water tap to vent, and empty the tank into a suitable drain or bucket.
How to determine the correct replacement unit (size, capacity, energy efficiency)
How many liters or gallons a household needs, and how efficiently the unit converts energy into hot water, are the two primary considerations when choosing a replacement electric hot water heater.
Assess peak demand, first-hour recovery, and tank size; compare energy factor or EF/UEF ratings; note physical dimensions and electrical requirements.
- A family shower schedule
- Compact closet fit
- High EF sticker
- Recovery coils humming
- Gallon markings visible
Checking local codes and permit requirements
Selecting the correct tank and verifying electrical capacity are only part of the preparation; compliance with local building codes and permit requirements determines whether the installation is legal and safe.
Research jurisdictional rules for water heater placement, venting, T&P relief, seismic strapping, and electrical connections.
Contact the local building department to confirm permit needs, inspection schedules, and documentation to avoid fines and guarantee code-compliant installation.
Shutting off power and water safely
Shut down the electrical supply and isolate the water feed to eliminate shock and flooding risks before any removal begins.
Confirm circuit breakers are off and lock out/tag out if possible.
Close the cold-water shutoff valve feeding the heater.
Verify power absence with a non-contact tester and confirm water isolation by opening a nearby hot faucet until flow stops.
Secure fittings and check for leaks.
Draining the old tank step-by-step
Begin by relieving pressure and removing as much water as possible from the tank to make it safe and light enough for removal.
Close cold supply, open a hot faucet, attach a garden hose to the drain valve, and route it to a floor drain or outside.
Open the drain valve and a vacuum breaker if present.
Flush until empty, then close valve and remove hose.
Removing the Old Electric Water Heater
The technician first guarantees the circuit is de-energized and disconnects the electrical wiring following lockout/tagout procedures.
Next, the water lines are shut off, drained, and disconnected while any residual leakage is contained and dried.
Finally, the tank is removed and transported for recycling or proper disposal according to local regulations.
Disconnecting electrical wiring safely
Before any wires are touched, confirm the breaker feeding the water heater is off and verify no voltage is present with a reliable non-contact tester or multimeter; if uncertainty remains, consult a licensed electrician.
Then remove the access panel and insulation, note wiring configuration and take photos, loosen terminal screws, disconnect conductors, cap or tape exposed ends, and secure loose wiring to prevent contact during removal.
Disconnecting water lines and handling leaking water
Shut off the cold-water supply at the house shutoff and open a nearby hot faucet to relieve pressure.
The person isolates supply and hot lines, then drains the tank via the drain valve into a hose directed to a floor drain or bucket.
Flexible connector fittings are loosened with wrenches.
Any residual drips are contained with rags and a mop; water sensors or towels prevent floor damage.
Removing the tank and disposing of the old unit responsibly
With water lines drained and connectors loosened, attention turns to removing the emptied tank. The unit is unbolted from its stand, tilted and slid onto a dolly.
Two people lift and maneuver it through doorways. Old wiring is capped and taped.
For disposal, the homeowner contacts a recycling center or bulk waste service; hazardous components are handled per local regulations.
Installing the New Electric Water Heater
The installer places the new tank in its final position and secures it according to manufacturer instructions and local codes.
Water lines, heating elements, thermostats, and electrical connections — including proper grounding — are reconnected using correct fittings and torque.
Finally, the system is refilled, air is purged, and all joints and connections are checked for leaks before restoring full power.
Positioning the new heater and securing it
Center the new electric water heater on its designated pad or platform, ensuring it sits level and stable before connecting any utilities.
Verify clearance per local code, align access panels and thermostat ports for serviceability, and attach seismic straps or anchoring brackets to studs or anchors.
Tighten fasteners securely without deforming the tank. Confirm stability and document positioning before proceeding to utility reconnections.
Reconnecting water lines and using proper fittings
Attach the cold and hot water lines using appropriate fittings and a brief plan to prevent leaks and cross-connection.
Use dielectric unions where dissimilar metals join, soldered or compression adapters as required, and tee off for pressure relief and drain connections.
Tighten fittings to manufacturer torque, apply thread sealant or tape on male threads, then open valves slowly and inspect all joints for leaks.
Installing heating elements and thermostats
With water lines secured and pressure tests completed, attention shifts to the electrical components: installing the heating elements and thermostats on the new unit.
The procedure involves seating element gaskets, threading elements into place with a torque wrench to specified values, and installing replaceable thermostats in their mounts.
After mounting, verify correct orientation, secure access covers, and label components for later wiring.
Reconnecting electrical wiring and grounding requirements
Reconnecting the electrical wiring is the final step before energizing the new water heater and must be done methodically to guarantee safety and code compliance.
The installer verifies power is off, matches and secures hot conductors to the heater’s terminals, tightens connections to manufacturer torque, installs a properly sized grounding conductor to the grounding lug or bonding screw, and restores circuit protection per local electrical code.
Refilling, purging air, and checking for leaks
Begin filling the tank slowly by opening the cold-water shutoff valve while a nearby hot faucet remains open to allow air to escape; this prevents pressure spikes and speeds the displacement of trapped air.
Observe steady flow from the faucet, then close it.
Inspect all fittings, inlet/outlet connections, T&P valve and drain for moisture.
Tighten or reseal any weeps; monitor for several minutes to confirm no leaks.
Initial Startup and Testing
Power is restored and the thermostat is set to the recommended initial temperature.
The unit is observed for normal operation while hot water temperature is measured at fixtures to confirm correct heating.
Finally, the pressure relief valve and electrical connections are inspected for proper function and safety.
Restoring power and initial temperature settings
After all electrical and plumbing connections have been confirmed secure and valves set, the technician restores electricity at the breaker and sets the thermostat to the manufacturer-recommended initial temperature—typically 120°F (49°C)—to balance safety and efficiency.
The technician then checks for warning indicators on the unit, inspects wiring and junctions for heat or unusual odors, and documents settings before leaving the site.
Verifying proper operation and testing water temperature
With the breaker re-engaged and initial thermostat set, the technician proceeds to confirm the water heater operates as designed by observing controls, indicators, and system responses.
They monitor heating element activation, listen for unusual noises, and check for steady tank warming over thirty to forty-five minutes.
After allowing recovery time, outlet water temperature is measured at a tap to verify target temperature and consistent delivery.
Safety checks: pressure relief valve and electrical inspection
While confirming normal heating behavior, the technician also conducts critical safety checks on the temperature and pressure relief (T&P) valve and completes a brief electrical inspection to secure safe operation.
They lift the valve lever to verify proper discharge and reseating, inspect wiring connections, check breaker and ground integrity, ascertain no leaks at fittings, and document findings with recommendations for corrective action if anomalies appear.
Common Problems During Replacement and Troubleshooting
During replacement and initial testing, several recurring issues may appear that require prompt attention.
Common items to check include absence of power or tripped breakers, leaks at fittings or tank connections, and incorrect or insufficient hot water.
Attention should also be paid to unusual noises or sediment buildup that can indicate internal problems.
No power or tripped breakers
Check the electrical panel and wiring first, as a lack of power or a tripped breaker is the most common and straightforward cause of an inactive replacement heater.
Inspect breakers for tripping, reset only after confirming safe conditions, and verify the dedicated circuit label.
Test voltage at the heater with a multimeter.
If breakers trip repeatedly, suspect a short, ground fault, or incorrect wiring and call an electrician.
Leaks at fittings or tank connections
Having ruled out electrical issues, attention should turn to plumbing connections where leaks are common after installation.
Inspect inlet/outlet fittings, relief valve, and drain valve for seepage.
Tighten loose connections, replace damaged washers or pipe dope/teflon tape on threads, and reseat compression fittings.
If the tank itself leaks at seams or fittings, replace the heater rather than attempting cosmetic repairs.
Insufficient hot water or incorrect temperature
Insufficient hot water or incorrect temperature often stems from thermostat missettings, a faulty heating element, improper tank size, or sediment buildup that reduces heat transfer.
Diagnosing requires verifying the thermostat setting, testing elements for continuity, and confirming the tank capacity matches household demand.
Replace defective elements or thermostats, guarantee wiring and breakers are correct, and consider upsizing or adding a secondary heater if usage exceeds capacity.
Strange noises or sediment issues
When owners hear popping, rumbling, or knocking from an electric hot water heater, the cause is often sediment buildup at the tank bottom that traps steam and reduces heat transfer.
Loose heating elements, worn anode rods, or mineral scaling on elements can also generate noise and lower efficiency.
Flushing the tank, replacing degraded elements or the anode, and installing a water softener resolve most issues and restore performance.
Efficiency, Maintenance, and Long-Term Care
Attention to routine care preserves performance and prevents premature failure of a replaced electric water heater.
Recommended tasks include regular tank flushing to remove sediment, periodic inspection and replacement of the sacrificial anode rod, and adding or improving insulation to reduce heat loss.
Clear guidelines for when to call a professional—such as persistent leaks, faulty heating elements, or gas/electrical safety concerns—should be part of any maintenance plan.
Flushing schedule and sediment prevention
Establishing a regular flushing schedule is essential to minimize sediment buildup, preserve heating efficiency, and extend tank life.
Homeowners should flush sediment annually in moderate-hardness areas and every 3–6 months where water is very hard.
Use the drain valve to remove debris until clear, then refill and restore power.
Regular flushing reduces noise, improves recovery time, and prevents premature element failure.
Anode rod inspection and replacement
Inspecting and replacing the anode rod is a critical maintenance task that prevents tank corrosion and preserves heating efficiency over the water heater’s lifespan.
Periodically check the rod for heavy corrosion, thinning, or depletion; replace when more than half consumed.
Use proper socket tools, shut off power and water, drain a few gallons, and install the correct-length magnesium or aluminum rod to extend tank life.
Insulation and energy-saving tips
Improve efficiency and lower operating costs by insulating the tank and pipes and by adopting simple temperature and usage adjustments.
Apply a suitable tank blanket and foam pipe insulation, seal gaps, and set the thermostat to 120°F.
Combine timed water heater use, low-flow fixtures, and routine leak checks to reduce standby losses and energy bills while extending appliance lifespan.
When to call a professional
When should a homeowner call a professional for an electric hot water heater?
A technician is recommended for gas conversions, electrical panel upgrades, persistent leaks, tank replacement beyond DIY scope, or failed safety devices (T&P valve, high-limit).
Also call for complex diagnostics, code compliance, warranty work, or if the homeowner lacks proper tools, permits, or confidence.
Professional service guarantees safety and long-term efficiency.
Cost Breakdown and Comparison of Options
When comparing replacement options, the analysis focuses on upfront cost, installation complexity, and projected operating expenses for tank versus tankless electric units. Warranty terms, expected lifespan, and return on investment are presented to clarify long‑term value. The table below summarizes key factors for quick comparison.
| Option | Typical Cost Range | Lifespan / Warranty |
|---|---|---|
| Tank | $500–$1,200 | 8–12 years / 6–10 yr |
| Tankless | $800–$2,500 | 15–25 years / 10–15 yr |
Tank vs. tankless electric replacement considerations
Although both tank and tankless electric water heaters provide hot water on demand, their upfront costs, installation complexity, and long-term operating expenses differ substantially.
Tank units cost less initially and are simpler to install; tankless models demand higher equipment and electrical upgrade costs but save energy with on-demand heating.
Size, household usage patterns, and available electrical capacity guide the best choice.
Warranty, lifespan, and return on investment
Cost considerations extend beyond purchase price and installation: warranties, expected service life, and projected operating costs determine true return on investment.
Homeowners should compare manufacturer warranty lengths, typical lifespans (tank: 8–15 years; tankless: 15–25 years), and energy consumption.
Calculate payback by combining initial cost, installation, maintenance, and annual energy savings to choose the most cost-effective, long-term option.
Tips to Ensure a Safe and Compliant Installation
Before closing the job, the installer confirms every connection and safety device is correctly installed and functioning.
Required documentation, permits, and inspection scheduling are handled promptly to meet local codes. Proper notification and record-keeping complete the installation process and protect the homeowner.
- A final checklist with tightness, wiring, T&P valve operation, and pressure tests
- Stamped permit folder and copy of the approved plans
- A scheduled inspection appointment with the local authority having jurisdiction
- Photo record of installations, serial numbers, and meter readings
- Signed completion form and warranty paperwork left with the homeowner
Checklist before finishing the job
A concise checklist assures the replacement is safe, code-compliant, and ready for daily use; it should cover electrical connections, grounding, temperature/pressure relief operation, leak inspection, and proper labeling.
Verify tight, secure wiring and correct breaker sizing, confirm T&P valve discharge routing and functionality, inspect all joints for drips under pressure, ascertain expansion tank presence if required, and affix permanent identification and date of installation.
Documentation, permits, and notifying inspectors
Several key documents and formal steps are required to guarantee the replacement meets local codes and is officially recorded: obtain the appropriate electrical and plumbing permits, complete any required manufacturer compliance forms, and prepare clear as-installed diagrams showing wiring, grounding, T&P valve routing, and expansion tank placement.
Schedule inspections, retain receipts and inspection reports, correct noted deficiencies promptly, and file final approval with the permitting authority.
Conclusion
After a meticulous march through tools, wiring, valves and warnings, the homeowner stands before a gleaming new tank — triumphant, yet oddly bond-free from the flood of contractors once feared. Ironically, the greatest victory is not a heroic plumbing feat but the quiet realization that routine maintenance and common sense would have avoided half the drama. Having learned enough to stay safe and competent, one can now enjoy hot showers and the comforting illusion of total mastery.