How to Use Emergency Heat on a Heat Pump: Step-by-Step Guide to Stay Warm Safely
To use emergency heat on a heat pump safely, activate it only during true heat-pump failures, heavy icing, or significant temperature drops. This backup mode relies on electric strips or a furnace and can increase your energy costs. Before switching to emergency heat, ensure power is on, check access to the outdoor unit, and confirm CO detectors are working. While in this mode, monitor the system for any unusual smells or sounds, and use it only for short periods. If issues persist, contact a professional for assistance. Detailed steps are provided below.
How Emergency Heat Works on a Heat Pump
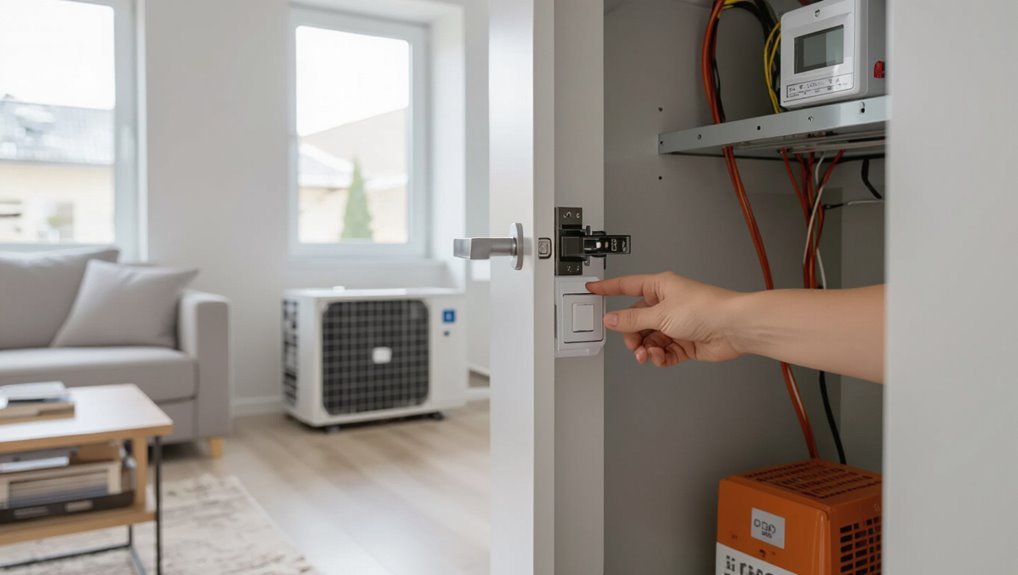
Emergency heat is the backup heating mode that supplies warmth when a heat pump cannot extract enough heat from the outside air. It is distinct from auxiliary heat, which assists the heat pump during normal operation.
It may engage automatically when the thermostat senses inadequate temperature or be selected manually by the homeowner for repeated defrost cycles or system faults.
Common emergency heat sources include electric strip heaters, gas furnaces, and oil-fired units, each providing direct heat independent of the outdoor heat pump loop.
What emergency heat is and how it differs from auxiliary heat
When a heat pump cannot efficiently extract warmth from the outside air, a secondary heating source automatically or manually takes over to maintain indoor temperature.
Emergency heat is a resistive or furnace backup used when the heat pump fails; auxiliary heat supplements during extreme cold.
Guidance on how to use emergency heat on heat pump emphasizes using it only for outages or malfunctions to avoid high energy costs.
When emergency heat activates automatically vs. manually
Heat pump systems switch into emergency heat either automatically—triggered by system faults, failed defrost cycles, or control-board commands—or manually via the thermostat when the primary heat pump is known to be inoperative.
Automatic activation preserves warmth without user input; manual selection provides user control for diagnostics or safety.
Both methods lock out normal heat-pump operation until the issue is resolved or the thermostat is reset.
Common types of emergency heat sources (electric strip, gas furnace, oil)
Several common backup systems provide auxiliary warmth when a heat pump cannot meet demand: electric resistance (strip) heaters, fossil-fuel furnaces (natural gas or propane), and oil-fired furnaces.
Electric strips heat quickly but increase electricity use. Gas furnaces offer efficient, sustained output where safe venting exists.
Oil furnaces provide reliable heat in off-grid or older systems but require storage and maintenance.
Quick Guide When to Use Emergency Heat
The guide outlines clear indicators for switching to emergency heat, such as persistent heat pump failure, rapidly falling indoor temperatures, or an ice-clogged outdoor unit.
It also notes situations where emergency heat is unnecessary or counterproductive, including brief power interruptions or already adequate auxiliary heat.
Safety considerations—like checking breaker and thermostat settings and avoiding prolonged use to prevent high energy costs or system strain—are highlighted before engaging emergency heat.
Clear indicators you should switch to emergency heat
When outdoor temperatures plunge or the heat pump’s outdoor unit stops running, homeowners should consider switching to emergency heat. This mode is designed for use only when the primary heat pump cannot provide adequate warmth due to compressor failure, frozen coils, or prolonged below-freezing conditions.
Clear indicators include steady indoor temperature drops, repeated defrost cycles, loud compressor failure noises, and visible ice buildup on the outdoor unit.
Situations when emergency heat is unnecessary or harmful
Occasionally, using emergency heat is unnecessary or can increase costs and wear without improving comfort; it should be reserved for true heat pump failures or extreme cold.
It is inappropriate when the system is defrosting, during brief temperature dips, if auxiliary heat already maintains setpoint, or when airflow issues, clogged filters, or thermostat misconfiguration are the real problems.
Unneeded use raises bills and component stress.
Safety considerations before engaging emergency heat
Before engaging emergency heat, assure basic safety checks are completed: verify carbon monoxide detectors are functioning, confirm clear access to outdoor and indoor units, and inspect electrical panels and thermostat wiring for obvious damage.
Additionally, secure fuel sources or backup electric circuits, review manufacturer warnings, confirm no unusual smells or sounds, and restrict operation if any safety concerns remain until a qualified technician inspects.
Step-by-Step: How to Turn On Emergency Heat Safely
The section outlines how to prepare the thermostat and heating system before engaging emergency heat to prevent damage or inefficiency.
It then provides clear, model-specific instructions for digital, programmable, and smart thermostats to activate emergency heat safely.
Finally, it explains how to switch emergency heat off and restore normal heat pump operation.
Preparing your thermostat and system for emergency heat
Prepare the thermostat and heat pump system methodically to confirm emergency heat engages only when needed and operates safely.
Inspect filters, clear vents, verify outdoor unit access, and ascertain power to the heat pump is uninterrupted.
Confirm thermostat batteries and display function.
Note system error codes and shut down auxiliary electric heaters.
Record settings before changes and consult the owner’s manual for system-specific precautions.
Detailed steps for common thermostat models (digital, programmable, smart)
Several common thermostat types—basic digital, programmable, and smart—require distinct sequences to activate emergency heat safely.
For basic digital units, select MODE until “EMER” or “Aux” appears, then confirm.
Programmable thermostats often need manual program override to switch mode.
Smart thermostats require accessing the app or device menu, choosing system settings, and selecting emergency heat or auxiliary heat, then confirming changes.
How to switch emergency heat off and return to heat pump mode
Switching emergency heat off and returning to the heat pump mode requires following the thermostat’s sequence carefully to avoid short cycling or damage; begin by confirming the outdoor unit is operational and the indoor temperature is stable.
Set the thermostat from EMR/EMG to HEAT or AUTO per model instructions, wait for the compressor to start, monitor for normal cycling, and resume scheduled programming once stable.
Troubleshooting Common Problems When Using Emergency Heat
When emergency heat is engaged but the home remains cold, the guide outlines checks for airflow, stuck dampers, and failed heat strips.
It also addresses unexpected spikes in energy use, thermostat failures to engage emergency mode, and situations where the auxiliary heat source produces no warmth.
Practical troubleshooting steps and when to call a technician are summarized to help identify and resolve these issues.
Emergency heat runs but house stays cold
A heat pump’s emergency heat may operate yet fail to warm the home effectively, and diagnosing why requires checking system limits and installation issues.
Possible causes include insufficient auxiliary capacity for extreme outdoor temperatures, reversed or closed dampers, blocked registers, malfunctioning or poorly sized backup coils, defective thermostats or sensors, and improper system configuration.
Professional inspection often identifies and corrects these faults.
High energy use or sudden spike in bills
Expect noticeably higher energy consumption when emergency heat is engaged, since the backup source—usually electric resistance or fossil-fuel burners—operates at much lower efficiency than the heat pump.
Users may see sudden bill spikes; investigate runtime, setpoint overrides, and prolonged emergency mode.
Check for stuck relays, short cycling, or blocked coils.
Consult utility rates and an HVAC technician to verify system faults and optimize usage.
Thermostat won’t switch to emergency heat
Diagnose the thermostat’s failure to switch to emergency heat by narrowing the issue to either user settings, wiring or control faults, or a malfunctioning sensor; each has distinct symptoms and fixes.
Verify mode and setpoint, inspect wiring terminals for loose or swapped leads, reset or replace faulty control boards, and test temperature sensors.
If uncertain, consult a licensed HVAC technician for safe diagnosis and repair.
No heat from auxiliary source
When the thermostat calls for emergency heat but the auxiliary source produces no warmth, narrow the fault to power, control signals, or the auxiliary unit itself by checking for incoming voltage, confirming relay or contactor operation, and verifying that the thermostat is actually energizing the aux/heater circuit.
Inspect fuses/breakers, test float or limit switches, measure heater element continuity, and guarantee proper wiring and ground.
Energy, Cost, and Efficiency Considerations
Emergency heat notably increases energy consumption and can raise heating bills due to its reliance on resistance or supplemental fossil-fuel systems.
Comparing costs shows emergency heat is usually more expensive per hour than allowing the heat pump to operate, though it may be necessary when the heat pump fails or in extreme cold.
Practical tips to minimize expense include using emergency heat only when required, raising thermostat setbacks, and improving home insulation to reduce run time.
How emergency heat affects energy consumption and bills
Any use of emergency heat markedly raises a heat pump system’s electrical draw because the backup source—typically electric resistance coils or a fossil-fuel furnace—operates at a far lower efficiency than the heat pump.
Consequently, energy consumption spikes, monthly bills climb, and peak-demand charges may apply.
Short, infrequent use minimizes cost impact; prolonged reliance notably increases utility expenses and reduces seasonal efficiency metrics.
Comparing costs: emergency heat vs. letting heat pump run
Although a heat pump supplemented by auxiliary heat can maintain indoor comfort during extreme cold, comparing the costs of engaging emergency heat versus allowing the heat pump to continue running reveals clear trade-offs in energy use and efficiency.
Emergency heat (resistive or gas) usually costs more per hour but restores temperature quickly; the heat pump is more efficient overall, though its performance drops as outdoor temps fall.
Tips to minimize cost while using emergency heat
Given the higher hourly cost of supplemental heat versus a running heat pump, homeowners can take targeted steps to limit emergency heat use and its expense.
Schedule emergency heat only when necessary, raise thermostat minimally, zone heat occupied rooms, improve insulation and seal leaks, use programmable setbacks, layer clothing and blankets, and restore heat pump operation promptly after resolving failures to minimize runtime and bills.
Safety and Maintenance When Relying on Emergency Heat
Before and after using emergency heat, routine checks of filters, switches, and visible components help confirm safe operation and identify issues.
If the backup uses combustion (furnace or space heater), attention to carbon monoxide detectors, proper ventilation, and clear exhaust paths is essential.
Any unusual noises, odors, persistent failure to heat, or detector alerts warrant prompt contact with a qualified HVAC technician.
Routine checks before and after using emergency heat
When emergency heat is engaged, homeowners should perform a few targeted checks to guarantee safe operation and prevent damage to the system.
Inspect filters and replace if dirty, verify thermostat settings match emergency mode, confirm exterior unit clearance from debris, listen for unusual noises, and monitor energy use.
After use, switch back to heat pump and recheck filters, wiring, and vents.
Carbon monoxide and ventilation precautions for combustion backups
After completing routine checks on filters, thermostat settings, and the outdoor unit, attention should turn to combustion-based emergency heat sources and the risks they pose.
Verify functioning CO detectors on each level, provide clear ventilation paths, never block flues or vents, and avoid indoor use of unvented combustion appliances.
Monitor for symptoms of CO exposure and ventilate promptly if alarms sound.
When to call a professional technician
Many homeowners should call a professional technician if the emergency heat system shows unusual behavior—such as persistent cycling, strange odors, visible soot, or failure to engage—since these signs can indicate electrical faults, gas leaks, or combustion inefficiencies that require trained diagnosis and repair.
A technician should also be summoned for persistent thermostat errors, tripped breakers, insufficient heat output, or after any fuel-related smell to guarantee safe, code-compliant operation.
Preventing Future Emergency Heat Use
Regular seasonal maintenance, such as cleaning coils and checking refrigerant, reduces the likelihood of unexpected heat pump failures that force emergency heat use.
Considering system upgrades or alternatives—like dual-fuel setups or backup generators—provides resilience during extreme cold.
Smart thermostat scheduling and automation can prevent cold snaps from triggering emergency heat by maintaining steady, efficient temperatures.
Seasonal maintenance to avoid emergency situations
Seasonal maintenance reduces the likelihood of needing emergency heat by ensuring a heat pump operates efficiently and reliably through temperature swings.
Routine tasks include filter replacement, coil cleaning, refrigerant level checks, thermostat calibration, and verifying defrost cycles.
Scheduling professional inspections before winter, clearing debris around outdoor units, and addressing minor repairs promptly prevents failures, improves performance, and reduces emergency heat reliance.
Upgrades and alternatives to emergency heat (dual-fuel systems, backup generators)
Several practical upgrades and alternatives can reduce reliance on emergency heat by providing more reliable, efficient backup and improving system resilience.
Homeowners may install dual-fuel systems that switch to gas or oil heat when temperatures drop, add dedicated auxiliary electric heaters for critical rooms, or equip the home with a standby generator to power heat pumps and controls during outages, minimizing emergency interventions.
Smart thermostat settings and automation to manage cold snaps
How can smart thermostats and automation reduce emergency heat reliance during cold snaps?
Smart thermostats optimize setpoints, enable geofencing, and stage heating to prioritize heat pump efficiency.
Automation schedules pre-warm cycles, monitors outdoor temperature and system performance, and notifies homeowners of anomalies.
Integration with weather forecasts and alerts prevents unnecessary emergency heat activation, prolonging equipment life and lowering energy costs.
Quick Reference Checklist
A concise checklist helps guarantee emergency heat is used safely and effectively when needed. It covers pre-switch safety checks, a clear step-by-step action sequence for switching on emergency heat, and post-use tasks to restore normal operation and schedule any required follow-up.
The checklist is designed for quick reference during stressful situations.
- Confirm power and clear area around the outdoor unit before switching modes
- Verify thermostat compatibility and set emergency heat per manufacturer instructions
- Observe system response for unusual noises, odors, or error codes during initial run
- Switch back to heat pump mode when conditions normalize and confirm normal heating function
- Schedule a professional inspection if performance issues or repeated emergency use occur
Pre-switch safety checklist
Before engaging emergency heat, the technician or homeowner should run a concise safety checklist to confirm power isolation, thermostat settings, and clear access to the outdoor unit and breakers.
Verify circuit breakers off, confirm outdoor disconnect open, set thermostat to emergency heat mode, inspect for ice/debris around the outdoor unit, and guarantee carbon monoxide detectors function.
- Breakers off
- Outdoor disconnect open
- Thermostat set correctly
- Outdoor unit clear
- CO detectors working
Step-by-step quick action checklist
Begin with a concise, numbered sequence that technicians or homeowners can follow under pressure:
1) Confirm power and thermostat access.
2) Switch thermostat to EMERGENCY HEAT.
3) Set desired temperature modestly.
4) Monitor system response for unusual sounds.
5) Note runtime and safety limits.
- Verify circuit power
- Use correct thermostat mode
- Avoid rapid temperature jumps
- Listen for faults
- Record start time
Post-use and follow-up checklist
Several concise checks should be completed immediately after emergency heat use to guarantee safety, prevent damage, and document performance.
Inspect system for odors or leaks, reset thermostat to normal mode, note runtime and conditions, schedule professional service if irregularities occurred, and replace any temporary heat sources used.
- Check for unusual smells or sounds
- Return thermostat to regular setting
- Log duration and temperature
- Book technician if needed
- Remove portable heaters
Conclusion
When outdoor temperatures plunge and the heat pump falters, emergency heat stands ready like a lighthouse guiding a ship through fog. It offers a reliable, if costlier, warmth when the primary system fails, echoing the old adage of keeping a spare candle during storms. Used judiciously and maintained properly, it protects home comfort until repairs restore normalcy—an interim guardian rather than a permanent replacement.