
How to Make a PVC Trap for Your Sink: Step-by-Step Guide and Common Mistakes to Avoid
To create a PVC sink trap that effectively blocks sewer gas and prevents clogs, follow this step-by-step guide. You’ll need to measure and cut PVC pipes, dry-fit the assembly, and use slip nuts and washers for secure connections. Ensure you solvent-weld the joints properly, avoiding both over- and under-tightening. Essential tools include a hacksaw, primer, cement, and safety gear. Be mindful of common mistakes, such as misalignment, using incorrect washers, and neglecting to include venting. When done correctly, your PVC sink trap will keep odors at bay and maintain proper drainage. The following sections will detail each step and provide solutions for common issues.
What a PVC Sink Trap Is and When You Should Replace or Install One
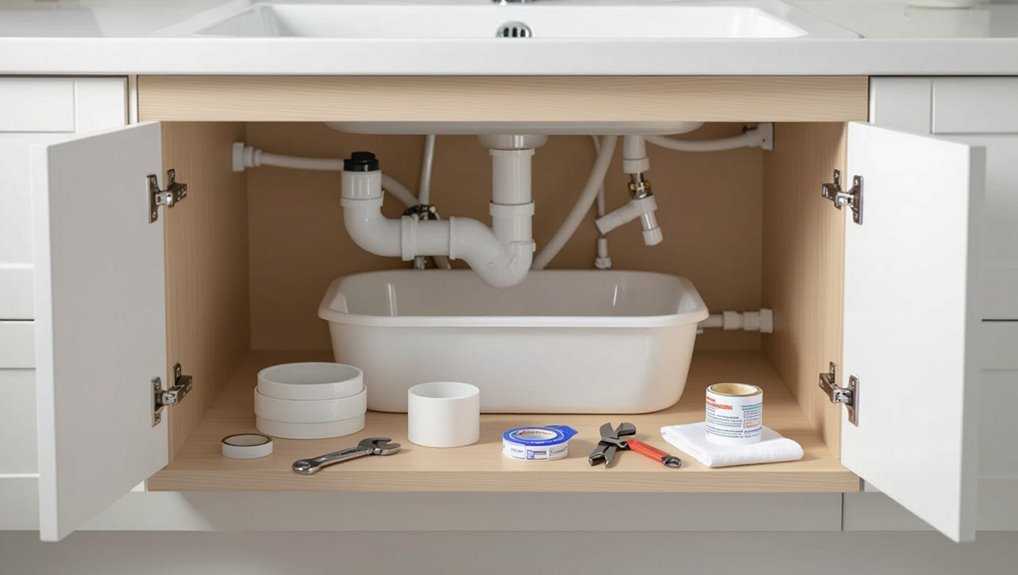
A sink trap is a U- or S-shaped pipe that holds water to block sewer gases while allowing waste to pass.
Different materials—PVC, ABS, and metal—offer varying durability, cost, and chemical resistance that influence selection.
Replacement or initial installation is recommended when there are leaks, persistent odors, slow drainage, or visible corrosion and damage.
Purpose of a sink trap in plumbing
Installers and homeowners rely on a sink trap—a curved section of PVC piping under a drain—to hold a small, permanent water seal that prevents sewer gases and odors from entering the living space while allowing wastewater to flow away.
The trap also captures debris to prevent clogs, supports proper venting, and permits inspection or replacement.
Guides on how to make a PVC trap emphasize correct slope, seals, and easy access.
Differences between PVC, ABS, and metal traps
When comparing trap materials, PVC, ABS, and metal differ in durability, chemical resistance, temperature tolerance, and cost, which informs choices for replacement or new installations.
PVC is lightweight, affordable, and chemical-resistant but less heat-tolerant.
ABS is tougher and better at low temperatures.
Metal (brass, chrome, or stainless) offers longevity and heat resistance, higher cost, and potential corrosion considerations.
Signs your sink trap needs replacement or installation
Maintenance of household plumbing often hinges on small, overlooked components like the sink trap, a curved PVC fitting that prevents sewer gases from entering living spaces and captures debris.
Recognition of its failure—persistent odors, slow drainage, visible cracks, frequent clogs, or active leaks—signals the need for replacement or initial installation to restore proper function and prevent water damage.
Timely replacement prevents odor, backups, corrosion, and structural harm.
Materials, Tools, and Safety Precautions
A concise list of required materials—pipe sections, fittings, solvent cement, and slip nuts—will be provided.
The discussion will also enumerate essential tools and a few optional items that can make assembly easier.
Finally, clear safety steps and workspace preparations will be outlined to minimize hazards and guarantee a smooth installation.
Complete materials list
Preparing to assemble a PVC sink trap requires a clear list of components, tools, and safety gear so the job proceeds efficiently and without unexpected delays.
The composer compiles required parts, seals, and protective equipment, ensuring compatibility and readiness before work begins.
- PVC trap kit (pipe, elbow, slip nut, washer)
- PVC primer and cement
- Replacement washers and gaskets
- Gloves and safety glasses
Required tools and optional helpful tools
With the materials checklist complete, attention turns to the tools that will make assembly straightforward and safe.
Essential items include a hacksaw for cutting pipe, PVC primer and cement applicators, adjustable wrench and slip-joint pliers for fittings, and a measuring tape and marker for accurate cuts.
- Hacksaw
- PVC primer & cement applicators
- Adjustable wrench & pliers
- Measuring tape & marker
Safety and workspace preparation
Before beginning work, the area should be cleared, well-lit, and ventilated to reduce hazards and allow safe use of primer and cement. All tools and materials must be organized within reach on a stable surface, and non-essential items removed from the workspace.
Protective gear includes gloves, safety glasses, and a respirator for solvents. Keep a fire extinguisher, absorbent rags, and first-aid kit nearby; follow manufacturer instructions.
Measuring and Planning the PVC Trap Installation
Before cutting or assembling any pieces, accurate measurements determine the correct trap size and overall length needed between the tailpiece, trap arm, and wall stub-out.
The installer should measure vertical drop from sink outlet to centerline, distance to the wall stub, and allowance for the trap arm run to guarantee proper slope and fit.
Finally, a choice between P-trap, S-trap, or bottle trap should be made based on local code, space constraints, and venting requirements.
How to measure for the correct trap size and length
How long and what diameter of trap will fit neatly under the sink depends on the tailpiece height, cabinet clearance, and the drain outlet position; accurate measurements of these three points guarantee a watertight, code-compliant installation.
Measure vertical distance from tailpiece to cabinet floor, lateral offset to drain outlet, and available headroom.
Select trap diameter matching pipe size and cut length allowing proper slope and union connections.
Accounting for trap arm, tailpiece, and wall stub-out
When planning the PVC trap installation, the installer must account for the tailpiece length, trap arm reach, and wall stub-out alignment together rather than as separate dimensions.
These three elements determine trap geometry, required fittings, and whether extensions or offsets will be necessary to maintain proper pitch and meet code fixture-clearance requirements.
Measure vertical offsets, horizontal distances, and stub-out depth, note obstruction clearances, then sketch parts and verify available slip-joint or solvent-weld connections.
Choosing trap configuration: P-trap vs S-trap vs bottle trap
Which trap best suits the sink’s layout and local code: a P-trap, an S-trap, or a bottle trap?
The writer compares functionality, code compliance, and installation constraints.
P-traps are standard, vent-friendly, and easy to service.
S-traps often violate code due to siphoning risk.
Bottle traps save space under vanities but trap odors and clog more readily; they may not meet local rules.
Step-by-Step Guide to Making and Installing a PVC Sink Trap
The process begins with turning off the water and clearing the work area to prevent spills and provide access.
Next, the old trap is removed and drain fittings inspected before dry-fitting PVC pieces and marking precise cutting points.
Finally, pipes are cut and deburred, and slip nuts, washers, and trap components are assembled for a final dry-fit check.
Step 1 Turn off water and prepare the area
Shut off the sink’s water supply and clear the cabinet beneath to create a safe, accessible workspace.
The person gathers basic tools—bucket, towels, adjustable wrench, and flashlight—then places a drip tray under the trap area.
Protective gloves and eye protection are donned.
Adequate lighting and floor protection minimize mess; nearby items are moved to prevent contamination or obstruction during the repair.
Step 2 Remove old trap and inspect drain fittings
Begin by placing the bucket under the P-trap and loosening the slip nuts with the wrench, then carefully removing the trap to catch residual water and debris.
Examine tailpiece, trap arm, and wall flange for corrosion, cracks, or misalignment. Clean mating surfaces and remove old tape or putty.
Measure thread sizes and note any irregular angles before proceeding to replacement or fabrication.
Step 3 Dry-fit PVC pieces and mark cutting points
Dry-fit each PVC component without solvent to verify alignment and identify exact cut locations.
The installer assembles trap arms, trap bend, and slip nuts to confirm fit against tailpiece and wall stub. Gaps, misangles, or interference are noted.
Mark precise cutting points with a fine marker, accounting for insertion depths of fittings and required slope toward the drain for proper flow.
Step 4 Cut and deburr PVC pipes and fittings
Using a sawing motion with a fine-toothed PVC cutter or hacksaw, the installer cuts each pipe to the marked lengths. Then, removes burrs and shavings with a deburring tool or round file to guarantee smooth, square ends that seat fully into fittings.
Chamfers are lightly applied to male ends to ease insertion; all cut surfaces are wiped clean and checked for accurate length before assembly.
Step 5 Assemble slip nuts, washers, and trap components (dry-fit check)
The installer loosely threads slip nuts onto the tailpiece and trap arms, seats flat washers and cone or bell washers where specified, and assembles the P-trap components without glue to verify fit and alignment; this dry-fit check confirms correct orientation, clearance to the cabinet and wall, and that pipe lengths and fittings will tighten without binding before final solvent welding.
After inspection, adjustments are made for straightening, trimming, and proper slope.
Step 6 Apply primer and solvent cement (when to glue vs use slip-joint fittings)
With the assembled trap pieces confirmed for alignment and clearance, attention turns to joining methods: solvent-welded joints for permanent connections and slip-joint fittings for removable access.
Primer cleans and softens PVC before applying solvent cement; allow proper dwell time. Glue permanent sections such as trap arm runs; reserve slip-joint fittings at service points.
Wipe excess cement and let cure per manufacturer instructions.
Step 7 Connect trap to sink tailpiece and wall drain
Begin by positioning the assembled trap beneath the sink so the inlet aligns squarely with the tailpiece and the outlet meets the wall drain stub-out at the correct angle and height.
Attach the trap to the tailpiece using the appropriate nut and washer or solvent-weld connection.
Verify slip joints seat properly and hand-tighten nuts to prevent cross-threading before proceeding to final adjustments.
Step 8 Tighten fittings, align trap slope, and support piping
After confirming all connections are seated, the installer tightens slip nuts snugly by hand and finishes with a quarter-turn using channel-lock pliers to compress washers without over-tightening.
The trap is aligned to maintain a slight downward slope toward the wall drain, ensuring proper flow.
Finally, support straps or hangers are installed on horizontal runs to prevent sagging and strain on joints.
Step 9 Test for leaks and adjust connections
Turn on the water and inspect each joint for drips or seepage. Then run several gallons through the sink to exercise the trap and reveal slow leaks or misalignments.
Observe trap and slip-nut seals, tighten fittings incrementally, and retest. If leaks persist, disassemble, reapply proper thread sealant or replace damaged washers, then reassemble and confirm watertight performance before concluding.
Step 10 Final finishing: securing, insulating, and cleaning up
Secure the assembly, insulate exposed sections, and leave the work area clean to guarantee the trap functions reliably and the installation meets code and aesthetic standards.
Tighten straps and hangers, anchor to studs without stressing joints.
Wrap insulation on cold-water-adjacent pipes to prevent condensation.
Wipe solvent residue, remove debris, and restore cabinet interiors.
Document materials and clearance for future maintenance and inspection.
Alternatives and Modifications
The section reviews alternative trap options such as flexible traps, noting their quick installation and potential for leaks or odor retention.
It also covers adaptations for garbage disposals and dishwasher connections, including common fittings and clearance considerations.
Finally, it explains when converting between trap types is feasible and identifies scenarios that warrant hiring a professional plumber.
Using flexible traps and advantages/disadvantages
Although less rigid than traditional PVC, flexible traps offer installers a quick, adaptable solution for tight or irregular under-sink spaces. They simplify alignment and reduce cutting but can sag, trap debris, and have shorter lifespans. Consider material, bend radius, and seal quality before choosing.
| Benefit | Drawback | Best Use |
|---|---|---|
| Easy fit | Sagging | Temporary fixes |
| No exact cuts | Debris catch | Retrofit situations |
Adapting trap for garbage disposals or dishwasher connections
When adapting a PVC trap for use with a garbage disposal or a dishwasher connection, installers must account for larger discharge outlets, air gaps, and grease-laden effluent by selecting compatible trap adapters, knockout plugs, and venting options.
The trap assembly should use reinforced fittings, maintain proper slope and seal depth, and include accessible cleanouts.
Dishwasher branches require air gaps or high loops to prevent backflow.
Converting between trap types and when to call a professional
Converting between P-traps, S-traps, bottle traps, and flexible traps requires evaluating pipe alignment, trap seal depth, venting, and local code restrictions to confirm proper function and prevent siphoning or leaks.
DIY swaps suit simple misalignments and like-for-like replacements; complex reroutes, inadequate venting, multi-fixture connections, or jurisdictional code issues necessitate a licensed plumber to ascertain compliance, avoid damage, and maintain warranty.
Common Mistakes and How to Avoid Them
Common failures during PVC trap installation often stem from improper slip-joint tension, poor alignment or slope that allows standing water, and mistakenly gluing where a removable joint is required.
Additional errors include using incorrect washers or cross-threading fittings, and neglecting local plumbing codes or venting requirements.
Addressing these issues early reduces leaks, clogs, and code violations.
Over-tightening or under-tightening slip joints
Balance matters: slip nuts on PVC trap assemblies must be tightened enough to compress the washer and form a seal, but not so much that the plastic threads or bell are deformed.
Proper torque prevents leaks and avoids cracking. Hand-tighten then give a quarter to half turn with a wrench.
If leaks persist, loosen, re-seat the washer, and retighten incrementally.
Incorrect alignment or slope causing standing water
Misaligned pipes or an improper slope in a PVC trap assembly can create low spots where wastewater pools, promoting clogs and odors.
Proper alignment requires straight runs and consistent 1/4-inch-per-foot downward pitch toward the drain. Use a level and adjust fittings or add short angled sections to eliminate sags.
Recheck after final tightening to guarantee continuous flow and no standing water.
Gluing where slip joints are required and vice versa
Confusing glue and slip joints can render a trap either permanently fixed or prone to leaks, so proper selection and installation of fittings is critical.
Glued joints are for permanent, solvent-weld connections; slip-joint fittings use compression nuts and washers for adjustability and service.
Mistaking one for the other leads to inaccessibility or seepage.
Verify component types and follow manufacturer instructions before assembly.
Using wrong washers or cross-threading fittings
Using the correct washers and threading fittings properly are essential to a leak-free sink trap; installing the wrong washer or forcing threads can cause immediate seepage or damage the connection.
Technicians should match washer material and size to the fitting, hand-start threads, then tighten with minimal wrench torque.
Inspect for cross-threading, replace damaged nuts or bolts, and test under pressure for secure seals.
Ignoring local plumbing codes and venting requirements
Although a DIY sink trap may appear straightforward, neglecting local plumbing codes and venting requirements can lead to failed inspections, persistent odors, or sewer gas hazards.
Professionals recommend verifying code specifics, required trap arm lengths, slope, and proper vent placement before installation.
Permits and inspections guarantee compliance; when unsure, consult a licensed plumber to avoid costly rework, safety risks, and fines.
Troubleshooting Post-Installation Problems
After installation, the guide addresses common post-fit issues such as identifying and repairing persistent leaks and resolving odors caused by dried-out traps.
It explains methods to clear slow drains without removing the trap and how to diagnose siphoning or backflow in a newly installed trap.
Practical, step-by-step checks and fixes are provided to help determine when simple adjustments suffice and when professional help is needed.
Detecting and fixing persistent leaks
Inspect the trap assembly systematically when leaks appear, starting with a visual check for loose slip-nuts, misaligned joints, or visible cracks in the PVC.
Tighten slip-nuts hand-firm plus quarter-turn, replace deteriorated washers, and realign fittings.
Test with paper towels and run water to locate slow seepage.
If cracks persist, replace the damaged section; guarantee proper thread tape on threaded connectors.
Eliminating odors and dried-out traps
Having ruled out leaks and confirmed joints are secure, attention shifts to odors and traps that have dried out—common post-installation complaints that signal a loss of the water seal or buildup in the trap.
The remedy is simple: refill the trap with water, flush with baking soda and vinegar, rinse thoroughly, and inspect for slow evaporation.
Repeat periodically or add a small trap primer if needed.
Clearing slow drains without removing the trap
Clear slow drainage by targeting common clogs above the trap before attempting removal; this saves time and reduces the risk of disturbing seals.
Use a plunger, a braid or hand snake, and a cup of boiling water to dissolve grease. Run hot water while operating the snake.
If flow improves, avoid trap removal; if not, inspect the trap for buildup or misalignment next.
When a new trap still siphons or backflows
If a newly installed PVC trap still siphons or allows wastewater to backflow, the cause usually lies in incorrect trap geometry, venting issues, or improper connections rather than defective parts.
Inspect trap arm pitch, tailpiece height and trap seal depth.
Verify vent integrity and absence of long unvented runs.
Check for loose or misaligned slip joints and guarantee correct trap orientation to restore proper function.
Maintenance Tips to Keep Your PVC Trap Functioning
Routine maintenance keeps a PVC trap functioning and reduces odors and backups.
A clear cleaning schedule, safe methods (mechanical clearing and mild cleaners), and simple preventive steps help prevent clogs and corrosion.
Guidance on when to replace fittings or the entire trap completes the maintenance plan.
Cleaning schedule and safe cleaning methods
Although a PVC trap requires little attention under normal use, a simple preventive maintenance schedule guarantees reliable performance and reduces clogs.
Inspect monthly for leaks and debris.
Every three to six months, remove and rinse the trap with warm water; use a soft brush to dislodge buildup.
For persistent residue, apply a diluted vinegar solution; avoid harsh chemical drain cleaners that can damage seals.
Preventive measures to avoid clogs and corrosion
Building on regular inspections and gentle cleaning, preventive steps can greatly reduce clogs and slow corrosion in a PVC trap.
Install strainers to catch hair and debris, avoid pouring grease or harsh chemicals, and run hot water after heavy use.
Periodically flush with baking soda and vinegar, tighten fittings gently to prevent leaks, and guarantee proper ventilation to limit moisture buildup.
When to replace parts versus replacing the whole trap
Several signs indicate whether individual components of a PVC trap can be replaced or if the entire assembly should be swapped out: small leaks at slip joints, faded or cracked washers, or minor corrosion on metal connectors are often resolved by changing gaskets, slip nuts, or the tailpiece.
In contrast, widespread cracking, deformation of the trap body, persistent odor despite cleaning, or misaligned fittings that compromise seal integrity typically justify replacing the whole trap.
Routine inspection, tightening, and targeted parts replacement save time and cost; replacement is prudent when repairs are recurrent, parts are obsolete, or structural damage risks leaks and sewer gas.
Cost, Time Estimates, and When to Hire a Professional
Typical material costs for a PVC trap range from a few dollars for basic fittings to higher amounts when add-ons like slip-nuts, solvent, or decorative escutcheons are included.
Estimated DIY time varies by experience: 15–45 minutes for a confident homeowner, up to a couple of hours for a novice.
The task should be left to a licensed plumber when leaks persist, pipe alignment is difficult, or local code and warranty concerns apply.
Typical material costs and common add-ons
A basic PVC sink trap can usually be assembled for a modest outlay: most DIYers will spend $10–$30 on pipe, fittings, and a compression trap adapter, while premium parts or specialty fittings push the total toward $40–$60. Typical add-ons include trap primers, escutcheons, odor traps, and slip-joint kits; professionals cost differently.
| Item | Price | Emotion |
|---|---|---|
| PVC pipe | $3–$10 | Relief |
| Fittings | $2–$15 | Confidence |
| Adapter | $5–$20 | Reassurance |
| Add-ons | $5–$30 | Satisfaction |
| Labor (pro) | $75+ | Security |
Estimated DIY time by experience level
Time estimates for installing a PVC sink trap vary with skill level and preparation:
A novice with basic tools and clear instructions typically needs 60–120 minutes.
An intermediate DIYer who has done simple plumbing before averages 30–60 minutes.
An experienced homeowner or plumber can complete the job in 15–30 minutes.
Allocate extra time for fitting, sealing, and cleanup; troubleshooting may add 15–45 minutes.
Signs a job should be left to a licensed plumber
When visible corrosion, recurring leaks, unusual odors, persistent clogs after basic troubleshooting, complicated pipe layouts, or connections to gas or main sewer lines are present, the task should be escalated to a licensed plumber; such conditions increase risk, require specialized tools or permits, and can substantially raise labor and repair costs if handled improperly.
A professional assessment clarifies scope, provides accurate cost and time estimates, and guarantees code compliance.
Visual References and Quick Checklists
The article provides compact visual references and quick checklists to support the PVC trap installation process.
A step-by-step installation checklist guarantees each connection and measurement is completed in order, while a leak-test and alignment checklist verifies seals and slope before finalizing.
Labeled reference images of common parts help identify fittings and their correct orientation at a glance.
Step-by-step installation checklist
Several clear steps guide the installer through fitting a PVC trap beneath a sink: gather tools and parts, measure and cut pipe to size, dry-fit components, solvent-weld or thread joints as required, test for leaks, and make final adjustments.
- Confirm trap type, trap arm length, and outlet orientation.
- Cut pipe, deburr, and dry-fit.
- Cement or tighten connections; align slope.
- Secure assembly to prevent movement and guarantee access.
Quick leak-test and alignment checklist
Begin by visually inspecting joints and fittings for alignment and proper seating.
Perform a brief leak and alignment checklist to confirm functionality and fit.
- Tighten slip nuts hand-tight plus quarter turn; avoid over-torquing.
- Run water for 2–3 minutes, watch all joints.
- Use dry paper towel to detect slow weeps.
- Recheck trap arm slope and clearances, adjust as needed.
Common part reference images and labels

A labeled diagram and a short photo gallery help users quickly identify common PVC-trap components—tailpiece, slip nut, washer, trap bend, trap arm, and trap adapter—so that parts can be matched to checklist items and replacement needs.
Captions note typical sizes, material finishes, and common wear points. A printable mini-checklist links each image to inspection steps and recommended spare parts.
Conclusion
A PVC trap, like a small sentry beneath the sink, quietly guards against foul intrusions and unseen troubles. When fitted with care and regular tending, it becomes a reliable ally in the household’s plumbing choreography. Yet neglect or hurried choices invite discord—drips, clogs, and odors—that tug at domestic calm. Thoughtful measuring, correct parts, and patient installation transform plastic pieces into lasting peace, reminding the homeowner that small acts preserve everyday harmony.
