How to Replace a Shower Diverter Pull-Up Valve: Step-by-Step Guide for DIY Repairs
To replace a shower diverter pull-up valve, first, shut off the water supply and drain any remaining water. Remove the trim and the old pull-up assembly. Compare the new parts for compatibility, clean the valve seat, and install the new diverter. Reassemble the trim and handle, then test for leaks by cycling the valve. Use the proper tools and apply gentle torque to avoid damage. Follow these step-by-step instructions for a successful DIY repair.
What a Shower Diverter Pull-Up Valve Is and When to Replace It
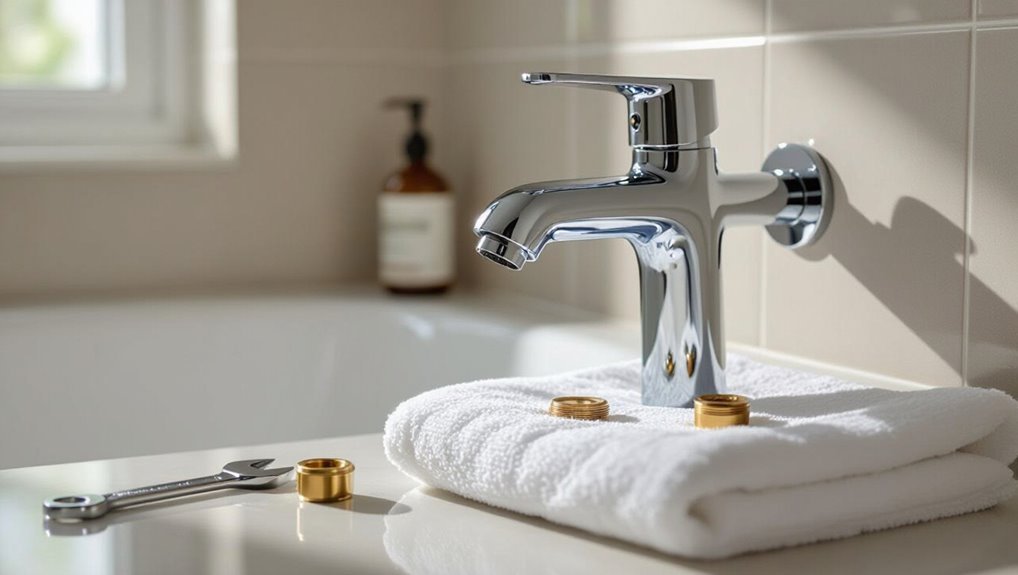
A pull-up shower diverter valve is a simple mechanical device that redirects water between the tub spout and showerhead by lifting and lowering an internal plunger.
Common signs it is failing include leaks around the spout, reduced or uneven flow to the showerhead, and a handle or plunger that sticks or will not hold position.
To confirm the diverter is the culprit, one can check for water flow with the spout blocked, inspect for visible wear or mineral buildup, and test operation after temporarily blocking the showerhead or bypassing the spout.
Definition and function of a pull-up diverter valve
Pull-up diverter valves are the small lift-type mechanisms built into tub spouts or shower fittings that redirect water from the tub outlet to the showerhead when raised.
They consist of a movable plug or stem that seals one pathway while opening another, controlling flow direction.
Understanding this component is essential before attempting how to replace shower diverter pull up to guarantee correct part selection and procedure.
Common signs of a failing diverter (leaks, poor flow, stuck handle)
Several common symptoms indicate a failing shower diverter pull-up valve: persistent leaks from the tub spout, reduced or uneven water flow from the showerhead, and a handle or stem that sticks or fails to hold the diverted position.
Other signs include water trickling from the spout when showering, intermittent pressure drops, and difficulty engaging or disengaging the diverter, signaling wear or internal damage.
How to confirm the diverter is the problem (diagnostic checks)
How can one be sure the diverter is causing the problem rather than a clogged showerhead, faulty cartridge, or downstream pressure issue?
Inspect flow at tub spout and showerhead separately; clear the showerhead and retest.
Operate the diverter while observing pressure and listening for internal rattles.
Isolate the cartridge by testing handle operation and shutoff.
If flow redirects inconsistently or leaks from the spout, the diverter likely fails.
Tools, Materials, and Safety Precautions
The section lists the essential tools and replacement parts required to remove and install a diverter valve, plus optional tools that can speed the job.
It also outlines safety precautions and the water-shutoff steps to follow before work begins.
Readers are advised to confirm part compatibility and wear basic protective gear.
Required tools and replacement parts
A concise kit of specific tools, replacement parts, and basic safety equipment guarantees a smooth, efficient diverter valve replacement and minimizes the risk of damage or injury.
- Adjustable wrench and pliers for nut removal and grip
- Replacement pull-up diverter cartridge matched to fixture model
- Plumber’s tape and thread sealant for leak prevention
- Protective gloves and safety goggles to prevent cuts and splash exposure
Optional tools that make the job easier
Consider adding a few convenience tools that reduce effort and speed the diverter replacement while maintaining safety: a basin wrench or long-handled socket for hard-to-reach nuts, a set of small picks for removing O-rings and seals without damage, a rubber jar opener or strap wrench to grip stubborn trim pieces, and a cordless drill with a soft-jaw adapter for controlled fastener removal.
- Basin wrench for back-of-valve fittings
- Small picks for seals
- Strap wrench for trim
- Cordless drill with soft-jaw adapter
Safety precautions and shutoff steps before starting
Before any work begins, confirm that water and electricity risks are controlled: shut off the home’s main water supply or the local shutoff for the bathroom, and switch off power to any nearby electric fixtures at the breaker.
Wear safety glasses and gloves, drain residual water by opening faucets, place towels to catch spills, keep tools organized, and confirm no leaks before re-energizing or restoring water.
How to Prepare for the Repair
Before starting, the water supply to the shower should be shut off and the lines drained to prevent leaks.
Fixtures and surrounding surfaces should be protected with towels or drop cloths to catch debris and water.
The escutcheon, handle, and trim plate must be removed carefully to expose the diverter assembly for replacement.
Turning off water supply and draining the shower lines
Shut off the water to the bathroom and relieve pressure in the lines before disassembling the shower.
Locate and close the local shutoff valves or, if none, the main house valve. Open the shower valve and nearby faucets to drain remaining water.
Flush residual water from the tub spout and cartridge area with a rag or sponge.
Verify dry lines before proceeding.
Protecting fixtures and surrounding areas
Several simple protective measures guarantee fixtures and finishes remain undamaged during the repair.
Protective cloths or towels cushion the tub and tiles; painter’s tape shields chrome and grout.
Remove loose items and cover nearby shelves.
Place a small bucket or tray beneath the work area to catch debris and drips.
Keep tools organized to avoid scratches and accidental knocks on surrounding surfaces.
Removing shower escutcheon, handle, and trim plate
Begin by turning off the water supply and verifying the line is depressurized.
Then remove any decorative caps or set screws on the handle with the appropriate screwdriver or hex key.
Pull the handle straight off; if stuck, wiggle gently or apply penetrating oil briefly.
Unscrew the escutcheon plate screws, detach the trim, and inspect behind for mounting hardware or sealant before proceeding.
Step-by-Step Replacement Process
The technician begins by inspecting the existing diverter assembly to identify wear and fastener types.
Next steps cover removing the old pull-up diverter, comparing the old and new parts for compatibility, and installing the replacement valve.
The process concludes with reassembling the handle, trim, and escutcheon and testing for proper operation.
Inspecting the existing diverter assembly
Before removing any parts, the diverter assembly should be carefully inspected to determine its type, condition, and the tools required for removal.
The inspector notes visible wear, corrosion, mineral buildup, and seal or O-ring degradation.
Confirm model compatibility, fastener types, and trim access.
Photograph the assembly, list required specialty tools and replacement parts, and plan any corrosion mitigation before proceeding.
Removing the old pull-up diverter valve
Shut off water to the shower and confirm flow has stopped at both the showerhead and tub spout before touching the trim; once dry, remove any escutcheon or handle components to expose the pull-up diverter assembly so access to retaining screws, clips, or snap rings is clear.
Unscrew or unclip fasteners, note component order, withdraw the pull-up stem, remove seals and springs, and clean the cavity for the new part.
Comparing old and new parts for compatibility
A careful comparison confirms the new diverter matches the old one in size, configuration, and valve type.
The technician inspects stem length, diameter, mounting flange, threading, and O-ring groove positions.
Materials and handle connection style are checked for compatibility.
Cartridge or spool design is compared to affirm flow patterns match.
Any mismatch is noted to source an appropriate replacement before installation.
Installing the new pull-up diverter valve
Having confirmed the replacement diverter matches the original in dimensions and operation, the technician prepares to install the new pull-up valve by gathering tools, cleaning the valve seat, and laying out any supplied seals and screws.
The valve is positioned squarely, seals seated without twists, and the body lowered into place. Fasteners are tightened to specified torque, and operation is checked for smooth travel and leak-free fit.
Reassembling handle, trim, and escutcheon
Begin reassembly by confirming the valve operates smoothly and that no leaks are present.
Align trim plate over the valve body, seating any gasket. Secure escutcheon with screws, tightening evenly to avoid distortion.
Reinstall handle, set retaining screw, and attach decorative cap.
Verify handle movement is unobstructed and that connections are snug.
Clean surrounding area of debris and fingerprints.
Restoring water and testing the new diverter
Turn the main water supply back on slowly and observe the valve area for immediate leaks or pressure issues.
Cycle the diverter between tub and shower positions multiple times, checking for smooth operation and steady flow.
Inspect joints and handle for drips.
Test hot and cold balance.
If leaks or irregularities appear, shut water off and tighten connections or re-seat seals before retesting.
Troubleshooting After Installation
After installation, the technician inspects the valve and trim for any visible leaks and tightens connections or replaces seals as needed.
If water pressure is low or water does not fully divert, flow passages and cartridge seating are checked and cleared of debris.
The handle is tested for smooth operation and realigned or adjusted to guarantee proper engagement and stop positions.
Addressing leaks at the valve or trim
When leaks appear around the diverter valve or trim following installation, a systematic inspection can quickly identify common causes such as loose trim screws, misaligned seals, or improperly seated cartridges.
Tighten screws, re-seat or replace O-rings and gaskets, and guarantee the cartridge aligns with the valve body.
Recheck plumbing connections and test slowly to confirm the leak is resolved before reassembling the escutcheon.
Fixing low water pressure or incomplete diversion
Once leaks around the trim and valve have been ruled out or corrected, attention should shift to water flow issues: low pressure or a shower that fails to fully divert water between the tub spout and showerhead.
Check for debris in the diverter passage and cartridge, clear mineral buildup using vinegar soak or gentle brush, verify inlet supply valves are fully open, and test for flow improvement.
Adjusting handle operation and alignment
Inspect the handle’s movement and alignment to guarantee smooth operation and correct positioning relative to the trim plate.
Verify the set screw is snug, not overtightened, and that the handle engages the cartridge squarely.
Adjust rotational stops or shims if rotation exceeds limits.
Confirm the handle returns to neutral without binding.
Recheck for leaks and test full diverter travel before finalizing trim.
Compatibility, Parts Selection, and Cost Considerations
Selecting the correct replacement begins with identifying the existing valve model and measuring fittings to guarantee compatibility.
The main diverter types—cartridge, spool, and pull-up—have distinct installation methods and wear patterns that affect part choice.
Typical parts range from inexpensive cartridges to pricier assemblies, and DIY labor can save money but may not be advisable if unfamiliar with plumbing, where professional rates will increase total cost.
How to identify the correct replacement valve model
How does one determine the correct replacement diverter valve?
Inspect markings, measure body dimensions, note inlet/outlet count and orientation, and photograph existing valve. Confirm manufacturer and model number when present.
Compare materials and finish to match trim. Consider cost versus OEM vs. aftermarket options.
- stamped model numbers
- port layout sketches
- dimension measurements
- clear reference photos
Differences between cartridge, spool, and pull-up diverters
A diverter valve can be a cartridge, spool (rotary/sliding), or pull-up (plunger) type, and each form has distinct compatibility constraints, parts availability, and cost implications that affect replacement choices. Match flange sizes, mounting, and manufacturer. Spools often require brand-specific kits; cartridges offer modular swaps; pull-up parts are simple but less universal.
| Type | Compatibility | Parts Availability |
|---|---|---|
| Cartridge | Moderate | Good |
| Spool | Low | Limited |
| Pull-up | High | Common |
Typical costs for parts and DIY vs professional replacement
Typical replacement costs span a wide range depending on diverter type, brand, and whether the work is DIY or performed by a professional.
Parts alone typically cost $10–$75; higher-end trim or brand-specific cartridges may reach $150.
DIY saves labor (usually $100–$300), but requires tools and skill.
Professional installation guarantees correct fit, warranty, and time savings, justifying higher total expense.
Common Mistakes to Avoid
Common errors include forcing parts or overtightening fittings, which can strip threads or crack components.
Skipping compatibility checks often leads to misfit parts and repeated work.
Neglecting to clean or inspect internal components can hide damage that causes leaks or premature failure.
Forcing parts or overtightening fittings
Forcing stuck components or overtightening fittings can strip threads, crack seals, and warp valve bodies, turning a simple repair into a costly replacement.
The technician should use proper tools, gradual force, and penetrating lubricant when needed. Hand-tighten then apply specified torque with a torque wrench or calibrated tool.
Inspect seals after reassembly; replace damaged parts rather than forcing them into service.
Skipping compatibility checks
Compatibility mismatches between replacement diverters, valve bodies, and trim can prevent proper sealing, interfere with cartridge alignment, or void warranties.
Installers should verify model numbers, dimensions, and designated flow paths before purchase. Ignoring manufacturer specification sheets or cross-reference guides risks leaks, poor operation, and repeat disassembly.
When uncertain, consult manufacturer support or a plumbing professional to confirm compatibility and avoid costly mistakes.
Neglecting to clean or inspect internal components
Failing to clean or inspect the valve assembly before reinstallation often leads to persistent leaks, sticking cartridges, or premature wear.
Residual mineral deposits, old O-rings, and debris compromise seals and valve operation. Thoroughly descaling components, replacing worn seals, and verifying smooth actuator movement prevents malfunctions.
Skipping this step often necessitates repeat repairs and increases water damage risk.
When to Call a Professional
If persistent leaks, corroded plumbing, or unusual water pressure are present, the problem may be more than a simple diverter replacement and warrants professional assessment.
A licensed plumber can diagnose underlying issues, perform repairs or replacements, and provide a warranty on labor and parts.
Homeowners should expect a service call plus hourly labor and parts costs, with typical labor fees varying by region and job complexity.
Signs the issue is more than a simple valve replacement
When visible damage, persistent leaks, or unusual noises accompany a malfunctioning diverter, the problem may extend beyond a simple cartridge swap and warrant professional assessment.
Complex plumbing issues—such as corroded supply lines, compromised valve bodies, or systemic pressure imbalances—require diagnostic tools and experience to identify and repair safely.
Additional red flags include staining inside access panels, fluctuating hot/cold balance, low flow despite clear aerators, and repeated failures after replacement.
What to expect from a professional service and average labor costs
Noticing those red flags usually signals that a homeowner should consider professional help. A licensed plumber will assess whether the problem is limited to the diverter or involves corroded lines, a damaged valve body, or system-wide pressure issues.
Expect diagnostic fees ($50–$150), labor rates ($70–$150/hour), and potential parts costs. A full replacement job typically totals $200–$600, higher for complex plumbing access.
Maintenance Tips to Prolong Diverter Life
Routine cleaning to remove soap scum and mineral deposits can prevent stiffness and leaks in the diverter.
Periodic seasonal checks of seals, handles, and cartridge function help catch wear before it causes failure.
Promptly addressing minor issues with quick fixes—such as replacing O-rings or clearing buildup—extends the diverter’s service life.
Routine cleaning and mineral deposit prevention
Inspecting and cleaning a shower diverter on a regular schedule prevents mineral buildup that can impede operation and shorten component life.
Use gentle descaling and soft brushes, rinse thoroughly, and lubricate moving parts sparingly.
Visualize deposits and cleaning actions:
- White crust around seal and spout
- Mineral flakes in crevices
- Soft-bristled brush scrubbing joints
- Vinegar soak dissolving scale
Seasonal checks and quick fixes to prevent failures
A few seasonal checks and simple quick fixes can catch wear and small leaks before they become full failures, extending the diverter’s service life.
Inspect for drips, loose handles, and mineral buildup every three months.
Tighten connections, replace worn O-rings, and apply plumber’s grease to moving parts.
Test function after repairs and note recurring issues for professional evaluation.
Quick Reference Checklist for DIY Replacement
One concise checklist helps guarantee the replacement proceeds safely and efficiently:
- Shut off water, relieve pressure, and cover drain.
- Gather tools: wrench, pliers, replacement valve, plumber’s grease.
- Inspect fittings, O-rings, and cartridge for wear before installation.
- Test assembly for leaks, restore water, and verify diverter function; tighten as needed.
Conclusion
Like Odysseus charting shoals, the DIYer must respect the diverter’s hidden hazards and know when to steer for shore. Mastery of tools and patience will often repair a stubborn pull-up valve, restoring flow and quiet confidence to the routine voyage of daily showers. Yet stubborn leaks or unfamiliar systems are sirens: call a professional to avoid costly detours. Careful maintenance guarantees the plumbing journey remains smooth for years to come.