How to Replace a Yard Hydrant: Step-by-Step Guide for DIY Repairs and Full Replacement
To replace a yard hydrant, first assess it for leaks, rust, or freeze damage to determine whether to repair or fully replace it. If replacement is necessary, begin by shutting off and draining the line. Mark any utilities, then excavate to expose the riser. For repairs, you may need to replace the packing, poppet, or seat. For a full replacement, remove the old unit, ensure the new hydrant matches the pipe size and connections, properly bed it, and perform a pressure test. Regular seasonal maintenance can help prevent future issues. Follow these steps for a successful hydrant replacement.
Overview of Yard Hydrant Replacement
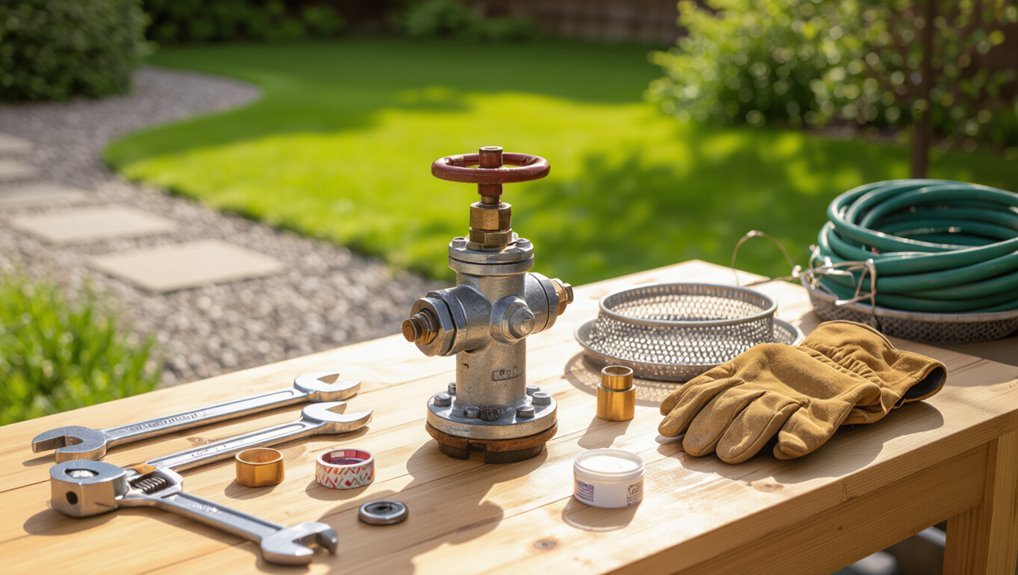
A yard hydrant is a frost-resistant outdoor valve that draws water from a buried supply when the handle is operated. Its basic mechanism and common failure points should be understood before any work begins.
The decision to repair or replace typically depends on factors such as the extent of internal damage, rust or leaking, cost of parts versus a new unit, and expected remaining service life.
Essential items for the job include replacement hydrant components or a new hydrant, wrenches and pipe tools, packing and sealant materials, and appropriate safety gear like gloves and eye protection.
What a yard hydrant is and how it works
Yard hydrants are outdoor frost-free water taps designed to access an underground water supply without freezing, using a long riser and a valve seat positioned below the frost line.
They operate by lifting a plunger or stem to open flow, then draining the riser when closed.
Understanding this mechanism helps homeowners assess how to replace a yard hydrant safely and efficiently.
Common reasons to repair vs replace a yard hydrant
Decide whether to repair or replace based on the nature and severity of the problem: discrete issues like a worn packing gland, a leaking bonnet, or a stuck stem often justify repair, while structural damage, severe corrosion, repeated failures, or persistent freeze-related cracks typically indicate replacement is more cost-effective and reliable.
Cost, age, parts availability, and anticipated lifespan guide the choice; safety and water quality concerns favor replacement.
Tools, materials, and safety gear needed
Several essential tools, materials, and safety items are required to replace a yard hydrant efficiently and safely.
A concise kit minimizes downtime and hazards: wrenches, pipe cutter, shovel, replacement hydrant, pipe, fittings, thread sealant, gravel, and gloves, eye protection, and boots.
Recommended items include:
- Wrenches and pipe tools
- Replacement hydrant and fittings
- PPE and excavation supplies
Assessing the Problem: Inspect Before You Start
The technician begins by inspecting the hydrant for visible leaks, signs of freeze damage such as cracked metal or warped seals, and worn components like packing nuts or valve stems.
Based on the condition, they decide whether a head assembly repair will suffice or if corrosion and subsurface damage warrant replacing the entire unit.
Finally, they locate the buried supply pipe, confirm the shutoff point, and secure the water to prevent flooding before work begins.
How to identify a leak, freeze damage, or worn parts
Begin by visually and physically inspecting the yard hydrant for obvious signs of leaks, freeze damage, or worn components: look for wet ground or pooling water, check the stem and bonnet for cracks or distortions, and feel for loose or corroded fittings.
Note hairline leaks, ice-split metal, bent rods, worn packing, mineral buildup, and steady dripping at the spout or base for targeted action.
When to repair the head assembly vs replace the entire hydrant
Decide whether to replace the head assembly or the entire yard hydrant based on the extent and location of damage: localized issues such as worn packing, a corroded spout, or a sticky valve stem typically warrant a head assembly repair, whereas bent rods, a cracked riser, severe freeze splits, or multiple failing components along the shaft indicate full-hydrant replacement.
Consider age, corrosion spread, and repair cost versus replacement.
How to locate the buried supply pipe and shut off water
Before digging, locate the buried supply pipe and shut off water to prevent damage and flooding.
The technician traces the line from the house or meter using as-built plans, probe rod, or metal detector. Once identified, the main shutoff or isolation valve is closed and the line is bled at a low point.
Confirm zero pressure with a pressure gauge before excavation begins.
Preparing the Site and Shutting Off Water
Before any work begins, the water supply to the yard hydrant must be isolated using the local shutoff valve or, if necessary, the property’s main shutoff.
The area should be assessed for standing water and provisions made for drainage or temporary dewatering to keep the trench dry.
All underground utilities must be marked and digging done with hand tools near marked lines to prevent accidental damage.
Methods to stop water to a yard hydrant (shutoff valves, main shutoff)
Shutoff methods for a yard hydrant concentrate on isolating the water supply either at a localized valve near the hydrant or at the property’s main shutoff, depending on the plumbing layout.
A local stop cock or curb valve permits targeted work with minimal disruption.
If no local valve exists, use the main house shutoff, notify occupants, and confirm zero pressure before beginning replacement.
Drainage and dewatering considerations
Having isolated the water supply at the local valve or main shutoff, attention turns to removing residual water and managing site drainage to prevent freezing, flooding, or muddy work conditions.
Drain lines, pit depressions, and exposed piping should be drained and sloped away from the work area.
Use pumps, buckets, or valves to divert flow; temporary trenches or gravel pads improve runoff and stabilize footing.
Marking utilities and digging guidelines for safety
Locate and clearly mark all underground utilities before excavation to prevent accidental strikes and guarantee worker safety.
Contact local utility-locate services and wait required time. Use visible flags, spray paint, or stakes to outline lines.
Hand-dig within 2 feet of marked utilities using non-powered tools. Maintain a clear work perimeter, wear PPE, and document utility locations before commencing hydrant removal or replacement.
Step-by-Step: Repairing Common Yard Hydrant Problems
This section outlines practical steps for repairing the most common yard hydrant issues, including replacing a worn packing gland and applying proper lubrication.
It then covers removal and replacement of the poppet, seat, and internal components, as well as methods for fixing a leaky spout or handle.
Finally, winterizing tips and thawing procedures for frozen hydrants are presented to prevent recurrence.
Replacing a packing gland and lubrication
Begin by shutting off the water supply and draining the hydrant to prevent pressure or residual water from interfering with the packing replacement.
Remove the bonnet, extract the old packing, and inspect the stuffing box.
Install new graphite or PTFE packing rings, compress evenly, and tighten the gland nut.
Apply waterproof lubricant to the stem and threads.
Test for leaks and adjust gland tension.
Replacing the poppet, seat, and internals
With the packing replaced and the gland properly adjusted, attention turns to the internal shutoff components that control flow and seal the hydrant.
Drain, remove bonnet and stem assembly, then extract the poppet and seat.
Inspect for corrosion, wear, or mineral buildup.
Replace matched poppet/seat kit, reassemble with new O-rings and lubricant, test operation and check for watertight shutoff.
Fixing a leaky spout or handle
Addressing a leaky spout or handle starts with isolating the hydrant, draining residual water, and observing the leak source to determine whether the problem is a worn packing, a failing washer/O-ring, or a cracked spout or handle component.
Then remove the handle or spout, inspect seals and threads, replace faulty packing/O-rings or damaged parts, reassemble with plumber’s grease, and test for leaks under normal pressure.
Winterizing and thawing procedures for frozen hydrants
Prepare for freezing conditions by properly winterizing yard hydrants and knowing safe thawing methods to prevent damage and leaks.
Drain and shut off supply, open hydrant to relieve pressure, and insulate aboveground sections.
If frozen, thaw slowly with warm towels or a heat gun at safe distance; never use open flame.
Inspect seals and test operation before restoring full service.
Step-by-Step: Full Replacement of a Yard Hydrant
The full replacement process begins with careful excavation to expose the hydrant and adequate clearance for maneuvering, followed by removal of the old unit and inspection of the supply pipe for damage or corrosion.
Selection of a replacement hydrant should match the pipe size, material, and connection type. Then the new unit must be set with correct alignment, bedding, and systematic backfilling.
Final connection options—threaded, flanged, or welded—are chosen based on the supply line and local codes to guarantee a watertight, durable joint.
Excavation: how deep and wide to dig
A trench should be dug deep enough to reach frost-free ground and wide enough to allow room for the hydrant body, pipe connections, and a small workspace for tools—typically 18–24 inches deep and 24–36 inches wide depending on local frost line and pipe diameter.
Sides should be squared where possible, sloped in unstable soils, and extended at least a foot beyond fittings for maneuvering and bedding material placement.
Removing the old hydrant and inspecting the supply pipe
Unscrew and lift the hydrant body off the buried riser, taking care to support its weight so threads and seals are not damaged.
Once freed, clear soil from around the supply pipe to expose at least 6–12 inches of clean pipe for inspection.
Check for corrosion, pitting, cracks, deformation, or old thread damage.
Measure pipe diameter and wall thickness; note required repairs or replacement sections.
Choosing the right replacement hydrant for your water line
With the buried riser exposed and the supply pipe inspected for corrosion or damage, attention turns to selecting a compatible replacement hydrant.
Choice depends on pipe material, connection type, freeze-resistant features, and flow capacity. Match thread size or flange, choose a durable body material, and confirm pressure rating.
Consider maintenance access and valve type.
- Pipe compatibility
- Freeze protection
- Flow and rating
Installing the new hydrant: alignment, bedding, and backfilling
Positioning the new hydrant demands precision: the riser must sit plumb over the supply line, the spout oriented for convenient access, and the shoe or coupling aligned to the pipe connection before bedding begins.
Stabilize with compacted pea gravel around the base, check vertical alignment and operability, then backfill in layers avoiding large rocks.
Tamp gently, slope soil for drainage, and replace surface sod.
Connecting to the supply pipe: threaded vs flanged vs welded connections
Connect the new hydrant to the supply using the method compatible with the existing pipe and site conditions: threaded couplings for standard galvanized or black iron risers, flanged joints where the hydrant or pipe is cast with mating flanges, or welded splices for steel systems requiring a permanent, leak-free bond. Choose fittings, gaskets, and bolts per material; guarantee proper alignment.
| Method | Best for | Notes |
|---|---|---|
| Threaded | Galvanized/black iron | Use pipe dope/PTFE tape |
| Flanged | Cast flange systems | Match bolt pattern |
| Welded | Steel mains | Performed by qualified welder |
Pressure testing and checking for leaks after installation
Begin pressure testing immediately after all mechanical and threaded connections are tightened and any welds or flanges are cooled and secured.
Gradually pressurize the line to operating pressure, monitor gauges for drops, inspect joints, valves, and packing for visible leaks, and apply leak detection solution where needed.
Hold pressure for the manufacturer’s recommended duration, document results, and repair any failing fittings before backfilling.
Soil, Frost, and Drainage Considerations
Proper bedding material and freeze-protection measures are essential to guarantee the new hydrant functions through winter.
Attention to slope and surface drainage prevents pooling around the hydrant body that can accelerate corrosion and freezing.
Where a high water table or clay soils exist, installers should consider raised beds, gravel collars, or engineered drainage to keep the hydrant dry and protected.
Proper bedding materials and freeze protection
Select stable, well-draining bedding and plan for frost protection to assure the yard hydrant remains secure and winter-safe.
Use compacted coarse sand or pea gravel around the pipe to prevent settling and allow drainage.
Insulate the riser with closed-cell foam or wrap heat tape where local code permits.
Ascertain backfill is free of organic matter and compacted to reduce frost heave risk.
Slope and drainage to prevent standing water
After establishing firm, well-draining bedding and insulating the riser, attention turns to grading and site drainage to keep water from pooling around the hydrant.
A gentle slope (minimum 1% away) directs runoff; surface swales, gravel pads, and perforated drain lines disperse moisture.
Confirm soil compaction prevents settling that forms depressions.
Regular inspection maintains positive drainage and reduces freeze risk.
Solutions for high water table or clay soils
Addressing a high water table or heavy clay requires altering the immediate soil and drainage conditions to prevent standing water and frost heave.
Options include installing a raised gravel bed beneath and around the riser, connecting a perforated drain to daylight or a sump, and using coarse, free-draining backfill to break the capillary action of clay.
Additionally, install a frost collar or extend the riser height and guarantee positive surface drainage away from the hydrant.
Permits, Codes, and When to Call a Professional
Local building codes and permit requirements can dictate whether a yard hydrant replacement is a simple homeowner task or a regulated job.
Projects that alter water service, cross property lines, or risk utility strikes typically require a licensed plumber and a utility locator.
Comparing typical permit and labor costs to DIY expenses helps decide when hiring a professional is the more economical and safe choice.
Local code considerations and permit triggers
While replacing a yard hydrant may seem straightforward, municipal plumbing codes, zoning rules, and utility locates often dictate how and where work can be done.
Local regulations specify setback distances, frost‑line depth, pipe materials, backflow prevention, and permit requirements. Homeowners should verify permit triggers, submission procedures, inspection schedules, and approved materials with the permitting authority before beginning work.
Situations requiring a licensed plumber or utility locator
Because yard hydrant work can intersect buried utilities, municipal codes, and property water systems, certain tasks should only be handled by licensed professionals or after an official utility locate.
Call a licensed plumber for mains repairs, backflow prevention, or when permits are required.
Contact utility locators before digging near marked lines.
Hire professionals for complex replacements, pressure issues, or any situation involving gas, sewer, or unclear ownership.
Cost comparison: DIY vs hiring a pro
A clear cost comparison between a DIY yard hydrant replacement and hiring a professional hinges on more than parts and labor: permits, code compliance, and potential risks can quickly shift a cheap DIY job into an expensive mistake. DIY saves labor but may incur permit fines; pros cost more upfront yet guarantee compliance and safety.
| Item | DIY | Professional |
|---|---|---|
| Labor | Low | High |
| Permits | Risky | Included |
| Liability | Homeowner | Contractor |
Maintenance Schedule and Long-Term Care
A clear maintenance schedule helps extend a yard hydrant’s service life and prevent emergency repairs.
Routine tasks include a seasonal checklist, specific winter preparation steps, and summer reactivation procedures.
Attention to corrosion, leaking seals, or reduced flow signals proactive replacement should be considered.
Seasonal maintenance checklist
When temperatures change and usage shifts, a concise seasonal maintenance checklist guarantees the yard hydrant remains reliable and freeze-safe. It outlines tasks, timing, and inspection points to prevent damage and extend service life.
- Inspect seals, handle operation, and drain paths each fall and spring.
- Flush lines after winterizing and before heavy summer use.
- Lubricate moving parts, tighten fittings, and document dates for future reference.
Signs of wear that warrant proactive replacement
Several clear indicators signal that a yard hydrant needs proactive replacement to avoid failure or costly repairs.
Persistent leaks, diminished water flow, intermittent operation, or visible corrosion and pitting on the stem or riser justify replacement.
Repeated freeze damage, loose or stripped operating hardware, and ongoing repairs that recur within a season also indicate the unit has reached end-of-life and merits full replacement.
Winter preparation and summer reactivation steps
Recognizing wear that warrants replacement, the homeowner should also follow a seasonal maintenance schedule to protect remaining yard hydrants and prolong their service life.
Before winter: drain lines, open valves, insulate aboveground sections, and shut off supply if possible.
After thaw: inspect for leaks, tighten fittings, lubricate stems, flush to clear debris, and test operation before regular use.
Troubleshooting Common Post-Installation Issues
After replacement, common problems such as intermittent leaks or reduced flow often indicate seating or seal issues that require inspection.
If no water is present, a sequence of diagnostic checks—verifying supply shutoffs, airlocks, and valve alignment—can isolate the fault.
For frozen lines after reinstall, the guide recommends checking drainage, thawing methods, and preventive insulation to restore function and prevent recurrence.
Dealing with intermittent leaks or slow flow
Inspecting intermittent leaks or slow flow begins with isolating possible causes and testing system responses under different conditions.
Check hose connections, packing nut tightness, and actuator seating for visible leaks.
Flush the line to remove debris, then monitor pressure and flow with other fixtures open to rule out supply issues.
Replace worn washers, clean screens, and tighten fittings as needed.
No water after replacement: diagnosis steps
Begin by confirming whether the newly installed hydrant is actually getting supply: shut off and reopen the main supply valve, then test water at a nearby faucet to verify upstream pressure.
If pressure exists, inspect hydrant inlet for debris, improperly seated seals, or kinked supply lines.
Check installation shutoffs, thread sealing, and alignment.
Use a pressure gauge and work systematically from source to spout.
Addressing frozen lines after reinstall
If frost or lingering cold is suspected, confirm whether the buried supply line or hydrant stem has frozen by checking for ice blockage at the inlet and feeling along accessible piping for hard, cold spots.
Thaw frozen sections gradually using warm water or a heat gun at low setting; avoid open flame. Open valves to relieve pressure, and recheck seals.
Insulate exposed piping and lower bury depth if feasible.
Quick Reference: Parts, Tools, and Replacement Kit Checklist
A concise checklist helps guarantee the replacement proceeds smoothly by listing standard parts, common sizes, and typical materials.
The following items summarize the essential components and tools to confirm before beginning work. Use these as a quick reference to match parts and avoid trips to the supply store.
- 3/4″ brass riser, stainless-steel bolts, neoprene washers
- Compression or sweat fittings (1/2″–3/4″) and replacement stem assemblies
- Adjustable wrench, pipe cutter, Teflon tape, and a basic repair kit
Standard parts with common sizes and materials
Several common components comprise a yard-hydrant replacement kit, each available in standard sizes and materials to match typical installations: the hydrant riser (3/4″ or 1″ NPT, brass or galvanized steel), the stem and plunger assembly (brass or stainless steel), packing gland and seals (PTFE or rubber), check valve or seat washer (rubber or neoprene), mounting flange or ground sleeve (galvanized steel), and fasteners (stainless or zinc-plated).
| Part | Size | Material |
|---|---|---|
| Riser | 3/4″–1″ NPT | Brass/galv. |
| Stem/plunger | Std lengths | Brass/SS |
| Seals | Assorted | PTFE/rubber |
| Flange/sleeve | 4″–6″ | Galv. steel |
Cost Estimates and Timeframes
Typical DIY replacement times are broken down by task so the reader can plan labor for excavation, part swap, and testing.
Material costs are summarized with price ranges for basic kits and common optional upgrades like frost-proof stems or brass fittings.
A brief note on budgeting for unexpected repairs and contingencies helps set realistic total cost expectations.
Typical DIY time by task
Most DIYers can expect the full yard-hydrant replacement to take between two and six hours, depending on soil conditions, existing pipework, and experience level.
Typical task breakdown:
- site prep and digging 30–90 minutes
- shutoff and drain 10–20 minutes
- removal and pipe cutting 20–45 minutes
- install and backfill 45–120 minutes
- testing and adjustments 15–30 minutes.
Planning adds 10–20 minutes.
Estimated material costs and optional upgrades
Costs for replacing a yard hydrant vary with pipe type, hydrant model, fittings, and site conditions, generally ranging from about $50 for a basic DIY kit to $300–$600 for higher-end components and extras.
Typical items include hydrant body, riser pipe, compression fittings, thread sealant, gravel, and insulation.
Optional upgrades—freeze-proof models, stainless hardware, backflow preventers—add $50–$200.
Budgeting for unexpected repairs
After accounting for basic materials and optional upgrades, homeowners should set aside a contingency fund for unforeseen repairs during a yard-hydrant replacement.
A recommended 15–25% buffer covers unexpected fittings, pipe repairs, or tool rentals.
Factor in potential extra labor days and permit fees.
Document receipts and adjust the budget if diagnostics reveal additional issues to avoid project delays and cost overruns.
Final Safety Reminders and Best Practices
Before any excavation begins, professionals should confirm underground utilities have been marked and follow safe digging practices to prevent accidents.
Regular winterization, proper drainage, and routine inspections will help extend the hydrant’s lifespan. These precautions both protect workers and reduce the need for future repairs.
Safe digging practices and utility notification
Exercise caution when preparing to dig for a yard hydrant replacement: notify local utility marking services, confirm the marks, and use hand tools within marked zones to avoid underground lines.
Verify depth and location before excavating, respect clearance distances, maintain a safe perimeter, and wear PPE.
If uncertainties arise, stop work and consult utility operators or a licensed contractor to prevent service disruptions and injuries.
Tips to extend the life of your yard hydrant
Following utility checks and careful excavation, attention shifts to practices that prolong a yard hydrant’s service life.
Regular inspections, seasonal draining, and prompt repairs prevent failures. Proper insulation and valve lubrication reduce freeze and corrosion risks. Clear surrounding debris and maintain drainage.
- Schedule inspections and drain before freeze.
- Lubricate and exercise the valve periodically.
- Keep area clear and repair leaks immediately.
Conclusion
A finished yard hydrant gleams where mud once lay; the steps were methodical, the parts matched, leaks checked, and frostproof function verified. Could a single, steady hand undo winters and restore flowing water with such quiet satisfaction? With proper inspection, careful shutoff, correct tools, and patience, homeowners can repair or fully replace a hydrant themselves. Still, when doubts or persistent leaks appear, calling a professional preserves safety and prevents costly mistakes.