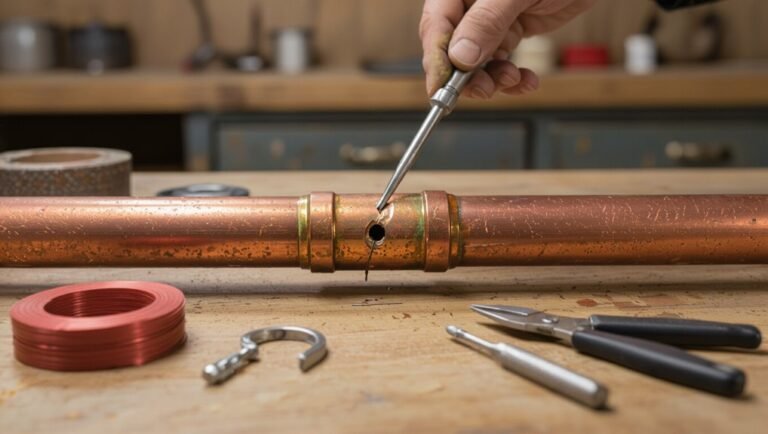
How to Cover Extra Holes in Kitchen Sink: Simple DIY Fixes and Best Plugs
To effectively cover extra holes in your kitchen sink, you can use simple DIY solutions such as rubber stoppers, silicone plugs, adhesive caps, or decorative escutcheon plates that fit the hole size. For a more permanent fix, consider installing a soap dispenser, air gap, or using epoxy for metal or resin patches in composite sinks. Make sure to measure the diameter and thickness of the holes, match finishes, and seal with silicone to ensure a watertight seal. Follow along for step-by-step guides, product recommendations, and maintenance tips.
Common Reasons for Extra Holes in Kitchen Sinks
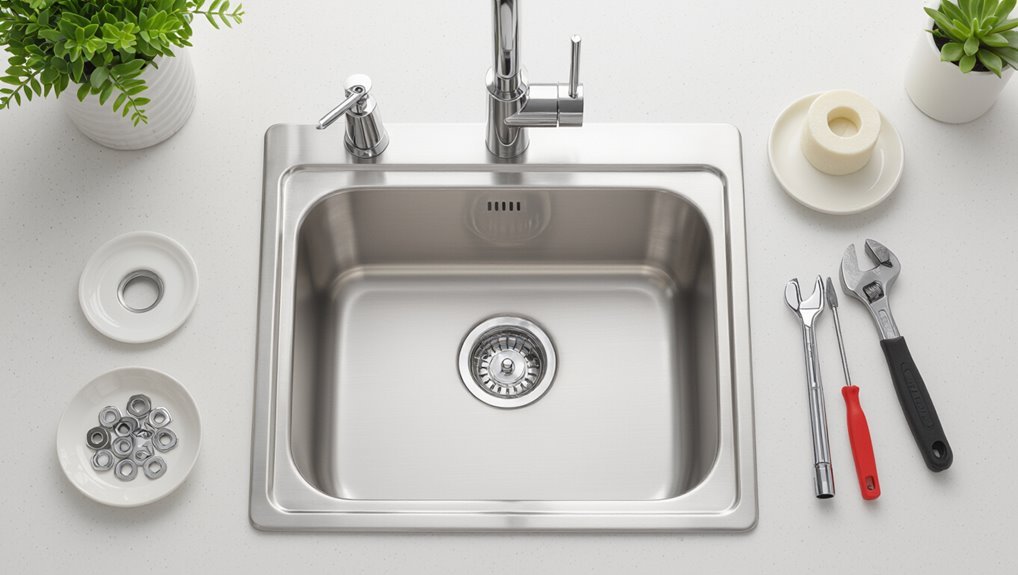
Extra holes often appear at the back of the sink or on the deck and were originally designed for faucets, soap dispensers, sprayers, or air gaps.
Remodels and faucet changes can leave unused openings when new fixtures do not match the old hole layout. Homeowners must weigh whether a hole can remain unused (if it is sealed and functional) or should be covered to prevent leaks, debris entry, and aesthetic issues.
Typical hole locations and their original purposes
Kitchen sinks often display one or more additional holes beyond the faucet opening, each originally meant for a specific fixture or function.
Common locations include the soap dispenser hole near the faucet, a sprayer or side spray opening, an air gap behind the sink for garbage disposals, and a hot-water dispenser or filtered water tap.
These guide choices for how to cover extra holes in kitchen sink.
Causes of leftover or unused holes during remodels and replacements
Many remodels and faucet swaps leave one or more holes unused because newer fixtures consolidate functions that older setups distributed across multiple openings.
Additional causes include replacing separate sprayers, soap dispensers or filtered taps with integrated units, changing countertop or sink styles, mismatched mounting patterns, and DIY errors that enlarge or misplace holes.
Homeowners also retain legacy holes when budget or aesthetics delay full replacements.
When to leave a hole versus when to cover it
Leftover openings from remodels or faucet swaps prompt a practical decision: leave a hole exposed or cover it.
The choice hinges on function, aesthetics, and risk. Keep an opening if it serves future fixtures, venting, or access.
Cover holes that collect dirt, allow leaks, or tarnish appearance. Prioritize watertight, matching covers when permanence or hygiene matters.
Quick Solutions for Covering Extra Sink Holes
Homeowners can quickly address extra sink holes with a range of simple options.
Permanent choices include decorative sink hole cover plates (escutcheons) or functional fillers such as soap dispensers and air gaps.
Temporary fixes include rubber stoppers, silicone plugs, and adhesive caps.
Each option balances appearance, utility, and ease of installation.
Using sink hole cover plates (escutcheons)
A single escutcheon plate provides a fast, tidy way to conceal an unused sink hole without removing fixtures or altering plumbing. It sits flush, matches finish, and resists moisture.
Selection considers diameter and mounting style. Installation is reversible and tool-light.
- Measures hole diameter
- Chooses matching finish
- Verifies screw or snap fit
- Cleans surface
- Seals lightly with silicone
Installing soap dispensers or air gaps as functional fillers
If a decorative escutcheon plate feels too passive for an extra hole, installing a functional item such as a soap dispenser or an air gap provides both coverage and utility.
These fixtures fit standard holes, conceal openings, and add purpose.
Consider the following when choosing and installing:
- Compatibility with hole diameter
- Mounting depth
- Plumbing connections
- Material and finish
- Ease of maintenance
Temporary fixes: rubber stoppers, silicone plugs, and adhesive caps
Try temporary covers like rubber stoppers, silicone plugs, or adhesive caps when a quick, nonpermanent solution is needed for an unused sink hole. They seal, prevent debris, and allow easy removal for future upgrades.
Choose size, material, and finish to match aesthetics and durability. Consider waterproof adhesive for longer wear.
- Rubber stoppers
- Silicone plugs
- Adhesive caps
- Size matching
- Easy removal
How to Choose the Right Sink Hole Cover
Selecting a sink hole cover begins with accurate measurements of the hole diameter and sink thickness to guarantee a proper fit.
Attention should then turn to matching finish and material with existing fixtures, while weighing durability, water resistance, and installation ease.
Finally, a brief cost comparison and checking available retailers help balance price and quality.
Measuring hole diameter and sink thickness
Before choosing a sink hole cover, precise measurements of the hole diameter and the sink’s thickness are required to guarantee a secure fit and proper sealing.
Use calipers or a ruler to record the hole’s maximum interior width. Measure sink thickness at the rim where the cover will sit.
Note tolerances and any bevels; compare these dimensions to product specifications before purchase.
Matching finish and material to existing fixtures
With measurements in hand, attention turns to matching the cover’s finish and material to existing fixtures so the repair looks intentional rather than improvised.
Select chrome, brushed nickel, stainless, or oil-rubbed bronze to align with faucet and hardware. Match textures and sheen, consider trim styles, and verify color consistency under kitchen lighting.
Small mismatches are minimized by choosing similar metallic tones and profiles.
Considering durability, water resistance, and ease of installation
Evaluate durability, water resistance, and ease of installation to guarantee the sink hole cover performs reliably over time and under daily use.
Select corrosion-resistant metals or solid polymer plugs with secure gaskets.
Prefer press-fit or threaded designs for simple fitting and replacement.
Verify seal integrity against splashes and steam.
Prioritize materials rated for kitchen environments and straightforward tool-free installation when possible.
Cost comparison and where to buy
Several factors influence the cost of a sink hole cover, including material, finish, mounting type, and brand reputation. Prices range from budget plastic caps to premium stainless steel or brass plates; local hardware, big-box retailers, and online marketplaces offer varied selections. Comparison should weigh warranty, finish match, and shipping.
| Type | Typical Price | Where to Buy |
|---|---|---|
| Plastic cap | $3–$10 | Hardware store |
| Stainless cover | $15–$60 | Online retailers |
| Brass plate | $30–$100 | Specialty plumbing suppliers |
Step-by-Step Installation Guides
This section provides clear, practical steps for common sink-hole solutions.
It covers installing a standard cover plate, converting an unused hole to a soap dispenser or sprayer, and permanently sealing a hole with silicone and a cover cap.
Instructions also explain removing old gaskets and preparing the sink surface for a reliable fit.
Installing a standard sink hole cover plate
Begin by gathering the cover plate, mounting hardware, plumber’s putty or silicone, a wrench, and a clean cloth; having the tools ready streamlines the installation.
Clean the hole rim, apply putty or a silicone bead, center the plate, press firmly, and secure underside nut or clip per manufacturer instructions.
Wipe excess sealant, tighten snugly without overtightening, and test for a watertight seal.
Replacing an unused hole with a soap dispenser or sprayer
Convert an unused sink hole into a functional soap dispenser or sprayer by selecting a compatible fixture, preparing the mounting area, and following a systematic installation sequence.
Measure hole diameter, verify counter thickness, then insert gasket and fixture, tighten mounting nut underneath, connect dispenser pump or sprayer hose to water supply or soap reservoir, test for leaks, adjust alignment, and secure all connections.
Sealing a hole permanently with silicone and a cover cap
After choosing not to install a dispenser or sprayer, the unused sink hole can be permanently sealed with a silicone bead and a matching cover cap to prevent leaks and debris buildup.
Clean and dry the rim, apply a continuous silicone bead, press the cap firmly into place, wipe excess, and allow full cure per manufacturer instructions.
Test for watertightness before regular use.
Removing old gaskets and preparing the sink surface
Remove any remaining fixtures and water, then inspect the hole and surrounding surface for old gaskets, sealant, and corrosion.
Use a plastic scraper or putty knife to lift gasket material, then apply a mild solvent or vinegar to soften stubborn residue.
Scrub with a non-abrasive pad, rinse thoroughly, and dry.
Confirm edges are clean, smooth, and oil-free before measuring and fitting the new plug or cover.
DIY Permanent Repair Options
The section outlines durable DIY repairs tailored to sink material, including epoxy or automotive body filler for metal and fiberglass or resin patches for composite and granite surfaces.
It also summarizes professional welding or brazing options for stainless steel and notes situations—such as large or structural holes—when a professional should be called.
Practical tips on tool needs, curing times, and expected longevity follow.
Using epoxy or automotive body filler for metal sinks
For small to medium holes in metal kitchen sinks, epoxy resin or automotive body filler offers a durable, permanent repair when properly applied and finished.
Surfaces must be cleaned, sanded to bare metal, and degreased.
Mix and apply filler, overbuilding slightly, then sand flush when cured.
Prime and paint or use matching touch-up for corrosion protection and inconspicuous appearance.
Fiberglass or resin patch for composite and granite sinks
Metal sinks can often be repaired with epoxy or body filler, but composite and granite sinks require a different approach: a fiberglass or resin patch provides a strong, water-resistant bond that matches the thicker, layered construction of these materials.
The process involves cleaning, sanding, layering fiberglass cloth with polyester or epoxy resin, curing, trimming, and sanding smooth before color-matching and sealing for durability.
Professional welding or brazing for stainless steel sinks
Consider professional welding or brazing when a stainless steel sink has through-holes, large cracks, or warped areas that compromise strength and watertightness. These techniques fuse stainless components with heat and filler metal to create a permanent, load-bearing repair that DIY adhesives cannot match.
Certified welders assess alloy, grind edges, apply TIG or brazing rods, and finish welds to restore corrosion resistance and smooth drainage.
When to call a professional
When a sink defect exceeds simple patching—such as through-holes, extensive corrosion, structural warping, or leaks that persist after adhesive or epoxy repairs—a professional should be contacted.
A licensed plumber or metalworker evaluates damage, recommends welding, brazing, or replacement, and guarantees watertight seals and code compliance.
Complex repairs, hidden damage, or warranty concerns justify professional intervention to prevent recurring failures and safety risks.
Aesthetic and Functional Upgrades Using Extra Holes
Extra holes can be repurposed to add filtered water taps, soap dispensers, or air gaps for improved sanitation and convenience.
They also accommodate auxiliary sprayers or compact accessory stations to enhance sink functionality.
Alternatively, unused openings may be finished with decorative covers or trim to create a cohesive, intentional look.
Adding filtered water taps, soap dispensers, or air gaps
Homeowners often use extra sink holes to add functional fixtures like filtered water taps, soap dispensers, or air gaps, which improve utility without cluttering the countertop.
These additions require matching hole size, proper sealing, and compatible mounting hardware. Filter taps need under-sink filters and tubing; soap dispensers offer refillable reservoirs; air gaps prevent backflow.
Professional installation guarantees code compliance and leak-free performance.
Installing auxiliary sprayers or accessory stations
Install an auxiliary sprayer or accessory station to add targeted functionality—such as a pull-out rinse sprayer, pot filler, or multi-use prep faucet—without replacing the main faucet.
These fixtures mount into extra holes, tie into existing water lines or a dedicated cold line, and require basic plumbing skills.
Choose matching finishes, verify hole size and deck thickness, and use plumber’s tape and proper mounting hardware for leak-free installation.
Converting holes into decorative elements (covers and trims)
A decorative cover plate or trim ring can transform unused sink holes into a deliberate design feature while preventing grime buildup and moisture intrusion.
Options include matching finishes, custom escutcheons, layered trim, magnetic covers, and recessed caps.
Selection considerations focus on material, waterproofing, ease of cleaning, secure fastening, and visual cohesion with faucets and hardware to guarantee durability and style.
Common Problems and How to Avoid Them
Common problems when covering sink holes include leaks from improper sealing, corrosion or staining from incompatible materials, and poor fit of aftermarket covers.
Each issue has straightforward prevention or fix options, such as using the correct sealant, choosing compatible metals or finishes, and modifying or selecting the right-sized cover.
Attention to proper measurements and installation steps reduces the risk of common DIY mistakes.
Leaks caused by improper sealing and how to fix them
Leaks around sink fixtures often stem from inadequate or deteriorated sealing, allowing water to seep into gaps and corrode surrounding materials.
To fix this, remove old caulk, dry surfaces, apply plumber’s putty or silicone sealant evenly, and tighten fittings to manufacturer torque.
Inspect gaskets and replace damaged ones.
Test for leaks, reapply sealant if necessary, and maintain periodic checks to prevent recurrence.
Corrosion or staining from incompatible materials
When dissimilar metals or reactive cleaners meet, electrochemical reactions and chemical staining can quickly mar sink surfaces and adjacent fixtures.
Homeowners should select compatible materials—stainless steel, brass, or plastic—and avoid acidic or bleach-based cleaners on vulnerable finishes.
Use non-reactive sealants and protective washers to isolate metals.
Regular gentle cleaning prevents buildup; promptly neutralize accidental chemical spills to minimize permanent discoloration.
Fit issues with aftermarket covers and how to adapt them
Aftermarket sink covers often fail to fit due to variations in sink rim shape, drain spacing, and mounting hardware. Mismatched dimensions, tapering edges, and obstructing fixtures commonly prevent a snug, watertight seal.
Inspect measurements, edge profiles, and nearby fittings before purchase. Use gaskets, silicone shims, or trimmed flanges to adapt covers.
Test for leaks and stability, replacing incompatible parts when necessary.
Mistakes to avoid during DIY installations
Start by planning each step and assembling the correct tools and materials to prevent the most common installation errors. The installer should avoid rushing, using wrong-size covers, skipping seals, overtightening fasteners, and neglecting compatibility checks.
Prioritize measurements, test-fit, and proper sealant application to guarantee watertight, durable results.
- Wrong size
- No sealant
- Overtightening
- Ignoring instructions
- Poor measurements
Maintenance and Long-Term Care for Covered Holes
Regular cleaning and periodic inspection of cover plates and seals keep patched sink areas functioning and looking good.
Worn gaskets should be replaced and fittings tightened promptly to maintain watertightness.
Seasonal checks for leaks and mold help catch problems early and extend the life of repairs.
Cleaning and inspecting cover plates and seals
Inspecting and cleaning cover plates and seals assures they continue to protect against leaks and maintain a neat appearance.
Regularly wipe plates with mild detergent and a soft cloth, removing grime and mineral buildup.
Examine seals for discoloration, cracking, or debris that could compromise contact.
Rinse and dry thoroughly; re-seat covers carefully to guarantee even contact and visual alignment.
Replacing worn gaskets and tightening fittings
After cleaning and verifying cover plates and seals, attention turns to the hardware that keeps them watertight: gaskets and fittings.
Inspect rubber or foam gaskets for cracks, compression, or brittleness; replace with matching sizes and materials.
Check threaded fittings and mounting nuts, tighten to manufacturer torque, and use plumber’s tape where appropriate.
Retest for leaks and adjust as needed.
Seasonal checks to prevent leaks and mold buildup
At each change of season, homeowners should schedule a concise check of sink covers, surrounding seals, and adjacent cabinetry to catch early signs of leaks or mold before they spread.
Inspect under-sink areas, feel for dampness, smell for mustiness, and examine caulking and plug integrity.
Promptly dry, re-seal, or replace compromised components and record findings to track recurring issues.
Recommended Products and Buying Guide
This section lists recommended products and a concise buying guide for covering sink holes, including top-rated cover plates and escutcheons and suitable soap dispensers and air gap models for spare openings.
It also outlines essential tools and sealants for typical DIY fixes and offers a quick cost comparison between DIY and professional repairs.
Readers are directed to product features, compatibility tips, and estimated price ranges to support an informed choice.
Top-rated hole cover plates and escutcheons
A compact selection of top-rated hole cover plates and escutcheons can simplify the process of finishing a kitchen sink installation while ensuring a polished, cohesive look.
Options prioritize fit, finish, material, and ease of installation. Recommended choices include corrosion-resistant stainless, brushed nickel, chrome, adhesive-backed plastic, and adjustable-fit metal plates.
- Stainless steel
- Brushed nickel
- Chrome
- Adhesive plastic
- Adjustable metal
Best soap dispensers and air gap models for spare holes
With the open holes capped or finished, attention can turn to functional accessories that put spare openings to work: soap dispensers and air gaps.
Recommended picks balance finish, compatibility, and installation ease. Consider stainless, brushed nickel, pump capacity, and venting code compliance.
Typical options include:
- Stainless soap dispenser
- Refillable ceramic dispenser
- Low-profile air gap
- Universal-fit mounting
- Child-safe pump design
Tools and sealants you’ll need for DIY fixes
Several essential tools and sealants make DIY sink-hole repairs reliable and long-lasting. Recommended items focus on ease, durability, and compatibility with sink materials.
Essential picks include quality sealants, hand tools, and finishing supplies:
- Silicone or plumber’s epoxy
- Utility knife
- Adjustable wrench
- Sandpaper (various grits)
- Hole cover plates or matching escutcheons
Select non-corrosive options and food-safe silicone.
Quick comparison of DIY vs. professional repair costs
Many homeowners can save substantially by handling small sink-hole repairs themselves, but the true cost gap depends on materials, labor rates, and the complexity of the job. DIY parts and sealants often cost $10–$60; professional service ranges $100–$400. Choose DIY for simple covers, pro for structural or warranty work.
| Option | Typical Cost |
|---|---|
| DIY materials | $10–$60 |
| Professional | $100–$400 |
Conclusion
Investigating whether extra sink holes are merely inconvenient or secretly invite persistent leaks and grime, the reader finds reassurance: simple covers and mindful installation typically prevent trouble. The truth—that modest DIY fixes often suffice—calms anxiety while prompting care. Choosing the right plug, sealing correctly, and considering permanent or aesthetic upgrades transforms a potential flaw into a functional feature. With routine maintenance, covered holes remain reliable, proving foresight and skill can ward off future headaches.