How to Reset Septic Tank Pump: Step-by-Step Troubleshooting and Safety Tips
To reset a septic tank pump, start by diagnosing any alarms and isolating the electrical power. Wear personal protective equipment for safety. Check the control panel for fault codes, use a tester to confirm power is off, and inspect floats and wiring for any damage or obstructions. Clear any blockages in the impeller before performing a controlled reset. After a brief wait, reset the control box and restore power while closely monitoring the operation. This process ensures your septic pump functions properly while prioritizing safety and efficiency.
What to Know Before Resetting a Septic Tank Pump
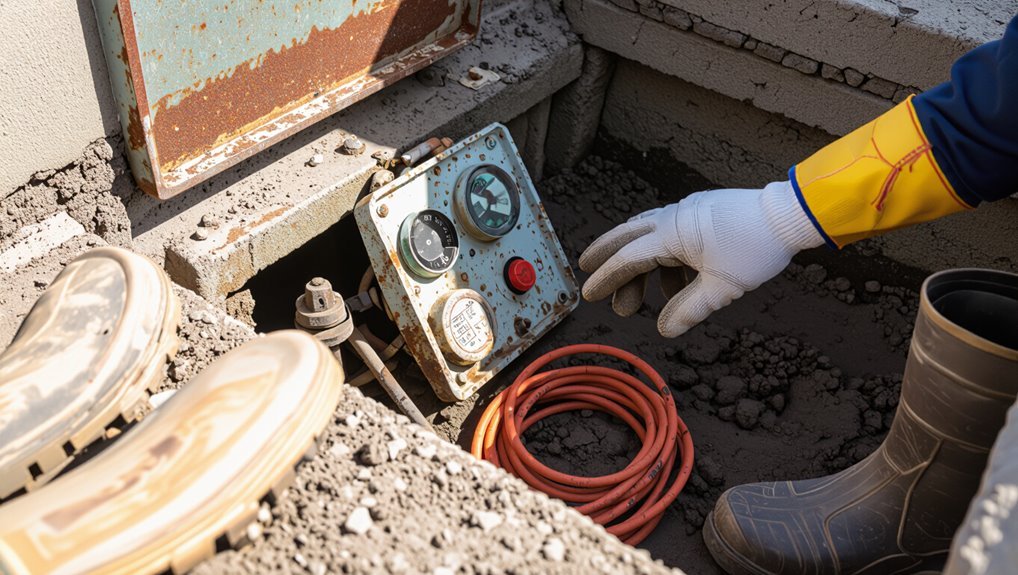
Before attempting a reset, one should understand common causes of pump failure, the pump, float switches, and control components involved, and the basic layout of the septic system.
Safety precautions—including electrical isolation, proper ventilation, and use of gloves and eye protection—must be observed.
If problems involve wiring, persistent alarms, or suspected sewer gas or structural issues, a licensed professional should be contacted.
Common reasons a septic pump needs resetting
Recognizing why a septic pump trips or stalls helps determine whether a simple reset is safe or a sign of a larger problem.
Common causes include electrical faults, float switch malfunctions, clogged impellers or intake screens, high solids or grease buildup, and intermittent overload from excessive water use.
Proper assessment before attempting how to reset septic tank pump reduces risk and avoids repeated failures.
Basic components of a septic pump system
After identifying why a pump trips, understanding the system’s basic components helps determine whether a reset is appropriate and how to proceed safely.
A typical septic pump system includes the septic tank, pump chamber, effluent pump, floats or level sensors, discharge piping, check valve, and control panel or alarm.
Familiarity with these parts clarifies troubleshooting steps and expected operation.
Safety precautions and required protective gear
Wear appropriate protective gear and follow strict safety precautions when preparing to reset a septic tank pump, since exposure to raw sewage, hazardous gases, and electrical components poses real risks.
Use chemical-resistant gloves, eye protection, a respirator rated for organic vapors/hydrogen sulfide, and sturdy boots.
Verify electrical power is isolated, work in well-ventilated conditions, and avoid confined-space entry without proper training.
When to call a professional instead of attempting a reset
When should a homeowner stop troubleshooting and call a professional? A professional is needed if sewage backups persist, electrical faults recur, odors worsen, tank access or alarms are damaged, float switches or pumps are submerged or corroded, or diagnostic steps fail.
Also call if the homeowner lacks tools, permits, or confidence.
Professionals prevent health risks, guarantee proper repairs, and comply with local codes.
Tools and Materials Needed for Resetting a Septic Pump
A concise inventory of tools and materials helps guarantee a safe, efficient pump reset. Essential items include basic hand tools, protective gear, and a flashlight; optional diagnostic meters and multimeters aid troubleshooting.
Common replacement parts to keep on hand are fuses, float switches, and impeller or seal kits.
Essential tools list
Essential tools for resetting a septic pump include items that guarantee safe access, diagnosis, and restart: a flashlight, insulated gloves, safety goggles, a multimeter or voltage tester, screwdriver set, adjustable wrench, pliers, a replacement fuse or circuit breaker, and a pump reset tool or manufacturer-specified key.
Reliable, serviceable equipment reduces risk and downtime.
- Personal protective equipment
- Basic hand tools
- Electrical safety devices
- Pump reset/key
Optional diagnostic tools and meters
After assembling basic safety gear and hand tools, a technician may choose to bring optional diagnostic meters to pinpoint electrical or performance issues more quickly.
Useful devices include a multimeter for voltage, continuity, and amperage checks; a clamp meter to measure pump current draw without disconnecting wiring; and a portable pressure or flow tester to verify discharge performance and detect clogs or impeller problems.
Replacement parts commonly kept on hand
Stocking common replacement parts saves time and prevents extended downtime when resetting a septic pump.
Recommended spares include float switches, seals and gaskets, impellers, check valves, pump fuses, and appropriate amperage circuit breakers.
Include spare wiring connectors, waterproof cable glands, hose clamps, and a compatible replacement pump cartridge or motor assembly.
Store parts dry, labeled, and accessible for quick maintenance.
How to Diagnose a Septic Pump Problem Quickly
A quick diagnosis begins with spotting common symptoms of pump failure such as persistent alarms, reduced effluent flow, or unusual noises.
The technician then checks the alarm panel and control box, inspects floats, wiring, and switch mechanisms for faults, and looks for visible obstructions.
Finally, the pump motor and impeller are tested for power, operation, and blockages to confirm the cause.
How to identify symptoms of pump failure
When a septic pump begins to fail, early signs often appear as slow drains, gurgling noises, or sewage odors near fixtures and the drainfield; recognizing these symptoms promptly helps prevent backups and costly repairs.
Additional indicators include unusually wet or soggy yard areas, toilet flushing issues, frequent cycling if visible, and higher-than-normal water levels in the tank riser or inspection ports.
Checking the alarm panel and control box
Noticing external signs of pump trouble should lead to a quick check of the alarm panel and control box, since these components provide the clearest diagnostic clues without opening the tank.
Inspect for illuminated alarms, fault LEDs, tripped breakers, loose conduit, burn smells, or water ingress.
Note model-specific error codes, consult the manual, and record observations before resetting power or contacting a technician.
Inspecting floats, wires, and switch mechanisms
Begin by visually and physically inspecting the floats, wiring, and switch mechanisms through the control box access or pump riser, looking for stuck or waterlogged floats, frayed or corroded wires, loose connections, broken clips, or mineral buildup that can impede movement.
Verify float buoyancy and free travel, tighten or replace loose terminals, secure damaged mounting, and clean corrosion with appropriate contacts cleaner before reassembling.
Testing pump motor and impeller for blockages
Start by cutting power to the pump at the circuit breaker or control panel to guarantee safety before any hands-on checks.
Then remove the pump per manufacturer instructions, inspect the impeller for debris, hair, rags, or calcification.
Manually rotate the shaft to check free movement.
Test motor windings with a multimeter and the capacitor if applicable.
Reassemble and restore power after confirming clearance.
Step-by-Step Procedure to Safely Reset a Septic Tank Pump
The procedure begins with confirming power is off and the system is isolated to guarantee safety.
Next, alarms are silenced and the control panel is inspected before manually resetting the control box and circuit breaker.
Finally, floats and switches are checked and repositioned as needed, and any obstructions are cleared from the pump and discharge line.
Step 1 Turn off power and verify isolation
Power to the pump must be disconnected and confirmed isolated before any work proceeds to prevent accidental startup or electrocution.
The technician locates the circuit breaker or disconnect switch, turns it off, and locks out/tag out per local regulations.
Verification uses a non-contact voltage tester at the control panel and motor leads.
Only after testing confirms zero voltage should physical access to the pump occur.
Step 2 Silence alarms and inspect control panel
Silencing audible alarms and visually inspecting the control panel gives a clear starting point for troubleshooting.
The technician confirms alarm status, notes indicator lights, and records fault codes. They check wiring, terminal tightness, and conduit for damage without touching live components.
Moisture, corrosion, burn marks, or loose labels are documented. Photographs assist later reference.
Any abnormalities prompt further diagnostics or professional referral.
Step 3 Manually reset the control box and circuit breaker
Begin by turning off the control box using its designated switch or key to verify all internal circuits are de-energized before any further work.
Next, locate the main breaker for the septic pump and switch it off.
Wait a full minute, then reset the control box by pressing its reset button.
Restore power at the breaker and observe for proper restart and indicators.
Step 4 Inspect and reposition floats and switches
Inspect the floats and switches visually and by hand to verify proper alignment and free movement before restoring full power.
The technician checks for cracked housings, frayed wires, corrosion, and obstructing debris on stems.
Adjust float positions to factory specifications, guarantee switches actuate smoothly without sticking, and secure loose wiring or mounting brackets.
Replace damaged components before re-energizing the system.
Step 5 Remove obstructions from pump and discharge line
Clear obstructions from the pump and discharge line to restore proper flow and prevent motor overload or premature failure.
The technician isolates power, removes pump access cover, and inspects impeller, inlet screen, and hose for rags, grease, or solids.
Debris is cleared with gloved hands and nonmetallic tools; damaged components are noted for replacement.
Reassemble seals and secure fittings before final checks.
Step 6 Restore power and monitor restart sequence
With obstructions removed and components reassembled, power can be safely restored while observing the restart sequence to confirm proper operation.
The technician re-engages the breaker or reconnects the pump panel, watches for normal startup sounds, and verifies pump run time against expected intervals.
Any unusual noise, vibration, or failure to start prompts immediate shutdown and further inspection before repeating power restoration.
Step 7 Verify proper cycling and alarm reset
Begin by observing the pump through several complete cycles to confirm it starts and stops at the correct levels and that the control panel indicators return to normal.
If an alarm was triggered, verify its silence and perform a manual reset per the panel instructions while noting any recurring trips or abnormal delays that could indicate float, timer, or wiring faults.
Then document cycle intervals, note pump run time, and schedule further diagnostics if inconsistencies persist.
Troubleshooting When Resetting Fails
If a reset does not restore pump operation, the next step is to diagnose persistent alarms or a no-start condition by checking electrical and mechanical causes.
The technician should verify breakers, fuses, and wiring integrity before inspecting for mechanical failures such as a seized motor or clogged impeller.
While awaiting parts or professional service, temporary measures—reducing water use and diverting drains if possible—can help prevent sewage backup.
Diagnosing persistent alarms or no-start conditions
When a septic pump continues to alarm or fails to start after a reset, systematic troubleshooting is required to identify the underlying cause rather than repeating resets.
Inspect float switches for sticking or damage, verify pump impeller and intake for blockage or debris, check for seized motor bearings by manual spin (with power off), and assess control panel relays and timers for correct operation before escalating to professional service.
Electrical faults to check (breakers, fuses, wiring)
Check the electrical supply and protective devices next, since breakers, fuses, and wiring faults are common causes of persistent alarms or no-start conditions.
- Verify the breaker is on and not tripped; reset if safe.
- Inspect fuses for continuity; replace blown fuses.
- Examine visible wiring for burns, corrosion, or loose terminals.
- Test voltage at the pump junction box with a multimeter before further diagnostics.
Mechanical failures to inspect (seized motor, clogged impeller)
Examine mechanical components next, since seized motors and clogged impellers are frequent causes of a pump that refuses to restart despite correct electrical supply.
Inspect the motor shaft for free rotation, listen for grinding, and check bearings.
Remove the pump to examine the impeller for debris, roots, or sludge; clear obstructions and replace damaged impellers or motors per manufacturer specifications.
Temporary measures to prevent backup while waiting for repair
If the pump’s mechanical parts have been inspected and a full repair cannot be completed immediately, temporary measures can reduce the risk of sewage backup while waiting for service.
Restrict water use, postpone laundry/dishwashing, and divert drains to unused sinks or exterior lines if available.
Use absorbent barriers at floor drains, monitor tank levels visually, and schedule prompt professional repair to avoid overflow and contamination.
Preventive Maintenance to Reduce Future Resets
A regular preventive maintenance program can minimize pump resets by following a clear inspection schedule and checklist.
It should include cleaning and testing floats, sensors, and control panels, as well as practices to reduce solids and grease entering the tank.
Guidance on when to replace the pump or upgrade the control system completes the plan and helps prevent repeat failures.
Routine inspection schedule and checklist
When maintained on a consistent schedule, routine inspections catch developing issues before they require a pump reset or costly repairs.
Inspect visually for leaks, listen for unusual pump sounds, verify alarm function, and note liquid levels. Record findings and dates.
Schedule quarterly inspections, with professional service annually.
- Visual leak and cover check
- Alarm and control verification
- Level and flow observation
- Documentation and service scheduling
How to maintain floats, sensors, and control panels
Routine inspections identify visible problems, but maintaining floats, sensors, and control panels prevents many issues from developing between checks.
Inspect float cords for frays or entanglement, clean sensors with manufacturer-approved solutions, verify float travel and switch actuation, and check control panel connections for corrosion or loose terminals.
Test alarms, log results, and replace worn components promptly to reduce unexpected resets and failures.
Best practices for reducing solids and grease in the system
Reduce solids and grease at the source to minimize pump strain, blockages, and the need for resets.
Encourage reduced disposal of food scraps, fats, oils, and coffee grounds; install sink strainers; use grease traps where applicable.
Promote water-conserving fixtures to lower flow velocity and settling disruption.
Schedule routine septic inspections and periodic pumping to remove accumulated solids before they impair pump function.
When to replace the pump or upgrade the control system
After addressing source control and regular inspections to limit solids and grease, attention should turn to signs that the pump or control system is near the end of its useful life.
Frequent resets, unusual noises, overheating, rising cycle frequency, or persistent alarms indicate replacement.
Upgrade controls for reliable float sensors, alarm redundancy, and programmable cycles.
Prioritize OEM-compatible pumps and professional evaluation to prevent repeated failures.
Safety and Legal Considerations
The section addresses key safety and legal considerations before attempting a pump reset.
It highlights electrical hazards near wet equipment, proper handling to prevent environmental contamination, and the need to confirm local regulations or permits for repairs.
Readers are urged to prioritize qualified professionals when legal or safety risks are present.
Electrical safety around septic systems
When working near a septic system, recognizing electrical hazards is essential because pumps, control panels, and alarm systems create shock and fire risks if handled improperly.
Qualified personnel should disconnect power before servicing, lock out/tag out controls, and verify absence of voltage.
Use insulated tools, waterproof connections, and ground-fault protection.
Follow local electrical codes and manufacturer instructions to reduce electrocution and fire hazards.
Environmental precautions for sewage handling
Many jurisdictions mandate strict handling, disposal, and reporting practices for sewage to protect public health and the environment; compliance requires operators to use appropriate personal protective equipment, contain and treat effluent, and follow chain-of-custody and disposal procedures specified by local and federal regulations.
Operators must prevent runoff, avoid groundwater contamination, disinfect tools and surfaces, document incidents, and arrange licensed transport and treatment of septage to minimize ecological and public-health risks.
Local regulations and permits for septic repairs
Because septic repairs can affect public health and the environment, property owners and technicians must comply with local codes, permits, and inspection requirements before work begins.
Verify jurisdictional rules, obtain required permits, and schedule mandated inspections. Use licensed contractors when required, retain documentation, and follow permit conditions to avoid fines, project delays, or legal liability.
Failure to comply can necessitate corrective action.
Quick Troubleshooting Reference and Checklist
A concise one-page reset checklist is provided to guide users through safe, step-by-step actions for restoring pump operation.
The checklist is paired with a summary of common error codes and their meanings to enable quick identification of typical faults.
Together these resources aim to reduce downtime and support accurate troubleshooting.
One-page reset checklist
Consult the one-page reset checklist before attempting any repairs to a septic tank pump; it condenses diagnostic steps, safety precautions, and common corrective actions into a single, easy-reference flow so the responder can quickly determine whether a reset is appropriate and what to try next.
- Verify power and circuit protection.
- Inspect float switch and wiring.
- Clear debris from pump and access points.
- Attempt controlled reset and monitor operation.
Common error codes and what they mean
Error codes provide immediate clues to the pump’s condition and guide which checks from the one-page reset checklist are most relevant. Codes like E1 (float fault), E2 (motor overload), and E3 (high water) map to inspection steps: float alignment, motor current, and tank level. Use this quick reference to prioritize safe reset steps and call a technician if uncertain.
| Code | Meaning |
|---|---|
| E1 | Float fault |
| E2 | Motor overload |
Conclusion
A dim porch light glints off a rain-darkened septic lid as the homeowner stands back, tools set like quiet sentinels. Knowledge from diagnosis to reset has been laid out with steady hands: check, protect, and proceed methodically. When steps are followed, pumps whisper back to life; when they do not, a call for professional help is the right next step. Routine care keeps the system humming, turning potential crises into manageable, scheduled maintenance.