How to Remove a Tub Spout Without a Set Screw: Simple Step-by-Step Fixes
To remove a tub spout without a set screw, first turn off the water supply and protect surrounding surfaces. Identify if the spout is a slip-on or threaded type. For slip-on spouts, grip the base with a strap wrench or cloth-wrapped pliers and pull straight off while wiggling. For threaded spouts, turn counterclockwise. If the spout is stuck, apply penetrating oil and gently tap it. After removal, inspect the stub-out for corrosion and clean it before installing the new spout. The following steps detail the necessary tools, techniques, and troubleshooting tips.
How to Remove a Tub Spout Without a Set Screw Quick Answer

A common quick method is to twist and pull a slip-on tub spout straight off the pipe after locating and releasing any hidden retaining collar.
The person should wear eye protection and turn off the water supply before attempting removal.
If the spout resists, using a strap wrench and gentle penetrating oil can prevent damage.
One-sentence solution and safety reminder
Loosen the tub spout by twisting it counterclockwise while holding the pipe steady; if it resists, wedge a flat tool into the seam and apply steady pressure until the spout slides off.
For how to remove tub spout without set screw, use channel-lock pliers or a spout puller, protect finishes, shut off water, wear eye protection, and avoid sudden force to prevent pipe or fixture damage.
Tools and Materials Needed
The next section lists the tools and materials required to remove a tub spout.
It covers essential hand tools and hardware plus optional supplies that can make the job easier or protect finishes.
Readers are informed which items are must-haves and which are convenient extras.
Essential tools
Gathering the right tools guarantees the tub spout removal goes quickly and without damage. A concise kit prevents slips and protects finishes.
Essential items cover gripping, leverage, sealing, and inspection needs:
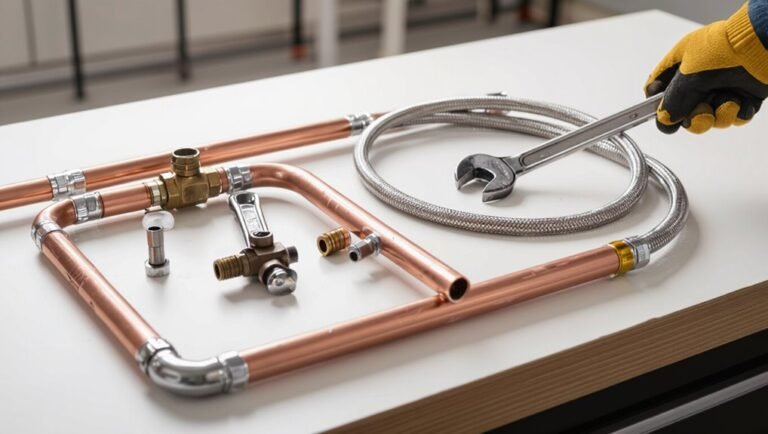
- Adjustable wrench
- Slip-joint pliers with tape
- Strap wrench
- Flat screwdriver
- Flashlight
Optional supplies that help
A few optional supplies can streamline tub-spout removal and protect nearby surfaces: plumber’s grease for reassembly, penetrating oil for stuck fittings, a soft cloth or rag to cushion tools, masking tape to mark alignment, and a small pick or needle-nose pliers for removing hidden set screws or debris.
- Plumber’s grease
- Penetrating oil
- Soft cloth or rag
- Masking tape
- Small pick or needle-nose pliers
Identify Your Tub Spout Type
The tub spout should be identified before removal because different types come off in different ways.
Common varieties include slip-on/compression spouts with no visible screw, threaded spouts that unscrew, and diverter spouts with pull-up mechanisms or integrated valves.
A quick visual check and simple measurements of the pipe end or inner opening will reveal which type is installed.
Slip-on/compression (no visible screw)
Identify a slip-on or compression tub spout by the absence of a visible retaining screw and a smooth base that slides over the shower arm or threaded pipe; many models use an internal set screw hidden under the spout or secure to a tapered fitting, while true slip-on types simply push onto the pipe and rely on friction or a retaining clip.
Inspect for a small access hole or recessed set screw beneath the spout.
Threaded spout
Look for visible threads at the base of the spout or a hex-shaped coupling nut; threaded tub spouts screw directly onto a threaded shower arm or pipe and usually require counterclockwise rotation to remove.
They often have a metal or plastic finish, may show tool flats for a wrench, and can be seized by corrosion.
Use penetrating oil and a wrench or strap tool to turn.
Diverter spout variations
Several common diverter spout styles exist—each redirects water to the shower differently, so recognizing the mechanism is essential before removal.
Push‑pull, lift‑knob, dial, and integrated diverters operate via internal plungers, valves, or rotating passages.
Some units are slip-on, others threaded. Identifying whether the diverter actuates axially, rotationally, or via a pop‑up informs the correct removal technique and needed tools.
How to tell which type you have (visual checks and measurements)
How can a quick visual and a few simple measurements determine the tub spout type? Inspect attachment: threaded, slip-on (smooth back), or set-screw style.
Measure spout length, inner diameter at pipe entry, and distance from wall to outlet. Note presence of diverter knob or visible screws.
Photograph fittings for reference. Use measurements to match manufacturer specifications before removal or replacement.
Prepare for Removal
Before beginning removal, the homeowner should shut off the water supply and open a nearby faucet to relieve any residual pressure.
Surfaces and nearby fixtures are then protected with towels or masking tape to prevent scratches and water damage.
Finally, the necessary tools are gathered and a clear workspace is arranged to keep parts organized and accessible.
Shut off water and relieve pressure
Shut off the water supply to the tub and relieve any trapped pressure to prevent leaks or spray when the spout is removed. Then open the tub faucet to drain residual water and close the supply valve fully. Verify no flow at the spout before proceeding.
| Step | Action | Check |
|---|---|---|
| 1 | Shut main | Valve closed |
| 2 | Open faucet | Water drains |
| 3 | Test spout | No flow |
Protect fixtures and surrounding surfaces
Several simple protections should be applied to prevent scratches, chips, and finish damage to fixtures and surrounding surfaces during spout removal.
Soft cloths or microfiber towels wrap the tub rim and nearby fixtures.
Apply painter’s tape to adjacent tile or chrome.
Place a shallow catch pan to protect the drain and floor.
Use rubber jaw pliers or a cloth-covered wrench to avoid marring finishes.
Gather tools and workspace tips
A few basic tools and a cleared workspace make tub-spout removal quicker and safer. The technician organizes tools, lays down towels, and guarantees good lighting and ventilation. Safety gloves and eye protection are kept nearby. Small parts are contained to prevent loss.
| Tool | Purpose |
|---|---|
| Adjustable wrench | Grip spout base |
| Allen key set | Hidden fasteners |
| Rubber strap wrench | Nonmarring grip |
| Flashlight | Inspect seams |
| Tray | Hold screws and clips |
Step-by-Step Removal Methods
The following section outlines five practical removal methods tailored to common tub spout types and problems.
It covers pull-off removal for slip-on spouts, counterclockwise twisting for threaded spouts, and the use of penetrating lubricant on seized fittings.
Additional options include using a strap wrench or spanner for leverage and a rubber mallet with a wood block for gentle persuasion.
Method 1 Pull-off removal for slip-on spouts
Begin by identifying whether the tub spout is a slip-on model with a visible set screw or a smooth, friction-fit base; this method applies when the spout slides off the threaded or copper protrusion without unscrewing. Grip the spout, apply steady outward force, wiggle if needed, protect finish with cloth, and pull straight off.
| Step | Action |
|---|---|
| 1 | Inspect |
| 2 | Cover |
| 3 | Grip |
| 4 | Wiggle |
| 5 | Pull |
Method 2 Twist counterclockwise for threaded spouts
Turn the spout counterclockwise to unscrew it from a threaded fitting, using steady, even pressure to avoid stripping the threads.
If hand rotation stalls, use a cloth-wrapped wrench on the base to maintain grip and prevent cosmetic damage.
Continue turning until the spout disengages from the pipe.
Inspect threads for corrosion or damage before installing a replacement or reassembling the faucet.
Method 3 Use penetrating lubricant for stuck spouts
Spray a penetrating lubricant around the spout base and into any visible seams to loosen corrosion and mineral buildup before attempting removal.
Let it soak for 10–15 minutes, reapplying if runoff occurs.
Tap lightly with a plastic mallet to help penetration.
After soaking, attempt to rotate or pull the spout; repeat lubrication if resistance persists until movement is achieved.
Method 4 Use a strap wrench or spanner for leverage
Apply a strap wrench or adjustable spanner to gain controlled leverage without damaging the spout finish. The tool grips evenly; rotate counterclockwise while stabilizing the pipe. If resistance persists, alternate small taps to break corrosion. Inspect threads for damage and clean before reinstalling or replacing the spout.
| Tool | Action | Note |
|---|---|---|
| Strap wrench | Grip & turn | No surface marks |
| Spanner | Apply torque | Use padded jaws |
| Rag | Protect finish | Prevent scratches |
Method 5 Use a rubber mallet and wood block for gentle persuasion
Tap gently with a rubber mallet against a small wood block held against the tub spout to break the bond without marring the finish.
The technician strikes lightly around the spout base, rotating the block to distribute impacts.
After several taps, grip and twist the spout; repeat if needed.
This controlled percussion loosens adhesive or mineral deposits while minimizing cosmetic damage.
Method 6 Removing spouts with internal retaining clips or hidden screws
Begin by locating the fastener type: many tub spouts hide a small retaining clip or a set screw beneath the spout or inside a removable cap.
Inspect for a snap clip or tiny screw; remove cap with a flat screwdriver.
Use needle-nose pliers to extract clips or a miniature screwdriver to loosen hidden screws.
Withdraw spout straight off the pipe, keeping hardware for reassembly.
What to Do If the Spout Is Stuck or Damaged
If the spout resists removal after standard methods, the author outlines escalation steps such as applying penetrating oil, heat, or gentle prying with proper tools.
When those fail, guidance is provided on safely cutting the spout without nicking the supply pipe and on techniques to protect copper or brass fittings.
Special procedures for dealing with corroded metal spouts and brittle PVC variants are also addressed.
Steps when spout won’t budge after initial attempts
When a tub spout refuses to move after standard removal steps, assess the situation for signs of corrosion, damaged set screws, or an internal diverter obstruction before proceeding.
Apply penetrating oil around the joint, allow soak time, then use a strap wrench or rubber jar opener with steady, even force.
Tap gently with a plastic mallet to break corrosion; reapply oil and retry.
When to cut the spout and how to avoid damaging the pipe
Cutting a stuck or damaged tub spout becomes the practical option when all non‑destructive methods fail or the spout itself is cracked, stripped, or sealing around a fragile pipe.
Assess pipe material and clearance, mark a straight cut line, and use a fine‑tooth hacksaw or oscillating tool with a metal blade.
Protect the pipe with a rag and slow, controlled cuts to avoid nicking.
Handling corroded or PVC spouts
Tackle corroded or PVC tub spouts by first identifying the attachment type and extent of deterioration: inspect for set screws, threaded adapters, or glued joints and note visible corrosion, cracks, or soft plastic.
Apply penetrating oil to metal joints, let sit, then gently twist with a strap wrench.
For brittle PVC, score and pry carefully or cut flush and replace the spout and any damaged fittings.
Inspecting and Preparing the Pipe After Removal
Once the spout is removed, the exposed pipe should be inspected for corrosion, damaged threads, or trapped debris.
Any buildup is cleaned away and threads or a copper stub-out are dressed to guarantee a proper seal.
Finally, the pipe is measured to confirm compatibility with the replacement spout.
Checking for corrosion, threads, or debris
After the spout is removed, inspect the exposed pipe for corrosion, damaged threads, mineral deposits, or trapped debris.
Note pitting, flaking, or greenish discoloration indicating galvanic corrosion. Verify thread integrity visually and by gentle hand-rotation of a fitting; stripped or bent threads will affect reseating.
Remove loose sediment with a soft brush and flush the line briefly to reveal hidden obstructions before proceeding.
Cleaning and dressing pipe threads or copper stub-out
Begin by evaluating the exposed pipe or copper stub-out for damage and contamination before any repair materials are applied.
Remove corrosion, mineral buildup, and old sealant with a wire brush, emery cloth, or fine sandpaper.
Deburr edges and straighten threads gently.
Wipe clean with solvent or acetone, then dry.
Apply appropriate thread sealant or tape sparingly before reassembly.
Measuring for replacement spout compatibility
With the tub spout removed, the installer measures the exposed pipe and surrounding clearance to determine which replacement spouts will fit and seal properly.
Measurements include pipe diameter, length from wall to end, and distance to nearby obstacles.
Thread type or slip-on style is confirmed.
Notes are taken on wall thickness and obstructions to verify the chosen spout aligns, seals, and mounts securely.
Installing a New Tub Spout Without a Set Screw
Selection of the correct replacement spout begins with confirming whether the pipe requires a slip-on or threaded model and matching finish and length.
For slip-on spouts, the article will outline proper alignment and securement over the pipe.
For threaded spouts, it will cover pipe-thread preparation and tightening technique.
Finally, testing for leaks and verifying diverter function will guarantee the new spout operates correctly.
Choosing the correct replacement spout
Determine the correct replacement spout by matching the connection type and dimensions of the existing plumbing:
Slip-on (sleeve) spouts slide over a copper or PVC pipe and secure with an internal O-ring or retaining clip, while diverter or threaded spouts attach to a 1/2-inch NPT or IPS fitting.
Measure pipe diameter, wall thickness, and distance from finished wall. Confirm diverter orientation, and choose compatible finish and material.
Slip-on installation steps
Begin by confirming the existing stub-out is clean, straight, and the correct length for a slip-on spout; debris, corrosion, or an uneven pipe end will prevent a proper seal and secure fit.
Slide the spout over the pipe, align the outlet, and seat it fully.
Tighten the internal compression mechanism or set collar per manufacturer instructions.
Test for leaks and adjust as needed.
Threaded spout installation steps
After sliding on a slip-on spout, some installations require a threaded connection instead; for a threaded tub spout without a set screw, the homeowner should verify the exposed pipe is clean and that the threads are intact and free of old tape or sealant.
Apply new plumber’s tape clockwise, thread the spout by hand until snug, then finish with a soft cloth and adjustable wrench for a firm, careful quarter-turn.
Testing for leaks and proper diverter function
Inspect the new spout and surrounding fittings visually and by touch while running water to confirm a watertight seal and correct diverter operation. Check for steady flow, no drip, smooth diverter switch, and no hidden leaks. Test hot/cold balance and tub/shower diversion repeatedly. Record findings and tighten or reseal as necessary.
| Check | Indicator | Action |
|---|---|---|
| Seal | No drip | Reseat/caulk |
| Diverter | Smooth switch | Adjust/replace |
| Flow | Steady stream | Clear aerator |
| Temp | Stable | Inspect valves |
Common Mistakes and How to Avoid Them
Common errors when removing a tub spout include forcing the fitting and bending or breaking the underlying plumbing.
Overlooking hidden fasteners or retaining clips can leave the spout stuck and lead to damage when pulled.
Failing to shut off the water or protect surrounding finishes risks leaks and cosmetic harm.
Forcing the spout and damaging plumbing
Forcing a stuck tub spout can strip threads, crack fittings, or bend the internal pipe, creating leaks or costly repairs.
Applying excessive torque or using improvised tools risks deforming the spout and joint seals. Instead, one should use proper pullers, penetrating lubricant, and steady, controlled force.
If resistance persists, stop and consult a plumber to prevent hidden damage and water intrusion.
Ignoring hidden fasteners or retaining clips
Overlooking hidden fasteners or retaining clips often leaves a spout stubbornly stuck despite strenuous pulling, because many designs conceal a set screw, snap ring, or clip that secures the fixture to the pipe.
Inspect visually and feel around the base for seams or access holes. Use appropriate tools like needle-nose pliers or a small screwdriver, and release clips before applying force.
Failing to shut off water or protect finishes
After checking for hidden fasteners, attention must turn to shutting off the water and protecting surrounding finishes—skipping these steps can create leaks, water damage, or scratched fixtures.
The writer should recommend closing the home’s main or local shutoff, testing taps to confirm dryness, and covering nearby surfaces with towels or painter’s tape.
These precautions prevent accidental flooding and preserve tile, chrome, and grout.
Troubleshooting Checklist
After installing a new tub spout, a brief troubleshooting checklist helps identify and resolve common minor issues such as drips, loose fittings, or misalignment.
Simple fixes—tightening connections, replacing a worn O-ring, or reseating the spout—often restore proper function.
If leaks persist, water pressure is abnormal, or internal valve problems are suspected, a professional plumber should be contacted.
Quick fixes for minor issues after replacement
Inspecting the replaced tub spout promptly helps catch common minor problems before they escalate. A brief checklist guides simple corrections and verifies function.
- Check for small leaks at the joint and tighten connection.
- Confirm proper alignment and secure fit.
- Test water flow for sputtering and flush aerator.
- Replace worn washers if dripping persists.
- Guarantee diverter operates smoothly.
When to call a plumber
When should a professional be summoned rather than relying on DIY fixes?
A plumber is advised when water leaks persist after spout replacement, pipes or fittings are corroded or inaccessible, unexpected low water pressure occurs, or when the repair requires cutting plumbing, soldering, or code‑compliant changes.
Also call for recurring clogs, mold growth, or if uncertain about shutoff valves and safety.
Maintenance Tips to Prevent Future Problems
Routine inspection and cleaning of the tub spout and surrounding fittings helps catch mineral buildup and wear before they cause seizing.
Periodic lubrication of moving parts and application of anti-corrosion treatments protect threads and seals from rust and deterioration.
Installing spouts with accessible fasteners and following manufacturer torque and sealing recommendations makes future removal simpler and less damaging.
Regular inspection and cleaning
Check the tub spout and surrounding fixtures monthly for mineral buildup, leaks, and loose fittings to catch issues early.
Wipe surfaces with a mild cleaner, clear aerators and flow openings, and remove visible deposits with a nonabrasive scrubber.
Tighten fittings as needed and inspect seals and caulking for deterioration.
Promptly address small problems to prevent larger repairs.
Lubrication and anti-corrosion measures
After monthly inspections and cleaning have removed deposits and tightened fittings, attention should shift to lubrication and anti-corrosion measures to protect moving parts and metal surfaces from wear and rust.
Apply a plumber-approved silicone or PTFE lubricant to O-rings and slip joints, and a thin corrosion-inhibiting paste on exposed threads. Wipe excess, recheck seals, and schedule reapplication every six to twelve months.
Best practices for installation to ease future removal
Plan installations with future access in mind by selecting spout types and fittings that facilitate removal without damage.
Use threaded adapters or slip-on spouts with set-screw alternatives, and apply plumber’s tape to threads for corrosion resistance.
Leave slight gap or access panel where possible, document valve and pipe dimensions, and avoid permanent sealants on removable joints to simplify future disassembly and replacement.
Conclusion
In the same way a gardener once coaxed a stubborn root from clay with steady taps and patient leverage, the homeowner approaches a set-screwless tub spout: methodical, calm, and prepared. After following the outlined removal steps and verifying measurements, the new spout fits like a grafted branch—secure and watertight. With routine checks and gentle maintenance, future problems remain small, and the fixture continues to serve quietly, dependable as a well-tended garden.