How to Fix a Leaking Water Heater Drain Valve: Step-by-Step Repair Guide
To fix a leaking water heater drain valve, start by shutting off the power and cold-water supply, then drain the tank below the valve level. Make sure to contain any runoff and wear eye protection. For a quick fix, try tightening the valve or applying PTFE tape. If the leak persists, fully depressurize the system, remove the old valve, clean the threads, and install a new threaded brass valve with approved sealant. Finally, refill the tank slowly, check for leaks, and purge any air. For detailed steps, tools needed, troubleshooting tips, and preventative measures, continue reading.
How to Stop a Leaking Water Heater Drain Valve Quickly
First, the water supply to the heater should be shut off and any nearby power source disconnected to prevent electrical hazards.
Next, water should be contained with towels, buckets, or a temporary pan to minimize immediate damage to floors and belongings.
Finally, a quick temporary fix—such as tightening the valve, wrapping the stem with plumber’s tape, or applying a hose clamp and rubber patch—can reduce or stop the leak until a permanent repair is made.
Immediate actions to minimize water damage
Shut off the water supply and power to the heater immediately, then contain the leak to prevent further damage.
The homeowner should place buckets and towels beneath the drain valve, elevate valuables, and direct runoff to a floor drain or outside.
For guidance on how to fix a leaking water heater drain valve, document the leak, mop excess water, and call a professional if unsure.
Quick temporary fixes you can do now
After the water and power have been secured and immediate containment measures are in place, a homeowner can apply several temporary fixes to slow or stop a leaking drain valve until a permanent repair is made.
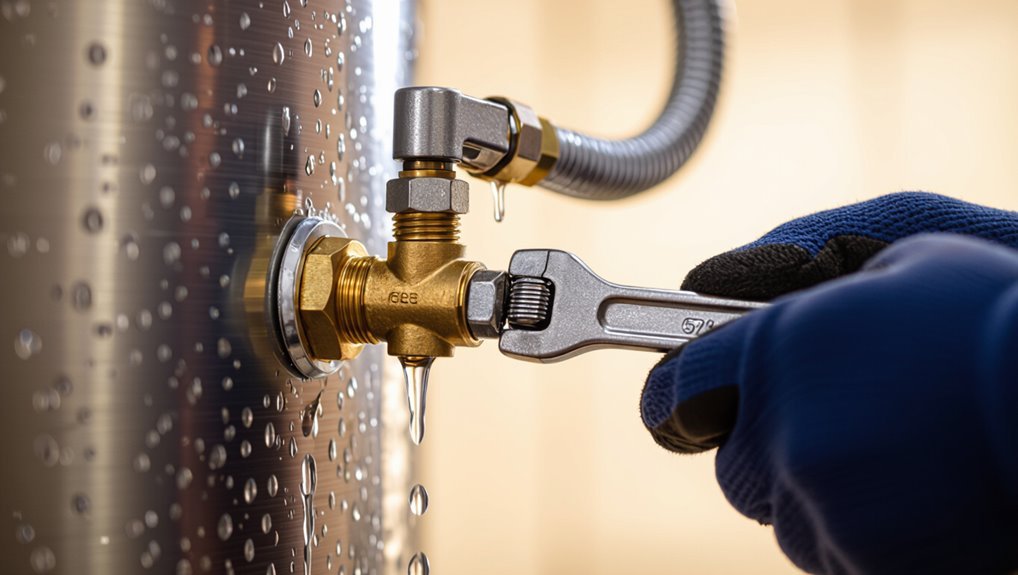
Tighten the valve gently with a wrench, wrap threads with plumber’s tape, apply pipe sealant, or use a rubber patch and hose clamp.
Monitor for continued seepage.
What Causes a Water Heater Drain Valve to Leak
Leaks at the water heater drain valve commonly stem from mechanical failures such as corrosion, worn washers, or loose fittings.
Age and sediment accumulation inside the tank can accelerate wear and prevent proper sealing.
Improper installation or using incompatible replacement valves also contributes to persistent leaks.
Common mechanical failures (corrosion, worn washers, loose fittings)
Corrosion, worn seals, and loose fittings are the primary mechanical causes of a leaking water heater drain valve.
Metal deterioration pits the valve body and threads, undermining seals.
Rubber washers and O-rings harden, crack, or compress, preventing tight closure.
Vibrations and thermal cycling loosen connections and fittings.
These discrete failures allow persistent dripping or steady leaks until the affected component is replaced or tightened.
Age-related issues and sediment buildup
Over years of service, mineral-laden water and routine thermal cycling degrade a water heater’s internal surfaces and drain valve components, causing sediment accumulation, scaling, and metal fatigue that compromise seal integrity.
Accumulated sediment abrades valve seats, prevents full closure, and accelerates corrosion. Aging rubber and plastic parts harden or crack, reducing flexibility and allowing slow leaks that worsen until components are replaced or cleaned.
Installation and compatibility problems
Installation and compatibility issues arise when replacement drain valves, fittings, or adapters are mismatched to the heater’s original specifications or installed improperly, leading to poor seals and stress on connections.
Improper thread types, incorrect pipe size, cheap materials, and wrong pressure ratings cause leaks. Tightening the wrong way can crack plastic fittings; using correct parts, proper sealing tape, and torque prevents failures and guarantees reliable operation.
Tools and Materials Needed for Repair
A concise list of basic tools—adjustable wrench, pliers, screwdriver, and a basin—prepares the reader for the repair steps.
Recommended replacement parts, such as a full-port ball valve or a high-quality threaded drain valve, are identified to guarantee a reliable fix.
Necessary safety gear and prep materials, including gloves, goggles, a bucket, and pipe sealant or Teflon tape, are highlighted before work begins.
Basic tools checklist
Preparing the right tools guarantees the drain valve repair proceeds efficiently and safely.
A concise checklist prevents delays and reduces risk during water heater work. Essential hand tools, sealing supplies, and a bucket are highlighted below.
- Adjustable wrench, pliers, screwdriver set, and utility knife.
- Teflon tape, plumber’s putty or thread sealant, rags.
- Bucket, hose, and safety gloves.
Replacement parts and recommended valve types
After gathering the basic tools, attention turns to the replacement parts and valve types best suited for a leaking water heater drain valve.
Preferred options include full-port brass ball valves, threaded replacement drain valves, and nylon/composite spares for corrosion resistance.
Select sizes matching the existing outlet and National Pipe Thread fittings; verify compatible temperature and pressure ratings before purchase.
- Full-port brass ball valve
- Threaded replacement valve
- Nylon/composite spare
Safety equipment and prep materials
Personal protective equipment and basic prep materials are essential before attempting any repair on a leaking water heater drain valve.
The technician should assemble protective gloves, eye protection, and a respirator if corrosive residues exist.
Also prepare a bucket, towels, pipe wrench, replacement valve, Teflon tape, and penetrating oil.
- Gloves and eye protection
- Bucket, towels, and rags
- Wrench, replacement valve, tape
Step-by-Step Permanent Repair for a Leaking Drain Valve
The procedure begins with shutting off power and the water supply, then draining the tank to a level below the valve to prevent spills.
The valve and surrounding area should be inspected, with fittings tightened and retested to check for an improved seal.
If tightening fails, the guide proceeds through detailed substeps to remove and replace the drain valve safely.
Step 1 Shut off power and water supply
Begin by cutting power to the heater and isolating its water feed to guarantee a safe work environment.
The technician verifies electrical disconnect: shut off the breaker for electric units or turn off the gas supply and pilot for gas models.
Close the cold-water inlet valve to stop flow.
Confirm no pressure changes at nearby fixtures before proceeding to the next step.
Step 2 Drain the tank safely to below the valve level
Drain enough water so the valve sits above the tank level to prevent further leakage and allow safe access for repair.
Attach a garden hose to the drain, route it to a safe floor drain or outside, open a hot-water faucet upstairs to relieve vacuum, then open the drain valve slowly.
Monitor flow until water drops below the valve; close and reposition hose if needed.
Step 3 Inspect the valve and surrounding area
Inspect the valve and its surroundings carefully to identify the leak source and any corrosion, cracks, or loose fittings that might require repair or replacement.
Note mineral buildup, warped or damaged threads, and any dampness on adjacent plumbing or tank seams.
Record observations, photograph visible defects, and confirm whether the valve body, compression nut, or connecting pipe shows evidence of stress or deterioration.
Step 4 Tighten fittings and test for improved seal
With the leak source and any visible damage documented, the next step is to tighten accessible fittings to improve the seal before considering part replacement.
Using appropriate-size wrenches, gently snug compression nuts, threaded adapters, and hose fittings; avoid over-torquing.
Reopen supply slowly, observe for drips, and wipe joints.
If leakage persists after careful tightening, proceed to valve replacement.
Step 5 Replace the drain valve (detailed substeps)
The technician first shuts off power and water, drains the tank, and removes the old valve using appropriate tools to avoid damage.
Threads are cleaned and prepared before applying pipe sealant or PTFE tape to guarantee a watertight joint.
A compatible replacement valve is installed and tightened to the manufacturer’s torque specification to complete the permanent repair.
Remove old valve safely
Before removing the old drain valve, the water heater must be fully depressurized and drained to prevent scalding and water damage.
Wearing gloves and eye protection, an adjustable wrench loosens the valve body while a backup wrench steadies the heater fitting.
Clear residual moisture with a rag, inspect the opening for corrosion or debris, and dispose of the old valve according to local regulations.
Prepare threads and apply sealant or plumber’s tape
Prepare the mating threads on both the tank fitting and the new valve by cleaning away any remaining debris, corrosion, or old sealant so the sealant or tape can seat evenly.
Inspect threads for damage, then choose NSF-approved pipe thread sealant or PTFE tape.
Apply sealant evenly or wrap tape clockwise three to five turns, keeping tape flush to thread roots without overlapping the valve port.
Install new valve and torque to proper specification
Position the new drain valve squarely into the tank fitting and begin threading it by hand to secure proper alignment.
Once hand-tight, use an adjustable wrench to snug the valve, applying torque per manufacturer specifications—typically moderate, avoiding overtightening.
Verify alignment, then open and close the valve to confirm smooth operation.
Inspect for leaks after refilling the tank and pressurizing to recommended levels.
Step 6 Refill tank, restore power, and recheck for leaks
Begin refilling the tank slowly once the drain valve repair is complete and all fittings are tightened.
Observe the cold-water shutoff and open it fully; vent trapped air by opening a hot faucet.
When the tank is full and water flows steadily from the faucet, restore power or gas per manufacturer instructions.
Inspect the drain valve and surrounding connections for any signs of leakage.
Alternative Repair Options
A few viable alternatives exist for a leaking water heater drain valve, including repair kits or replacing the rubber washer to stop minor drips.
For larger or hard-to-access installations, a slip-on or inline replacement valve can be fitted to simplify future maintenance.
Temporary fixes such as a cap or hose clamp may be acceptable only until a permanent repair is performed.
Using a repair kit or rubber washer replacement
When a leaking drain valve cannot be tightened or replaced immediately, a repair kit or a rubber washer replacement offers a compact, cost-effective stopgap or permanent fix.
Kits include new washers, seals, and packing; rubber washers alone often seat leaks.
Procedure: drain/flush, remove valve insert or disassemble per kit, fit new components, test for leaks.
Verify compatible sizes and temperature-rated materials.
Installing a slip-on or inline valve as an alternative
If a repair kit or washer replacement proves temporary or the original valve body is corroded, installing a slip-on or inline drain valve provides a straightforward alternative.
A slip-on model clamps over the existing stub; an inline valve replaces the section of drain hose or pipe.
Both require draining, cleaning the connection, and securing with appropriate clamps or fittings to guarantee a reliable, leak-free seal.
When a temporary cap or hose clamp is appropriate
Apply a temporary cap or hose clamp only as a short-term measure to stop minor drips while arranging a proper repair or replacement.
This option suits inaccessible locations, awaiting parts, or preventing water damage before professional service.
Verify compatibility with valve size, use a rubber gasket or hose section for sealing, and monitor frequently.
Replace with a proper replacement valve or repair promptly.
When to Call a Professional
If the leak appears to come from the tank itself, shows rust or corrosion, or there is a sudden increase in water around the unit, it likely indicates a failing tank that needs professional assessment.
Similarly, situations that involve electrical components, gas lines, or extensive plumbing changes require a licensed plumber or electrician.
In those cases, contacting a qualified professional promptly is the safest course of action.
Signs the leak indicates a failing tank or major issue
Recognize that not all leaks are repairable at the valve: persistent dripping from the tank body, corrosion or rust around seams, puddling that reappears after draining, discolored or cloudy water, and signs of pressure-related failure (bulging or unusual noises) point to a failing tank or major internal issue.
Such indicators warrant stopping use, isolating water and power, and arranging professional inspection or replacement guidance promptly.
Scenarios requiring licensed plumbers or electricians
When a leaking drain valve is accompanied by signs beyond a simple hardware failure—such as persistent tank-body leakage, visible corrosion, gas-smell in gas-fired units, electrical burning smells or tripped breakers, or evidence of water pressure irregularities—homeowners should contact a licensed professional; these symptoms can indicate structural tank failure, gas or electrical hazards, or complex plumbing issues that exceed routine DIY repairs.
A plumber or electrician can diagnose, isolate hazards, and implement code-compliant repairs.
Preventive Maintenance to Avoid Future Leaks
Preventive maintenance can considerably reduce the risk of future drain valve leaks by establishing a routine drain-and-flush schedule to remove sediment.
Regular inspection and timely replacement of aging valves help catch wear before it becomes a failure.
Attention to water quality and corrosion control—such as using a water softener or anode rod checks—further extends valve life.
Routine drain-and-flush schedule to reduce sediment
Establishing a routine drain-and-flush schedule minimizes sediment buildup that accelerates drain-valve wear and leads to leaks.
Recommended frequency varies: annually for soft-water areas, every six months for hard-water regions, and monthly for heavy sediment conditions.
Each service flushes accumulated minerals, clears particulates from the tank bottom, and improves heat efficiency, reducing valve stress.
Record dates and observations for trend monitoring.
Inspecting and replacing valves before failure
Routine drain-and-flush schedules reduce sediment that wears a drain valve, but regular visual and functional inspections catch deterioration before a leak develops.
Technicians should check for mineral buildup, handle stiffness, and slow weeps. Replace valves showing damage or persistent seepage to prevent emergency repairs.
- Inspect for cracks, corrosion, and mineral deposits.
- Operate valve monthly to confirm smooth action.
- Replace at first sign of persistent leakage.
Water quality and corrosion prevention tips
One key factor in minimizing drain valve corrosion is maintaining balanced water chemistry; hard water with high mineral content accelerates scale buildup and galvanic reactions that degrade valve components.
Regular flushing, installing a water softener or scale inhibitor, and using dielectric unions where dissimilar metals connect reduce electrochemical corrosion.
Periodic water testing and timely anode rod replacement further protect the tank and fittings.
Cost, Time, and Difficulty Estimates
A concise breakdown of typical DIY costs—replacement valves, packing material, and basic tools—helps homeowners budget for repairs.
Estimated time and required skill level for each option, from quick packing-tape fixes to full valve replacement, clarify whether a job is suitable for a confident DIYer or warrants a professional.
Presenting these estimates side-by-side aids in choosing the most cost-effective and safe approach.
Typical DIY cost breakdown
For most homeowners, repairing a leaking water heater drain valve falls into the low-to-moderate DIY cost range, with expenses primarily driven by the replacement part chosen and any needed tools. Typical costs: replacement valve $5–25, hose $5–15, basic tools $0–30, optional new valve assembly $20–60. Expected small parts dominate costs; professional replacement costs more.
| Item | Typical cost |
|---|---|
| Valve | $5–25 |
| Hose | $5–15 |
| Tools | $0–30 |
| Assembly | $20–60 |
| Total (DIY) | $5–60 |
Estimated time and skill level for each repair option
Repair options for a leaking water heater drain valve vary in time and required skill, ranging from quick, low-skill fixes to longer, more technical work; simple actions like tightening the valve or attaching a garden hose typically take 10–30 minutes and suit novice DIYers, while replacing the valve or installing a new threaded assembly generally requires 30–90 minutes and basic plumbing skills, and full replacement of the valve body or tank-side components can take 1–3 hours plus intermediate-to-advanced skills and may call for shutdown, draining, and safe handling of hot water.
| Repair | Time |
|---|---|
| Tighten/attach hose | 10–30 min |
| Replace valve | 30–90 min |
| Body/tank work | 1–3 hrs |
Troubleshooting Common Problems After Repair
If leaks persist after replacing the drain valve, the cause may be an improperly seated new valve, damaged threads, or a cracked fitting requiring reinstallation or a different part.
Leakage originating from adjacent fittings or the tank seam points to a separate failure that replacement of the drain valve alone will not fix.
Low water pressure or air in the lines after refilling often indicates incomplete bleeding, a partially closed shutoff, or sediment restricting flow and should be checked before concluding the repair is complete.
Persistent leaks despite valve replacement
Although a replaced drain valve often resolves leaks, persistent dripping can indicate other underlying issues that require targeted troubleshooting.
Inspect the valve seat, surrounding threads, and pipe connection for damage, corrosion, or improper sealing.
Verify water pressure and thermal expansion controls.
If external components appear sound, consider professional evaluation for hairline tank cracks or internal corrosion that may mimic valve failure.
Leak from adjacent fittings or tank seam
Several common leaks that seem to come from the drain valve actually originate from adjacent fittings or a tank seam, and distinguishing the source is critical for proper repair.
Inspect nearby pipe joints, T-pieces, and the sacrificial anode area for seepage.
Tighten or replace corroded fittings; apply appropriate thread sealant.
If the tank seam leaks, recommend tank replacement due to safety and irreparable corrosion.
Low water pressure or air in lines after refill
Once fittings and seams have been checked and fixed, attention should turn to water pressure and trapped air that can appear after refilling the tank.
Bleeding and restoring normal flow requires systematic checks.
- Open nearest hot faucet fully to purge air.
- Inspect inlet shutoff and sediment for blockages.
- Verify municipal pressure or adjust pressure-reducing valve as needed.
Conclusion
The guide equips homeowners with clear steps to stop a leaking water heater drain valve, yet it prompts a practical question: is a temporary fix worth the risk? By identifying causes, weighing repair options, and following permanent repair steps or calling a professional when needed, readers can make informed choices. Preventive maintenance reduces future leaks, while cost, time, and troubleshooting guidance helps guarantee repairs are effective and safe for continued hot water use.