How to Install a Washing Machine Drain Pipe: Step-by-Step Guide for a Leak-Free Connection
To install a washing machine drain pipe effectively and ensure a leak-free connection, follow these essential steps: secure the hose to a standpipe or utility sink with a vented trap, maintain the correct slope, and use tight fittings. Begin by measuring and trimming the hose, then fasten it to the washer outlet. Insert the hose into the standpipe, positioning it 18–30 inches above the floor, and secure it with a hook or clamp. Finally, test for steady flow and seal any threaded joints. Detailed instructions for each step will help you achieve a reliable installation.
Overview of Washing Machine Drain Pipe Installation
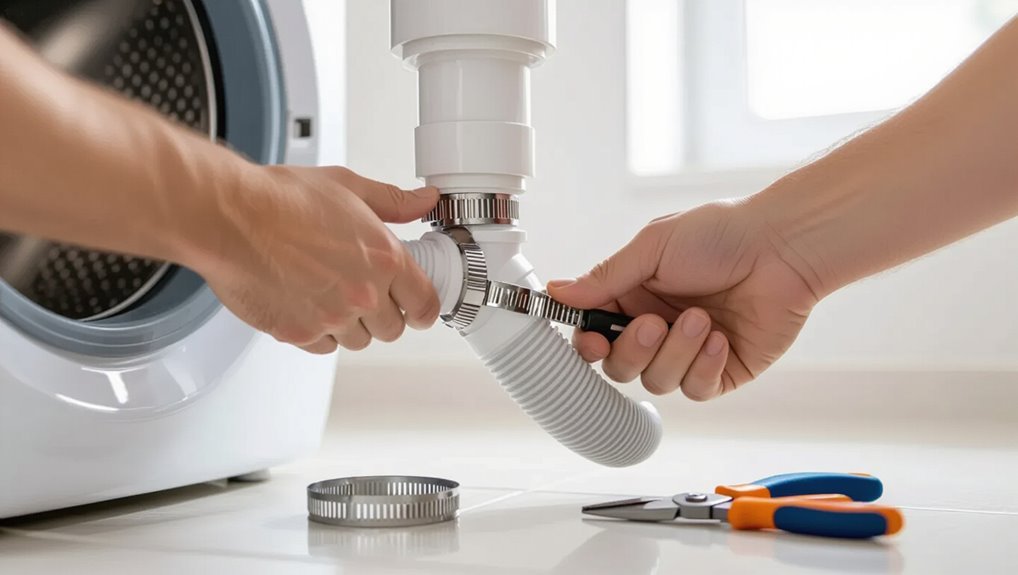
A proper washing machine drain connection features a secure, elevated inlet with tight fittings and a vented trap to prevent backflow and odors.
A leak-free installation reduces water damage risk, prevents mold growth, and minimizes maintenance needs.
Typical drain configurations include a standpipe, a laundry tub, or a dedicated floor drain, each chosen for space and plumbing layout.
What a proper drain connection looks like
Several essential features define a proper washing machine drain connection: a secure, trap-equipped standpipe of correct height, a tight-fit drain hose with an air gap or clamp, and leak-free fittings joined to the home’s waste line.
The description for how to install a washing machine drain pipe emphasizes proper slope, accessible junctions, durable materials, and verified seals to prevent backflow and hidden leaks.
Benefits of a leak-free installation
Reliability in a washing machine drain installation translates directly into fewer interruptions, lower repair costs, and reduced risk of water damage. A leak-free system protects floors, walls, and stored belongings while preserving indoor air quality by preventing mold and mildew growth.
It also conserves water, reduces unexpected utility expenses, prolongs appliance lifespan, and minimizes disruption to daily routines by avoiding emergency repairs and structural remediation.
Common drain configurations (standpipe, laundry tub, floor drain)
Common drain configurations for washing machines include standpipes, laundry tubs, and floor drains, each offering distinct space, plumbing, and overflow characteristics that influence installation choices.
Standpipes are compact, require proper trap and height; laundry tubs allow visible discharge and easy cleaning; floor drains suit utility rooms but need correct slope and trap seals.
Selection depends on code, layout, and maintenance access.
Tools and Materials Required
A concise inventory of essential tools — adjustable wrench, pliers, pipe cutter, tape measure, and silicone sealant — prepares the reader for the task.
Common parts and replacement components such as hoses, clamps, standpipe extensions, and trap assemblies are listed and described.
Optional materials for challenging setups, including flexible connectors, venting kits, and adhesive-backed insulation, are noted for reference.
Essential tools list
Several basic hand tools and a few plumbing supplies are needed to install a washing machine drain pipe safely and correctly.
The essential tools enable secure, confident connections and reduce leaks. A compact set improves efficiency and calm during installation.
- Adjustable wrench, pliers, pipe cutter
- Screwdriver set, utility knife, tape measure
- Plumber’s tape, hose clamps, bucket
Parts and replacement components
After gathering the basic hand tools, attention turns to the specific parts and replacement components required for a washing machine drain pipe installation.
Essential items include a corrugated or smooth drain hose, a secure hose clamp, and appropriate fittings or adapters to match the home’s drain stub.
Select durable, water-resistant materials to prevent leaks and future frustration.
- Corrugated or smooth drain hose
- Hose clamp
- Fittings/adapters
Optional materials for difficult setups
For complex or constrained installations, additional materials can simplify fitting the washing machine drain to an existing plumbing layout.
Useful items include flexible corrugated hoses, adjustable elbow adapters, rubber couplings with stainless clamps, P-trap extension kits, and anti-siphon vents.
Also recommended are silicone sealant, pipe insulation, mounting brackets, and small lengths of PVC or ABS for custom offsets to guarantee secure, code-compliant connections.
Safety and Preparation Steps
Before any work begins, the appliance’s water supply and electrical power should be shut off and locked out to prevent leaks and shock.
The installer should verify local plumbing codes and whether permits or inspections are required for the new drain.
Accurate measurements and a planned drain route will minimize fittings, guarantee proper slope, and prevent rework.
Turning off water and power safely
Turn off the washing machine’s power and supply valves to eliminate electrical and water hazards before beginning work.
Confirm power is cut by unplugging the machine or switching off its circuit breaker.
Close both hot and cold supply valves, then open a nearby faucet to relieve line pressure.
Keep a towel and bucket ready to catch residual water and verify valves hold before proceeding.
Checking local plumbing codes and permit considerations
Although regulations vary by municipality, verifying local plumbing codes and permit requirements is essential before installing a washing machine drain pipe.
The installer should check allowable materials, trap and vent specifications, discharge heights, and connection types.
Contact the local building department or website for guidance, determine if a permit and inspection are required, and obtain necessary approvals to avoid fines and guarantee code compliance.
Measuring and planning the drain route
When planning the washing machine drain route, the installer should map the shortest, most direct path that maintains required slopes, avoids structural members, and minimizes fittings that can trap debris.
Measure distances, note wall studs, joists, and chases, and identify vent and trap locations.
Verify pipe sizes, slope (typically 1/4″ per foot), and access for future maintenance before cutting or fastening materials.
Step-by-Step Installation for a Standard Standpipe Connection
The installer first readies the machine and clears the work area. Then, measures and trims the drain hose to the correct length.
The hose is fastened to the washer’s outlet, routed into the standpipe, and held in place with a hook or clamp.
Finally, the installer verifies the hose height and air gap to prevent siphoning and guarantee proper drainage.
Preparing the washing machine and area
Clear the immediate area around the washing machine and turn off the water supply and power before any installation work begins.
The machine should be moved forward slightly to access connections; protective gloves and towels placed to catch spills.
Inspect existing hoses, clamps, and the standpipe opening for damage or debris.
Verify floor is level and dry, and confirm adequate lighting and ventilation for safe, efficient work.
Selecting and cutting the drain hose to length
Measure the distance from the washer’s drain outlet to the top of the standpipe, allowing extra length for a gentle loop that prevents siphoning; this determines the hose length to cut.
Select a reinforced, kink-resistant hose rated for appliance use. Mark the cut point, account for clamp placement, and trim squarely with a sharp utility knife or hose cutter.
Deburr and inspect the end for damage.
Attaching the hose to the machine outlet securely
Begin by ensuring the washer is unplugged and the water supply valves are shut off to prevent electrical hazard and accidental flooding.
Slide the cut hose onto the machine outlet fully, aligning ribbing for a snug fit.
Install a stainless-steel worm-drive clamp, tighten evenly until secure but not crushing the hose.
Check for movement and re-tighten if necessary before restoring power.
Inserting the hose into the standpipe and securing with a hook or clamp
Slide the drain hose straight down into the standpipe until the end sits just above the trap arm, keeping about 6–8 inches of exposed hose to prevent siphoning.
Guide the hose to avoid kinks, then secure it to the standpipe or nearby wall with a supportive hook or clamp sized for the hose.
Confirm the connection is stable and won’t pull free during cycles.
Ensuring proper hose height and air gap to prevent siphoning
With the hose seated and fastened, attention turns to setting the correct height and air gap to prevent siphoning.
The hose end should rest between 18 and 30 inches above the floor and extend into the standpipe without tightly sealing it.
Maintain a visible air gap above the standpipe rim to allow air entry, preventing backflow and unintended siphoning during drain cycles.
Testing for leaks and proper drainage flow
Turn on the water and run a short drain cycle while observing the hose, standpipe connection, and P-trap for any signs of leakage or abnormal flow.
The goal is to confirm a steady, free flow down the standpipe, no sputtering or gurgling, and no drips at joints or hose clamps.
Inspect fittings, tighten clamps or replace seals if needed, and verify discharge clears without backing up.
Installing to a Laundry Tub or Utility Sink
When connecting a washing machine drain to a laundry tub or utility sink, the drain hose should be routed into the designated inlet or overflow opening using the proper adapter if the inlet is non-standard.
The installer must secure fittings and position the hose to minimize splashing, then clamp or fasten connections to prevent movement.
Finally, the system should be tested under load and inspected for leaks, addressing any loose fittings or improper seals.
Connecting to an overflow or designated inlet
Begin by positioning the washing machine drain hose so its end will rest securely in the laundry tub’s overflow opening or the sink’s designated inlet, ensuring the hose is routed without kinks and is supported at the correct height to prevent siphoning.
Fasten the hose with a securing clamp or hook to prevent displacement during drains, check alignment, and run a test cycle to confirm steady flow without splashing.
Using adapters and fittings for non-standard inlets
Many laundry tubs and utility sinks have inlet shapes or sizes that don’t match standard washing machine drain hoses, so installers use a range of adapters and fittings to create a secure, watertight connection.
Common solutions include rubber sink adapters, threaded hose adapters, barbed fittings with hose clamps, and PVC connector pieces.
Match material, diameter, and thread type, test for leaks, and replace worn seals.
Securing connections and preventing splashing
Secure the washing machine drain hose firmly into the laundry tub or utility sink inlet and add splash-prevention measures to keep water contained during discharge.
Use a proper-sized clamp or hose retainer to prevent dislodging. Route the hose to avoid kinks and secure it to the sink edge or wall bracket.
Install a splash guard or elbow attachment and trim excess hose for neat, stable drainage.
Leak testing and troubleshooting
With the hose firmly seated and splash-prevention devices in place, the next step is to test for leaks and address any issues before regular use.
Run a short drain cycle, observe joints and tailpiece for drips, and inspect the sink trap.
Tighten fittings incrementally, reseat the hose, or replace damaged clamps/gaskets.
Repeat until dry, then document the fix and monitor initial loads.
Connecting to a Floor Drain or Direct Waste Line
When a washing machine drain is tied into a floor drain or direct waste line, it should only be done where local codes and site conditions permit a direct connection.
The installer must provide a proper trap and address venting, secure the hose with a funnel or adapter for a tight fit, and consider a check valve or other backflow prevention.
Compliance with code and a watertight, vented connection are necessary to prevent odors and sewage backup.
When direct connection is appropriate or code-compliant
Although many installations route a washer into a standpipe or utility sink, a direct connection to a floor drain or dedicated waste line can be acceptable where local plumbing codes allow and the drain’s design prevents backflow and siphoning.
Appropriate when permitted: accessible inspection ports, adequate diameter and slope, no shared sanitary lines that violate code, and provisions for overflow containment and removable fittings for maintenance.
Installing a trap and vent considerations
Properly installing a trap and addressing venting are essential steps when connecting a washing machine to a floor drain or direct waste line to prevent sewer gas entry and maintain reliable drainage.
The installer must fit a P-trap sized for washer flow, guarantee trap arm slope and length meet code, and confirm an appropriate vent or air admittance valve is present to prevent siphoning and odors.
Using a funnel or adapter for secure fit
Fit a purpose-built funnel or reducer adapter to the washing machine discharge to guarantee a secure, leak-free connection to the floor drain or direct waste line.
Select an adapter matching hose and drain diameters, secure with stainless clamps, and position vertically to prevent siphoning.
Check seating, test with a water run, and tighten fittings as needed to eliminate drips and wobble.
Backflow prevention and check valve options
Several simple backflow prevention methods protect the washing machine and household plumbing when connecting to a floor drain or direct waste line.
Common options include anti-siphon loops, standpipe height per code, and inline check valves.
Choose a spring-loaded or flap-type check valve rated for laundry discharge, guarantee easy access for inspection, and avoid valves that trap lint or obstruct flow to prevent backups.
Sealing, Clamps, and Fastening Best Practices
The section outlines suitable clamp types and correct placement for washing machine drain hoses to guarantee secure connections.
It explains proper use of plumber’s tape and compatible sealants to prevent leaks without damaging fittings.
Guidance is also provided on anchoring the hose to minimize movement and kinking that can lead to strain or blockage.
Types of clamps and hose clamps placement
Choose the correct clamp type and placement to guarantee a watertight, vibration-resistant connection between the washing machine drain hose and the standpipe or pump outlet.
Use stainless steel worm-gear clamps for durability, Oetiker ear clamps for permanent seals, or spring clamps for quick service.
Position clamps just behind the hose bead, tighten evenly, avoid over-compression, and verify secure fit without kinking the hose.
Using plumber’s tape and sealants correctly
Apply plumber’s tape and sealants with care to create leak-proof, serviceable joints without damaging hoses or fittings.
Wrap Teflon tape clockwise around threaded fittings three to five turns, smoothing overlaps.
Use silicone or plumber’s grease sparingly on rubber gaskets to preserve elasticity.
Allow recommended cure times for liquid sealants.
Reinspect connections after first wash cycle for signs of seepage and retighten if necessary.
Anchoring the hose to prevent movement and kinks
Anchor the drain hose firmly to prevent movement and kinks that can cause leaks or restrict flow.
Fasten hose with appropriate clamps, straps, or a support bracket near the appliance and at the wall stub.
Maintain gentle bends, avoid sharp turns, and leave slight slack for vibration.
Inspect connections periodically, tighten metal clamps as needed, and replace worn fasteners to guarantee a reliable, leak-free drain.
Common Installation Problems and How to Fix Them
Common installation problems include leaks at the machine outlet or hose connection, overflowing or slow-draining standpipes, siphoning and odor issues, and hose kinks, clogs, or blocked venting.
Each issue has identifiable causes — loose fittings, improper standpipe height, missing traps or air gaps, and pinched hoses or buildup — that determine the remedy.
The following steps explain how to diagnose and correct these faults to restore reliable drainage.
Leaks at the machine outlet or hose connection
Leaks at the washing machine outlet or hose connection often stem from loose fittings, worn washers, or improperly seated hoses; identifying the exact source quickly prevents water damage and recurring problems.
Inspect hose ends, clamps, and the machine’s spout for cracks, corrosion, or misalignment.
Tighten connections, replace damaged washers or hoses, and guarantee clamps are properly seated to restore a watertight seal.
Overflowing standpipe or slow draining
When a standpipe overflows or the washer drains slowly, the problem usually traces to an obstructed or undersized drain, improper standpipe height, or a poor trap configuration.
Diagnosing these causes quickly prevents water damage and repeated backups. Inspect for clogs, measure standpipe height (typically 30–39 inches), verify trap size and slope, and clear or replace undersized piping to restore full flow.
Siphoning and odor issues
Problems with overflowing or slow drains can sometimes mask a different set of issues: siphoning and foul odors originating at the trap or vent.
Siphoning occurs when improper trap seal height or lack of an air gap allows wash flow to pull water from the trap, breaking the seal.
Inspect trap water level, verify proper standpipe height, add an anti-siphon vent or air admittance valve.
Hose kinks, clogs, and blocked venting
Inspecting the drain hose, trap, and vent is essential because kinks, internal clogs, or restricted venting can disrupt flow, cause backups, and stress the washer’s pump.
Check hose routing for bends, clear lint and debris from the trap, and run a plumbing snake if needed.
Test with a water flush; consider adding venting or replacing crushed hoses to restore proper drainage.
Maintenance Tips to Keep the Drain Leak-Free
A concise routine inspection checklist helps identify loose connections, cracks, and signs of wear before they become leaks.
Clear instructions for safely cleaning and unclogging the drain — including recommended tools and noncorrosive cleaners — minimize buildup that stresses fittings.
Guidance on when to replace hoses and fittings based on age, damage, or manufacturer recommendations guarantees a consistently leak-free system.
Routine inspection checklist
Routine visual checks and simple functional tests performed on a regular schedule help catch early signs of wear or improper connections in a washing machine drain system.
Inspect hoses, clamps, and fittings for cracks, corrosion, or looseness.
Verify drainage speed and listen for gurgles.
Record findings and corrective actions.
- Check: visible damage and tightness
- Test: flow and sounds
- Log: date and fix
How to clean and unclog the drain safely
After completing regular visual checks and simple flow tests, attention should turn to safe cleaning and unclogging methods that prevent leaks and prolong drain life.
Remove lint trap and clear visible debris manually; use a plumber’s snake for blockages beyond reach.
Flush with hot water and mild detergent. Avoid harsh chemicals that degrade seals.
Recheck joints and test flow before resuming use.
When to replace hoses and fittings
When should hoses and fittings be replaced to prevent leaks and failures? They should be replaced every 5 years or immediately if any cracks, bulges, kinks, corrosion, or persistent leaks appear.
Replace after visible wear, after heavy impacts, or when fittings no longer tighten securely. Use quality, compatible parts and inspect connections annually; replace sooner in harsh water or high-temperature environments.
When to Call a Professional Plumber
If recurring backups, multiple leaks, foul odors, or low drainage indicate more than a simple clog, a professional plumber should be consulted.
Homeowners should weigh repair or rerouting costs and the project scope against DIY limits before proceeding.
Key questions to ask include licensing and insurance, an itemized estimate, timeline, warranty on work, and references.
Signs of complex plumbing issues
Several warning signs indicate that a washing machine drain issue exceeds simple DIY fixes and requires a professional plumber’s assessment.
Persistent backups, slow drainage after multiple attempts, sewage odors, repeated leaks despite repairs, visible corrosion or broken pipes, water appearing in unexpected areas, and mold or staining beyond the appliance suggest systemic or hidden faults best diagnosed and corrected by a licensed plumber.
Cost and scope considerations for repairs or rerouting
Because rerouting or repairing a washing machine drain can range from a simple trap replacement to tearing out walls and reconfiguring drain lines, evaluating cost and scope early helps determine whether a licensed plumber is required.
Consider labor, permits, materials, and potential drywall or flooring restoration.
Minor fixes suit DIY; extensive work, code compliance, or concealed leaks warrant professional assessment to avoid higher future costs.
Questions to ask a plumber before hiring
What should homeowners ask before hiring a plumber for washing machine drain work?
The homeowner should inquire about licensing, insurance, and local code familiarity.
Request references and examples of similar jobs.
Confirm estimated costs and written guarantees.
Ask about timeline and disruption.
Verify who performs the work.
Clarify responsibility for permits and cleanup to guarantee accountability and a compliant, leak-free installation.
Quick Troubleshooting Guide
A quick troubleshooting guide helps identify and stop common washing machine drain pipe problems before they worsen.
It outlines step-by-step checks for immediate leaks and lists fast fixes to try prior to calling for professional help. This practical approach saves time and reduces anxiety when a leak appears.
- Relief — clear clogs and tighten fittings to stop drips fast.
- Confidence — follow simple checks to know when a repair is safe to attempt.
- Urgency — recognize signs that require immediate professional intervention.
Step-by-step checks for immediate leaks
Begin by preparing the area: turn off the washer, disconnect power if accessible, place towels and a shallow pan under the drain hose connection, and keep a flashlight handy.
Inspect hose clamp tightness, check for splits or soft spots, confirm hose seating in standpipe or sink, examine fittings for cracks, run a short rinse cycle while observing joints, and note any drips for targeted repair.
Fast fixes you can try before calling help
Try simple fixes first to address common drain issues: tighten or replace a loose hose clamp, reseat the drain hose deeper into the standpipe or sink, clear visible kinks or soft spots in the hose, and remove any trapped lint or debris from accessible fittings.
If leaks persist, check the drain connection for cracks, test with a short cold-water cycle, and document findings before calling a plumber.
Useful Reference Diagrams and Measurements
The article provides concise reference diagrams showing recommended hose height and standard standpipe dimensions to guarantee proper discharge and prevent siphoning.
It also includes a compact chart of typical fitting sizes and corresponding adapters for common washer models and plumbing configurations.
Readers are directed to consult these visuals when measuring and selecting parts.
Recommended hose height and standpipe dimensions
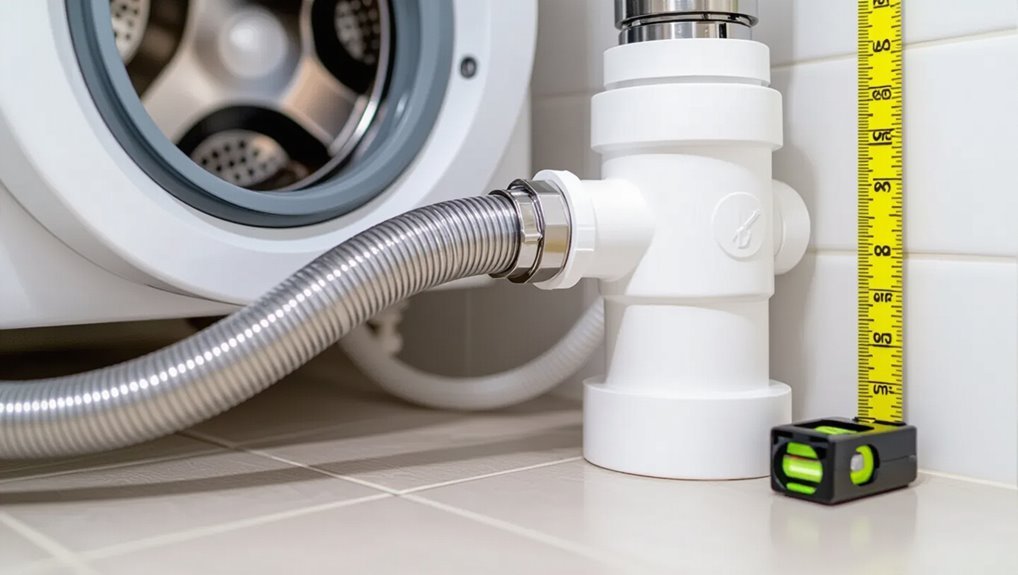
When installing a washing machine drain, the hose should enter a standpipe at a height and diameter that prevent siphoning, backflow, and overflow.
Industry guidance typically places the top of the standpipe between 36 and 42 inches above the finished floor with an internal diameter of at least 2 inches (1¼ inches for some stacked or compact units).
The hose should be secured so its outlet sits a few inches below the standpipe rim without creating a tight seal.
Install straps or clips to maintain that position, guarantee the standpipe connects to a trap and vent per local code, and leave access for removal and inspection.
Typical fitting sizes and adapter chart
Several common sizes and adapter types cover nearly all washing machine drain installations, so installers can usually match hoses and standpipes with a short checklist of fittings. Typical sizes: 1.25″ hose tail, 1.5″ standpipe, 2″ trap inlet, and reducer adapters. Use proper gaskets and clamps for leak-free joints.
| Fitting | Common Size |
|---|---|
| Hose tail | 1.25″ |
| Standpipe | 1.5″ |
| Trap inlet | 2″ |
| Reducer adapter | 2″→1.5″ |
Conclusion
Proper installation of a washing machine drain pipe guarantees a dependable, leak-free connection and prolongs appliance life. Following safety steps, using the right tools, and securing the hose to a correctly sized standpipe or sink prevents common problems. Routine maintenance and prompt repairs keep small issues from becoming big headaches. If doubts remain or complex plumbing is involved, call a professional to avoid cutting corners and guarantee the job is done right the first time.