How to Keep Water Clean in a Storage Tank: Proven Steps for Safe, Clear Water
To keep water clean in a storage tank and ensure safe, clear water, it’s essential to regularly inspect and maintain the tank. This involves checking lids, vents, and fittings for secure seals, placing screens to prevent contamination, and situating tanks away from pollution sources. Implement a maintenance routine that includes daily visual inspections, monthly testing for turbidity, pH, and chlorine levels, and an annual professional check-up. Clean and disinfect the tank using methods like manual cleaning or chlorination, or UV treatment as needed, while consistently monitoring and documenting results. For detailed procedures and best practices, continue reading.
Why clean water in a storage tank matters for health and equipment
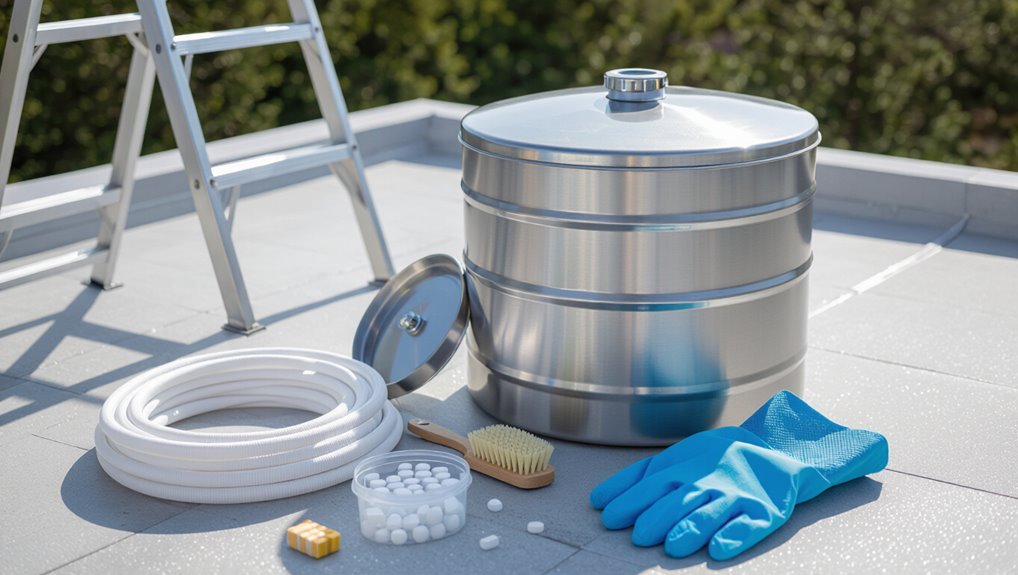
Contaminated stored water can carry pathogens, chemicals, and sediments that threaten user health and accelerate corrosion or fouling of pumps and plumbing.
Compliance with regulatory and safety standards—such as local potable water rules and sanitation guidelines—reduces legal risk and guarantees appropriate monitoring and treatment.
Typical contamination sources include ingress from wildlife or runoff, biofilm growth, and deteriorating tank materials or seals.
Common risks of contaminated stored water
Many stored-water systems harbor microbes, sediments, and chemical residues that can compromise potability and corrode plumbing components.
Contaminated tanks risk gastrointestinal illness, skin infections, and biofilm-driven antibiotic resistance.
Sediment accelerates valve and pump wear, impairing pressure and filtration. Chemical buildup alters taste and releases toxins.
Understanding how to keep water clean in a storage tank prevents health hazards, equipment failure, and costly downtime.
Regulatory and safety standards to consider
Because stored water intersects public health and infrastructure integrity, regulatory and safety standards set minimum requirements for water quality, tank design, maintenance, and monitoring to prevent disease, corrosion, and service disruption.
Compliance includes disinfection residuals, periodic sampling, structural inspections, access controls, recordkeeping, and worker safety protocols.
Adhering to local codes and recognized standards reduces liability, guarantees reliable service, and protects public health and equipment longevity.
Typical sources of contamination
Various pathways introduce contaminants into storage tanks, threatening both public health and system equipment.
Common sources include airborne dust, bird and rodent droppings, insect ingress, backflow from plumbing, corroding pipes, biofilm and algal growth, and contaminated fill water.
Human handling, maintenance lapses, and stormwater ingress further elevate microbial, chemical, and particulate risks, accelerating equipment wear and creating illness hazards.
How to assess your water storage tank condition quickly
A quick assessment begins with a visual checklist of the tank and surrounding area, looking for cracks, rust, debris, animal access, and proper covers.
Simple at-home tests for odor, cloudiness, pH, and chlorine can indicate basic water quality issues.
If results are suspicious or problems are extensive, a professional should be called for thorough microbial and chemical testing.
Visual inspection checklist for tanks and surroundings
How often should a quick visual inspection be performed to spot obvious problems before they worsen? A routine check can catch leaks, contamination entry points, and damage early.
Inspect tank exterior, fittings, vents, and surroundings for hazards. Note visible issues and schedule repairs.
- Check for cracks, rust, or bulges
- Inspect inlet/outlet seals
- Examine vents and screens
- Look for standing water nearby
- Observe animal or debris access
Basic water quality tests to perform at home
What simple checks quickly reveal a tank’s water condition? A few basic home tests suffice: observe color and clarity, note odors, and taste only if known safe.
Use a turbidity tube or clear bottle for sediment, test pH strips, and chlorine test tablets to confirm residual disinfectant.
Record results and repeat monthly or after storms to track changes.
When to call a professional for detailed testing
When should a professional be contacted for thorough testing of a water storage tank? A professional is needed when persistent discoloration, unusual odors, taste changes, repeated bacterial or chemical test failures, visible contamination, or corrosion appear.
Professionals provide extensive microbiological, chemical, and structural analysis, source tracing, and remediation plans.
Call also after major repairs, flooding, or suspected contamination events to guarantee safety and compliance.
Choosing the right tank and location to minimize contamination
Selection of tank materials and designs should prioritize non-corrosive, smooth-surfaced options that inhibit algae growth and biofilm formation.
The chosen site ought to offer good elevation for gravity feed, firm drainage, shade to limit light exposure, and convenient access for maintenance.
Proper sizing, securely routed overflow, and screened ventilation complete the installation to reduce contamination risks.
Materials and designs that resist algae, rust, and biofilms
Choosing tank materials and siting them carefully reduces the risk of algae growth, corrosion, and biofilm formation by limiting nutrients, light, and oxygen exposure while favoring durable, non-reactive surfaces.
Components and designs that help include:
- Stainless steel or food-grade polyethylene tanks
- Smooth, seamless interiors
- Opaque, UV-blocking exteriors
- Secure, tight-fitting lids
- Sloped bottoms with sanitary drains
Site selection: elevation, drainage, shade, and access
Although often overlooked, the tank’s site profoundly affects contamination risk: select elevated ground to prevent backflow and flooding, guarantee sloped grading and perimeter drains to divert runoff, and choose shaded locations or install sun barriers to limit algal growth.
Provide secure, clear access for inspection and maintenance while avoiding proximity to septic systems, livestock, and pollutant sources to reduce contamination vectors.
Sizing and overflow/ventilation considerations
Proper tank sizing and reliable overflow and venting reduce contamination risk by preventing stagnation, backflow, and pressure-related failures.
Selection matches demand to avoid long residence times; include secure screened vents to exclude insects and debris.
Position overflows away from drains and soil, with visible outlets and non-return fittings.
Allow access for inspection and maintenance; guarantee vents terminate above potential contamination sources.
Routine maintenance schedule to keep tank water clean
A clear maintenance schedule helps preserve water quality and detect problems early.
It should include daily and weekly visual and operational checks, monthly water sampling with basic tests, and an annual professional inspection and cleaning.
Following this timeline reduces contamination risks and extends tank service life.
Daily and weekly visual and operational checks
Daily and weekly visual and operational checks provide a predictable framework for early detection of problems such as leaks, contamination, and equipment failure.
Routine inspections confirm water clarity, cover integrity, and pump operation. Record findings and act on anomalies immediately.
- Inspect lid and vents for damage
- Check water level and clarity
- Verify pump and float switches
- Look for leaks or stains
- Review recent records
Monthly water sampling and simple tests
Perform monthly water sampling and basic tests to verify tank water remains within acceptable microbiological and chemical limits.
Collect samples aseptically from outlet and mid-depth, test for turbidity, free chlorine, pH, and total coliforms using simple field kits.
Record results, compare to standards, and flag deviations.
Prompt corrective actions include flushing, shock chlorination, or targeted investigation when limits are exceeded.
Annual professional inspection and cleaning timeline
Because routine monthly checks cannot replace thorough hands-on assessment, an annual professional inspection and cleaning provides an extensive review of tank integrity, internal deposits, fittings, and disinfection systems.
A certified technician schedules inspection, vacuuming, sediment removal, surface sanitization, and component testing. Findings generate a concise report with prioritized repairs, replacement recommendations, and a follow-up timeline to restore and maintain water quality for the coming year.
Step-by-step cleaning and disinfection process for storage tanks
The cleaning and disinfection sequence begins with preparing the tank: safely shutting off the supply, draining, and isolating the vessel.
Manual cleaning follows to remove sludge, sediment, and biofilm before applying a chosen disinfectant such as controlled chlorine dosing, shock‑chlorination, or an approved alternative.
The process concludes with thorough flushing, neutralization of residual disinfectant, and careful reintroduction of water to guarantee safety and compliance.
Preparing the tank: safely shutting down supply and draining
Before any cleaning begins, supply lines must be isolated and the tank fully emptied following a verified shutoff procedure to guarantee worker safety and prevent contamination.
Personnel should lock out valves, verify zero flow, and post permits.
Ventilation and confined-space checks follow.
Residual water is drained to approved disposal points.
Documentation of shutdown, inspections, and safety measures is completed before proceeding.
Manual cleaning: removing sludge, sediment, and biofilm
With the tank isolated, emptied, and safety checks documented, on-site personnel proceed to manual removal of sludge, sediment, and biofilm.
Workers scrape and dislodge deposits using non-sparking tools and stiff brushes, collect solids with shovels and vacuums, and bag waste for proper disposal.
Surfaces are rinsed with potable water; inspections verify removal before proceeding to the disinfection stage.
Disinfection methods: chlorine dosing, shock-chlorination, and alternatives
Disinfection follows physical cleaning and targets remaining microorganisms and residual organic matter. Operators select methods—continuous chlorine dosing, shock chlorination, or non-chlorine alternatives—based on water quality, tank material, system use, and regulatory limits.
Continuous dosing maintains low residuals; shock chlorination delivers high short-term concentrations for biofilm control.
Alternatives (UV, ozone, peracetic acid) suit specific materials, efficacy needs, and regulatory or taste constraints.
Flushing, neutralizing, and safe reintroduction of water
After chemical treatment or alternative disinfection, the water and residual disinfectant must be flushed, neutralized if necessary, and returned to service in a way that protects downstream users and the environment.
The procedure includes controlled flushing to waste, testing until disinfectant levels meet standards, neutralizing excess chemicals (e.g., sodium thiosulfate for chlorine), verifying microbiological safety, and documenting results before resuming supply.
Filtration and treatment options for stored water
Effective protection of stored water begins with staged treatment: pre-filters or first-flush systems keep large debris and contaminants out at the inlet, while inline sediment, carbon, and micron cartridges address particulates, taste and odor, and finer impurities.
Disinfection options such as UV, chlorination, and ozone each offer distinct advantages and limitations suited to different water qualities and storage scenarios.
Regular inspection and scheduled replacement of filters and treatment media are essential to maintain performance and prevent secondary contamination.
Pre-filtration for inlets and first-flush systems
Installations that direct rainwater or supply lines into storage tanks benefit from pre-filtration and first-flush systems to remove debris, sediments, and early-season contaminants before they enter the reservoir.
These devices divert initial runoff and capture leaves, grit, and oils, reducing tank loading and maintenance.
Proper sizing, routine cleaning, and secure bypass prevention guarantee consistent performance and extend downstream filter life.
Inline filters: sediment, carbon, and micron cartridges
Following pre-filtration and first-flush measures, inline cartridge filters provide targeted removal of particles, organic compounds, and fine contaminants before water reaches distribution points.
Sediment cartridges trap sand and rust; activated carbon reduces taste, odor, and many organics; micron cartridges capture bacteria-sized particulates when rated appropriately.
Regular replacement, correct sizing, pressure ratings, and accessible housings guarantee effective, low-maintenance protection of stored water.
UV, chlorination, and ozone: pros, cons, and use cases
How should stored water be disinfected to balance safety, cost, and operational demands? UV offers chemical-free, immediate inactivation but needs prefiltration and power. Chlorination is low-cost, provides residual protection, but forms disinfection byproducts. Ozone is potent and fast, requires complex dosing and no residual.
| Method | Key trade-off |
|---|---|
| UV | No residual; power-dependent |
| Chlorine | Residual; DBP risk |
| Ozone | Strong; complex systems |
Maintaining and replacing filters and treatment media
Maintaining and replacing filters and treatment media is essential to secure consistent water quality, system efficiency, and regulatory compliance.
Scheduled inspections, pressure-drop monitoring, and manufacturer-recommended replacement intervals prevent breakthrough and biofouling.
Backwashing, media rinsing, and chemical cleaning restore performance where applicable.
Documenting changes, testing post-maintenance, and matching media to contaminant profiles guarantee effective, economical long-term protection of stored water.
Preventive measures to stop contamination at the source
Preventing contamination at the source focuses on secure inlet and vent fittings, including screens and sealed connections to block debris.
It also requires backflow prevention and overflow controls to stop reverse flow and spillage.
Finally, pest-, insect-, and bird-proofing measures keep animals and their waste from entering the tank.
Inlet and vent protection: screens, vents, and sealed fittings
A reliable first line of defense for a storage tank is proper inlet and vent protection: screens, pressure vents, and sealed fittings that block insects, debris, and airborne contaminants while allowing necessary airflow and inflow.
Effective measures include:
- Fine mesh insect screens
- Pressure/vent caps to prevent ingress
- Sealed threaded fittings
- Regular inspection and cleaning
- Weatherproof guards to limit contamination
Backflow prevention and overflow controls
Beyond keeping contaminants out at entry points, stopping contamination at the source requires controls that prevent contaminated water from flowing back into the tank and systems to manage overflow safely.
Backflow preventers, check valves, and air gaps block reverse flow; pressure relief and high-level alarms stop overfill.
Regular testing, certified devices, and install to code guarantee reliable operation and reduced contamination risk.
Pest, insect, and bird-proofing strategies
Seal openings and eliminate access routes to keep pests, insects, and birds from introducing contaminants into storage tanks.
Install fine mesh screens on vents, secure lids with locks, and repair cracks or gaps.
Use bird spikes or deterrents on nearby structures and maintain vegetation clearance.
Regularly inspect and document integrity, promptly sealing any breaches to prevent contamination at the source and preserve water quality.
Monitoring and testing plan for ongoing water quality assurance
A practical monitoring and testing plan specifies which microbial, chemical, and physical parameters are tracked and why each matters.
It also sets sampling frequency and exact locations in the tank and distribution system to guarantee representative data.
Standardized record-keeping templates and predefined triggers for corrective action translate results into timely responses.
Key parameters to monitor (microbial, chemical, physical)
When establishing a monitoring and testing plan for water stored in tanks, operators should track a concise set of microbial, chemical, and physical parameters that together indicate safety and system performance.
Essential microbial tests: total coliforms, E. coli, heterotrophic plate count.
Chemical: free chlorine/residual, pH, nitrates, metals (lead, copper).
Physical: turbidity, temperature, color, odor.
Frequency and sampling locations within the system
How often and where samples are collected profoundly affects the ability to detect contamination early and verify treatment efficacy.
Sampling frequency should reflect risk: higher after maintenance, rainfall, or stagnation; routine monthly or quarterly checks for low-risk systems.
Locations must include inlet, outlet, mid-tank, sludge-prone zones, and post-treatment points to capture spatial variability and transient events.
Record-keeping templates and triggers for corrective action
Building on sampling frequency and site selection, clear record-keeping templates and predefined triggers for corrective action turn raw data into timely decisions.
Templates list date, location, parameters, results, analyst, and corrective actions.
Triggers specify threshold exceedances, trends, and missed samples.
When triggered, documented steps—investigation, notification, remediation, and re-testing—ensure accountability and traceable resolution timelines for ongoing water quality assurance.
Common problems and how to troubleshoot them
Typical issues in storage tanks include visible algae growth, unpleasant taste or odors, accumulating sediment that restricts flow, and repeated contamination events.
For each problem, the article outlines identification signs, likely causes, and concise corrective actions—from targeted algaecides and light exclusion to odor source tracing, flushing or filtration for sediments, and a root-cause analysis checklist for recurrences.
Clear, stepwise troubleshooting helps prioritize treatments and prevent future failures.
Algae growth: identification, causes, and targeted fixes
Why is green scum appearing on the water surface and inner walls of a storage tank? Algae indicate light exposure, nutrients (phosphates, nitrates), and stagnant conditions.
Identify slimy, green films or floating mats; test for nutrients.
Targeted fixes: block light, clean and scrub surfaces, flush and disinfect, install tight covers, improve circulation, and limit nutrient entry from runoff or contaminated inlets to prevent recurrence.
Foul odor or taste: steps to diagnose and remediate
How can a storage tank develop a persistent foul odor or off‑taste, and what immediate signs point to the source?
Inspect for sulfur/rotten-egg (bacterial sulfate reduction), chlorine loss, or organic contamination.
Smell location, check aeration, and test residual chlorine, bacteria, iron, and sulfate.
Remediate by shock chlorination, aeration, targeted disinfection, flushing, and fixing contamination pathways; retest to confirm resolution.
Sediment buildup and reduced flow: corrective maintenance
Inspect the tank and downstream piping for signs of sediment accumulation and flow restriction, since particulate buildup is a common cause of reduced discharge and can indicate upstream erosion, poor filtration, or biofilm detachment.
Remove settled solids via controlled draining and flushing, clean or replace inlet strainers and filters, inspect and clear screens and valves, and schedule periodic desludging to restore flow and prevent pump damage.
Recurrent contamination: root-cause analysis checklist
Settled solids and flow restrictions can mask or contribute to repeated contamination events, so a systematic root‑cause checklist helps isolate persistent sources.
Inspect inlet screens, vents, and overflow paths; verify chemical dosing and residual disinfectant levels; sample at multiple depths and outlets; review recent maintenance and intrusion records; check for biofilm, dead zones, and cross‑connections; implement corrective actions and monitor trends to confirm resolution.
Cost considerations and choosing service providers
Consideration of typical costs for inspections, cleanings, and treatments helps owners budget and compare options.
Prospective contractors should be asked about experience, warranties, proposed methods, and verifiable certifications or licenses.
The choice between DIY and professional service hinges on tank complexity, safety risks, and long-term liability.
Typical costs for inspection, cleaning, and treatment options
When budgeting for storage tank maintenance, owners should weigh typical inspection, cleaning, and treatment costs against the frequency and complexity of required services.
Typical ranges vary by tank size, access, and contamination level.
Common cost elements include:
- Visual inspection and reporting
- Internal cleaning and sediment removal
- Disinfection or shock chlorination
- Biocide or chemical treatments
- Routine monitoring and lab testing
Questions to ask contractors and certifications to verify
Balancing costs against service quality requires asking targeted questions and confirming proper credentials before hiring a contractor.
Inquiries should cover experience with tank types, references, detailed scope, warranty, liability insurance, and disposal methods.
Verify certifications such as certified water system technician, OSHA safety training, and state contractor licenses.
Request written estimates and compare credentials to guarantee transparent pricing and qualified workmanship.
DIY vs professional service decision factors
Deciding between DIY upkeep and hiring a professional hinges on a clear comparison of direct costs, time investment, technical difficulty, and long-term risk.
Homeowners should tally material and tool expenses, estimate labor hours, and weigh warranty and liability differences.
For complex repairs, contamination risks, or regulatory compliance, hiring certified providers often proves cost-effective.
Reference reviews, certifications, and transparent estimates when selecting a contractor.
Practical tips to extend tank lifespan and ensure safe water
Practical measures focus on routine seasonal adjustments to inspections and cleaning schedules to address temperature- and weather-driven risks.
Clear emergency procedures after contamination events and rapid response checklists minimize health hazards and system damage.
Strategic upgrades—such as improved filtration, covers, and corrosion-resistant linings—deliver long-term safety and operating cost savings.
Seasonal maintenance adjustments
Adjust maintenance tasks with the seasons to prevent damage and preserve water quality:
Winter requires insulating exposed pipes, checking for ice buildup around vents and covers, and ensuring heating elements or recirculation systems remain functional;
Spring focuses on inspection for cracks, cleaning out sediment accumulated over cold months, and resealing fittings;
Summer emphasizes shading, vent screening to block insects and debris, and monitoring for algae growth;
Autumn calls for draining or protecting external components from freezing, clearing gutters and overhanging vegetation, and topping up any chemical disinfectants before temperatures drop.
Regularly schedule inspections, document findings, and adjust treatment dosages and cleaning frequency based on observed conditions.
Emergency procedures after contamination events
Act quickly after a contamination event to isolate the tank, protect residual water quality, and minimize corrosion or biological growth.
Inspect intake, vents, and fittings; shut off valves and lock access. Sample water for laboratory analysis, document findings, and notify stakeholders.
Flush and disinfect per regulations, remove sediment, and repair breaches.
Restore service only after clearance confirms safety and system integrity.
Upgrades that deliver long-term safety and savings
After addressing contamination and restoring safe service, attention should turn to upgrades that reduce future risk and operating costs.
Practical, durable improvements extend tank life and protect water quality:
- Replace corroded fittings and install sacrificial anodes
- Add secure, screened vents
- Upgrade to UV or monitored disinfection
- Install level and leak sensors with alerts
- Improve access for inspection and safe maintenance
Conclusion
Maintaining clean water in a storage tank is nothing short of a quiet revolution against invisible threats; neglect can turn a simple cistern into a biofilm metropolis. Regular assessment, proper siting, vigilant maintenance, and timely disinfection transform potential disaster into dependable clarity. With routine testing and prompt troubleshooting, tanks can outlive expectations and deliver pristine water like a loyal guardian. The payoff is colossal: health preserved, equipment spared, and peace of mind secured.