How to Check Sprinkler System: Step-by-Step Homeowner Checklist for Fast Repairs
To quickly check your sprinkler system, follow this step-by-step checklist:
- Turn Off the Controller and Main Water: This relieves pressure in the system.
- Test One Zone at a Time: Activate each zone to inspect it thoroughly.
- Inspect Sprinkler Heads: Look for clogs or breaks, and check the spray patterns and riser alignment.
- Measure Pressure: Use a gauge to check the pressure at a riser.
- Verify Valve Function: Ensure each valve cycles properly and seals completely.
- Listen for Leaks: Pay attention to any unusual sounds that indicate leaks, and note any wet or dry spots in the yard.
- Perform Necessary Repairs: Clean or replace nozzles, tighten fittings, and retest the system.
Following these steps will help you efficiently troubleshoot and maintain your sprinkler system.
Fast Overview Can You Check a Sprinkler System Yourself?
A homeowner can often identify and fix common issues like broken heads, clogged nozzles, and simple valve problems without professional help.
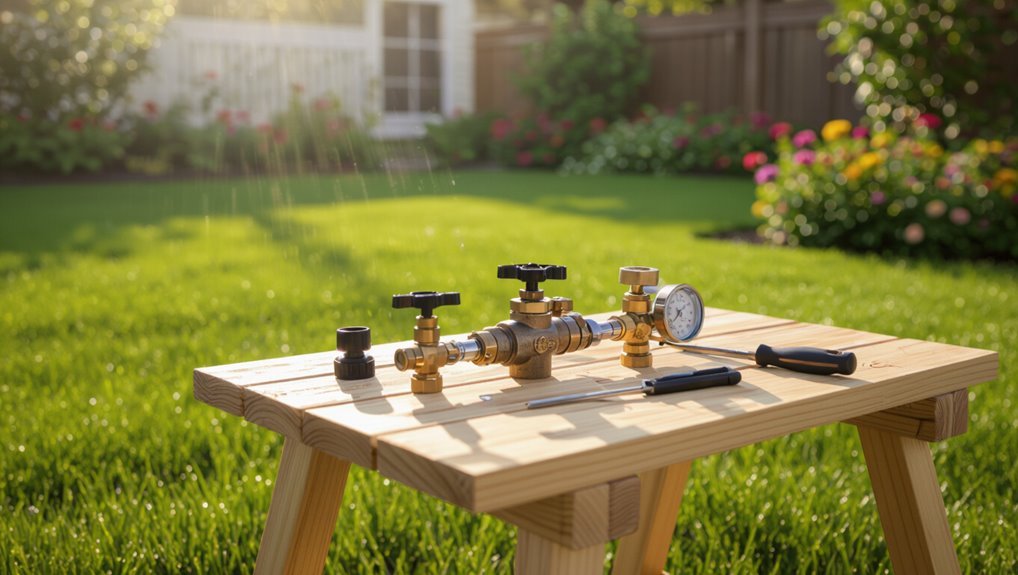
Basic safety precautions—shutting off water and electricity where applicable—and a short tools checklist (shovel, screwdriver, pliers, replacement nozzles, and seal tape) are essential before starting.
For complex diagnostics or mainline repairs, a qualified technician should be consulted.
Quick summary of what a homeowner can diagnose and repair
Homeowners can diagnose and fix many common sprinkler issues themselves, including clogged or misaligned heads, broken spray nozzles, minor leaks at fittings, and zone control valve problems; tasks typically require only basic tools, a replacement nozzle or valve, and shutting off the water.
A quick how to check sprinkler system routine finds stuck timers, low pressure, uneven coverage, damaged risers, and faulty solenoids.
Safety precautions and tools checklist
Having identified common issues a homeowner can handle, the next step is to outline basic safety precautions and a compact tools checklist to determine whether a sprinkler system can be checked and repaired personally.
Wear gloves and eye protection, shut off water and power to pumps, mark irrigation lines.
Essential tools: adjustable wrench, screwdrivers, pliers, pipe tape, replacement nozzles, sprinkler key, small shovel, bucket.
Essential Tools and Materials for Sprinkler Inspection and Quick Repairs
A concise set of hand tools and a few diagnostic devices can let a homeowner quickly locate leaks, test valves, and adjust heads.
Keeping common replacement parts—nozzles, seals, sprinkler heads, and a spare solenoid—on hand reduces downtime for routine fixes.
The text will also distinguish simple DIY tasks from problems that warrant professional service.
Hand tools and diagnostic devices
Several essential hand tools and diagnostic devices enable quick, accurate inspection and minor repairs of a sprinkler system.
A concise kit speeds troubleshooting and reduces guesswork. Recommended items focus on diagnosis, adjustment, and isolation without replacing parts.
- Multimeter — checks solenoid voltage and controller outputs.
- Pressure gauge — measures system and zone pressure.
- Screwdrivers, pliers, digging knife — adjust heads and access valves.
Replacement parts to keep on hand
Spare parts laid out before a service call save time and prevent extended downtime: common items include extra sprinkler heads (pop-up and fixed), nozzle sets in various spray patterns and sizes, solenoids, and sprinkler-specific O-rings and seals.
Also keep replacement valves, pressure regulators, filter cartridges, drip tubing couplings, PVC repair couplings, and a small assortment of screws and clamps for rapid field swaps and secure fittings.
When to call a professional vs. DIY
When should a homeowner tackle sprinkler repairs and when is a professional the safer choice?
Minor tasks—cleaning heads, replacing nozzles, adjusting spray patterns, and swapping simple valves—suit a confident DIYer with basic tools.
Call a pro for persistent leaks, mainline breaks, complex valve manifold issues, electrical controller faults, or recurring pressure problems.
Safety, irrigation design, and warranty considerations also justify professional service.
Preparing the System for Inspection
Before beginning, the inspector locates the controller, individual zone valves, and the main shutoff to establish control points.
The system is then turned off and any remaining pressure relieved to prevent water flow during checks.
Finally, the controller settings and irrigation schedule are reviewed to confirm current programming and identify active zones.
Locating the controller, valves, and main shutoff
Locating the controller, valves, and main shutoff is the essential first step in preparing a sprinkler system for inspection.
The homeowner identifies the controller box, zone valves (often in valve boxes or near meter), and the main water shutoff.
Note labels, wiring, and accessibility.
Mark locations for future reference and guarantee clear paths to components before proceeding with testing or repairs.
Turning off the system and relieving pressure
Shut down the controller and close the main service valve to stop water flow.
Then open a high-point bleed or a designated drain to relieve residual pressure in the lines.
Confirm gauges drop to zero and listen for escaping air or water.
Close drains after flow ceases.
Tag the valve positions and document any leaks or abnormal pressure behavior before proceeding with inspection or repairs.
Reading the controller and irrigation schedule
A quick check of the controller and its programmed schedule assures inspection efforts target the correct zones and times. The technician should power the unit, review the display for active programs, and note seasonal adjustments, start times, run durations, and watering days.
They verify sensor inputs (rain/freeze), confirm manual run capability, record station numbers, and ascertain program mapping matches valve locations before proceeding with zone tests.
Step-by-Step Inspection Checklist for Each Zone
The inspector activates one zone at a time to isolate performance issues.
For each zone, they observe sprinkler heads and spray patterns, check water pressure and flow, and listen and look for leaks or breaks.
They also verify proper valve operation before moving to the next zone.
Activating one zone at a time
Begin by activating one zone at a time to isolate issues and accurately assess sprinkler performance. This controlled approach lets an inspector observe sprinkler heads, water pressure, coverage, and sound for each zone without interference from others.
Run each zone for several minutes, note unusual noises, fluctuating pressure, leaks at valves or pipes, and whether timers or controllers engage correctly before moving to the next zone.
Observing sprinkler heads and spray patterns
Inspect each sprinkler head visually and while active to verify correct orientation, unobstructed nozzles, and consistent spray patterns; note any heads that sputter, mist, drip, or produce uneven arcs.
Record misaligned, tilted, clogged, or damaged heads and mark replacement or adjustment needs.
Check coverage overlap to prevent dry spots or runoff, and confirm pop-up mechanisms fully extend and retract without sticking.
Checking water pressure and flow
After confirming sprinkler heads and spray patterns are correct, attention shifts to measuring water pressure and flow for each zone.
The inspector notes baseline pressure at the backflow or valve with a gauge, then observes flow rate by timing zone cycles and checking rotor/sprayer travel.
Compare readings to system specifications, flagging low pressure, inconsistent flow, or clogged filters for targeted adjustment or component replacement.
Listening and looking for leaks and breaks
Move slowly along the zone while listening for hissing, gurgling, or a steady rushing sound and scanning the turf and piping for wet spots, sunken soil, muddy patches, or unusually verdant strips that indicate leaks or breaks.
Note sprinkler heads that wobble, uneven spray patterns, pooled water, or low depressions.
Mark suspected locations, photograph damage, and isolate zones for targeted repairs.
Verifying proper valve operation
Begin by shutting off the zone at the controller and then manually activating the valve at the valve box to observe its response.
Confirm the diaphragm seats, solenoid clicks, and flow starts promptly.
Check for delayed opening, partial flow, or continuous flow when closed.
Inspect wiring connections and look for debris or corrosion.
Replace faulty solenoids or diaphragms and retest until operation is reliable.
Common Problems Identified During Inspection
Inspections commonly reveal several recurring issues that affect sprinkler performance.
Technicians often find clogged or broken heads, low or fluctuating water pressure, stuck or leaking valves, and broken pipes that create wet spots in the lawn.
Electrical or controller malfunctions are also frequent and can prevent zones from operating correctly.
Clogged or broken sprinkler heads
Clogged or broken sprinkler heads are among the most common issues uncovered during system inspections, often causing uneven coverage, water waste, or localized brown patches.
The inspector notes stuck nozzles, debris buildup, cracked casings, and misaligned pop-ups.
Recommended actions include cleaning screens, replacing damaged heads, realigning spray patterns, and testing operation after adjustments to restore uniform irrigation and prevent landscape damage.
Low or fluctuating water pressure
Low or fluctuating water pressure often manifests as weak spray patterns, intermittent zones failing to run, or sudden surges that disturb distribution uniformity.
Inspect main supply, backflow device, and pressure regulator for obstructions or settings.
Check for hidden leaks, partially closed valves, or municipal supply issues.
Measure pressure with a gauge at the system tap.
Record findings and prioritize repairs to restore uniform coverage.
Stuck or leaking valves
Stuck or leaking valves compromise zone control and can cause runoff, dry spots, or continuous flow. Technicians should check each manual and solenoid-operated valve for visible leaks, sticky stems, or valve bodies that fail to open or close fully.
Diagnosis includes isolating a zone, activating the valve manually, inspecting diaphragms and solenoids, tightening fittings, replacing worn seals, and verifying proper electrical operation before concluding repairs.
Broken pipes and wet spots in lawn
After verifying valve integrity, inspectors turn attention to the distribution network where broken pipes often reveal themselves as persistently wet spots or soggy soil.
They probe for soft ground, depressions, and unusually lush grass patterns, then isolate zones to locate leaks.
Visible pooling, reduced spray pressure, and unexplained water bills corroborate pipe damage; repair typically requires excavation, section replacement, and pressure testing.
Electrical/controller malfunctions
Many inspections reveal electrical or controller malfunctions that disrupt scheduling, valve activation, or sensor input.
Technicians check controller programming, transformer output, and terminal connections for corrosion or loose wires.
Faulty sensors, damaged solenoids, or shorted wiring cause intermittent or total failure.
Recommended actions include resetting and reprogramming the controller, replacing failed components, and testing circuits with a multimeter before concluding repairs.
Fast Repair Steps for Typical Issues
The section outlines quick, practical fixes for common sprinkler problems, starting with cleaning and adjusting misaligned heads and replacing broken heads or nozzles.
It covers valve repairs including diaphragm replacement, simple PVC or polyethylene pipe patching, and steps for resetting or reprogramming the controller.
Each procedure is presented with basic tools, safety notes, and when to call a professional.
Cleaning and adjusting sprinkler heads
Begin by shutting off the irrigation controller or closing the main valve to prevent accidental activation.
Then locate the malfunctioning head and clear surface debris.
Retract the pop-up, inspect for clogs, remove grit with a soft brush and water, check and realign the spray pattern, adjust arc and radius via the manufacturer’s screws, and test operation before restoring full system power.
Replacing a broken head or nozzle
Shut off water to the zone and expose the damaged riser or nozzle before removing it. Then confirm the replacement part matches the spray type, radius, and inlet size.
Replace the head, hand-tighten the inlet, then test for correct coverage and leaks. Adjust arc and throw as needed.
- Match specifications precisely
- Tighten and seal connections
- Test and fine-tune coverage
Fixing valve leaks and replacing diaphragms
Inspect valves for visible leaks, then isolate the zone and relieve pressure before disassembling the bonnet to access the diaphragm and solenoid.
Inspect diaphragm for tears, warping, or debris; clean or replace with the correct model.
Check solenoid and connections, tighten or replace as needed.
Reassemble with proper seals, restore pressure, and test for leaks and correct operation before finishing.
Repairing small PVC or polyethylene pipe breaks
When a small PVC or polyethylene line develops a crack or puncture, the quickest reliable fix is to isolate the affected zone, depressurize the line, and make a clean repair using the appropriate coupler, sleeve, or adhesive-rated tape.
Cut back to sound pipe, dry surfaces, deburr, and fit a repair coupling or slip sleeve with primer/glue for PVC or barbed insert and clamp for poly.
Test under pressure.
Resetting or reprogramming the controller
After repairing pipe damage and confirming the system holds pressure, attention should turn to the controller, since electrical or programming faults often produce symptoms similar to plumbing issues.
Inspect power and backup battery, then review zone schedules and run times. Reset to factory if corruption is suspected, re-enter zone durations, start times, and watering days.
Test each zone manually and monitor for proper valve response.
Testing and Verifying Repairs
After repairs are made, a full system test is run to confirm each zone operates correctly.
Pressure readings are taken at representative points and spray patterns are checked to verify even coverage.
All controller settings, measurements, and repair actions are documented for future reference and troubleshooting.
Running a full system test after repairs
Begin a thorough system run to verify that all repaired components function correctly and that no new issues have arisen.
Operate each zone sequentially, observing valve operation, sprinkler activation, and retraction.
Inspect for leaks, unusual noises, or uneven spray patterns. Note any balky heads or slow starts.
Record observations, repeat tests after adjustments, and schedule a follow-up check to ascertain long-term reliability.
How to measure pressure and confirm even coverage
Measure water pressure at the sprinkler riser and at representative heads to guarantee the system delivers the flow required for uniform coverage.
Use a pressure gauge on the riser and flow cups or catch cans across a zone to record output. Compare readings to manufacturer specs and between heads.
Adjust pressure regulators, nozzles, or spacing until uniform output and overlap achieve consistent distribution across the lawn.
Documenting settings and repairs for future reference
A concise record of controller schedules, zone run times, valve settings, nozzle types, and any repair work provides a reliable reference for future troubleshooting and seasonal adjustments.
Include dates, parts replaced, adjustment notes, and water usage observations.
Store photos, wiring diagrams, and controller backups digitally and in a labeled notebook.
Update entries after each inspection or change to maintain an accurate maintenance history.
Seasonal Maintenance and Winterization Tips
A concise seasonal checklist helps prevent early spring issues, including valve checks, zone testing, and head alignment.
During summer, controllers and nozzle choices should be adjusted to conserve water while maintaining coverage.
Before freezing weather, a proper blowout and insulation or shutoff procedures protect pipes and components from damage.
Spring startup checklist to prevent problems
Begin by inspecting the entire sprinkler system for signs of winter damage and wear, focusing on valves, backflow preventers, pipes, and heads.
Drain plugs and vacuum breakers should be checked, seals replaced if brittle, and each zone slowly pressurized to reveal leaks.
Clean and adjust sprinkler heads, verify controller settings and battery backup, and confirm proper operation of timers and sensors before regular use.
Summer adjustments for water conservation
Many homeowners can save substantial water by adjusting sprinkler runtimes, schedules, and hardware to summer conditions.
Inspect heads for misting, replace worn nozzles, and group zones by plant water needs.
Shift irrigation to early morning, reduce frequency but increase soak time, and set controller seasonal adjustments.
Check for leaks and soil moisture to avoid overwatering and protect landscape health.
Winter blowout and freeze protection methods
Proper winterization prevents costly freeze damage and guarantees the sprinkler system returns to service without leaks or broken components.
Professionals or experienced homeowners perform a compressed-air blowout, drain valves, and shut off irrigation supply.
Insulate exposed backflow devices, meter boxes, and aboveground pipes.
Verify controller is set to off or frost mode, and document dates and pressures used for future reference.
Troubleshooting Guide: Symptoms to Probable Causes
A concise symptom-to-cause quick reference helps identify common sprinkler problems and their likely origins. The table below presents clear symptom, probable cause, and suggested first action to guide fast troubleshooting. Use it to prioritize checks before performing repairs.
| Symptom | Probable Cause | First Action |
|---|---|---|
| No zones run | Controller or power failure | Check controller display and breakers |
| Weak spray | Clogged nozzles or low pressure | Inspect and clean nozzles; check supply valve |
| Water pooling | Broken pipe or misaligned sprinkler | Inspect for leaks and adjust/replace head |
Symptom-to-cause quick reference
When a sprinkler system shows an obvious symptom—such as low pressure, uneven coverage, or broken heads—technicians can consult a concise symptom-to-cause chart to quickly narrow likely faults; each symptom links to the most probable mechanical, hydraulic, or control-related causes and the typical diagnostic steps to confirm them. The chart lists symptom, probable cause, and first-check action.
| Symptom | Probable cause |
|---|---|
| Low pressure | Clogged filter/valve leak |
| Uneven spray | Misadjusted nozzle/clog |
Cost Estimates and Timeframes for Common Repairs
The article next outlines typical costs and durations for common sprinkler repairs, comparing DIY expenses and parts to professional service rates.
It provides ballpark figures for fixes like broken heads, valve replacements, and timer issues, and notes how complexity and system type affect labor costs.
Estimated completion times for each repair are presented to help readers decide whether to attempt a DIY fix or call a pro.
Typical DIY vs. professional repair costs
Although some sprinkler repairs can be handled with basic tools and a few hours of weekend effort, cost and time vary widely depending on the issue and homeowner skill level.
DIY parts often cost $10–$75; common fixes save labor but risk mistakes.
Professional service fees typically add $75–$200 labor plus parts, offering warranty, diagnostics, and faster, reliable resolution for complex problems.
Estimated time to complete common fixes
Because repair complexity and skill level vary, estimated completion times for common sprinkler fixes should be treated as guidelines rather than guarantees.
Typical tasks: adjusting heads (10–30 minutes), replacing a sprinkler head (15–45 minutes), fixing a leak in a lateral line (30–90 minutes), replacing a solenoid or valve (20–60 minutes), and diagnosing controller issues (20–120 minutes).
Allow extra time for troubleshooting.
Preventive Measures to Reduce Future Breakdowns
A regular inspection schedule and a concise checklist of common signs—leaks, uneven coverage, nozzle clogs, and pressure fluctuations—help catch issues before they escalate.
Scheduled seasonal checks and quick post-storm reviews are recommended to maintain reliable operation.
Strategic upgrades such as pressure regulators, smart controllers, and durable valves improve long-term reliability and efficiency.
Routine inspection schedule and what to look for
Regular visual checks should be performed at least monthly during the irrigation season, with a more thorough inspection at the start and end of the season to catch wear, leaks, and controller or valve issues early.
Inspect heads for alignment and clogging, look for soggy spots or dry patches, verify proper pressure and cycle timing, test manual activation, and note damaged wiring, cracked pipes, or stuck valves for prompt repair.
Upgrades that improve reliability and efficiency
Consider upgrading key components to boost sprinkler reliability and conserve water: installing pressure-regulating valves and rain/soil-moisture sensors prevents overwatering.
Replacing aging solenoids and PVC with modern, flexible piping reduces leaks, and swapping fixed timers for smart controllers enables weather-based scheduling and remote diagnostics.
Additionally, use corrosion-resistant fittings, quick-connect valves, and zone flow meters to detect issues early and simplify maintenance.
When to Hire an Irrigation Professional
If leaks, low pressure, widespread zone failures, or electrical issues persist after basic checks, the problem may be beyond typical DIY repairs.
Homeowners should prepare a concise list of symptoms and ask potential contractors about licensing, irrigation-specific experience, warranty terms, and projected timelines.
Request written estimates that break out labor, parts, and any recommended system upgrades for easy comparison.
Signs the problem is beyond DIY
When system issues persist despite basic troubleshooting, or when symptoms suggest complex failures, it is time to recognize problems that exceed typical homeowner skills.
Signs include recurring water pressure loss, underground leaks with sinkholes or continuous saturation, electrical controller faults, repeated valve or zone failures, major pipe breaks, and unexplained high water bills.
Professional diagnostics and repair are warranted for safety and system longevity.
Questions to ask and estimates to request
After determining that problems exceed homeowner repairs, the next step is preparing to consult an irrigation professional by knowing which questions to ask and what estimates to request.
A concise checklist guarantees clear comparisons, fair pricing, and scope clarity before hiring.
- Ask about license, insurance, warranty, and references.
- Request itemized estimates: diagnostics, parts, labor, timeline.
- Clarify follow-up service, maintenance plans, and payment terms.
Conclusion
A homeowner can complete most sprinkler checks with basic tools and patience, and doing so saves time and expense. Even those worried they lack skill should start with the simple inspection checklist—many fixes are straightforward and explained here. Routine checks, prompt minor repairs, and basic preventive steps greatly reduce failures and costly emergencies. If problems exceed comfort or ability, a professional is the sensible next step to restore reliable, efficient irrigation.