How to Air Lock a Water Heater: Quick Steps to Diagnose and Fix Air in Hot Water Lines
To air lock a water heater and resolve issues caused by trapped air in hot water lines, follow these quick steps: Shut off the power or gas supply and close the cold inlet. Open the hot taps in affected fixtures to release trapped air. Gradually open the drain or relief valve to allow air to escape while flushing the taps until the flow stabilizes. If the problem persists, inspect valves, the expansion tank, vents, and fittings for faults. For stubborn air locks, consider using an air vent or pump. Continue reading for detailed troubleshooting guidance.
How to Tell If Your Water Heater Has an Air Lock
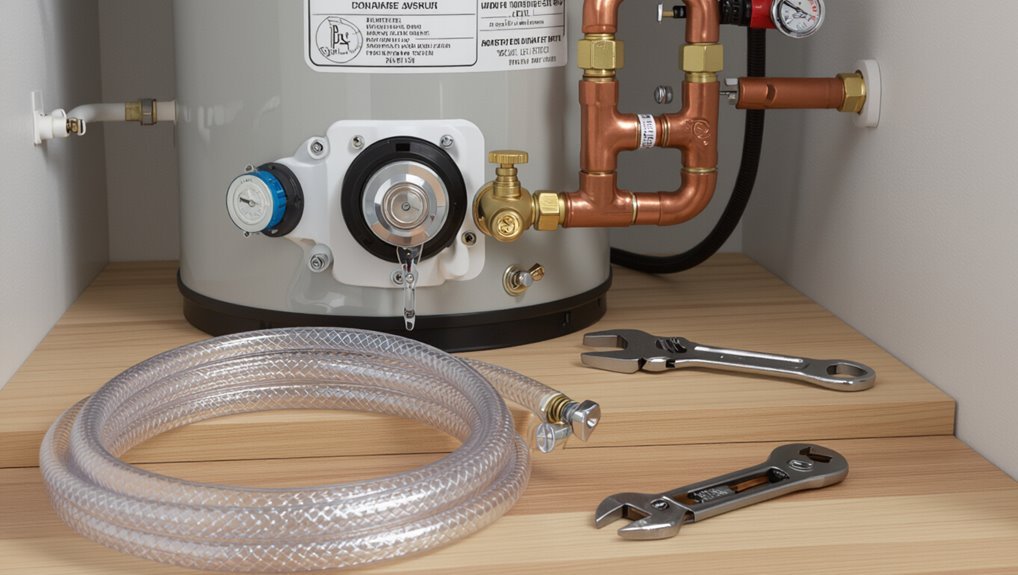
An air lock in the hot water lines is often indicated by sputtering, no hot water at fixtures, or inconsistent flow.
Such a blockage reduces flow and can cause the heater to cycle or fail to deliver expected temperatures.
Quick checks—confirming the cold supply is on, valves are open, and sediment is not obstructing outlets—help rule out other causes before addressing an air lock.
Common signs of an air lock in hot water lines
How can one tell if a water heater has an air lock? Observable signs include sputtering or intermittent flow at hot taps, weak or no hot water despite cold flow, banging or gurgling noises in pipes, and sudden temperature fluctuations.
Frequent need to purge lines, air bubbles from faucets, and localized loss of hot water pressure also indicate trapped air.
Techniques for how to air lock a water heater follow.
How an air lock affects water flow and heater performance
When air becomes trapped in the hot-water side of a plumbing system, flow to fixtures can be severely restricted because the compressible pocket interrupts the continuous column of liquid the heater relies on.
This causes sputtering, reduced or halted hot flow, and irregular temperatures at taps. The heater may cycle more, strain pump or gas components, delay recovery, and waste energy as it compensates for inconsistent circulation.
Quick checks to rule out other causes (cold water supply, valves, sediment)
Begin by eliminating common, easily diagnosed problems before assuming an air lock is the culprit: verify that the cold-water supply to the heater is fully open, check that all nearby shutoff and mixing valves are in correct positions, and inspect for heavy sediment at the tank outlet or in inline strainers that could restrict flow.
Also confirm municipal supply pressure, examine for closed fixture valves, and test multiple taps.
Tools and Safety Precautions Before You Start
Before beginning, the article lists required tools and materials such as adjustable wrenches, hose, bucket, and replacement fittings.
It also notes recommended personal protective gear like gloves and safety glasses.
It explains when to shut off electricity or gas to the water heater and how to confirm the power is isolated.
Guidance is provided on signs that warrant calling a professional rather than attempting repairs alone.
Required tools and materials
Proper preparation requires a concise set of tools and clear safety measures to air lock a water heater effectively. A minimalist toolkit and replacement parts prevent delays; verify instruments are functional and compatible with plumbing fittings.
Essential items enable isolation, bleeding, and brief repairs without improvisation.
- Adjustable wrench
- Screwdriver set
- Garden hose (for drain/bleed)
- Bucket and towels
Personal safety and protective gear
After gathering the listed tools and confirming their condition, attention should shift to personal safety and protective gear to reduce injury risk during air-lock removal.
Wear safety glasses, gloves resistant to heat and chemicals, and closed-toe non-slip shoes. Use hearing protection if working with noisy pumps.
Verify clothing fits to avoid snagging. Keep a first-aid kit accessible for minor injuries.
When to shut off power and gas to the water heater
When should power and gas to the water heater be cut off?
Power and gas should be shut whenever working on plumbing connections, draining the tank, or loosening fittings to prevent electrical shock, burner ignition, or gas leaks.
Electric heaters require breaker off; gas models need the gas valve closed and pilot extinguished.
Confirm shutdown before beginning work and ventilate the area.
When to call a professional
Who should be called in for help depends on the complexity and risks of the job.
A licensed plumber is recommended for persistent air locks, inaccessible valves, or corrosion.
An electrician or gas technician should be contacted if electrical connections, pilots, or gas lines are involved.
Call emergency services for leaks, flooding, or gas smell.
Professional assessment prevents damage and guarantees code compliance.
Step-by-Step Method to Bleed Air from a Water Heater
The procedure begins with turning off the heater and closing the supply valves to isolate the tank.
Next, opening hot water taps identifies affected fixtures while slowly releasing trapped air through the heater drain or pressure relief valve allows pressure to drop.
Finally, flushing the lines from fixtures in a controlled order and re-pressurizing the system guarantees a steady flow and confirms the air lock is cleared.
Step 1 Turn off heater and close supply valves
Shut off the water heater’s power or gas supply and close the cold-water inlet and hot-water outlet valves to isolate the tank before bleeding air.
Confirm electrical breakers are off or the gas pilot is extinguished.
Close any nearby shutoffs to prevent flow.
Verify isolation by checking that no water or heat reaches fixtures.
Proceed only when the system is fully isolated.
Step 2 Open hot water taps to locate affected fixtures
Open several hot-water taps throughout the house and run them briefly to reveal where air is trapped by observing sputtering, intermittent flow, or loud banging.
Note which fixtures show symptoms, then prioritize those nearest the heater. Keep cold taps closed. Record locations to target during bleeding.
- Kitchen sink: typical first indicator
- Bathroom tubs/showers
- Upstairs fixtures
- Outdoor faucets
Step 3 Slowly open the water heater drain or pressure relief to release trapped air
Begin by locating the water heater’s drain valve or temperature-and-pressure (T&P) relief valve and preparing a bucket or hose to carry discharged water away.
Then, slowly open the chosen valve to allow trapped air and a small steady stream of water to escape.
Monitor flow and listen for sputtering; when steady water flows without air bursts, close the valve and secure fittings.
Step 4 Use fixtures to flush air from the lines (order and technique)
Next, systematically run household fixtures to push remaining air out of the hot-water lines, starting with the faucet closest to the heater and progressing to the farthest fixture; this order guarantees a steady downstream flow that displaces trapped pockets efficiently.
Open taps fully, wait for continuous water without sputtering, then close each.
Include showers and outdoor spigots to confirm all branch lines are cleared.
Step 5 Re-pressurize the system and check for steady flow
Restore normal pressure to the water heater by closing any purge valves used during bleeding and slowly reopening the supply valve at the cold-water inlet, allowing the system to pressurize while monitoring for steady, uninterrupted flow at the previously tested fixtures.
Observe for sputtering or fluctuating flow, listen for trapped air, and recheck fittings and shutoffs for leaks; repeat brief purges if irregularities persist.
Step 6 Restore power/gas and test hot water temperature
With the plumbing fully pressurized and no air pockets detected at fixtures, power or gas to the water heater can be safely restored and the unit brought back on line for temperature verification.
Restore electrical breaker or gas pilot per manufacturer instructions. Allow the system to reach operating temperature, then open a hot faucet to confirm continuous, scald-free flow and stable temperature before concluding the job.
Alternative Methods for Releasing Air Locks
Several practical alternatives exist for clearing air locks beyond manual bleeding. Options include automatic air vents or vacuum breakers, temporarily disconnecting and refilling specific branch lines, and using an in-line pump or compressor to purge trapped air.
Each approach carries trade-offs in cost, complexity, and suitability depending on system layout and user skill.
Using an automatic air vent or vacuum breaker
Install an automatic air vent or vacuum breaker to let trapped air escape without manual bleeding.
These devices mount at high points on the hot water line or near the heater, releasing accumulated air automatically and preventing future locks.
Selection should match pipe size, pressure rating, and water chemistry.
Periodic inspection guarantees proper operation; replace corroded or leaking units promptly to maintain system efficiency.
Disconnecting and refilling specific branch lines
If an automatic air vent or vacuum breaker does not clear stubborn pockets of air, disconnecting and refilling individual branch lines offers a targeted alternative.
A plumber isolates the affected branch, drains it, then reconnects and slowly refills while opening downstream fixtures to purge trapped air.
Verify steady, uninterrupted flow and recheck connections for leaks before restoring normal system pressure and operation.
In-line pump or compressor-assisted purging
For persistent air locks that resist manual venting, technicians may employ an in-line pump or compressor to force air out of the line and restore continuous flow.
This method attaches to accessible shutoff points, pressurizes the cold or hot side briefly, and pushes trapped air toward fixtures or open drains.
Careful pressure control and isolation prevent damage and backflow during purging.
Pros and cons of each method
Effectiveness, speed, safety, and cost help differentiate the common approaches to clearing air locks—manual venting, fixture-by-fixture purging, and compressor- or pump-assisted purging—each offering distinct trade-offs in required tools, time, risk of damage, and suitability for different plumbing layouts.
| Method | Pros | Cons |
|---|---|---|
| Manual venting | Simple, low cost | Slow, awkward |
| Fixture purging | Targeted, safe | Time-consuming |
| Compressor/pump | Fast, thorough | Requires equipment |
Diagnosing Persistent or Recurrent Air Locks
When air locks recur, the likely causes include leaks, improper installation, or sustained low supply pressure that allows air to re-enter the system.
Inspection should target check valves, expansion tanks, and venting to confirm proper operation and sealing.
Additionally, sediment buildup or corrosion can produce symptoms similar to air locks and should be checked before assuming trapped air is the sole issue.
Causes of repeated air accumulation (leaks, improper installation, low pressure)
If air keeps appearing in a water heater despite proper venting, technicians should investigate a narrow set of likely causes: concealed leaks drawing in air, incorrect installation or component mismatch, and inadequate incoming water pressure that allows air to separate and accumulate.
Other contributors include intermittent pump cavitation, trapped pockets from improper piping slopes, and poorly sealed service fittings—each promoting repeated air ingress and retention.
How to inspect check valves, expansion tanks, and vents
Begin by visually and functionally inspecting each component—check valve, expansion tank, and vent—to quickly identify failures that allow air intrusion or retention.
Verify check valve orientation, operation, and external leaks.
Check expansion tank pressure, diaphragm integrity, and proper mounting.
Confirm vents are open, unobstructed, and pitched correctly to drain trapped air.
Replace or repair faulty parts promptly to prevent recurrence.
When sediment or corrosion mimics air lock symptoms
Although check valves, expansion tanks, and vents are common sources of air intrusion, persistent flow issues can sometimes stem from sediment buildup or corrosion that mimics air lock symptoms.
Sediment restricts passages; corrosion creates rough surfaces and partial blockages.
Recommend flushing the tank, inspecting inlet screens, and checking fittings for pitting.
If deposits recur, consider water treatment or tank replacement to resolve chronic flow loss.
Preventive Maintenance to Avoid Air Locks
Preventive maintenance reduces the likelihood of air locks by addressing common causes before they become problems.
Routine tasks include flushing and descaling the tank, inspecting and servicing the pressure relief valve and expansion tank, and properly bleeding lines after repairs or system changes.
Following a seasonal maintenance schedule with documented checks helps catch issues early and maintains reliable flow.
Regular flushing and descaling of the water heater
Regularly flushing and descaling a water heater removes sediment and mineral buildup that can trap air and disrupt flow, thereby reducing the likelihood of air locks.
Periodic tank flushing and chemical or mechanical descaling restore heat transfer and clear pockets where gas accumulates.
Recommended intervals depend on water hardness; inspections after treatment confirm improved flow and reduced gurgling or intermittent hot-water delivery.
Checking and maintaining pressure relief and expansion tanks
Inspect pressure relief valves and expansion tanks at least annually to verify they operate correctly and do not contribute to air pockets or pressure irregularities that can lead to air locks.
Check for leaks, corrosion, waterlogged tanks, and proper air charge in expansion tanks.
Replace faulty relief valves and service or replace tanks showing loss of air cushion to maintain stable system pressure.
Properly bleeding lines after repairs or system changes
After any repair or system modification, bleed the lines promptly to remove trapped air that can impede flow, cause noise, or create hot/cold spots.
Follow a sequence: shut off water heater, open highest hot faucet, then lower fixtures until steady flow appears.
Close faucets in reverse order, restore heater supply, and check for leaks.
Repeat until aeration is eliminated.
Seasonal checks and recommended maintenance schedule
Several simple seasonal checks and a concise maintenance schedule can prevent air locks and extend system reliability.
Recommended tasks focus on inspection, bleeding, and component care to minimize trapped air and failures.
- Inspect fittings, valves, and visible piping quarterly for leaks or corrosion.
- Flush tank and sediment removal annually.
- Exercise pressure/temperature relief and shutoff valves semiannually.
- Bleed high points after any service or cold-season startup.
Troubleshooting Checklist and Quick Remedies
A concise troubleshooting checklist helps identify air-lock symptoms and steps to follow during diagnosis.
It should separate quick homeowner fixes (bleeding lines, checking valves) from repairs that need a plumber.
Estimated costs and typical timeframes for each common repair complete the guide and set realistic expectations.
One-page checklist to follow during diagnosis
Begin the checklist with a clear sequence of diagnostic steps that isolate common causes of air locking—shut off power and water supply, verify pressure at the cold inlet, open a hot tap and observe flow and sputtering, inspect the relief valve and tank fittings for trapped air, and bleed the system using the appropriate vent or mixing valve.
- Confirm isolation and safety
- Check inlet pressure and flow
- Observe sputtering and noise
- Bleed vents and recheck system
Fast fixes for homeowners vs. fixes that require a plumber
After completing the isolation and bleeding checks, the guide separates quick homeowner remedies from issues that need a licensed plumber.
Homeowner tasks: rebleed faucets, tighten loose fittings, reset water heater pressure relief, and purge via a hose.
Plumber-required: persistent air after purging, failing check valves, damaged dip tubes, cross-connections, or complex manifold work.
Safety and permit concerns also demand professional service.
Cost and time estimates for common repairs
Estimate typical costs and times for common air-lock repairs to help prioritize responses and decide when to call a pro. Simple bleeding or valve tap: $0–$50, 10–30 minutes. Replacing a faulty mixing valve: $100–$250, 30–90 minutes. Tank flushing service: $75–$200, 30–60 minutes.
| Repair | Cost | Time |
|---|---|---|
| Bleed valve | $0–$50 | 10–30 min |
| Mixing valve | $100–$250 | 30–90 min |
| Flush service | $75–$200 | 30–60 min |
Signs You Need Professional Service
If basic fixes do not restore normal operation or if there are electrical, gas, or plumbing code implications, professional service is recommended to protect safety, compliance, and warranty coverage.
A qualified technician will perform a systematic inspection, diagnose issues beyond routine maintenance, and provide a clear repair plan with cost and timeline estimates.
Homeowners should ask about licensing, insurance, warranties on parts and labor, and whether permits will be obtained before work begins.
Safety, code, and warranty considerations
Several clear warning signs indicate that air-locking issues or related water-heater problems require a licensed technician rather than DIY intervention.
Safety, code, and warranty considerations include electrical or gas connections, pressure-relief valve handling, local plumbing codes, and manufacturer service requirements. Unauthorized repairs can void warranties and create hazards.
Homeowners should verify credentials, permits, and written warranty impact before proceeding.
What to expect from a professional inspection and repair
Expect a professional inspection to begin with a systematic assessment of symptoms and safety checks: the technician will look for uneven or no hot water, banging or gurgling noises, visible leaks, abnormal pressure readings, and signs of corrosion or sediment buildup.
The technician will also verify electrical/gas connections and the functioning of the temperature-pressure relief valve.
The report will note diagnostics, recommend repairs—flushing, valve replacement, pressure regulation—or parts and estimate time/cost.
Questions to ask your plumber before work begins
What should a homeowner ask before a plumber begins work?
The homeowner should request license and insurance verification, an itemized estimate, expected timeline, warranty details, diagnostic approach for air locks, parts and labor costs, and whether permits are required.
Also ask about experience with water heater systems, references, and cleanup procedures.
Clear communication guarantees informed consent and prevents hidden charges.
Useful Diagrams and Photos to Guide the Process
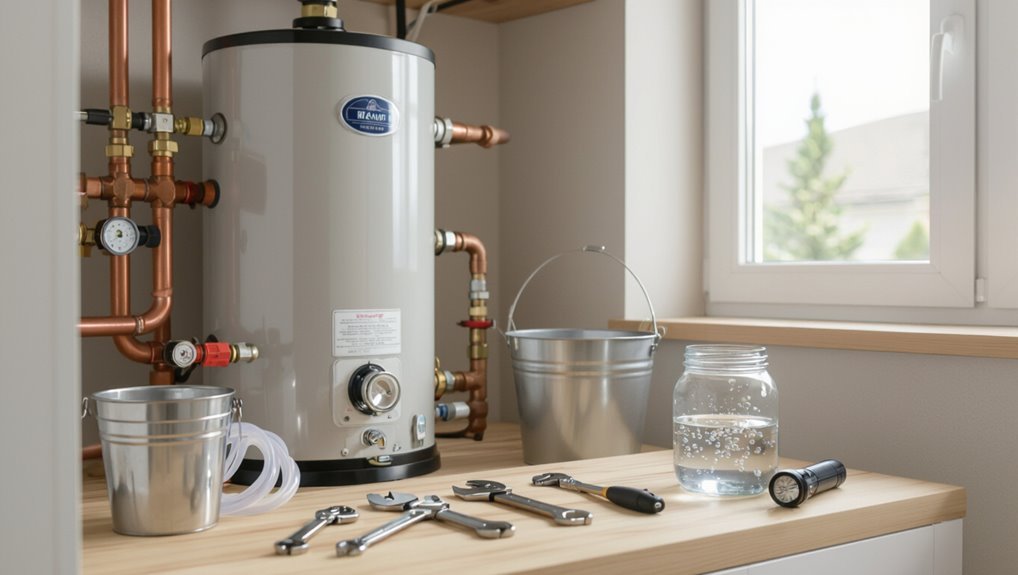
Clear, labeled diagrams and step-by-step photographs accelerate identification of the heater’s inlet, outlet, pressure-relief valve, and bleed points. This allows readers to match their own unit to the procedure and reduce the chance of error.
Include close-ups of fittings, arrows for flow direction, and annotated tools. Sequential images showing bleeding, valve operation, and safe drainage improve accuracy and confidence during troubleshooting.
Conclusion
In sum, when air locks impede hot water flow, following simple diagnostic and bleeding steps usually restores normal operation; tools, safety precautions, and occasional alternative methods support success. If problems persist, systematic troubleshooting and preventive maintenance help pinpoint causes before damage occurs. As the adage goes, “an ounce of prevention is worth a pound of cure,” so regular checks and timely fixes spare larger repairs and guarantee reliable hot water when it’s needed most.