How to Permanently Cap Off a Copper Water Pipe: Step-by-Step Guide to a Safe Seal
To permanently cap off a copper water pipe, start by shutting off and draining the line. Next, cut, deburr, and clean the pipe end. For pressurized lines, the best method is to use a soldered (sweat) copper cap: apply flux, heat the joint evenly, and feed in lead-free solder until sealed. Alternatively, you can use compression, threaded, or push-to-connect caps where suitable. After capping, test the joint under pressure and inspect for leaks. Always follow local codes, document your work, and consult a licensed plumber for complex situations to ensure proper procedures are followed.
How to Permanently Cap Off a Copper Water Pipe: Quick Overview and When to Do It
Permanent capping is recommended when a branch line is unused long-term, during demolition, or to isolate a section after repairs.
Decisions about hiring a professional hinge on access, soldering skill, and local code requirements versus simple push-fit or threaded cap options for competent DIYers.
The safest permanent methods are soldered caps for pressurized lines, brazed joints where higher strength is needed, and compression or flared fittings only where codes permit.
Situations that require permanent pipe capping
When a section of the water system is retired or repurposed, permanently capping a copper pipe prevents leaks, contamination, and unintended water flow.
Common situations requiring permanent pipe capping include removing fixtures, decommissioning supply branches, isolating abandoned extensions, addressing remodeling changes, and ending exterior spigots.
Guidance on how to permanently cap off a copper water pipe guarantees safe, code-compliant closure and long-term integrity.
When to hire a pro vs. DIY considerations
Although many copper pipe capping jobs are straightforward, the decision to hire a professional versus tackling it as a DIY depends on skill level, tools, local code requirements, and the job’s complexity.
Choose a pro if permits, hidden leaks, plumbing system alterations, or limited experience exist.
Opt for DIY when skills, proper tools, clear shutoff access, and local regulations allow safe, confident completion.
Quick summary of the safest permanent capping methods
Summarize the safest permanent capping options for copper water pipes, focusing on methods that provide long-term leak prevention and code compliance.
Preferred methods include soldered caps, compression caps with proper sleeves, and brazed joints for high-temperature systems.
Threaded adapters with tested NPT caps suit retrofit situations.
All installations should use approved materials, correct fittings, pressure-tested seals, and comply with local plumbing codes to guarantee permanent reliability.
Essential Safety Precautions Before You Begin
Before starting, the water supply must be shut off and system pressure relieved to prevent flooding.
The installer should confirm the line is copper and wear appropriate PPE while clearing and ventilating the work area.
Finally, applicable local codes, permits, and inspection requirements must be checked and followed.
Shutting off water supply and relieving pressure
Turn off the main supply valve and open a nearby faucet to relieve pressure before cutting or capping the pipe.
Confirm isolation by checking that water flow stops and pressure drops.
Drain residual water from the line and collect it with a bucket or rag.
Close the faucet after draining.
Use caution when handling tools on depressurized piping to prevent accidental reopening.
Identifying pipe type and verifying it’s copper
Because different metals require different tools and sealing methods, confirming that a line is copper is a critical safety step before cutting or capping.
Inspect color and surface—copper is reddish-brown, developing a greenish patina when aged.
Magnet testing helps: copper is non‑magnetic.
Check markings or stamping for “CU” or “COPPER.”
When uncertain, consult a professional to avoid improper tools or fittings.
Personal protective equipment and workspace preparation
Gather appropriate personal protective equipment and establish a safe, organized workspace before cutting or capping a copper water pipe.
Use gloves, eye protection, hearing protection for power tools, and a dust mask if soldering.
Clear the area of flammable materials, provide adequate lighting and ventilation, secure the pipe, and position tools within reach.
Keep a fire extinguisher and first aid kit nearby.
Local codes, permits, and building inspection requirements
After preparing protective equipment and a safe workspace, attention should shift to legal and regulatory requirements that govern plumbing work.
The homeowner or contractor must verify local codes, obtain necessary permits, and confirm whether a licensed plumber is required.
Schedule inspections where mandated, keep documentation of approvals, and follow inspector guidance to guarantee the capped pipe complies with safety, sanitation, and resale standards.
Tools and Materials Needed for Permanent Capping
The contractor lists the specific tools and materials required to create a secure, long-lasting cap on a copper water pipe. Included are cutting, cleaning, and joining tools along with options for permanent capping—soldered caps, compression fittings, epoxy solutions, and push-fit devices.
Recommended replacement parts and accessories are noted to guarantee a reliable repair and future access if needed.
- The right tools prevent leaks and costly rework.
- Choosing quality materials gives lasting confidence.
- Having spare fittings avoids frustrating delays.
Tools for cutting, cleaning, and soldering
Cutting, cleaning, and soldering a copper water pipe require a small set of specific tools chosen for accuracy and safety.
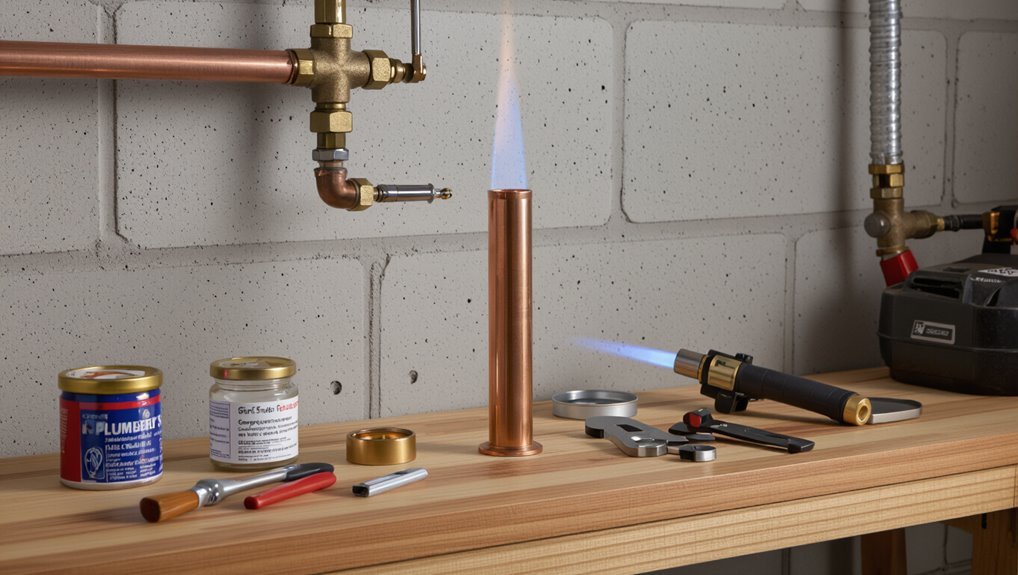
Essential implements include a tubing cutter or hacksaw for straight cuts, a deburring tool or reamer, wire brush or emery cloth for oxide removal, flux brush, propane or MAP gas torch with adjustable flame, heat shield or wet rag, and safety gear: gloves, goggles, and fire extinguisher.
Materials for different capping methods (caps, fittings, flux, solder, plumbing epoxy, compression caps, SharkBite)
A clear list of materials simplifies selecting the right approach for permanently capping a copper water pipe.
Common options include copper end caps and threaded fittings, flux and lead-free solder for sweat joints, plumbing epoxy for small repairs, compression caps, and push-to-connect fittings (e.g., SharkBite).
Choose materials rated for potable water and matching pipe diameter; verify compatibility with hot water and local codes.
Recommended replacement parts and accessories
Selecting the correct cap or fitting leads naturally to assembling the right tools and replacement parts for a permanent installation.
Recommended items include a quality copper cap or threaded plug, solder and flux or a compression/SharkBite cap, pipe cutter, emery cloth, torch or crimp tool, PTFE tape, replacement O-rings, pipe straps, leak detector spray, and heat shield or insulation for protected sealing.
Preparing the Pipe for a Permanent Cap
The technician first locates and exposes the section of copper pipe to be capped, ensuring clear access and shutoff.
The pipe is then cut square to the required length, with all edges deburred and the ends cleaned to bare metal for a reliable seal.
Finally, the fitting choice is confirmed after inspecting the cut end for corrosion or damage that could affect the cap’s suitability.
How to locate and access the target pipe section
Before capping, the exact section of copper pipe to be sealed must be located and exposed so the work area is safe, accessible, and free of obstructions; this requires tracing the water line from visible fixtures, identifying nearby shutoff valves, and removing any cabinetry, drywall, or insulation that conceals the target segment.
Confirm pipe material and orientation, mark the precise location, clear workspace, and verify water is isolated before proceeding.
Properly cutting the copper pipe to length
Measure and mark the pipe precisely, accounting for the cap’s insertion depth and any required clearance so the finished cap sits flush and allows room for nearby fittings or wall material.
Use a proper tubing cutter or fine-toothed saw, secure the pipe to prevent twisting, and cut squarely at the mark.
Remove any burrs and verify length before proceeding to the sealing step.
Deburring and cleaning pipe ends for a reliable seal
Remove burrs and contaminants immediately after cutting so the cap will seat cleanly and solder or adhesive can bond fully.
Use a deburring tool or round file to remove internal and external sharp edges, then wipe with a clean cloth.
For soldered joints, abrade the copper with emery cloth or a fine abrasive pad until bright.
Remove dust and oil with flux-compatible cleaner before capping.
Inspecting for corrosion or damage that affects capping choice
After deburring and cleaning, the pipe should be examined for corrosion, pitting, cracks, and thinning that will influence which capping method is appropriate.
Visible deterioration near the end may require cutting back to sound metal or using a soldered cap instead of a compression fitting.
Severe corrosion or hairline fractures call for pipe replacement.
Document findings and select a compatible cap and materials.
Method 1 Soldering (Sweat) a Copper Cap: Step-by-Step
Soldering is recommended when a permanent, leak-free connection is required and the installer is comfortable using a torch.
First, the cap is measured and test-fitted, then flux is applied and the fitting assembled for a clean joint.
The installer follows proper torch technique to heat the joint, applies solder to the heated seam, and allows the connection to cool before inspecting for a solid seal.
When soldering is the best option
When a permanent, leak-proof seal is required and the installer has access to a torch and basic soldering tools, sweating a copper cap is the preferred method because it creates a durable bond that withstands pressure and temperature changes.
It suits high-pressure mains, hot-water lines, and concealed joints where reliability matters.
It requires skill, clean surfaces, proper flux, and adherence to safety and code requirements.
Step 1: Measure and fit the cap
Measure the pipe and select a cap with a matching inner diameter so the fit is snug but not forced.
The technician cleans the pipe end, deburrs and lightly file-smooths the edge, and verifies straightness.
Test-fit the cap to guarantee full contact without gaps. If necessary, trim the pipe to achieve flush seating.
Confirm appropriate cap material and size before proceeding.
Step 2: Apply flux and assemble fitting
Prepare the joint by applying a thin, even layer of flux to the outside of the pipe end and the inside of the cap, ensuring full coverage where solder will flow.
Insert the pipe fully into the cap, rotate slightly to spread flux, and verify alignment.
Remove excess flux with a clean rag.
Secure the assembly in a vise or support to prevent movement before heating.
Step 4: Proper torch technique and heating guidelines
Position the torch so the flame targets the joint evenly, circling the cap and pipe to heat the metal uniformly rather than blasting one spot.
Maintain a neutral flame, keep about 2–3 inches distance, and move continuously to avoid overheating.
Heat until flux liquefies and metal reaches soldering temperature, watching nearby materials; use heat shields and ventilate the area for safety.
Step 5: Applying solder and cooling/inspection
Apply solder promptly once the flux has liquefied and the joint reaches proper temperature, touching the solder to the heated seam—not the flame—so it flows into the interface by capillary action.
After adequate fillet formation, remove heat and allow the joint to cool naturally; do not quench.
Inspect visually for continuous fillet and full coverage, then wipe residual flux and confirm no visible gaps or excess solder.
Common problems when soldering and how to avoid them
Once the joint has cooled and been inspected, attention should turn to common problems encountered during soldering and straightforward ways to prevent them.
Cold joints occur from insufficient heat—reheat evenly and apply solder when flux liquefies.
Excess solder indicates overheating or poor fit—trim and refit.
Flux residue causes corrosion—clean thoroughly.
Leaks often stem from dirty surfaces or inadequate flux; prep and inspect carefully.
Method 2 Using a Compression or Threaded Cap: Step-by-Step
Compression and threaded caps offer a quick, solder-free option for capping copper lines, especially for shutoffs, temporary caps, or when a torch is impractical.
The steps cover selecting the correct cap type and size, preparing the pipe, installing the fitting, and tightening to specified torque before pressure-testing for leaks.
A brief comparison notes that compression/threaded caps are faster and easier for many users but can be bulkier and less permanent than a properly soldered cap.
Suitable scenarios for compression/threaded caps
When a pipe end remains accessible and the supply will be turned back on at normal household pressure, a compression or threaded cap provides a reliable, nonpermanent seal.
These caps are appropriate for short- to medium-term shutdowns, stub-outs awaiting fixtures, or situations where soldering is impractical.
They suit temporary repairs, pressure-tested systems, rental property work, or DIY projects needing reversible closure without heat or solder.
Step 1: Selecting the right cap size and type
A correct cap begins with matching the pipe’s outer diameter and connection type to guarantee a leak-free fit.
The technician measures OD or reads stamped size, confirms if the run uses compression, male or female threaded fittings, and selects compatible materials (brass, chrome-plated brass, or stainless).
Choose pressure-rated caps and verify threading standard (NPT, BSP) before proceeding.
Step 2: Preparation and installation procedure
Begin by shutting off the water supply and draining the line to prevent leaks and pressure during work.
Clean the pipe end, remove burrs, and guarantee it is square.
Slide the compression nut and ferrule onto the pipe for compression caps, or apply pipe thread sealant to male threads for threaded caps.
Position cap, hand-start the nut or threads before final seating.
Step 3: Tightening, testing for leaks, and torque guidance
With the cap hand-started and properly aligned, tightening must be done in controlled increments while observing the seal.
Use a wrench to snug the nut or turn the cap, applying manufacturer-recommended torque if available—typically moderate, not excessive.
Restore water pressure briefly, inspect for drips, and re-tighten slightly if needed.
After confirming dryness, run a pressure or dye test for final verification.
Advantages and limitations compared with soldering
Choosing a compression or threaded cap instead of soldering offers faster installation and requires fewer specialized tools, making it suitable for quick repairs or DIYers without soldering equipment.
It provides reversible, serviceable seals and reduces fire risk.
Limitations include potential leaks if improperly tightened, dependence on quality fittings, and generally lower longevity and pressure ratings compared with a properly soldered joint.
Method 3 Push-to-Connect (SharkBite) Caps: Step-by-Step
When a push-to-connect cap is recommended, the technician should first clean and deburr the copper, mark the insertion depth, and insert the pipe straight into the fitting until it seats.
After installation, the connection must be pressure-tested and inspected for leaks to verify a secure seal.
The installer should follow manufacturer guidelines for expected durability, temperature and pressure limits, and any required periodic checks.
When push-fit is recommended
Many homeowners and plumbers turn to push-fit caps for capping copper water pipes in situations where speed, simplicity, and minimal tooling are priorities.
They are recommended for temporary or permanent caps on accessible straight runs, when soldering is impractical, in retrofit jobs, or where hot-work permits are restricted.
Use when pipe ends are clean, undamaged, and reachable for a reliable seal without specialized skills.
Step 1: Prep and insertion technique
Before inserting a push-to-connect cap, the copper pipe must be clean, straight, and cut square to guarantee a proper seal.
Deburr the inside and outside, remove oxidation with emery cloth, and wipe debris.
Mark insertion depth on the pipe.
Align the cap, push firmly until it seats against the stop, and give a slight twist to verify the grab ring engages without damaging the pipe.
Step 2: Pressure testing and verification
With the push-to-connect cap seated and the grab ring confirmed, the next step is to verify a leak-free seal under pressure.
Isolate the capped line, restore system pressure slowly, and observe for drops or audible leaks.
Monitor for at least five minutes, inspecting joints and cap.
Use a pressure gauge or soapy water for detection.
Depressurize before finalizing.
Durability expectations and manufacturer guidelines
Expectations for a push-to-connect cap’s lifespan should align with the manufacturer’s stated ratings and installation conditions.
Users should follow specified temperature, pressure, and media limits, compatible tubing, and proper insertion depth.
Routine inspection schedules and warranty terms must be observed.
Deviations, such as exposure to UV, corrosive chemicals, or improper installation, can void warranties and reduce longevity; document installation for claims.
Method 4 Epoxy or Chemical Sealing for Damaged Pipes
Epoxy and chemical sealants offer a temporary or permanent solution for capping copper pipes when damage is localized and the pipe remains structurally sound.
The discussion will cover proper surface preparation, step-by-step application and recommended curing times for common products.
It will also address expected long-term reliability and clear guidelines for when epoxy should not be used.
When epoxy sealing is appropriate
When is chemical sealing a suitable choice for capping a damaged copper water pipe?
It suits small, localized corrosion, pinholes, or hairline cracks where mechanical replacement is impractical.
Appropriate when access is limited, water flow can be stopped, and pressure is moderate.
Not recommended for extensive corrosion, large breaches, or structural failures; then full repair or replacement is required.
Step-by-step application and curing times
Begin by isolating the damaged section, shutting off downstream water, and draining the pipe to create a dry, clean surface for the chemical sealant.
Clean and abrade copper, apply primer if required, then mix epoxy per manufacturer directions.
Fill and smooth the repair, remove excess, and allow initial set.
Observe full cure time (typically 24–72 hours) before restoring pressure and inspecting for leaks.
Long-term reliability and when to avoid epoxy
Although epoxy coatings and chemical sealants can provide a quick, watertight repair for small pinholes and surface corrosion, their long-term reliability depends on pipe condition, water chemistry, and application quality.
They suit localized, non-structural defects but are unsuitable for extensive corrosion, active leaks, high-pressure lines, or buried/hidden damage.
Permanent repairs or replacement are recommended when integrity is compromised or regulatory codes prohibit chemical sealing.
How to Pressure-Test Your Capped Pipe
After capping a copper water pipe, the homeowner should perform a simple pressure test using either air with a gauge or a closed-water method to confirm a tight seal.
Measured pressure stability and absence of visible drips indicate success, while pressure loss or wetness requires locating the leak, reseating or replacing the cap, and retesting.
The cap should be redone if leaks persist or if repeated tests show pressure decline over the recommended holding period.
Methods for DIY pressure testing (air/water)
To verify a capped copper pipe holds under service conditions, perform a controlled pressure test using either water (hydrostatic) or compressed air (pneumatic).
For hydrostatic testing, fill the section, purge air, pressurize with a hand pump and gauge.
For pneumatic testing, use low-pressure compressed air with a regulator, gauge, and soap solution to detect leaks.
Monitor for a fixed interval.
Interpreting test results and steps if leaks are found
With the test complete, the results must be evaluated against the target pressure and the holding interval specified for the chosen method (hydrostatic or pneumatic).
If pressure holds, record readings and depressurize safely.
If pressure drops, inspect joints, fittings, and the cap for visible leaks, tighten or re-solder as needed, then retest.
Document findings, repairs performed, and final pass or fail for records.
When to repeat or redo the cap
When should a capped copper pipe be retested or recapped following an initial pressure check?
If pressure drops or visible seepage occurs, immediate recapping is required after locating and repairing the leak.
Retest after repairs and cure time for sealant or solder.
If the original cap shows deformation, corrosion, or was a temporary fitting, replace and pressure-test.
Document stable holding for recommended duration before finalizing.
Troubleshooting Common Problems
Common causes of a leaking cap include improper fitting, damaged threads, or inadequate soldering, each requiring specific fixes such as tightening, replacing the cap, or reflowing the joint.
Corrosion, pitting, and uneven pipe ends can prevent a reliable seal and often call for cleaning, cutting back to sound metal, or using a mechanical cap designed for irregular surfaces.
If a solder joint fails the pipe should be cleaned and re-soldered or the cap replaced with a compression or push-fit alternative.
Why caps leak and how to fix them
Leaks at capped copper pipe ends usually stem from a few predictable causes—improper fit, damaged or missing flux/ solder, degraded threads or seals, and residual pressure—and diagnosing which is present guides the fix.
Tightening or replacing misfit caps, reheating and properly soldering joints, renewing PTFE tape or rubber gaskets, and relieving trapped pressure typically stop leaks.
Verify repair under normal system pressure.
Addressing corrosion, pitting, or uneven pipe ends
Inspect the pipe end for visible corrosion, pitting, or an uneven cut before attempting to cap it.
Corroded or pitted metal must be cleaned to solid copper using a wire brush or emery cloth; deep pitting may require cutting back to sound metal.
Deburr and square the end with a tubing cutter.
Confirm the surface is smooth and dry so a cap or fitting can seat evenly.
Repairing a failed solder joint or replacing a cap
When a solder joint fails or an existing cap must be replaced, the affected area should be isolated, drained, and allowed to cool before work begins.
Cut back to sound copper past the defect, deburr and clean with emery cloth, then flux and either resolder with proper alloy or install a compression or push-fit cap.
Pressure-test the repair and inspect for leaks.
Comparing Permanent Capping Methods
The article now compares permanent capping methods by summarizing key factors that affect selection and performance. The table below highlights durability, cost, skill required, time to complete, and typical best use cases with code notes for quick reference. Readers can use this comparison to choose the method that fits their situation and compliance needs.
| Factor | Notes |
|---|---|
| Durability | Varies by material and joint type (solder, compression, brazed, welded) |
| Cost | Ranges from low (compression) to high (brazing/welding) |
| Skill required | From DIY-friendly to professional-only |
| Time to complete | Quick for mechanical caps, longer for permanent heat methods |
| Best use cases & code notes | Mechanical for temporary or accessible, solder/braze/weld for permanent installations where code permits |
Durability, cost, skill required, time to complete
Compare durability, cost, required skill, and time to complete across permanent capping options to determine the best fit for a given situation.
Soldered caps offer high durability, moderate cost, and intermediate skill with 30–60 minutes.
Compression or mechanical caps cost less, need low skill, finish in minutes but may be less permanent.
Brazed or welded joints are most durable, higher cost, advanced skill, and longer work time.
Best use cases and code compliance notes
Although each permanent capping method secures a copper line, suitability depends on expected pressure, longevity needs, accessibility, and local plumbing codes.
Threaded caps suit accessible, low-pressure shutdowns; soldered or brazed caps work for permanent, high-pressure lines when brazing is permitted.
Compression fittings fit confined spaces but may not meet code for long-term use.
Always verify local code, permit requirements, and inspector approval before finalizing.
When to Call a Licensed Plumber
If the capping involves complex plumbing systems, signs of hidden water damage, or uncertain shutoffs, a licensed plumber should be consulted.
The article will outline how to vet candidates, key questions to ask about licensing and experience, and what paperwork to request.
It will also summarize typical professional costs and common guarantees to expect.
Signs the job is beyond DIY (complex systems, hidden damage)
When multiple lines converge, the home relies on obsolete materials, or water damage appears behind walls, the situation often exceeds routine DIY capping and warrants a licensed plumber.
Signs include concealed corrosion, pressurized multi-branch manifolds, asbestos or lead-era components, recurrent leaks after temporary fixes, unclear shutoffs, and electrical or structural complications.
Professional assessment prevents missed damage and unsafe repairs.
How to vet a plumber and what questions to ask
Recognizing the limits of a DIY repair, homeowners should shift focus to selecting a qualified plumber rather than attempting complex fixes themselves.
Verify license and insurance, check local references and online reviews, confirm experience with copper pipe capping, request a written scope and timeline, ask about permits and code compliance, and obtain clear contact information.
Prioritize transparent communication and documented agreements.
Typical professional costs and guarantees
How much should a homeowner expect to pay for professional copper pipe capping, and what guarantees typically accompany the work?
Typical service ranges from $75–$300 for a simple cap; larger jobs or access challenges raise costs.
Licensed plumbers often provide written estimates, liability insurance, and 30–12-month workmanship warranties.
Permits and pressure testing add fees; always request itemized invoices and warranty terms before hiring.
Long-Term Maintenance and Inspection After Capping
Periodic inspections should confirm the cap remains secure, leak-free, and corrosion-free, with attention to nearby joints and insulation.
Consider how the capped line will influence future renovations or system changes, marking its location and noting whether it can be reactivated or must be removed.
Record the work with date-stamped photos, the method used, and any contractor details for the homeowner’s maintenance file.
Periodic checks and what to look for
Although the cap is designed to provide a long-term seal, regular inspections are necessary to confirm continued integrity and detect early signs of failure.
Periodically check for moisture, corrosion, greenish discoloration, mineral deposits, or staining around the joint.
Feel for warmth indicating leaks, listen for dripping, and verify surrounding drywall or flooring remains dry.
Address any abnormalities promptly to prevent damage.
How capping affects future renovations or system changes
When future renovations or system changes are planned, a capped copper pipe becomes a fixed point that must be documented and considered in design decisions.
Planners must locate caps, assess accessibility, and determine whether removal, rerouting, or reuse is feasible. Structural, code, and finish implications influence choices.
Periodic inspection records inform decisions, reducing surprises and costs during remodeling or system upgrades.
Documenting the work for homeowner records
Record the capping procedure clearly and concisely in the homeowner’s maintenance file, including the date, location (using a simple diagram or photo), type of cap and sealant, installer’s name and license number, and any pressure or leak test results.
Also note recommended inspection intervals, warranty details, materials purchased, and photographs before and after.
Keep digital and physical copies accessible for contractors and future renovations.
Safety and Legal Considerations Specific to Copper Pipe Capping
When capping copper pipe, attention must be paid to fire safety during any soldering performed in confined spaces, including ventilation, heat shields, and a fire watch.
Installations should comply with local plumbing codes and be prepared for common inspection issues such as accessible shutoffs, proper fittings, and leak-free joints.
Removed pipe and flux-contaminated materials require proper disposal or recycling according to local environmental regulations to avoid contamination and fines.
Fire safety when soldering in confined spaces
Any confined-space soldering task on copper water pipes demands strict fire precautions to prevent ignition of nearby combustibles and to protect occupants and property.
Portable fire watch, Class B/C extinguisher, and flame-resistant shielding should be in place.
Ventilation to clear fumes, flammable-material removal, and continuous monitoring during and after soldering minimize risks.
Trained personnel must supervise and document safety measures.
Plumbing code pitfalls and inspection tips
Understand common code pitfalls and inspection expectations before capping a copper water pipe to avoid failed inspections, rework, or liability.
Inspectors require approved materials, proper joint methods, accessible shutoffs, and pressure testing records.
Verify local permit and inspection requirements, backflow prevention, labeling of abandoned lines, and ventilation for soldering.
Document compliance and photograph completed work to expedite approval and reduce disputes.
Environmental disposal of removed pipe and materials
Although capping a copper water pipe is primarily a mechanical task, the disposal of removed pipe and associated materials carries distinct environmental, safety, and legal obligations that must be followed.
Contractors should segregate copper for recycling, contain and label any solder, flux, or asbestos-contaminated insulation, and follow local hazardous-waste rules.
Documentation of disposal and receipts guarantees compliance and reduces liability.
Quick Checklist: Steps to Permanently Cap a Copper Pipe
A concise checklist guides the technician through the essential stages of permanently capping a copper water pipe.
It covers pre-work safety and preparation, step-by-step installation options for common capping methods, and post-installation testing with required documentation.
Following a brief, ordered routine reduces risk and guarantees a verifiable, code-compliant result.
- Relief at knowing every safety step is covered
- Confidence in a clear, methodical installation path
- Assurance from documented, testable completion
Pre-work safety and prep items
Before beginning any work on a copper water pipe, gather the necessary safety gear and tools—gloves, eye protection, a pipe cutter or hacksaw, emery cloth, a torch or soldering kit if soldering is planned, flux, a properly sized cap or fitting, and a bucket or towels to catch residual water.
Confirm the shut-off location, depressurize the line, ventilate the area, and inspect for nearby electrical wiring or combustibles.
Installation checklist for each capping method
With safety gear on and the line depressurized, proceed to a concise checklist for permanently capping a copper pipe.
Inspect pipe, cut squarely, deburr and clean.
Select method: compression cap, soldered cap, or brazed/flare cap.
Fit components dry, flux if required, apply heat or tighten per manufacturer specs.
Cool, wipe flux, secure mechanical supports, and label capped line.
Post-installation testing and documentation
Verify integrity and document results immediately after capping to guarantee the repair is secure and traceable.
Inspect the joint for visible leaks, corrosion, and proper solder or compression seating.
Perform a pressure test per local codes, monitor for the required hold time, and record test pressure and duration.
Photograph the capped area, note materials used, date, installer, and retain records for future reference.
Conclusion
When a copper water pipe requires permanent capping, the homeowner is advised to proceed methodically and safely, remembering that “measure twice, cut once.” Proper preparation, correct materials, and attention to local codes reduce leaks and future problems. If uncertainty, corrosion, or complex fittings arise, a licensed plumber should be engaged. Regular inspections guarantee the seal holds over time, and careful documentation of the work preserves both safety and resale value.