How to Keep My Bath Water Hot Longer: 12 Simple Tricks That Work
To keep your bath water hot longer, you can implement several effective strategies. Start by closing windows and doors to minimize drafts, pre-warm the tub, and fill it with a larger volume of hot water. Cover the surface between soaks, and consider topping up with brief additions of hot water. Insulating the tub’s exterior, using a lid or thermal blanket, and employing an immersion heater or recirculating pump can also help maintain warmth during longer baths. By applying these simple tricks, you can enjoy a hotter bath for an extended period.
Why your bath water cools down quickly
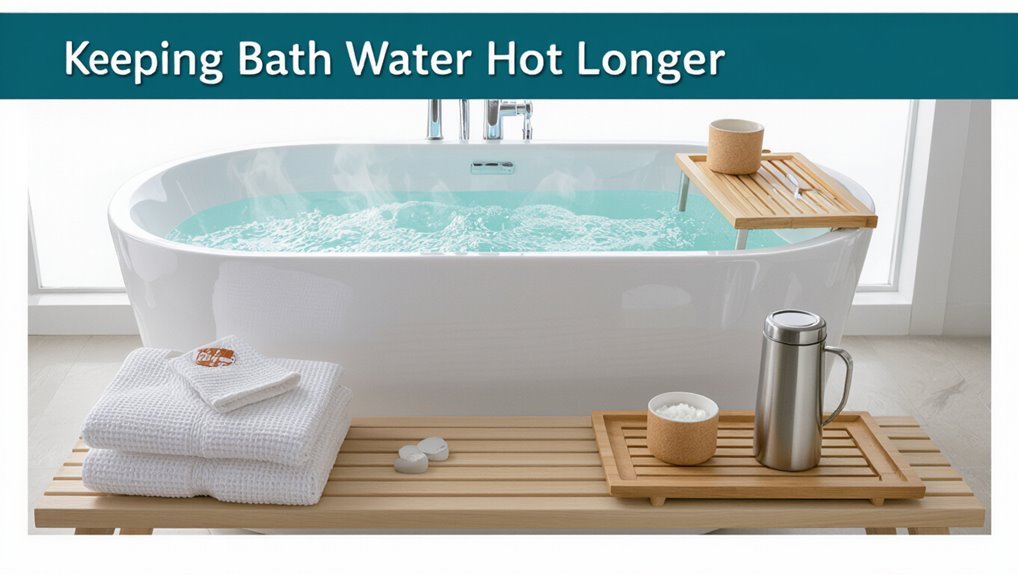
Heat escapes from a bath through conduction into the tub, convection with cooler air, radiation, and especially evaporation from the water surface.
The rate of cooling is influenced by tub material, room temperature, and water volume, with metal tubs, cold rooms, and small volumes losing heat faster.
Common mistakes such as leaving the bathroom door open, using too much exposed surface area, or adding cold water also accelerate cooling.
Heat loss mechanisms: conduction, convection, radiation, and evaporation
Although a bath may feel warm at first, several distinct mechanisms continually transfer thermal energy from the water to the surroundings, causing it to cool.
Conduction through the tub, convection as cooler air moves across the surface, infrared radiation to warmer objects, and evaporative cooling at the surface all reduce temperature.
Understanding these processes helps frame how to keep my bath water hot effectively.
Factors that affect temperature retention: tub material, room temperature, water volume
Because several physical properties and environmental conditions determine how quickly a bath loses warmth, the choice of tub material, the ambient room temperature, and the water volume each play a distinct role in temperature retention.
Metal tubs conduct heat away faster than acrylic or insulated models. Cooler rooms increase convective losses.
Larger volumes cool more slowly per unit mass, maintaining warmth longer.
Common mistakes that speed cooling
Overlooking simple habits and setup choices often causes a bath to cool faster than expected.
Leaving drafts, using small water volumes, and filling a cold tub all hasten heat loss.
Bathing in a cold room, exposing water to air currents, and failing to insulate the tub rim or cover the water surface let warmth escape.
Avoid these common mistakes to retain heat longer.
Quick actions to keep bath water hot during a single soak
Before running the bath, the reader is advised to close bathroom vents, preheat towels, and guarantee the tap and plug are ready.
While filling the tub, they should run a higher temperature briefly and minimize splashing to reduce initial heat loss.
During the soak, simple adjustments—covering exposed water with a towel, limiting cool airflow, and topping up with brief hot bursts—help maintain temperature.
Immediate steps before running the bath
A few straightforward checks and small adjustments taken immediately before filling the tub make a noticeable difference in how long the water stays hot:
Close windows and vents, pre-warm the tub with hot shower water, run hot water briefly through the faucet to clear cold lines, guarantee the drain plug seals properly, and have a towel or lid nearby to cover exposed surface quickly once filling begins.
Actions to take while filling the tub
Seal the tub and limit heat loss while it fills: keep the drain plug fully seated, close the bathroom door and any nearby vents, and direct the hottest available water toward the center of the tub to minimize contact with cold surfaces.
Reduce cold inflow by pre-warming fixtures briefly, add a small volume of very hot water last, and avoid splashing against chilly walls or rims.
Simple adjustments to maintain temperature during the soak
Once the tub is filled and initial heat loss minimized, small in-soak measures preserve warmth without interrupting relaxation.
A draft stopper or rolled towel across the overflow reduces cooling. Cover exposed water with a lightweight floating cover or bath blanket. Limit splashing and stay centered.
Add brief bursts of hot water if needed, and keep the bathroom door closed to maintain ambient temperature.
12 Practical tricks to keep bath water hot longer
The section lists twelve compact, practical tricks that extend warmth without gadgets or fuss.
Examples include simple preparations and small interventions that reduce heat loss and make top-ups efficient, such as:
- Preheat the tub surface
- Fill with the hottest comfortable water and mix quickly
- Use a tub cover or lid while filling and between soaks
- Insulate the tub with towels or a blanket around the exterior
Each tip is actionable and designed to be combined for longer-lasting hot baths.
Preheat the tub surface
Warming the tub surface before running a bath reduces heat loss from water to the cold porcelain or acrylic, so a bath stays hotter longer.
Simple methods include pouring a few gallons of hot water over the empty tub or using a warmed towel to preheat the basin.
This minimizes initial temperature drop, prolonging comfort without altering water temperature or requiring insulation modifications.
Fill with the hottest comfortable water and mix quickly
Although starting with water at the highest tolerable temperature may seem obvious, doing so and stirring it briskly prevents rapid cooling and uneven pockets of chill.
Filling quickly minimizes heat loss through prolonged faucet exposure. Agitating the water distributes temperature evenly, reduces surface temperature gradients, and slows convective heat escape.
Combine with insulating measures later for best retention without risking scalding.
Use a tub cover or lid while filling and between soaks
After stirring and filling, covering the tub while it fills and between soaks preserves heat by trapping trapped warm air and reducing evaporation.
A fitted tub cover, board, or tightly draped towel minimizes convective and evaporative losses. Covers are especially useful during breaks, keeping plumbing and bath additives warmer and reducing reheating needs.
Remove cover carefully to avoid splashes and condensation.
Add a smaller top-up of hot water mid-soak
A small mid-soak top-up of hot water can noticeably extend bath temperature without refilling the tub.
A brief pour of near-boiling water mixed with existing water raises average temperature efficiently; aim for a modest volume to avoid overflow and sudden scalding.
Test by hand before returning, and add slowly along the tub edge to reduce turbulence and preserve warmth for the remainder of the soak.
Insulate the tub with towels or a blanket around the exterior
Several layers of towels or a folded blanket wrapped around the tub’s exterior reduce heat loss by adding an insulating barrier between the warm water and cooler room air.
Secure covers with clips or string, focusing on exposed sides and the base. This simple, low-cost measure slows conduction and convective cooling, requires no special materials, and can extend soak warmth without altering water or heating systems.
Use a thermal bath mat or foam liner inside the tub
Place a thin thermal bath mat or closed-cell foam liner directly on the water’s surface to reduce heat loss from evaporation and convection.
It forms a low-profile barrier that limits air contact, slows conductive cooling, and fits around the bather.
Choose buoyant, waterproof materials that resist mildew, clean easily, and trim to avoid interference with drains or overflow.
Run a small stream of hot water to offset cooling (recirculation)
Run a thin stream of hot water into the bath to counteract heat lost from the surface and pipes.
A gentle trickle maintains temperature by replacing cooled layer without overflowing.
Monitor flow to conserve water and avoid scalding; aim for just enough to keep the bath comfortable.
Use a nearby faucet or handheld shower at low flow, stopping periodically to reassess temperature.
Close bathroom doors and vents; warm the room first
Comfort helps retain bath heat: closing the bathroom door and sealing vents reduces drafts that strip warmth from the water and surrounding air.
Pre-warming the room with a space heater or heated towel rail raises ambient temperature, slowing heat loss.
Minimizing openings and cold surfaces around the tub maintains a steadier air temperature, so the bath stays comfortably warm for longer without altering water volume.
Use a higher-volume bath to reduce surface-area-to-volume ratio
After sealing the room and raising the ambient temperature, attention can shift to the bath itself: using more water reduces the proportion of heat lost through the surface by lowering the surface-area-to-volume ratio.
Filling the tub deeper keeps heat distributed over a larger volume, slowing cooling. This method requires slightly longer fill time and more hot water but markedly extends soak warmth without additives.
Add bath salts or oils that slightly slow cooling
Although additives cannot replace proper insulation or volume, certain bath salts and oils can modestly slow cooling by altering surface properties and reducing evaporation.
Epsom or sea salts slightly increase water density and thermal mass; lightweight bath oils form a thin surface film that limits heat loss from evaporation.
Use small, skin-safe amounts to avoid slippery tubs and maintain water quality; avoid excessive concentrations.
Install or use a thermostatic mixing valve for steady temperature
While bath salts or oils can modestly reduce evaporative cooling at the surface, longer-lasting temperature control is better achieved through plumbing adjustments: installing a thermostatic mixing valve (TMV) maintains a steady outlet temperature by blending hot and cold water automatically.
A TMV prevents sudden scalding or chilling from supply fluctuations, preserves desired soak temperature, and reduces the need for manual taps adjustments during a bath.
Consider an immersion heater or inline water heater for long baths
Install an immersion heater or an inline water heater to keep bath water warm during extended soaks.
These devices maintain or boost water temperature without reheating the whole tank. Immersion heaters sit in the tub or vessel; inline units heat incoming water on demand.
Both require proper electrical/plumbing installation, thermostatic control, and safety features to prevent scalding and electrical hazards.
Choose certified models.
Choosing the best methods for your situation
Readers should weigh convenience against equipment needs, choosing quick fixes when ease matters and more involved solutions when performance is a priority.
Renters may favor nonpermanent, low-cost tactics while homeowners can consider permanent upgrades.
Cost considerations should separate budget-friendly short-term measures from investments aimed to deliver long-term heat retention.
When you should prioritize convenience over equipment
When time, budget, or physical limitations make extensive upgrades impractical, prioritizing convenient tactics over new equipment delivers the fastest and most accessible gains in bath water retention.
Simple actions—preheating the room, using a fitted cover, adding a small insulated liner, timing showers, and topping up with hot water—offer measurable results without installation.
Choose methods matching lifestyle and effort capacity.
Solutions for renters vs. homeowners
Because ownership affects what changes are feasible, solutions should be tailored to whether one rents or owns:
Renters benefit most from non-permanent, low-cost tactics—like insulated tub covers, draft-reducing curtains, and portable room heaters—while homeowners can justify permanent upgrades such as better insulation, dual-flush water-heater settings, or a dedicated hot-water recirculation system.
Renters should prioritize reversible measures; homeowners may pursue plumbing or insulation work.
Budget-friendly vs. long-term investment options
Although short-term fixes can produce immediate warmth, selecting between budget-friendly tactics and long-term investments depends on frequency of use, building permissions, and available funds.
Renters may prefer inexpensive options—insulating covers, draft-proofing, or timed heating—while homeowners might invest in better insulation, high-efficiency water heaters, or heated tubs.
Evaluate cost, expected lifespan, energy savings, and disruption to choose the most practical approach.
Tools, products, and upgrades that help retain heat
A range of tools and upgrades can noticeably slow heat loss from a filled tub.
Practical options include:
- insulating tub covers and thermal blankets
- portable immersion heaters and recirculating pumps
- bath liners, foam inserts, and insulating mats
- smart thermostats, mixing valves, and bathroom heaters
Each choice has trade-offs in cost, convenience, and safety that should guide selection.
Insulating tub covers and thermal blankets
Many bath owners extend soak time by adding insulating tub covers or thermal blankets, which reduce heat loss through the water surface and open tub edges.
Lightweight insulated covers, fitted foam tops, and floating thermal blankets trap warmth, cut evaporation, and lower reheating frequency.
Choose mildew-resistant, quick-dry materials sized to the tub, and remove covers briefly to stir or check water temperature safely.
Portable immersion heaters and recirculating pumps
Extend heat with targeted equipment: portable immersion heaters and recirculating pumps provide rapid, localized reheating and continuous temperature maintenance without relying solely on the tub’s main heater.
Immersion units quickly boost water temperature; low-power models suit safety-conscious use.
Recirculating pumps move water through inline heaters or heat exchangers to sustain warmth uniformly.
Both require proper electrical safety, GFCI protection, and careful monitoring for efficient, reliable performance.
Bath liners, foam inserts, and insulating mats
Install bath liners, foam inserts, or insulating mats to reduce heat loss at the water–air interface and through the tub shell.
These products add a thermal barrier, slowing conductive and convective cooling. Choose materials rated for water exposure and low thermal conductivity.
Fit liners snugly, trim foam to avoid gaps, and use non-slip adhesive if needed.
Maintenance is minimal: rinse and dry after use.
Smart thermostats, mixing valves, and bathroom heaters
A few targeted upgrades—smart thermostats, thermostatic mixing valves, and dedicated bathroom heaters—can markedly reduce heat loss and keep bath water at a comfortable temperature longer by optimizing room and supply temperatures.
Smart thermostats learn schedules and reduce HVAC cycling. Mixing valves maintain safe, steady delivery while minimizing cold-water intrusion.
Wall-mounted or ceiling heaters provide immediate ambient warmth, lowering convective and evaporative cooling from the tub.
Safety considerations and best practices
Attention to safety complements strategies for retaining bath heat: temperature limits and anti-scald devices reduce burn risk while insulation and covers preserve warmth.
Electrical precautions are essential when using immersion heaters or heated covers, including inspected cords, ground-fault protection, and strict dry-area placement.
Adequate ventilation prevents excess condensation and mold growth that can follow longer, hotter baths.
Preventing scalding while keeping water hot
Balance safety and comfort by limiting maximum faucet temperature and using thermostatic mixing valves or anti-scald devices that cap outlet temperature.
Regularly test water with a reliable thermometer and set household hot water heater to a safe maximum (typically 120°F/49°C).
Supervise children and elderly, install grab bars, and educate bathers on gradual entry to prevent sudden exposure to dangerously hot water.
Electrical safety with immersion devices
After addressing temperature controls and anti-scald measures, attention shifts to electrical risks posed by immersion devices used to warm bath water.
Users should select certified, waterproof heaters with grounded plugs, inspect cords for damage, and never leave devices unattended.
Devices must remain outside reach while powered, be unplugged before removal, and be used per manufacturer instructions to prevent shocks, short circuits, and fire hazards.
Proper ventilation to avoid condensation and mold
While warm bath water improves comfort, inadequate ventilation allows moisture to accumulate on surfaces and in wall cavities, creating conditions that promote condensation and mold growth.
Proper ventilation—exhaust fans, open windows, ceiling vents—reduces humidity, prevents structural damage, and protects health.
Guarantee fans vent outdoors, run them during and after bathing, clean filters regularly, and consider a humidity-controlled timer or dehumidifier for persistent dampness.
How to measure effectiveness and track improvements
The effectiveness of each tactic can be quantified by tracking simple metrics—temperature drop per 10 minutes and comfort duration—and by running repeatable test procedures. A short example comparison table helps visualize typical results and set improvement targets:
| Tactic | Expected result |
|---|---|
| Insulating lid | Slower temp drop (~1–2°C/10 min) |
| Hot water top-up | Extended comfort duration (10–20 min) |
| Preheated room | Moderate reduction in heat loss |
| Bubble bath layer | Small improvement in surface cooling |
Consistent recording of these metrics before and after changes enables clear assessment of what actually improves bath warmth.
Metrics to track: temperature drop per 10 minutes, comfort duration
How should effectiveness be measured when trying to keep bath water hot longer?
Track temperature drop per 10 minutes using a reliable thermometer, recording baseline and after interventions.
Also record comfort duration: time until water feels uncomfortably cool to the user.
Log conditions (room temp, cover used) to compare trials.
Use consistent intervals and criteria for objective, repeatable measurements.
Simple test procedures to compare methods
Having established which metrics to track (temperature drop per 10 minutes and user comfort duration) and the need to log conditions, simple test procedures can be defined to compare methods reliably.
Use consistent starting temperature, identical water volume, and fixed ambient conditions.
Apply one tactic per trial, record temperatures at set intervals, note subjective comfort, repeat multiple times, and calculate average performance and variance.
Example comparison table of common tactics and expected results
A concise comparison table lists common tactics (insulation wrap, lid/cover, pre-warmed tub surface, reduced water depth, and heated pad) alongside measurable outcomes—temperature drop per 10 minutes, estimated comfortable soak duration, cost, and ease of implementation—so readers can quickly assess trade-offs. The table below summarizes typical results for quick decision-making.
| Tactic | Expected result |
|---|---|
| Insulation wrap | -2°C/10min, +20–30min |
| Lid/cover | -1°C/10min, +25–35min |
| Pre-warmed surface | -1.5°C/10min, +15–25min |
| Reduced depth | -2.5°C/10min, +10–20min |
| Heated pad | -0.5°C/10min, +30–45min |
Troubleshooting common problems
When baths cool quickly despite precautions, a brief diagnosis checklist helps isolate causes such as inadequate insulation, drafts, or evaporative heat loss.
Uneven temperature or hot spots often point to mixing valve issues, poor water circulation, or localized heat sources and can usually be corrected with minor adjustments.
Persistent problems that suggest plumbing faults or insufficient water heater capacity should prompt inspection of pipes, valves, and heater sizing.
Bath still cools quickly despite precautions diagnosis checklist
If a bath still cools quickly despite following the usual steps to retain heat, a short diagnostic checklist helps pinpoint the cause:
Check room temperature and drafts, inspect insulation of walls, floor and tub surround, verify lid or cover use, confirm hot water heater output and plumbing layout, assess bathwater volume versus tub size, rule out active ventilation pulling warm air away, and note timing between fill and soak.
Uneven temperature or hot spots causes and fixes
Although uneven temperature or hot spots often feel like a plumbing mystery, they usually stem from identifiable causes: uneven mixing of incoming hot and cold water, localized heat loss from thin tub material, or residual hot pockets from recent tap use.
Solutions include gently stirring water to blend temperatures, insulating the tub exterior or adding a liner, and waiting briefly after heavy faucet use before filling to equalize temperatures.
Issues with plumbing or water heater capacity
Because a bathtub’s ability to stay warm depends heavily on the supply system, issues with plumbing or inadequate water heater capacity are common causes of rapidly cooling baths.
Inspect for undersized heaters, excessive pipe length, poor insulation, or cross-connections that mix cold water.
Consider increasing tank size, adding a booster, insulating hot lines, or hiring a plumber to locate leaks and correct valve or routing problems.
Practical routines and timing tips for consistently warmer baths
Before filling the tub, the bathroom should be warmed and towels, lids, or insulating covers prepared to reduce heat loss.
A clear sequence—preheat the room, run hot water to the desired temperature while minimizing exposure, then cover and soak—keeps water warmer longer.
Regular maintenance of seals, shower curtains, and heating elements guarantees these routines remain effective over time.
Preparing the bathroom and bath in advance
A few simple pre-bath steps particularly extend water temperature by reducing heat loss and streamlining workflow: warming the room with a heater or hot shower, preheating the tub surface with hot water, closing vents and doors to limit drafts, and timing the run of the tap so the bath is filled within a short window before entering.
Prepare towels, robes, and any accessories nearby, set thermostat modestly, and clear clutter.
Best sequence for filling, preheating, and soaking
When aiming for a consistently warm soak, follow a tight, repeatable sequence: preheat the tub surface briefly with hot water, close doors and vents to trap heat, then fill the bath with a strong flow of the desired temperature so it reaches target level quickly, and step in within a few minutes to minimize surface cooling.
Time filling to allow immediate immersion and reduce heat loss.
Maintenance tips to keep methods effective over time
Establish simple, repeatable maintenance habits to keep bath-warming methods reliable: regularly descale fixtures and showerheads monthly, inspect and tighten any leaky taps or loose fittings, and periodically test the hot-water heater temperature and pressure relief valve (every 3–6 months) to verify steady delivery.
Schedule towel and draft-blocker inspections seasonally, replace worn seals and insulation annually, and log maintenance dates to confirm consistent warmth and performance.
Conclusion
Keeping bath water warm relies on slowing heat loss and using smart timing. For example, a busy parent added a snug bath lid and started running hot water five minutes before bedtime; their child’s tubs stayed comfortably warm through storytime, reducing reheats and saving energy. By combining insulation, shorter exposure to cold air, and modest temperature boosts—chosen to fit one’s routine—anyone can enjoy longer, safer, and more efficient baths with minimal effort.