How to Add Jets to a Bathtub: a Step-By-Step Guide to Converting Your Tub Into a Spa
Converting your bathtub into a jetted spa is a rewarding project that enhances relaxation and enjoyment. To achieve this, you will need to add jets, a pump, plumbing, and controls that are compatible with your tub’s shape and material. Start by inspecting the structure and electrical capacity to ensure safety and functionality. Next, choose a suitable retrofit kit or design a custom installation. The process involves cutting and sealing openings for jets, mounting the pump with vibration isolation, wiring a GFCI circuit, and pressure-testing the plumbing. Regular maintenance and adherence to building codes will ensure your spa lasts for years. Continue reading for detailed step-by-step instructions, necessary tools, estimated costs, and troubleshooting tips.
What Adding Jets to a Bathtub Involves and Who Should Consider It
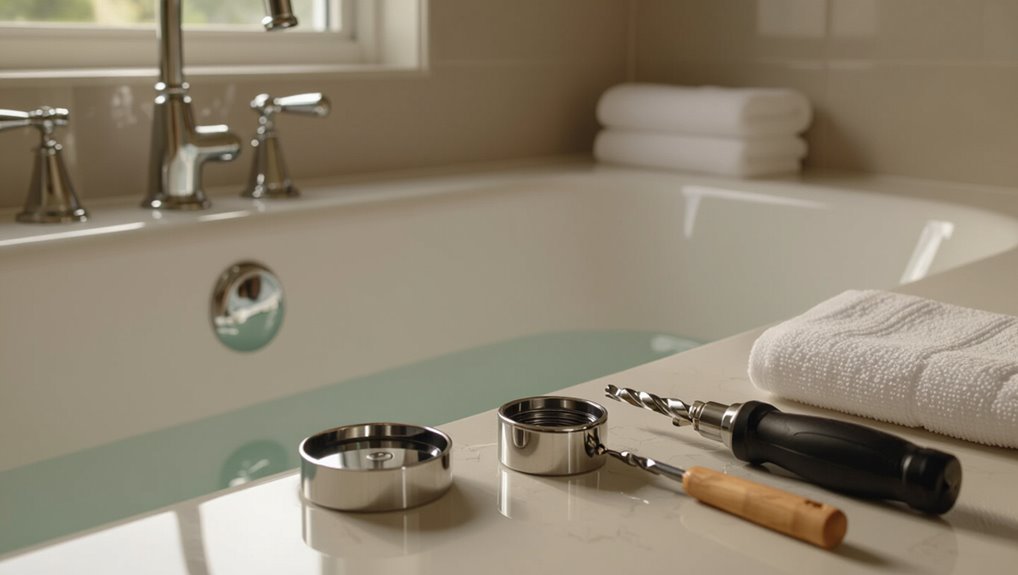
Converting a standard tub to a jetted spa typically requires installing pumps, jets, plumbing lines, and a control system, with choices varying by conversion kit or custom retrofit.
The upgrade can improve hydrotherapy, relaxation, and home value, but suitability depends on tub material, existing space, and structural or electrical constraints.
Homeowners with solid acrylic or cast-iron tubs and basic plumbing experience may attempt simple kits, while complex layouts, weakened surrounds, or electrical upgrades usually warrant a professional.
Overview of tub-jet conversions
Many homeowners weigh the benefits of adding jets to a bathtub to create a whirlpool or air-jet system that enhances relaxation and hydrotherapy.
The process typically involves installing mechanical jet fittings, a circulation pump or air blower, piping, a control system, and sometimes electrical upgrades or structural modifications.
A clear plan covers tub compatibility, budget, DIY versus professional installation, required permits, and maintenance when learning how to add jets to a bathtub.
Benefits of converting a standard tub into a jetted spa
After weighing compatibility, budget, and installation logistics, homeowners can consider the specific advantages of turning a standard tub into a jetted spa.
Benefits include targeted hydrotherapy for muscle relief, improved circulation, and enhanced relaxation. Added home value and aesthetic appeal may appeal to buyers.
Energy-efficient pumps and adjustable jets provide customizable comfort, while routine maintenance keeps performance reliable and longevity maximized.
When to hire a professional vs. DIY suitability
When should a homeowner tackle a jetted-tub install and when is a pro required?
Homeowners comfortable with basic plumbing, electrical knowledge, and moderate carpentry may handle kits and retrofit jobs.
Hire a professional for complex plumbing reroutes, electrical panel upgrades, structural modifications, or warranty-sensitive manufacturer installations.
Prioritize safety, code compliance, and experience when risk or skill gaps exceed personal capabilities.
Common limitations by tub type and bathroom layout
Although adding jets can transform a standard tub into a spa-like fixture, the feasibility depends heavily on tub construction and bathroom layout:
Acrylic drop-in and alcove tubs are often retrofit-friendly if there is crawlspace or access panels, while cast-iron, freestanding, or integral tub-shower units frequently present structural, access, or mounting constraints that complicate pump placement, plumbing runs, and sealing.
Tight bathrooms limit equipment and venting routes.
Quick Checklist: Tools, Materials, and Skills Needed
A concise checklist helps determine whether the project is feasible and what will be required.
It should list required tools and equipment, the specific parts and materials for each conversion method, and the basic plumbing and electrical skills needed to complete the work.
The checklist must also note relevant permits, code requirements, and essential safety precautions.
Required tools and equipment
Installing bathtub jets requires a precise set of tools, materials, and basic skills to guarantee a safe, watertight, and code-compliant result.
Essential items include appropriate hand and power tools, sealing supplies, electrical testing gear, and access equipment.
Recommended checklist:
- Drill, hole saws, wrenches
- Plumbers’ silicone, thread sealant
- Multimeter, GFCI tester
- Step ladder, work light
Parts and materials for different conversion methods
Having the right tools and basic skills established, the next step is to outline the specific parts and materials required for each common conversion method—air jets, whirlpool (water) jets, and retrofit external systems.
Essential items include jet assemblies, pumps or blowers, mounting hardware, seals, and control switches.
Typical checklist:
- Jets and fittings
- Pump/blower unit
- Hoses, clamps, seals
- Electrical/control components
Basic plumbing and electrical skills checklist
Basic competency in plumbing and electrical tasks is essential before attempting any bathtub-jet conversion.
This checklist summarizes the tools, materials, and practical skills required to perform safe, code-compliant work and to diagnose common issues.
Required tools: wrenches, tubing cutter, multimeter, drill, sealant gun.
Materials: fittings, flexible hoses, GFCI device, conduit.
Skills: soldering, pipe fitting, basic circuit wiring, leak testing, troubleshooting.
Permits, codes, and safety considerations
Because adding jets alters plumbing and electrical systems, a quick checklist of permits, applicable codes, and safety measures is essential before work begins.
Verify local building and electrical permits, consult plumbing and electrical codes, guarantee GFCI protection, confirm ventilation and access panels, schedule required inspections, hire licensed contractors when needed, document approvals, and follow manufacturer safety and installation guidelines to avoid violations and hazards.
Choosing the Right Jet System for Your Tub
Choosing the right jet system requires comparing options such as rim-driven, retrofit air/whirlpool, and modular units to match desired features and installation constraints.
Key considerations include pump power, jet count and placement, control type, and whether an inline heater is needed, plus sizing the pump and jets to the tub’s water volume.
Electrical requirements, including proper circuit sizing and GFCI protection, must be confirmed before purchase.
Types of jet systems (rim-driven, retrofit air/whirlpool, modular)
Consider the range of jet systems available—rim-driven, retrofit air/whirlpool, and modular—each designed for different tub configurations, installation complexity, and massage preferences.
- Rim-driven: discreet jets integrated into the tub edge for minimal alteration.
- Retrofit air: simpler, blower-driven bubbles; lower cost, gentler sensation.
- Whirlpool: pump-powered hydromassage with stronger flow.
- Modular: customizable panels and placements for targeted therapy.
Comparing features: pump power, number of jets, controls, heater
When selecting a jet system, buyers should weigh pump power, jet count, control options, and heating carefully, since each factor directly affects performance, comfort, and maintenance. Consider balance: stronger pumps increase intensity and noise; more jets enhance coverage but need maintenance; advanced controls add convenience; heaters extend soak time.
| Feature | Benefit | Trade-off |
|---|---|---|
| Pump power | Intensity | Noise/energy |
| Jet count | Coverage | Cleaning |
| Controls/heater | Comfort | Complexity |
Sizing the pump and jets for your tub volume
Because tub volume determines the water mass the jets must move, matching pump output and jet count to that volume guarantees effective circulation and pressure without overtaxing the system.
Calculate tub volume, then select a pump flow rate (GPM) that achieves desired turnover and jet velocity.
Balance larger jets with higher GPM or increase jet quantity for even distribution; avoid undersized pumps.
Electrical requirements and GFCI protection
Verify the jet system’s electrical design meets local codes and the tub’s power needs: most tubs require a dedicated circuit, appropriate voltage (typically 120V for small systems or 240V for larger pumps/heaters), correctly sized wire and breaker, and a GFCI-protected disconnect to prevent shock hazards.
Install GFCI protection at the circuit or subpanel, guarantee grounding, use waterproof fixtures, and have a licensed electrician inspect and sign off.
Preparing Your Bathroom and Tub for Installation
Before installing jets, the condition of the tub and the strength of its supporting structure should be inspected to guarantee they can handle new fixtures.
Exact jet locations must be measured and marked, and water and power sources turned off and isolated for safety.
Any tub surround that obstructs access should be removed or modified to permit installation.
Inspecting tub condition and structural support
A visual and tactile inspection of the bathtub and surrounding structure determines whether the installation of jets is feasible and safe.
Check for cracks, flexing, soft spots, water damage, mold, and adhesive failures.
Verify flange and rim integrity, subfloor stability, and accessible crawlspace or basement supports.
Assess weight capacity for added components and confirm drainage and overflow conditions are sound.
Measuring and marking jet locations
Measure twice and mark once: precise jet placement begins with mapping out the tub surface and surrounding clearances, noting ergonomics, pump reach, and underlying structure.
Templates or cardboard mockups help visualize positions relative to seating, armrests, and drain.
Verify symmetry, maintain required spacing from edges and reinforcement areas, and record measurements.
Label each location for drill guide alignment and future reference.
Shutting off and isolating water and power
Shut off all relevant water supplies and electrical sources to eliminate risk during installation: close the tub’s local shutoff valves or the home’s main water supply if local valves are unavailable, and switch off power at the bathroom’s circuit breaker, labeling the breaker to prevent accidental reactivation.
Verify isolation with a meter and by opening a faucet, drain remaining water from lines, and tag valves and breaker for safety.
Removing or modifying the tub surround if needed
With water and power confirmed isolated, attention turns to the tub surround: determining whether it must be removed or altered to fit jet plumbing and the pump.
Inspect framing, access panels, and clearances. Remove fragile finishes carefully; salvage waterproof backer where possible.
Cut minimal openings for piping and electrical access, reinforcing edges and sealing joints.
Preserve tile or replace with water-resistant materials as needed.
Step-by-Step: Installing Retrofit Jet Kits (Do-It-Yourself)
The installer begins by choosing a retrofit kit that matches the tub’s material, thickness, and jet layout.
Next steps cover cutting mounting holes, fitting jets, routing plumbing with pump and check valves, and securely mounting and wiring the pump and control unit per local codes.
The process finishes with careful sealing, caulking, and restoring the tub surround for a watertight, finished appearance.
Selecting a compatible retrofit kit
Choosing a compatible retrofit jet kit begins by matching the tub’s material, shape, and drain configuration to the kit’s specifications to guarantee a proper fit and safe operation.
Evaluate pump size versus tub volume, power and noise ratings, electrical requirements, and available clearance for plumbing and pump placement.
Confirm manufacturer compatibility, warranty implications, and whether professional certification or additional brackets are required.
Cutting holes and mounting jet fittings
After confirming kit compatibility, attention turns to creating precise openings for the jets and securing their fittings so that seals meet manufacturer tolerances and plumbing aligns with the pump.
Measure and mark locations, drill pilot holes, and use recommended hole saw sizes.
Deburr edges, test-fit each jet, apply specified sealant or gaskets, then tighten retaining nuts evenly to prevent distortion and leaks.
Installing plumbing to the pump and check valves
Begin by laying out the pump location and plumbing route to verify reach, flow direction, and clearance for check valves and fittings.
Cut and dry-fit PVC or flexible hose runs from each jet fitting to the pump inlet and outlet.
Install accessible inline check valves oriented to prevent backflow.
Use proper solvent or clamp connections, slope piping slightly, and pressure-test for leaks before finalizing.
Mounting and wiring the pump and control unit safely
Locate a secure, accessible spot for the pump and control unit that keeps the assembly above the tub base, within reach of the routed plumbing and the nearest grounded electrical supply.
Mount vibration-isolating brackets, level the pump, and tighten fasteners.
Run conduit or cable to code, install a GFCI-protected circuit, make connections per manufacturer wiring diagram, and verify grounding and strain relief before energizing.
Sealing, caulking, and finishing the surround
Seal and finish the tub surround with care to prevent leaks and to create a clean, durable appearance.
After drywall or backer board is trimmed, apply mildew-resistant silicone at all joint lines and around fixtures.
Smooth beads for uniform seals, tool edges neatly, and remove excess.
Allow full cure per manufacturer instructions.
Install trim pieces or access panels for service and protect finished surfaces during final work.
Filling, priming, and testing the system for leaks and airlocks
With the surround finished and access panels in place, attention shifts to the hydraulic and electrical system: filling the pump and plumbing, priming the circulation loop, and verifying that no leaks or trapped air remain.
The installer fills lines slowly, opens purge valves, runs pump briefly, watches fittings for drips, repeats until steady flow and no gurgling.
Electrical safety checks follow before full operation.
Step-by-Step: Converting to Built-In Whirlpool or Air Bath (Advanced)
Converting a standard tub to a built-in whirlpool or air bath requires careful planning of the layout, plumbing reroutes, and structural work to guarantee proper support and access.
The process includes reworking supply and drain connections, framing and reinforcing the surround with an access panel, and installing multiple jets, manifolds, and balancing valves for even flow.
Finally, the system must integrate a heater, blower, and electronic controls with appropriate electrical and ventilation considerations.
Planning a built-in whirlpool conversion
Several factors must be evaluated before planning a built-in whirlpool conversion, including tub material, available space, structural support, and access for plumbing and electrical connections.
The planner must assess motor placement, ventilation, noise control, and waterproofing. Decide on jet layout, control location, and maintenance access.
Confirm local codes and permit requirements, and budget for labor, materials, and contingencies.
Reworking plumbing and drain connections
Begin by mapping the existing supply and waste lines relative to the tub’s rim, access panels, and proposed pump location to determine which pipes must be rerouted or extended.
Then isolate water and power, cap lines, and plan new runs: dedicated cold/hot feeds, heated return if required, and reinforced drain with proper slope and air gap.
Verify fittings, valves, and local code compliance.
Framing, reinforcing, and access panel installation
Prepare the tub’s support structure to carry the added weight and allow service access: measure the finished rim height and outline where blocking, ledger boards, and substrate will attach.
Then install reinforced framing (joist straps, doubled joists, or treated backer boards) under and around the tub flange to distribute loads and prevent deflection.
Cut and fit an access panel sized for pump and fittings; secure and seal for easy service.
Installing multiple jets, manifolds, and balancing valves
Install the jet layout and plumbing assemblies after confirming pump location, electrical routing, and access panel placement to guarantee reachable connections and balanced flow.
Position manifolds to minimize pipe runs; mount securely. Run dedicated lines to each jet, keeping slopes and unions accessible.
Install balancing valves at manifolds for adjustable flow to zones.
Pressure-test the system, correct leaks, and mark shutoff locations for service.
Integrating heater, blower, and electronic controls
Integrating the heater, blower, and electronic controls requires coordinating mechanical, electrical, and user-interface elements to guarantee safe, reliable operation and serviceability.
Components are mounted for access, wiring follows local code with dedicated circuits and GFCI protection, and airflow and water lines include isolation valves.
Control modules are programmed for temperature limits, timed blower cycles, fault reporting, and straightforward maintenance access.
Commissioning, balancing flow, and final safety checks
Begin commissioning by methodically verifying that all plumbing, electrical, and control connections conform to the design and local codes, since accurate setup at this stage prevents performance issues and safety hazards.
Fill and run the system, inspect for leaks, purge air, and confirm heater and blower operation.
Adjust jet balancing valves for even flow.
Perform GFCI, grounding, and pressure tests; document results and remediate defects.
Alternative Options If Full Conversion Isn’t Feasible
When a full built-in conversion is impractical, several simpler alternatives can provide hydrotherapy benefits with less time and expense.
Options include portable spa pumps and plug-in jet attachments, freestanding whirlpool units or inflatable spa liners, and choosing between professional retrofit services or replacing the tub with a factory-jetted model.
Each choice carries trade-offs in performance, cost, and installation complexity that merit comparison.
Portable spa pumps and plug-in jet attachments
If a full plumbing conversion is impractical, portable spa pumps and plug-in jet attachments offer a compact, noninvasive way to add whirlpool-like action to an existing tub.
They require minimal installation, plug into standard outlets, and often include suction-mounted jets and adjustable flow.
- Ease of setup
- Cost-effective
- Removable for renters
- Safety and GFCI use
Freestanding whirlpool units and inflatable spa liners
Several practical alternatives exist for adding hydrotherapy without reworking bathroom plumbing: freestanding whirlpool units and inflatable spa liners provide self-contained jet systems that sit inside or alongside an existing tub.
These options offer easy installation, portability, and temporary use without invasive work.
Buyers should compare jet power, materials, safety features, fit, and maintenance requirements to choose a reliable, leak-resistant model.
Professional retrofit services vs. replacement tub with factory jets
Consider professional retrofit services and full replacement tubs with factory-installed jets as two practical routes for homeowners who cannot or prefer not to undertake a full in-place conversion.
Retrofit specialists install jet kits, pumps, and controls with minimal disruption, preserving existing finishes.
Replacement tubs offer guaranteed integration, warranties, and modern features but require demolition and higher cost.
Choice depends on budget, timeline, and desired reliability.
Troubleshooting Common Problems After Installation
After installation, common problems can include loss of suction or weak jets, excessive noise or vibration and irregular pump cycling, leaking at fittings, seals, or access panels, and electrical faults such as tripped breakers.
Each issue typically has specific diagnostic steps and straightforward remedies, from cleaning air traps and tightening fittings to checking pump mounts and inspecting wiring.
If simple fixes do not restore proper operation, a qualified technician should be consulted to prevent damage or safety hazards.
Loss of suction or weak jets and how to fix them
Troubleshooting weak or intermittent jet suction begins with diagnosing common causes such as clogged lines, air leaks, blocked intake screens, or a failing pump motor.
Inspect and clean filters and suction grates, flush lines with a descaler, tighten hose clamps, and check seals for air entry.
Test pump performance and replace worn impellers or motors if flow remains inadequate after basic maintenance.
Noise, vibration, and pump cycling issues
Many users report persistent noise, vibration, or erratic pump cycling after jet installation, symptoms that usually stem from mechanical imbalance, cavitation, loose mounting, or electrical control faults.
Inspect impeller balance, secure pump mounts and fittings, verify proper inlet flow to prevent cavitation, check flexible mounts and isolation pads, and test electrical connections and control relays.
Replace worn bearings or damaged impellers promptly.
Leaks at fittings, seals, and access panels
Inspect for visible moisture, drips, or staining around fittings, seals, and access panels immediately after testing the jets to quickly locate breaches.
Tighten loose connections, replace deteriorated gaskets or O-rings, and reseal joints with appropriate marine-grade sealant.
Check access panel fastenings and drain any trapped water.
Re-test for leaks; document persistent seepage and isolate the affected plumbing section for repair.
Electrical faults and tripped breakers
Start by confirming power continuity and breaker status before assuming a mechanical issue.
The installer inspects the GFCI, dedicated circuit, and wiring for loose connections or burnt terminals. Resetting tripped breakers or replacing faulty GFCI may resolve the fault.
If trips persist, the technician tests motor impedance and insulation, then isolates and repairs shorted wiring or defective pump components to guarantee safe operation.
Maintenance, Cleaning, and Long-Term Care
Regular maintenance keeps a newly jetted bathtub functioning safely and efficiently, so owners should follow routine pump and jet cleaning procedures and use treatments that prevent biofilm, scale, and clogging.
For residences with seasonal use, winterizing and proper long-term storage options protect internal plumbing and components.
Clear criteria for when to replace parts or call a professional help avoid costly failures and guarantee continued performance.
Routine pump and jet cleaning procedures
Routine maintenance of the pump and jets prevents buildup, preserves performance, and extends equipment life.
Technicians recommend a simple schedule:
- Shut power, remove and inspect accessible fittings for debris.
- Flush lines with warm water after each heavy use.
- Monthly, run a manufacturer-approved cleaner through the system per instructions.
- Quarterly, check pump mounts, seals, and electrical connections for wear.
Preventing biofilm, scale, and clogging
Beyond pump and jet maintenance, preventing biofilm, mineral scale, and clogs requires attention to water chemistry, flow patterns, and material surfaces.
Regularly balancing pH and hardness, using occasional non-corrosive descalers, and flushing lines with hot water maintain clear passages.
Smooth, non-porous fittings resist buildup; intermittent high-flow circulation breaks early deposits.
Inspect strainers and replace worn seals to avoid particle ingress and stagnation.
Winterizing and long-term storage options
Winterizing a jetted bathtub and planning long-term storage protect equipment and waterlines from freeze damage, corrosion, and microbial regrowth during extended idle periods.
Drain and purge all lines, run low-pressure air to remove residual water, and add non-toxic antifreeze where manufacturer allows.
Clean thoroughly, dry accessible components, disconnect electrical supply, seal openings, store removable pumps and controls in a climate-controlled area.
When to replace parts or schedule professional service
Monitor performance and inspect components regularly to determine whether parts should be replaced or a professional should be called.
Signs warranting replacement or service include persistent leaks, unusual noises, reduced water pressure, visible corrosion, malfunctioning controls, and recurring clogs despite cleaning.
Replace worn seals, impellers, and gaskets promptly.
Schedule a licensed technician for electrical issues, motor failure, or complex plumbing repairs beyond routine maintenance.
Cost Estimates, Timeline, and Return on Investment
A concise cost comparison outlines typical DIY expenses versus hiring a professional, including parts, labor, and potential surprises.
A realistic timeline with key milestones—permits, plumbing and electrical work, installation, and testing—helps set expectations.
Consideration of resale value and visual integration will determine whether the investment yields a measurable return.
Typical DIY vs. professional cost breakdown
Cost comparisons between DIY and professional installation hinge on labor, parts, and unforeseen repairs: DIY usually lowers labor costs but requires accurate parts sourcing and skill to avoid costly mistakes, while professional work carries higher upfront labor fees but includes warranties and faster turnaround. Typical figures:
| Item | DIY (estimate) | Professional (estimate) |
|---|---|---|
| Parts | $200–$800 | $300–$900 |
| Labor | $0–$400 | $600–$1,800 |
| Contingency | $100–$500 | $200–$700 |
Expected project timeline and milestone checklist
Project planning for adding jets to a bathtub outlines clear milestones, budget checkpoints, and an estimated timeline to help homeowners weigh upfront expenses against potential resale value.
Typical schedule: site assessment (day 1), parts procurement (1–7 days), plumbing/electrical prep (1–2 days), installation (1–3 days), testing and adjustments (1 day).
Include contingency time and cost reserve; document completion dates and receipts.
Resale value and aesthetic considerations
Perception of value often hinges on finish and functionality; when jets are added to a bathtub, buyers evaluate both the visible aesthetic upgrades—trim, tile integration, and fixture style—and the less obvious benefits such as improved comfort and perceived luxury.
Reasonable installation costs, cohesive design, and reliable mechanical work increase resale appeal, while inconsistent finishes, dated controls, or poor maintenance can negate any return on investment.
Safety, Code Compliance, and Warranty Considerations
Safety, code, and warranty implications are central when adding jets to a bathtub and should be reviewed before work begins.
Key electrical and plumbing requirements—GFCI protection, equipment bonding and grounding, and local permit rules—must be met to guarantee safe operation and code compliance.
Homeowners should also confirm how converting a standard tub to a jetted model affects manufacturer warranties and homeowner insurance coverage.
Electrical and plumbing code highlights for jetted tubs
Because jetted tubs combine water and electrical systems, adherence to local electrical and plumbing codes is essential to prevent shock, leaks, and voided warranties.
Inspectors require licensed installations, approved materials, and proper clearances.
Plumbing codes govern drain, overflow, and pump connections to prevent backflow and access for maintenance.
Electrical rules limit circuit loading, enclosure ratings, and service access to guarantee safe, maintainable operation.
GFCI, bonding, and grounding requirements
When installing a jetted tub, strict compliance with GFCI protection, equipment grounding, and bonding requirements is essential to protect users, satisfy electrical codes, and preserve manufacturer warranties.
Licensed electricians must install dedicated circuits with GFCI breakers or receptacles, guarantee continuous equipment grounding conductors, and bond metal piping and tub frames to the grounding system.
Documentation and inspection verify compliance and safety.
How conversions affect tub warranties and insurance
After meeting GFCI, grounding, and bonding requirements, homeowners should assess how converting a standard tub to a jetted model can affect warranties and insurance coverage.
Manufacturers may void warranties if alterations breach installation specifications. Homeowners should notify insurers, document compliant work, and obtain permits.
Proof of licensed labor and code-compliant electrical and plumbing changes reduces liability and helps maintain coverage in case of damage or claims.
Practical Tips and Best Practices for a Successful Conversion
Practical tips focus first on jet placement to balance comfort and targeted therapy, recommending strategic positions for back, hip, and foot relief.
Attention to energy-efficient pump and heater options helps minimize operating costs while maintaining performance.
Homeowners are advised to source verified compatible parts and to vet professionals by asking about past installations, certifications, and warranty terms.
Jet placement recommendations for comfort and therapy
Because precise jet placement determines both comfort and therapeutic effect, planning should start with the bather’s body geometry and anticipated use.
Position larger directional jets for lumbar and shoulder relief, smaller rotating jets for calf and foot massage, and gentle diffuse jets for neck support.
Maintain symmetry, allow adjustability, avoid direct eye-level streams, and plan spacing to prevent turbulent overlap and uneven pressure.
Energy-efficient pump and heater choices
Select pumps and heaters that match the tub’s volume and usage pattern to maximize efficiency and longevity.
Choose variable-speed pumps for adjustable flow and lower energy draw during maintenance cycles.
Opt for high-efficiency, compact electric or on-demand heaters with proper wattage and corrosion-resistant elements.
Prioritize models with thermal controls, timers, and low standby losses to reduce operating costs and extend service life.
Sourcing quality parts and verifying compatibility
Begin by identifying the exact components required for the conversion—pump type, jet fittings, plumbing adapters, gaskets, heater unit, and electrical controls—then cross-reference manufacturer specifications and tub dimensions to guarantee fit and function.
Inspect certifications, materials, and flow ratings. Verify electrical and plumbing standards. Check warranty and return policy.
- Part quality
- Compatibility charts
- Flow/heating specs
- Serial traceability
Hiring the right professional: questions to ask and credentials to verify
Who is best suited to convert a standard tub into a safe, reliable jetted system depends on a mix of skills and verified credentials.
Seek licensed plumbers or certified spa installers.
Ask about experience with pump and plumbing integrations.
Request references and photos of past installs.
Confirm insurance and warranties.
Verify local code compliance and permits.
Obtain written estimates with timelines and clear liability terms.
Conclusion
Converting an ordinary tub into a bubbling sanctuary transforms bathrooms from humdrum to heavenly, promising spa-level bliss with a few clever cuts and bolts. The project seems simple but sings with detail—measure, choose, drill, seal—each step a tiny drumbeat toward aquatic triumph. When done right, jets turn routine baths into epic escapes; when done wrong, they teach patience. With care, tools, and savvy, the tub becomes a small, jubilant ocean.