How to Stop a Leaking Kitchen Faucet Fast: Step-by-Step Fixes for Every Type
To quickly stop a leaking kitchen faucet, first, turn off the nearest shutoff valves and catch any dripping water with a towel or bucket. Next, determine the source of the leak—whether it’s from the spout, base, supply lines, or under the sink. Identify your faucet type (compression, ball, cartridge, or ceramic disc) and replace any worn washers, O-rings, seats, springs, or the cartridge as needed. For persistent leaks, tighten fittings and reseal the base. Ensure safe disassembly and test the faucet under pressure to confirm the repair. Follow the detailed steps below for a comprehensive guide.
What to Do Immediately When Your Kitchen Faucet Starts Leaking
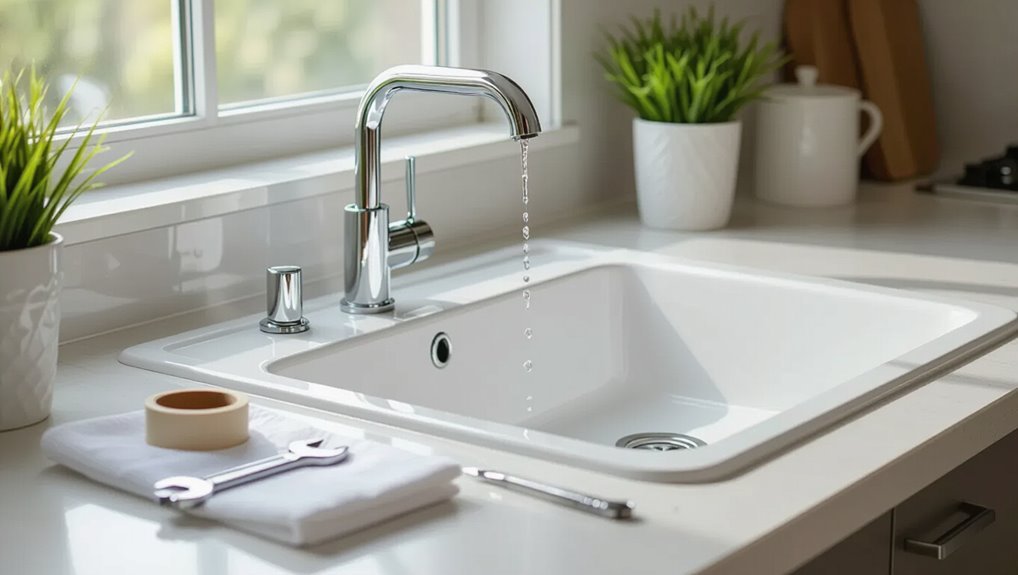
When a kitchen faucet begins leaking, the first priority is to stop the flow by turning off the nearest shutoff valves or, if those are inaccessible, the main water supply.
The person should cease using the sink and collect any leaking water to prevent damage while evaluating whether the leak is a simple fix or requires a professional.
If the leak persists after shutting off supply or water damage is occurring, a licensed plumber should be contacted immediately.
Quick actions to stop the leak right now
Shut off the water and contain the drip immediately: locate and turn the shutoff valves under the sink or, if none are present, close the home’s main water supply.
Then place a bucket or towel beneath the faucet to catch leaking water.
Inspect visible fittings, tighten loose nuts, and wipe areas dry.
For quick relief, cap the spout or apply plumber’s tape until repairs begin.
How to shut off water supply (main valve vs. local shutoffs)
If a kitchen faucet begins leaking, the quickest way to stop water flow is to close the nearest shutoff valves located under the sink.
If those valves are missing, seized, or do not stop the leak, the home’s main water supply valve must be turned off to prevent further damage.
Locate and turn clockwise; use pliers cautiously.
Drain residual water by opening the faucet and mop up to avoid pooling.
When to stop using the sink and call a professional
What signs indicate it’s time to stop using the sink and call a professional? Persistent leaks despite shutoff, water pooling under cabinets, visible structural damage, contaminated or discolored water, reduced water pressure, or active flooding warrant immediate cessation of use. If DIY attempts fail or gas/major electrical components are nearby, contact a licensed plumber to prevent further damage and health hazards.
How to Diagnose the Type and Location of the Leak
To diagnose a kitchen faucet leak, the reader should first pinpoint the source—spout, base or counter, supply lines, or under the sink—by observing where water appears and by performing simple tests like running the faucet and checking for drips.
A brief inspection without special tools (visual cues, paper or tissue to trace dampness, and a flashlight for dark areas) will often reveal obvious problems, while using basic tools can help locate hidden leaks.
Identifying the faucet type—compression, ball, cartridge, or ceramic disc—guides the next steps for repair.
Identifying leak source: spout, base/counter, supply lines, under-sink
When a kitchen faucet starts leaking, pinpointing the exact source—spout, base/counter, supply lines, or under-sink—guides the appropriate fix; each location produces distinct signs that narrow the diagnosis.
Spout drips indicate cartridge or seat wear.
Base leaks suggest failed seals or mounting issues.
Supply-line seepage or loose fittings cause steady wetness.
Under-sink pooling often signals hose or connection failure requiring access and repair.
How to inspect without special tools (visual cues and simple tests)
A quick visual inspection and a few simple tests can narrow down the leak’s location without specialized tools.
Observe wetness patterns: drips from the spout indicate internal cartridge or seat issues; dampness at the base suggests failing O-rings or seals; pooled water under the sink points to supply lines or connections.
Operate handles and note when and where water appears.
Using basic tools to locate hidden leaks (tissue, paper, flashlight)
Building on the visual checks and simple handle tests, basic household items can reveal leaks hidden from casual view.
Place folded tissue or paper under joints, base, and supply connections; watch for damp spots or streaks.
Use a flashlight to inspect shadowed areas, under the sink, and behind escutcheons.
Renew paper after each probe to confirm slow seepage.
Determining faucet type: compression, ball, cartridge, ceramic disc
How can the faucet type be determined quickly and accurately to narrow down likely leak sources?
Identify handle count and motion: two separate handles with up/down rotation indicate compression; a single lever with ball-shaped housing suggests a ball faucet; a single lever with smooth cartridge movement implies cartridge; flat lever movement with ceramic disks signals ceramic disc.
Inspect under-sink connections and spout for leak location.
Step-by-Step Fixes for Each Faucet Type
The following section presents concise, step-by-step fixes tailored to common faucet types so readers can address leaks efficiently.
- Compression faucet: quick repair steps
- Ball faucet: fast troubleshooting and repair
- Cartridge faucet: how to replace the cartridge quickly
- Ceramic disc faucet: common causes and quick fixes
- Tools and parts checklist for each type
Each item will be explained with clear steps and safety notes.
Compression Faucet: quick repair steps
Start by shutting off the water supply and placing a towel in the sink to catch drips.
The technician loosens the handle screw, removes the handle and bonnet nut, then extracts the stem.
Inspect and replace worn rubber seats and compression washers.
Reassemble with plumber’s grease, tighten parts, restore water, and test for leaks, repeating replacement if dripping persists.
Ball Faucet: fast troubleshooting and repair
Diagnose a leaking ball faucet by checking for drips around the spout, handle, and base while the valve cycles; these faucets use a ball valve, seats, and springs that commonly wear or collect debris.
Tighten handle, remove cam and ball assembly, inspect and replace worn rubber seats and springs, and clean mineral buildup.
Reassemble with new seals and test for leaks, adjusting as needed.
Cartridge Faucet: how to replace the cartridge quickly
Identify a cartridge faucet leak by noting constant dripping from the spout or difficulty controlling water flow. Then shut off the water and prepare basic tools—allen wrench, screwdriver, pliers, and a replacement cartridge—before beginning.
Remove handle, bonnet nut, and old cartridge; inspect O-rings and seals. Clean the housing, insert new cartridge aligned with guide tabs, reassemble, restore water, and test for leaks.
Ceramic Disc Faucet: common causes and quick fixes
After covering cartridge faucets, attention turns to ceramic disc models, which leak for different reasons and require distinct fixes.
Leaks often stem from worn O-rings, damaged seals, mineral buildup, or misaligned discs.
Quick fixes include replacing O-rings and seals, cleaning deposits with vinegar, realigning or replacing discs, and tightening mounting hardware.
Test for leaks and repeat as needed.
Fast Repairs by Leak Location
When a faucet leaks, the quickest fixes depend on where the water appears and whether a temporary patch or a permanent repair is needed.
Common locations and immediate actions include the following:
- Leaking from the spout: check and replace worn cartridges or O-rings
- Leak at the base/deck: clean the area, tighten or replace gaskets, consider resealing the base
- Supply lines/connections under the sink: tighten fittings, replace damaged lines, or use tape as a short-term fix
- Dripping after shutoff: replace seals and valve seats
- Persistent or unclear leaks: shut off water and inspect components methodically
Leaking from the spout: immediate fixes
If a faucet is leaking from the spout, the most effective immediate steps focus on isolating the problem and stopping water flow to prevent damage.
First, shut off the water supply under the sink, then open the faucet to relieve pressure.
Inspect the aerator for debris and clean or replace it.
If the drip persists, loosen and check the cartridge or valve seat for visible damage before arranging repair.
Leak at the base or deck around the faucet: temporary and permanent solutions
Although a leak at the base or deck can start as a small seep, it often indicates failing seals, a loose mounting, or degraded plumber’s putty; quick containment includes shutting the supply valves and drying the area.
Permanent fixes range from reseating and replacing O-rings or gaskets to removing the faucet for full replacement of mounting hardware and sealant.
After drying, inspect seal integrity, tighten mounting nuts, replace deteriorated gaskets or putty, and test for leaks.
Leaking supply lines or connections under the sink: tighten, replace, or use tape
Check the supply lines and connections beneath the sink for visible drips, loose fittings, or corrosion, since leaks in this area are commonly caused by loose compression nuts, worn washers, or damaged flexible hoses.
Tighten fittings with appropriate wrenches, replace frayed or bulging hoses, swap worn washers or compression rings, and use plumber’s tape on threaded connections.
Test for leaks after repairs.
Dripping after shutoff: replacing seals and seats
Many persistent drips that continue after the faucet is shut off stem from worn seals or corroded valve seats that no longer create a watertight closure.
Technicians remove the handle and cartridge or stem, inspect O-rings, rubber seats and springs, and replace deteriorated parts.
Lapping or replacing corroded seats restores proper sealing.
Test thoroughly and reassemble, ensuring leaks are eliminated.
Tools and Parts You May Need for a Rapid Repair
For a rapid faucet repair, a concise set of tools and a small parts kit often make the difference between a temporary stopgap and a lasting fix.
The following essentials are recommended for quick troubleshooting and common replacements:
- Adjustable wrench
- Screwdrivers (flat and Phillips)
- Replacement cartridges, seats, and springs
- Assorted O-rings and washers
- Needle-nose pliers
Knowing when a quick seal or O-ring swap will suffice and when a full cartridge or seat replacement is required helps prioritize parts and avoid repeat trips to the hardware store.
Essential tools to have on hand for quick fixes
A small, well-organized toolkit can turn a dripping faucet into a brief weekend chore rather than an expensive repair.
Basic essentials include adjustable and basin wrenches, screwdrivers (flat and Phillips), needle-nose pliers, plumber’s grease, plumber’s tape, a flashlight, and a set of hex/Allen keys.
A small bucket and clean rags complete a compact, ready-to-use repair kit.
Common replacement parts to keep in a kit (seats, springs, cartridges, O-rings)
With the basic tools in place, a small selection of common replacement parts lets a homeowner convert a short maintenance session into a complete repair.
Include faucet cartridges (match make/model), rubber O-rings and seals in varied sizes, valve seats and springs for ball-style faucets, and a few universal washers.
Label parts and store with basic fittings for quick identification and replacement.
When temporary fixes are acceptable and when parts are required
Although small, temporary measures can halt drips and buy time, homeowners should distinguish between stopgaps and remedies that require proper parts:
Quick fixes—such as tightening connections, applying plumber’s tape, or using a rubber sleeve or epoxy putty—address external leaks or worn seals short-term, while persistent drips, internal cartridge damage, or worn valve seats demand matched replacement components to restore reliable, long-term function.
Temporary fixes suit emergencies; replacements suit longevity.
Temporary Fixes to Stop Leaks Fast (Until You Can Repair Properly)
Temporary fixes like plumber’s tape, rubber washers, and waterproof sealants can stop minor faucet leaks quickly when applied correctly.
Short-term clamp or compression methods may also control a drip until a proper repair can be made.
These measures carry risks—improper use can worsen damage or mask underlying problems—so they should be viewed only as temporary remedies.
Using plumber’s tape, rubber washers, and sealants safely
Apply common sealing materials cautiously to stop a kitchen faucet leak temporarily while awaiting permanent repairs.
The user should clean contact surfaces, dry thoroughly, and use plumber’s tape on threaded joints only, wrapping clockwise.
Replace worn rubber washers with correct-size parts.
Use silicone or plumber’s putty sparingly around nonpainted, nonmoving seams.
Avoid adhesive over valve seats or inside cartridges to prevent damage.
Short-term clamp and compression methods
Clamp and compression methods provide quick, noninvasive ways to reduce or stop a faucet leak until proper repairs can be made.
Temporary options include using a rubber hose sleeve with a hose clamp over a leaking joint, or compressing a soaked cloth and securing it with a C-clamp.
These approaches limit dripping and buy time until replacement parts or professional service are available.
Risks and limitations of temporary solutions
Although quick fixes can stop a drip long enough to prevent water damage, they carry clear risks and limitations that users should weigh.
Temporary patches, tape, or clamps may fail, conceal underlying damage, or worsen seals. They can create hidden leaks, corrosion, or pressure imbalances.
Use them only briefly, monitor closely, shut off water if signs worsen, and schedule a proper repair promptly.
How to Replace a Faucet Component Safely: Basic Procedure
Before any repair begins, the workspace should be cleared and the water supply shut off to prevent flooding and allow safe access to fittings.
The procedure then covers step-by-step removal of common parts such as handles, cartridges, and valves, using the right tools and keeping track of fasteners.
Reassembly follows a checklist for correct part placement and torque, ending with a controlled leak test to confirm the repair.
Preparing the workspace and turning off water
Clear the area around the sink and lay down a towel or plastic basin to catch drips, then close the cabinet doors to create an organized workspace.
Locate and turn off the water supply valves under the sink; if none, shut off the main house supply.
Open the faucet to relieve pressure and drain remaining water.
Gather tools and place a bucket for residual leaks.
Step-by-step removal of common components
Begin by identifying the faucet type (ball, cartridge, ceramic disk, or compression) and locating the visible components to be removed—handle, decorative cap, retaining clip, cartridge or valve stem, and any mounting nuts.
Wear gloves, protect finishes, and document part orientation.
Loosen set screws, remove caps, extract retaining clips, then withdraw cartridges or stems straight out.
Keep small parts organized and inspect seals for damage.
Reassembly checklist and leak-testing procedure
Reassemble the faucet in the reverse order of disassembly, verifying each part, fastener, and seal is correctly oriented and seated before proceeding to the next step.
Tighten connections to manufacturer torque specifications, replace damaged O-rings, and align moving parts.
Restore water supply slowly, check for leaks at joints and under sink, operate handle(s) and spout, monitor for drips and adjust as needed.
When a Leak Means You Should Replace the Faucet Entirely
Persistent corrosion, multiple failing components, or recurrent leaks despite repairs indicate a faucet may be beyond practical restoration.
Evaluating the cost and time of continued repairs against replacing the unit helps determine whether replacement is more economical and less disruptive.
When replacement is chosen, selecting a model with robust materials, accessible parts, and straightforward servicing will improve durability and simplify future maintenance.
Signs a faucet is beyond repair
How can one tell when a leaking kitchen faucet has outlived repair?
Visible corrosion, cracked or warped components, persistent multi-point leaks despite part replacements, and internal cartridge or valve damage indicate irreparable failure.
Repeated seal or gasket failures, loose or stripped mounting hardware, and chronic mineral buildup impair function beyond practical repair.
Safety hazards like exposed supply lines also justify full replacement.
Cost and time comparison: repair vs. replacement
Once visible damage, recurring seal failures, or safety risks make repair impractical, the next consideration is whether to fix or replace the faucet. The decision weighs immediate cost, downtime, and long‑term reliability. Simple repairs: low cost, short time. Replacement: higher upfront cost, longer install, but reduces repeat service. Table summarizes typical comparisons.
| Option | Cost range | Time to complete |
|---|---|---|
| Repair | $10–$100 | 15–90 min |
| Replace | $50–$400 | 1–3 hours |
| Hybrid | $30–$150 | 30–120 min |
How to choose a replacement faucet for durability and ease of future repairs
Why choose one faucet over another when durability and future repairs are the priority?
Select solid-brass or stainless-steel bodies, ceramic-disc cartridges, and replaceable cartridges and aerators.
Prefer common, standardized fittings and cartridge availability from reputable brands.
Look for clear warranty terms, modular designs that allow part replacement, and accessible mounting that simplifies future disassembly and maintenance.
Preventive Maintenance to Avoid Future Leaks
Preventive maintenance reduces the chance of future faucet leaks and prolongs fixture life.
Key actions include a simple inspection routine, scheduled replacement of common wear parts, and addressing water quality issues that accelerate corrosion.
Suggested checklist for homeowners:
- Inspect seals, handles, and spouts every 3–6 months
- Check supply lines and shutoff valves for drips and stiffness
- Replace cartridges, O-rings, and washers every 1–3 years or as needed
- Test for hard water and consider a softener or point-of-use filter
- Flush aerators and clean mineral buildup quarterly
Routine inspection schedule and what to check
Regularly scheduled inspections help catch small faucet issues before they become leaks.
Inspect monthly for visible drips, loose handles, and mineral buildup at spouts and aerators.
Quarterly check under-sink connections for dampness, corrosion, and secure fittings.
Test hot and cold operation for smooth movement and noise.
Record findings and promptly address abnormalities to prevent escalation.
Parts that commonly wear and how often to replace them
After establishing a routine inspection schedule, attention should turn to the faucet components that most frequently wear out and require replacement to prevent future leaks.
Common parts: O-rings and seat washers (replace every 1–2 years), cartridge or valve seats (3–7 years), aerators (clean or replace annually), and supply-line washers (replace every 3–5 years).
Monitor seals for visible deterioration.
Water quality factors (hard water) and solutions to extend faucet life
Because mineral buildup from hard water accelerates wear on seals, cartridges, and aerators, evaluating water quality is a key step in extending faucet life.
Testing for hardness informs choices: install a water softener or point-of-use filter, flush lines periodically, and descale aerators and cartridges with vinegar.
Regular maintenance and targeted treatment reduce corrosion, prolong component life, and prevent future leaks.
Common Mistakes That Make Leaks Worse
Homeowners often unknowingly worsen faucet leaks by over-tightening fittings, which can strip threads and damage seals.
Installing incorrect replacement parts or cartridges can prevent a proper seal and cause recurring drips.
Ignoring worn supply lines and shutoff valves leaves underlying problems unaddressed and can turn a minor leak into a major repair.
Over-tightening fittings and stripping threads
Tightening a fitting until it feels rock-solid is a common instinct, but excess force can deform seals and strip threads, turning a small drip into a persistent leak.
Over-torquing damages nylon or brass components, warps compression seats, and makes future repairs harder.
Use proper tools, turn nuts finger-tight plus a quarter turn, and test for leaks before assuming a tighter fit fixes the problem.
Using the wrong replacement parts
After addressing over-tightening, attention must turn to parts selection: installing a cartridge, O-ring, or washer that doesn’t match the faucet’s specifications often creates new leaks or accelerates wear.
Incorrect dimensions, materials, or pressure ratings prevent proper seals, cause misalignment, and stress adjacent components.
Always verify model numbers, compare originals, and use OEM or exact-fit replacements to restore reliable, long-lasting performance.
Ignoring supply line and valve issues
While attention often focuses on cartridges and seals, overlooking the supply lines and shut-off valves can leave the root cause of a leak unaddressed.
Corroded, kinked, or loose supply lines and failing shut-off valves often cause persistent drips despite faucet repairs.
Inspect hoses, fittings, and valve operation; tighten connections, replace damaged lines, or swap a faulty valve to fully eliminate the leak source.
Estimated Time and Cost for Common Quick Repairs
Typical quick fixes vary by type: replacing a cartridge or O-ring often takes 15–30 minutes, while reseating a ball or replacing a cartridge can take 30–60 minutes.
Parts for simple repairs commonly range from $5–$30, with basic tools or DIY supplies adding another $0–$20.
If a homeowner prefers professional help, call-out fees and labor typically push the total to $75–$200 or more depending on complexity.
Typical time to fix a drip by type of repair
Many common drip repairs fall into a short, predictable range of time and cost.
Replacing a cartridge or valve seat typically takes 20–45 minutes.
Swapping O-rings or seals often requires 10–25 minutes.
Tightening loose connections or replacing a worn aerator runs 5–15 minutes.
Minor handle adjustments or set-screw fixes usually take under 10 minutes.
Preparation and cleanup add a few extra minutes.
Ballpark cost of parts and simple repairs vs. professional service
A rough comparison of parts-and-DIY costs versus hiring a professional highlights why some homeowners tackle leaks themselves and others call a plumber:
Parts for cartridge, ball, or ceramic-disk faucets typically cost $5–$25; basic seals and O-rings $3–$10.
DIY fixes often take 15–60 minutes.
Professional service ranges $100–$250 for a service call plus labor, higher for complex replacements.
Signs It’s Time to Call a Plumber Immediately
When a leak causes flooding, sewage backup, persistent high-pressure spraying, or involves gas lines or electrical risk, professional intervention is required immediately.
The homeowner should note exact symptoms—where the water appears, timing, noises, water color, and any visible damage—to convey a clear, concise description.
Providing these details and any recent changes or quick fixes attempted helps the plumber diagnose and respond more quickly and accurately.
Situations requiring professional intervention
How severe is the leak and what other signs accompany it?
Immediate professional help is warranted for flooding, persistent spurting, or sudden pressure loss.
Call if water discoloration, foul odor, or visible corrosion appears, if shutoff valves fail, or if mold and structural damage emerge.
Complex cartridge, valve, or supply-line failures also require licensed plumbers to diagnose and repair safely.
How to explain the problem to get faster, more accurate service
What details will help a plumber diagnose the issue most quickly? Provide faucet brand/model, installation age, visible damage, leak location (spout/base/handles), sound or drip rate, water pressure changes, recent repairs, and whether shutoff valves work. Note leaks with hot or cold only, odor, and sediment. Include photos or short video and the home’s water type (hard/soft) for faster, accurate service.
Quick Reference Checklist to Stop a Leaking Kitchen Faucet Fast
A simple checklist condenses the essential steps to stop a leaking kitchen faucet quickly and safely: shut off the water, identify the leak source, gather the correct tools and replacement parts, perform the repair or seal, then test for leaks and restore normal use.
- Turn off water supply
- Inspect faucet type and leak location
- Collect appropriate tools/parts
- Replace worn seals or cartridges
- Test thoroughly and clean up
Conclusion
A drip meets a rising kettle, and coincidence turns annoyance into action: the homeowner reaches for a wrench just as the neighbor returns a borrowed flashlight. Steps followed, diagnosis matched, and a single cartridge swap silences the leak. Small tools, clear choices, and swift judgment converge—what began as a random drip ends with steady flow. If repair stalls, a call to a plumber preserves that quiet, timely resolution.