How to Fix a Leak Under Kitchen Sink: Step-by-Step Repair Guide for Beginners
To fix a leak under your kitchen sink, start by identifying the source of the leak. Inspect the supply lines, P-trap, sink flange, and disposal connections. First, shut off the water supply, then clear out the cabinet for easy access. Gather essential tools such as a wrench, basin wrench, replacement washers, plumber’s tape, and sealant.
For supply hoses, tighten or replace ferrules; for drain connections, replace slip-joint washers and reseal the flange; for faucets, swap out worn O-rings. Once you’ve made the necessary repairs, test for leaks and make any adjustments as needed. Follow this step-by-step guide for detailed repair instructions and troubleshooting tips.
How to Tell If the Leak Under Your Kitchen Sink Is Repairable
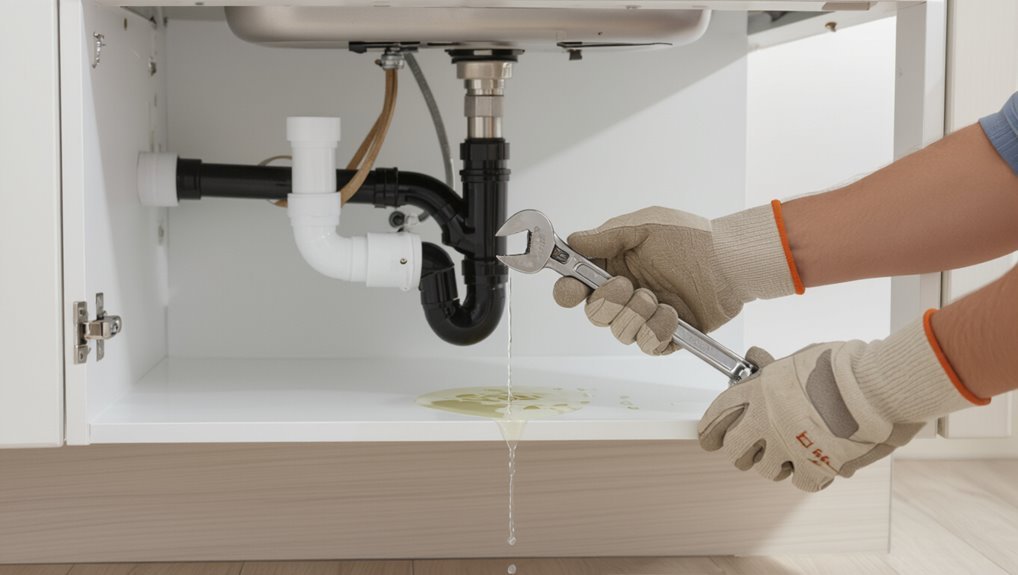
The homeowner should first look for common signs of a leak—visible drips, pooled water, musty odors—and perform a careful, dry inspection with the shutoff valves closed and power to nearby outlets off.
Identifying whether water originates from a supply line, the drain assembly, or the cabinet itself helps determine if the repair is a simple parts swap or a larger structural problem.
If the source is unclear, corrosion is extensive, or the fix requires soldering or pipe replacement, a professional plumber should be called; minor leaks like loose fittings or worn washers are generally DIY-friendly.
Common signs of a leaking sink and how to inspect safely
Several clear indicators point to a leaking kitchen sink: visible puddles or dampness under the cabinet, water stains or swollen wood, a musty odor, and persistent drips from exposed pipes or the trap.
The inspector should turn off water, place absorbent cloths, use a flashlight and mirror, wear gloves, and document findings.
These steps inform whether to proceed with how to fix leak under kitchen sink.
Differentiating between supply line, drain, and cabinet leaks
After documenting signs and isolating the area, the next step is to determine whether the leak originates from the water supply lines, the drain assembly, or the cabinet structure itself—because each source has different repair options and cost implications.
Supply-line leaks show dripping at fittings or wet flexible hoses; drain leaks appear around tailpiece, p-trap, or sink flange; cabinet leaks manifest as diffuse dampness, stains, or soft wood away from joints.
When to call a professional vs. DIY-friendly leaks
When should a homeowner attempt a repair and when is professional help warranted?
The homeowner can handle visible loose fittings, minor supply line drips, or simple P-trap clogs with basic tools.
Call a professional for persistent leaks, hidden pipe corrosion, sewage smells, water damage to cabinets or floors, complex valve replacements, or when unsure about shutoff valves.
Safety and structural risk justify expert intervention.
Tools and Materials You’ll Need Before Starting
Before beginning repairs, a concise list of essential tools—adjustable wrench, basin wrench, pliers, plumber’s tape, bucket, and flashlight—should be gathered.
Relevant replacement parts and materials, such as new supply lines, a replacement P-trap or cartridge, plumber’s putty, and thread sealant, ought to be on hand in case components need swapping.
Basic safety gear and preparations—gloves, eye protection, shutting off water and placing towels or a pan to catch spills—should be confirmed before work starts.
Essential tools checklist
A clear, compact toolkit prevents delays and mistakes while fixing a leak under the kitchen sink.
The checklist focuses on versatile, safe tools for diagnosis and basic repair. Keep items organized and within reach to streamline work.
- Adjustable wrench and basin wrench
- Slip-joint pliers and channel-lock pliers
- Screwdrivers (flat and Phillips)
- Utility knife and flashlight
Replacement parts and materials to have on hand
Several small replacement parts and a few common materials should be gathered ahead of time to avoid interruptions during the repair.
A concise kit speeds fixes: replacement washers, slip-joint nuts, faucet O-rings, and a short tailpiece or trap adapter if corroded.
Also include plumber’s tape, pipe dope, a roll of plumber’s putty, and a small emergency bucket for fluid containment.
- Replacement washers and O-rings
- Slip-joint nuts and washers
- Tailpiece or trap adapter
- Plumber’s tape and putty
Safety gear and preparations
Gather protective gear and set up the work area so the repair proceeds safely and efficiently.
The person should wear gloves, safety glasses, and knee pads; use a flashlight or headlamp for visibility.
Place a bucket, towels, and a waterproof mat to catch drips.
Turn off water supply and power to disposables, ventilate the space, and keep tools organized within reach.
Preparatory Steps Before Any Repair
Before any repair begins, the water supply should be shut off and the shutoff valves tested to confirm there is no flow.
The cabinet under the sink must be emptied and the work area protected with towels or a waterproof mat.
Photographs and brief notes of the leak location and any damaged parts should be collected for reference during and after the repair.
Shutting off water supply and testing shutoff valves
Turn off the water to the sink and confirm both hot and cold valves fully close before proceeding; this stops flow and reduces the risk of flooding or injury during repairs.
Locate the individual shutoff valves beneath the sink, turn clockwise to close, then open the faucet to verify flow has stopped.
If a valve leaks or won’t close, note it for replacement before starting repairs.
Clearing out the cabinet and protecting the area
A clear workspace under the sink helps prevent damage and makes the repair quicker: remove all stored items, sliding them to a safe area away from potential drips or falling tools.
Lay down absorbent towels or a waterproof mat. Place a shallow bucket beneath the leak. Protect surrounding flooring with cardboard.
Guarantee adequate lighting and clear access to shutoff valves and fittings before beginning repairs.
Gathering leak evidence: photos and notes for reference
With the workspace cleared and protected, documenting the leak becomes the next practical step.
The person photographs wet areas, drip sources, pipe joints, and fittings from multiple angles and distances. They note time, water color, odor, and when the leak occurs.
Measurements and brief sketches of pipe layout and affected materials are recorded for troubleshooting, parts ordering, and communication with professionals.
Step-by-Step Guide to Fixing Common Leaks (Beginner-Friendly)
A clear, step-by-step approach helps a beginner identify and fix the most common under‑sink leaks safely and efficiently.
The following steps cover typical trouble spots, from faucet connections to disposal and dishwasher hookups. Each item can be followed with basic tools and simple parts for a quick repair.
- Fixing a leaking faucet connection
- Repairing a leaking P-trap or drain joint
- Sealing the sink strainer or basin connection
- Fixing disposal/dishwasher connections and addressing slow faucet drips
Fixing a leaking faucet connection
The guide begins by identifying the specific failing component—valve, fitting, or hose—so the correct repair can be chosen.
It then explains how to tighten or replace supply line fittings using basic tools and proper seals.
Finally, it outlines steps for safely replacing supply hoses, including shutting off water, testing for leaks, and disposing of old parts.
Identifying the failing component
Begin by shutting off the water supply and clearing space beneath the sink to inspect the faucet connection.
The observer checks for moisture source: dripping at the valve, wet around the faucet base, or pooling near coupling nuts.
Examine hose ends, ferrules, and visible seals for cracks, corrosion, or loose parts.
Note the exact location and nature of the leak before proceeding.
How to tighten or replace supply line fittings
With the leak source identified beneath the sink, attention moves to the supply line fittings where most small faucet leaks start.
First, shut off water and place a bucket.
Tighten compression nuts with an adjustable wrench; avoid overtightening.
If threads or ferrules are damaged, remove nut, replace ferrule and cone or swap fitting, then retighten.
Test for drips and recheck after a few minutes.
Replacing supply hoses safely
Disconnecting and replacing a worn or leaking supply hose can stop common under‑sink drips quickly and prevent water damage.
The homeowner first shuts off water, opens faucet to relieve pressure, then inspects fittings and hose condition.
Using correct replacement hose and new ferrules, they tighten connections with pliers, avoid overtightening, check for leaks, and reinstall cleanly, confirming a watertight seal.
Repairing a leaking P-trap or drain joint
The guide explains how to remove the P-trap carefully to minimize spills and catch residual water.
It then covers inspecting and replacing worn slip joint washers and gaskets to restore a tight seal.
Finally, it outlines correct reassembly and a simple testing routine to confirm the leak is fixed.
How to remove the P-trap without spilling
Loosen the slip nuts on the P-trap a few turns and then support the trap beneath to prevent water from pouring out.
Place a bucket beneath the trap, slide towels around the area, and slowly unscrew the nuts while maintaining upward support.
Tip the trap away from the tailpiece to let residual water drain into the bucket, then lift straight down to remove without spilling.
Inspecting and replacing slip joint washers and gaskets
With the P-trap removed and any trapped water drained into the bucket, attention turns to the slip joint washers and gaskets that seal the connections.
Each washer and gasket is inspected for cracks, flattening, or mineral buildup. Worn or deformed pieces are removed and replaced with correctly sized neoprene or rubber equivalents.
Clean mating surfaces before installing new seals to guarantee proper seating.
Reassembling and testing for leaks
Begin reassembly by hand-threading the slip nuts and aligning the P-trap so the washers seat evenly against the tailpiece and trap arm.
Tighten nuts snugly with channel pliers, avoiding over-torquing.
Restore water supply, run both hot and cold to flush debris.
Inspect all joints for drips. If dry after several minutes, monitor periodically; if leakage appears, re-seat washers or retighten nuts incrementally.
Sealing leaks at the sink strainer or basin connection
Next, attention turns to the sink strainer and basin connection, common sources of leaks under the sink.
First, the old plumber’s putty or sealant should be removed completely and replaced with fresh putty or a suitable silicone seal to guarantee a watertight bond.
Finally, the sink flange must be tightened evenly and securely from below to prevent gaps while avoiding over-tightening that could crack the sink.
Removing old plumber’s putty and installing new seal
To remove old plumber’s putty and install a new seal, the area around the sink strainer must be cleaned, inspected, and prepared so the replacement will seat properly and stop leaks.
Remove remaining putty with a plastic scraper, clean residue with mild solvent, dry thoroughly, and inspect the flange and basin for damage.
Apply a uniform bead of new putty or approved gasket before reseating the strainer.
Properly tightening the sink flange
Carefully tightening the sink flange guarantees a watertight seal between the strainer and the basin without cracking the sink or distorting the putty.
Use even pressure while hand-threading the locknut, then tighten incrementally with a basin wrench. Alternate sides if using a multi-part assembly.
Stop when snug; avoid over-torquing.
Verify alignment, wipe excess sealant, and test for leaks after reassembly.
Fixing leaks from the garbage disposal or dishwasher connection
Attention turns to leaks at the garbage disposal and dishwasher connection, where loose mounting bolts or worn seals are common causes.
The next steps outline how to inspect and tighten mounting hardware, then remove and replace the disposal gasket if needed.
Finally, the guide covers swapping hose clamps and testing for a watertight connection.
Checking mounting bolts and seals
Begin by inspecting the mounting assembly and seals where the garbage disposal or dishwasher hose meets the sink and unit.
Tighten loose mounting bolts evenly, avoiding overtightening.
Look for cracked or compressed seals and replace gaskets if necessary.
Confirm the hose connection sits squarely in its fitting and that retaining hardware is present and secure before testing for leaks under normal operation.
Replacing disposal gasket and hose clamps
Replace the disposal gasket and hose clamps to stop common leaks where the garbage disposal or dishwasher hose meets the sink:
Turn off power and water, disconnect hose and disposal, remove old gasket and clamps, clean mating surfaces, fit a new rubber gasket, reattach with stainless steel hose clamps tightened evenly, restore connections, test for leaks, and retighten if needed.
Use correct-size parts.
Addressing slow drips from the faucet body
A slow drip from the faucet body often indicates worn internal parts such as cartridges, ball assemblies, or stems that require replacement.
The guide outlines basic steps for identifying the faulty element, removing and installing the correct replacement, and ensuring seals and O-rings are renewed.
It also emphasizes reassembling components in the proper order and testing the faucet for leaks before finishing.
Cartridge, ball, and stem replacement basics
Several common faucet designs—cartridge, ball, and stem—can produce slow drips from the faucet body, and each requires a specific removal and seal-replacement approach to stop leaks effectively.
Identify type, shut water, remove handle and retaining hardware, inspect worn seals, O-rings, springs or seats, and replace with matching parts.
Clean bore and lubricate new seals before reinstalling. Confirm parts match model.
Reassembling faucet components correctly
Begin by ensuring both water supply valves remain off and the workspace is dry and lit.
Reassemble in reverse order: insert cartridge or stem, align tabs, seat O-rings with lubricant, replace retaining clips and bonnet nut, then reinstall handle and escutcheon.
Tighten components snugly without over-torquing.
Restore water slowly, check for drips, and retighten minor fittings as needed.
Testing and Verifying the Repair
After repairs, the area should be checked immediately with water pressure and direct visual inspection to confirm no active drips or loose joints remain.
Follow-up checks over several days will guarantee no hidden moisture or slow seepage is present. If leaking continues, the repair should be revisited—tighten fittings, replace faulty parts, or contact a professional plumber.
How to run pressure and visual tests for immediate leaks
One clear way to confirm a successful sink repair is to run a combination of pressure and visual tests that reveal immediate leaks.
Turn on hot and cold taps simultaneously, inspect all joints and fittings under steady flow, and operate any sprayers.
Check for drips with a dry paper towel. Briefly tighten suspect connections, then retest until no moisture appears.
Long-term checks to ensure no hidden moisture remains
Several simple checks over the next 24–72 hours will reveal any hidden moisture that immediate testing might miss.
Inspect cabinet undersides, flooring, and adjacent walls daily for discoloration or swelling.
Press paper towels in corners to detect dampness.
Re-scan seals and connections after normal use cycles.
Use a moisture meter for suspicious spots and photograph findings to track changes over time.
What to do if the leak persists after repair
If a leak continues despite initial repairs, systematically isolating potential causes helps pinpoint the failure.
First, rerun tests: tighten fittings, run water full force, and inspect joints and supply lines. Use paper towels or dye to reveal seepage.
If the source remains unclear, shut water, disassemble the trap and tailpiece, and consult a plumber or replace suspect components to prevent damage.
Preventive Maintenance to Avoid Future Leaks
A simple preventive plan helps prevent future leaks by scheduling regular inspections to check for drips, soft spots, and loose fittings.
Recommendations include upgrading to corrosion-resistant materials and better seals to reduce failure risk.
Attention to water quality is also important, since hard water and corrosion accelerate wear on valves and joints.
Regular inspection schedule and what to look for
Because small drips often precede major damage, establishing a regular inspection schedule for the area beneath the kitchen sink helps catch problems early; a monthly check is recommended to identify issues before they worsen.
- Look for dampness, stains, or mold on cabinet base and walls.
- Inspect P-trap and supply lines for corrosion or loose fittings.
- Test shutoff valves for smooth operation.
- Note odors and residual moisture.
Best materials and upgrades to reduce leak risk
Monthly inspections naturally lead to contemplating long-term solutions that reduce the chance of future leaks.
Recommended upgrades include replacing rubber hoses with braided stainless steel, installing quarter-turn shutoff valves, upgrading to corrosion-resistant PEX or brass fittings, and fitting a stainless steel or composite sink flange.
Adding a water sensor and reinforced drain assembly further minimizes risk and simplifies future maintenance.
How hard water and corrosion affect fittings
When mineral-laden hard water flows through plumbing over time, it leaves scale deposits that narrow pipe interiors and pit metal surfaces, accelerating wear on fittings and seals.
Corrosion weakens threads, joints and compression rings, promoting leaks and hindering proper sealing.
Regular descaling, water softening, and replacing corroded parts with corrosion-resistant materials extend component life and reduce leak incidence.
Troubleshooting Guide for Persistent or Unusual Leaks
When leaks persist or present oddly, the guide outlines how to spot hairline cracks, pinhole leaks, and concealed pipe damage through targeted inspection.
It contrasts temporary patches and stopgaps with permanent repairs and replacement options.
It also highlights warning signs that point to broader plumbing failures or structural issues requiring professional intervention.
Diagnosing hairline cracks, pinhole leaks, and hidden pipe damage
Detecting hairline cracks, pinhole leaks, and concealed pipe damage requires careful observation and targeted tests because these problems often manifest intermittently and leave minimal visible evidence.
Inspect joints, traps, and supply lines for dampness, mineral deposits, or discoloration. Use paper towels, dye tests, and dry-paper trails while running water or applying pressure.
Listen for drips, check behind cabinets, and consider moisture meters to locate hidden failures.
Temporary fixes vs. permanent solutions
Differentiate temporary fixes from permanent solutions by matching the repair method to the leak’s cause, severity, and location.
Temporary options—plumber’s tape, epoxy putty, rubber patch clamps—buy time and limit water until parts or professional help arrive.
Permanent solutions replace failed components: resin-welded fittings, new trap assemblies, soldered or properly crimped joints.
Choose permanence for recurrent, enlarging, or inaccessible failures.
Signs of larger plumbing or structural problems
After temporary measures or straightforward part replacements fail to stop water or problems recur in different locations, the leak may signal a larger plumbing or structural issue requiring broader troubleshooting.
Indicators include persistent moisture despite repairs, spreading stains or mold, unusually high water bills, pressure fluctuations, recurring clogs, sagging cabinets or floors, and multiple leaks downstream.
Such signs warrant professional inspection and possible systemic repairs.
Cost Estimates and When Replacement Is More Cost-Effective
Typical part prices for DIY repairs (washers, supply lines, sealant) are often under $50, while professional service fees for diagnosis and repair commonly range from $100 to $300 or more. A table below compares common DIY costs, average plumber charges, and scenarios where full replacement of sink, drain, or piping is advisable. Replacement is recommended when corrosion, repeated failures, extensive water damage, or complex hidden pipe issues make repairs unreliable or nearly as costly as new installation.
| Item | Typical DIY Cost | When Replacement Is Recommended |
|---|---|---|
| Parts (washers, seals, hoses) | $5–$50 | Minor leaks, isolated component failure |
| Professional service | $100–$300+ | Persistent leaks after repairs, unknown source |
| Replacement (sink/drain/piping) | $200–$1,000+ | Corrosion, structural damage, repeated failures |
Typical DIY part costs vs. professional service fees
Many homeowners weigh the upfront cost of replacement parts against the charge for a licensed plumber when deciding whether to DIY a sink leak repair.
Typical parts—washers, O-rings, P-trap sections, slip-joint nuts—range $5–$40. A basic service call and repair often runs $100–$300 or more.
For minor fixes, DIY saves money; complex leaks may justify professional fees.
When replacing the sink, drain, or piping is recommended
Cost comparisons help determine when a simple parts swap is sufficient and when full replacement of the sink, drain assembly, or supply and waste piping is more economical.
Replacement is recommended when corrosion, extensive cracking, multiple leaking joints, mold, or repeated repairs raise cumulative costs near or above replacement estimates.
Also replace when renovations, upgrades, or code compliance require new materials or improved layouts.
Quick Tips and Common Mistakes to Avoid
A few targeted tips help prevent common errors when repairing a sink leak.
Careful tightening prevents stripped threads from overtightening, while choosing sealants compatible with the materials avoids chemical damage and failed seals.
Relying on temporary fixes can mask underlying issues and often leads to larger, costlier repairs.
Tightening vs. overtightening: how to avoid stripping fittings
Recognize that snug, not brutal, force prevents most leaks: fittings seal by compressing washers or threads, so tightening should stop once resistance increases and the joint feels secure.
Use properly sized wrenches, apply steady even pressure, and tighten incrementally.
If metal threads deform or plastic fittings crack, loosen and reassess—replace damaged parts rather than forcing a tighter fit to avoid stripping.
Using the right sealants and avoiding incompatible products
After ensuring fittings are snug but not overstrained, attention turns to the sealants used around joints and connections.
Use plumber’s tape for threaded pipes, silicone for sinks and drains, and plumber’s putty where recommended.
Avoid mixing incompatible chemistries (e.g., solvent cements with silicone) and petroleum-based products on rubber seals.
Read manufacturer guidance and test fit before applying permanent sealants.
When temporary fixes can create bigger problems
Ignore quick patches that look tidy but aren’t engineered for long-term plumbing: temporary fixes—rubber bands, duct tape, caulk over a corroded joint, or chemical drain cleaners used repeatedly—often mask underlying failures and can accelerate damage to seals, trap components, and nearby cabinetry.
Such stopgaps delay proper diagnosis, increase repair complexity, void warranties, and raise mold or structural risks; replace with correct parts and professional assessment.
Visual Reference Gallery for Common Leak Locations
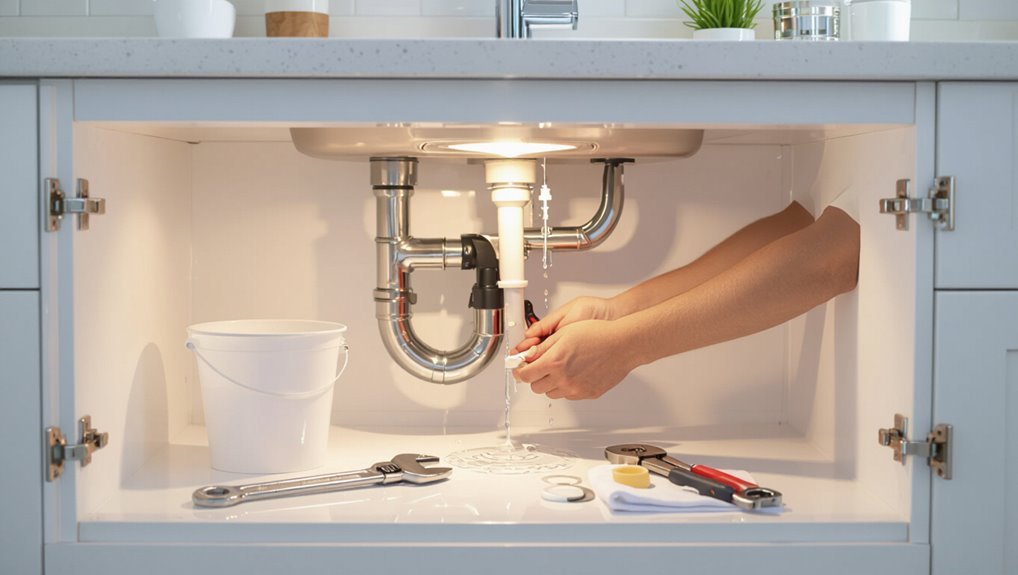
A concise visual gallery helps identify the most common leak locations beneath a kitchen sink by showing real examples of failing components and typical water trails.
Photographs and labeled diagrams illustrate loose supply connections, corroded P-traps, cracked tailpieces, worn gaskets, and sink flange leaks.
Close-ups highlight drip patterns and rust stains.
Captions note inspection tips, likely causes, and suggested first-step fixes for each image.
Conclusion
To sum up, a majority of under-sink leaks are simple: roughly 60% stem from loose fittings or worn washers, making them repairable by beginners with basic tools. Following preparatory checks, stepwise repairs, and proper testing typically resolves issues quickly. When leaks persist or involve corroded pipes, replacement may be more cost-effective. By avoiding common mistakes and using the troubleshooting tips provided, homeowners can confidently address most leaks and decide when to call a professional.