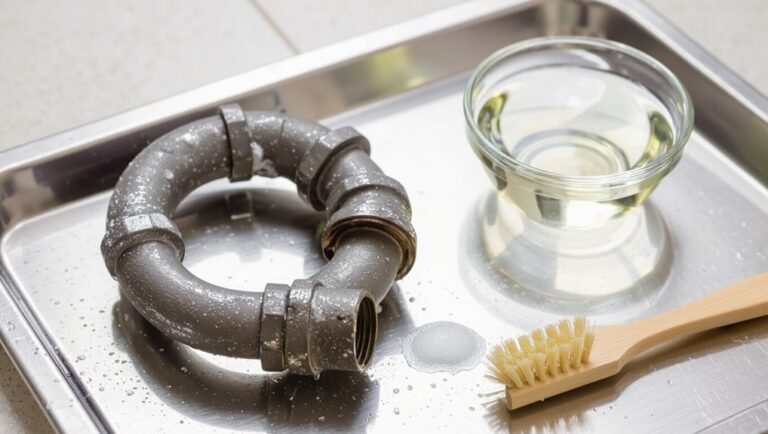
How to Purge a Gas Line Safely: Step-by-Step Guide for Homeowners
To safely purge a gas line, follow these essential steps: begin by shutting off the gas utility and notifying all occupants in the area. Ensure proper ventilation, gather necessary tools and personal protective equipment (PPE), and check for any required permits or local code compliance. Establish a clear outlet for the purge, utilize appropriate regulators and hoses, and perform a controlled displacement while closely monitoring pressure and potential leaks. Finally, conduct thorough leak tests and relight your appliances. For detailed guidance on each step, associated risks, and advice on when to consult a professional, refer to the extended instructions.
What Purging a Gas Line Means and When Homeowners Need It
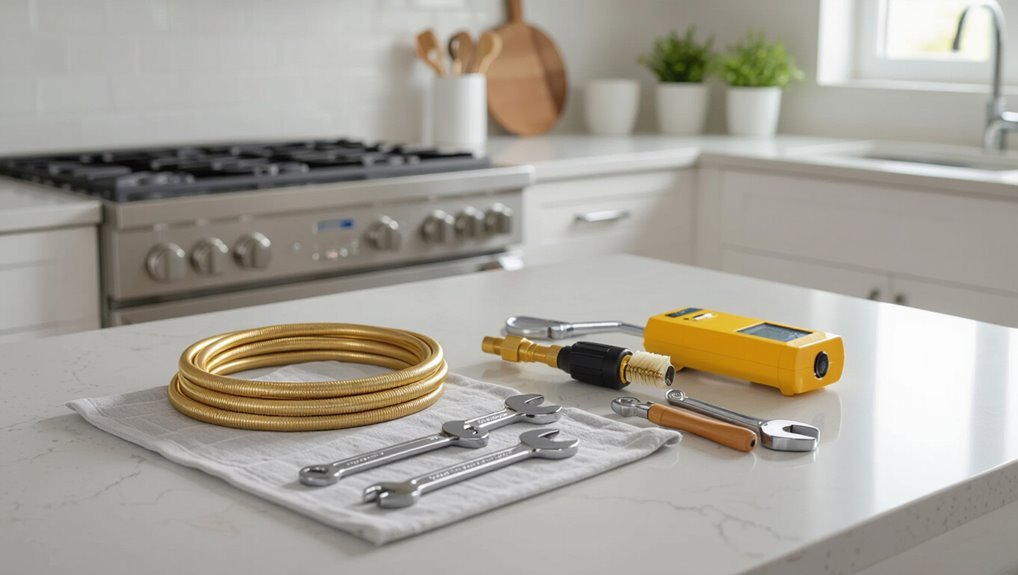
Purging a gas line means removing air, contaminants, or residual gas from piping to guarantee a safe, consistent fuel flow to appliances.
Homeowners typically require purging after new installations, repairs, appliance replacements, or when air has entered the line.
Building codes, permit requirements, and safety standards often dictate procedures and when a licensed professional must perform the work.
Definition and purpose of purging a gas line
Removing trapped gas from a distribution line or appliance connection, purging is the controlled process of displacing unwanted gas with an inert or clean medium until the line contains only the desired fuel at safe pressure and composition.
Its purpose is to eliminate flammable mixtures, prevent corrosion or contamination, and guarantee operational safety.
Homeowners learning how to purge a gas line should understand objectives before proceeding or hiring a professional.
Common scenarios requiring purging (new installations, repairs, appliance replacement, air in line)
When a gas line is newly installed, modified, or opened for service, trapped air, testing gases, or contaminants can create unsafe mixtures or impede appliance performance; consequently, purging is required in specific situations such as new installations, repairs, appliance replacement, and when air has entered the line.
Homeowners also need purging after pressure testing, component swaps, or extended inactivity to guarantee correct flow and combustion.
Legal and safety obligations for homeowners (codes, permits, when to hire a pro)
Why must homeowners understand the legal and safety obligations tied to gas-line purging? Homeowners must follow local codes, obtain required permits, and comply with utility company rules.
Many jurisdictions mandate licensed technicians for purging, pressure testing, or reconnection. Failure risks fines, voided insurance, and hazards.
When unsure, hire a certified plumber or gas contractor to guarantee legal compliance and safe execution.
Quick Safety Overview and Immediate Do’s and Don’ts
Before beginning any purge, the article lists critical safety rules such as shutting off supply valves, ventilating the area, and using appropriate detection equipment.
It warns to avoid open flames, operating light switches, and using phones or other spark-producing devices near the work area.
If unexpected gas odor persists, equipment malfunctions, or unsure conditions arise, the author advises stopping immediately and calling a qualified emergency professional.
Critical safety rules before you start
If flammable vapors or pressurized gas may be present, the task requires strict adherence to specific safety rules:
Confirm utility shutoff and obtain permits, notify occupants and neighbors, ventilate the area, and guarantee competent supervision.
Use approved tools and personal protective equipment, verify gas detector calibration, and have an emergency plan and unobstructed exits.
Record actions and contacts before proceeding.
What to avoid (open flames, switches, phones near work area)
Several clear prohibitions must be observed at the work site to prevent ignition or interference.
No open flames, smoking, or pilot lights.
Do not operate light switches, appliances, or garage doors.
Avoid using mobile phones, radios, or tools that can spark.
Keep away batteries and lighters.
Restrict entry to essential personnel only and post clear warnings until the area is confirmed gas-free.
When to stop and call an emergency professional
When should work cease and a qualified emergency professional be contacted: whenever any unexpected odor of gas persists after ventilation, a hissing sound or bubbling at fittings is detected, any flame or sparking occurs, or a person experiences dizziness, headache, nausea, shortness of breath, or loss of consciousness.
Immediately evacuate, avoid ignition sources, shut off main gas if safe, and call emergency services and the gas utility for expert response.
Essential Tools, Materials, and Personal Protective Equipment
The article lists the specific tools and materials required to purge a gas line safely, followed by optional equipment that can improve efficiency.
It also identifies essential personal protective equipment and monitoring devices, including a gas detector, soap solution for leak checks, gloves, and goggles.
Clear selection and proper use of these items are critical to minimizing risk during the purge.
Required tools list
A concise inventory of essential tools, materials, and personal protective equipment (PPE) guarantees a safe, efficient gas-line purge by matching each item to its specific task and hazard.
- Adjustable wrench and pipe tools for secure fittings
- Manometer or gas detector for pressure and leak checks
- Approved purge hose and fittings rated for gas
- PPE: gloves, safety glasses, and flame-resistant clothing
Optional helpful equipment
Beyond the core items listed previously, several optional tools and accessories can streamline a gas-line purge, improve accuracy, and reduce risk in complex or confined scenarios.
Useful additions include flexible purge tubing, adjustable flow regulators, quick-connect fittings, magnetic or clamp-on valve wrenches, pressure gauges with fine resolution, and a portable ventilating fan.
A compact flashlight and labeled tags aid organization.
PPE and monitoring devices (gas detector, soap solution, gloves, goggles)
Wear appropriate personal protective equipment and deploy monitoring devices before any purge begins to minimize exposure and detect leaks promptly.
The homeowner should use a calibrated combustible gas detector, noncorrosive soap solution for bubble testing, chemical-resistant gloves, and impact-resistant goggles.
Verify detector function, keep detector upwind, apply soap to joints, and replace PPE or batteries as needed to maintain safety and accurate monitoring.
Preparing the Work Area and System for Purge
Before purging, the operator secures the system by shutting off the gas supply and electricity to affected appliances and isolating relevant sections with valves, caps, or plugs.
The work area is cleared, ventilated, and arranged to prevent ignition sources and allow safe access to fittings.
Household members and nearby occupants are notified when purging might affect them or require temporary precautions.
Shutting off gas supply and electricity to affected appliances
Shut off the building’s gas at the meter or main service valve and tag it closed.
Then disconnect or shut fuel supply valves at each affected appliance so the piping between the meter and appliances is isolated.
Turn off electrical power to those appliances at the breaker panel and label circuits.
Verify appliances are cool, pilot lights extinguished, and controls locked out before proceeding.
Isolating sections of the gas system (valves, cap/plug access)
With the supply isolated and appliance valves secured, attention turns to isolating specific sections of the gas piping to create a controlled purge zone.
Technicians close intermediate shutoffs, install temporary caps or plugs on open ends, and verify seal integrity. Each isolation is labeled and documented.
Access points are arranged for safe connection of purge hoses and pressure monitoring without affecting adjacent systems.
Ventilation and area preparation procedures
How should the workspace be prepared to assure adequate air exchange and clear access during a purge?
The area must be cleared of combustibles, openings and windows opened to create cross-ventilation, and mechanical ventilation set up if natural airflow is insufficient.
Assure unobstructed pathways to valves and exits, place barriers to limit access, and position exhaust fans to direct gas away from occupied spaces.
Notifying household and neighbors if needed
A quick notification to residents and nearby neighbors reduces risk and prevents accidental exposure during the purge.
The homeowner should inform occupants, explain timing and safety measures, and advise avoiding ignition sources.
If shared lines or close structures exist, notify adjacent properties and building management.
Provide contact information for questions and emergency response, and post visible notices if work will generate vibrations or odors.
Step-by-Step Gas Line Purging Procedure for Homeowners
The homeowner is advised to confirm required permits and local code compliance before beginning.
Next, system pressure and all fittings should be checked for integrity. Then a clear purge path and downstream ventilation point must be established.
Finally, a safe gas source with proper regulator is connected and a controlled purge is performed using inertia displacement or a measured flow purge method.
Step 1 Verify permits and local code requirements
Before any work begins, confirm required permits and applicable local codes to verify the purging procedure meets legal and safety standards.
Homeowners should check municipal regulations, utility company rules, and required inspection or notification steps.
Obtain permits, document approvals, and schedule any mandated inspections.
Compliance reduces liability, verifies permitted methods, and may require licensed personnel for specific tasks before proceeding with physical gas work.
Step 2 Confirm system pressure and leak-free fittings before purge
Several key checks must be completed to guarantee the gas system is at the correct pressure and all fittings are leak-free before purging.
A qualified person measures static pressure at the manifold and compares it to the appliance rating. They inspect joints, valves, and regulators, apply an approved leak-detection solution, and tighten or replace suspect fittings.
Confirm readings remain stable for the prescribed observation period.
Step 3 Establish purge path and downstream ventilation point
Identify a clear, continuous route for gas to exit the system and a safe, well-ventilated point downstream where displaced gas will disperse.
The homeowner locates an unobstructed outlet, verifies vents or open windows direct fumes away from ignition sources, and guarantees the downstream point is accessible for monitoring.
Block off unintended branches and mark the purge path to prevent accidental reconnection during work.
Step 4 Use safe gas source and regulator setup
One critical task is selecting and installing a safe gas source and regulator that match the pipe size, pressure rating, and gas type to ascertain controlled flow during purging.
The installer secures fittings, uses approved hoses, and mounts a calibrated regulator with pressure gauges.
Leak-tested connections and an accessible emergency shutoff valve guarantee safety.
Only rated equipment and proper grounding are used.
Step 5 Controlled purge using inertia displacement or flow purge methods
Begin the controlled purge by choosing either inertia displacement or flow purging based on pipe size, length, and available ventilation.
Then establish clear start/stop points and monitor locations.
Execute purge slowly, using valves to direct inert gas or controlled flow of fuel gas toward the outlet.
Verify directional flow, maintain steady pressure, avoid turbulence, and purge until predetermined volume or time criteria are met before isolating the line.
Step 6 Monitor flow, odorant presence, and gas concentration with detector
After completing the controlled purge and isolating the line at the predetermined points, attention shifts to monitoring flow, odorant presence, and gas concentration to confirm a safe environment.
A qualified person observes steady flow rates, verifies mercaptan odor detectability, and uses a calibrated combustible gas detector to log concentrations.
Any abnormal readings trigger isolation and corrective action until readings stabilize within acceptable limits.
Step 7 Bleeding air until required methane concentration achieved
Proceed to bleed trapped air from the line methodically until the methane concentration reaches the target set by local codes or the equipment manufacturer.
Open purge points gradually, maintain steady flow, and monitor with a calibrated detector at multiple locations. Continue until readings stabilize within acceptable limits.
Avoid sparks, open flames, and electrical switches during bleeding.
Record concentration values and durations for compliance.
Step 8 Securely close valves and pressure test the line after purge
Once acceptable methane levels are confirmed, the operator should close purge points and service valves in a controlled sequence to isolate the line without entrapping air pockets.
Then perform a calibrated pressure test at recommended test pressure for the system duration, monitor gauges for leaks, record results, and remedy any pressure decay.
Restore protective caps and document the procedure for safety and inspection.
Step 9 Appliance relighting and functional checks
Relight each appliance only after the gas line is confirmed secure, ventilated, and pressure-tested, following the manufacturer’s lighting sequence and using a certified lighter or pilot ignition where specified.
Verify burners, pilots, and igniters operate reliably, listen for irregular sounds, and observe steady flames and correct flame color.
Check thermostats, timers, and safety shutoffs; record any malfunctions for professional repair.
Step 10 Final leak check and documentation
A final leak check and thorough documentation conclude the purge process: each accessible fitting, valve, and appliance connection is re-inspected using a calibrated leak detector or approved soapy-water solution while the system is under working pressure.
Findings are recorded—including pressure readings, test methods, times, and any corrective actions—so the homeowner has a clear, timestamped record for safety and future reference.
A certified inspector signs and retains copies.
How to Use Common Purge Methods and Tools
The section compares inertia (flow) purges and mechanical purges, noting the conditions and risks associated with each method.
It also contrasts verification techniques, such as calibrated gas detectors versus simple soap tests, to show differences in sensitivity and reliability.
Finally, it outlines appropriate uses for purge adapters, caps, and temporary vents to guarantee controlled venting and safe isolation during the purge.
Inertia/flow purge vs. mechanical purge explained
Often confused, inertia (flow) purges and mechanical purges use different principles and equipment to clear gas lines: inertia relies on sustained flow to displace gas, mechanical uses tools to physically push or extract gas. Selection depends on line length, access, and contaminants.
| Method | Characteristic |
|---|---|
| Inertia (flow) | Continuous flow displacement |
| Mechanical | Positive push/pull action |
| Speed | Variable |
| Equipment | Minimal vs. tools |
Using a calibrated gas detector vs. soap test
When choosing between a calibrated gas detector and a soap test for purging verification, technicians weigh accuracy, speed, and safety: calibrated detectors provide quantitative, real-time readings of specific combustible or toxic gases, while soap tests offer a simple, qualitative check for visible leaks at fittings and joints.
Detectors confirm gas concentration and alarm thresholds; soap identifies small external leaks. Both require proper technique and documented results.
When to use purge adapters, caps, and temporary vents
Select purge adapters, caps, and temporary vents based on system size, gas type, flow direction, and access points to control purging flow and isolate sections safely.
Use purge adapters where fittings restrict flow or require shift to flexible hose.
Apply caps to seal unused branches during purging.
Install temporary vents at high points or downstream exits to guarantee efficient displacement and confirm complete purging before permanent sealing.
Troubleshooting Problems During Purge
If a leak is detected during the purge, the operator should stop the procedure, isolate the affected section, and repair the leak before resuming.
Persistent air pockets or slow purge rates require checking flow paths, increasing purge volume or pressure within safe limits, and verifying valve sequencing.
When odorant is not detectable or detectors fail, replace or recalibrate sensing equipment and use alternative verified detection methods before continuing.
What to do if you detect a leak during purge
Stop the purge immediately and isolate the affected section upon detecting a leak.
Evacuate the area, ventilate, and shut off valves upstream and downstream.
Do not operate electrical switches or open flames.
Mark the leak location and notify the utility or a licensed technician.
Document actions taken.
Only resume work after a certified repair and pressure test confirm leak elimination and safe conditions.
Handling persistent air pockets or slow purge rates
Several common causes can produce persistent air pockets or slow purge rates during a gas-line purge, including improper venting points, inadequate flow velocity, partial obstructions, or trapped high spots.
The technician should quickly identify the symptom pattern, verify upstream pressure and flow settings, and inspect vent locations and purge connections to determine whether corrective actions like adjusting flow, adding vents, or repositioning piping are needed.
If flow remains low, isolate sections, remove restrictions, and re-establish proper venting while monitoring differential pressure and gas velocity to confirm restoration.
Dealing with nondetectable odorant or detector faults
When nondetectable odorant or detector faults occur during a purge, the technician must treat the situation as a potential loss of warning capability and immediately verify detector function and odorant presence before continuing.
Inspect detector calibration and power, use a known gas source or calibrated tester, and confirm odorizers are functioning.
If uncertainty persists, stop the purge, ventilate, notify supervisor, and repair or replace faulty equipment.
Post-Purge Verification, Testing, and Recordkeeping
After purging, technicians verify system integrity with pressure testing against accepted thresholds to confirm no leaks remain.
They then check combustion characteristics and appliance performance to guarantee safe, efficient operation.
All results, including test values, observations, and photos, are documented for permits and warranty records.
Pressure testing and acceptable thresholds
Begin pressure testing only after the purge confirms the system is free of combustible gas and all valves and seals are secured for test conditions.
A certified gauge or manometer applies standardized pressure (per local code) while monitoring for drop over a specified dwell time.
Acceptable thresholds follow jurisdictional standards; any pressure loss mandates leak isolation, repair, retest, and documented results retained with installation records.
Combustion and appliance performance checks
Once the purge and pressure testing confirm system integrity, combustion and appliance performance checks verify safe operation and proper combustion characteristics.
Technicians inspect burners, pilot flames, and venting, measure CO, O2, and draft, and adjust air-fuel mixtures to manufacturer specifications.
Appliance operation cycles are observed for stability. Findings, adjustments, and measured values are recorded for homeowner reference and future maintenance.
Recommended documentation and photos for permits and warranties
Documentation is essential for permits, warranties, and future service, so technicians should compile clear, dated records and photographs that demonstrate the post-purge condition and tests performed.
Records should include technician name, license, purge method, pressure and leak-test results, appliance checks, meter readings, and time stamps.
Photos should show valve positions, fittings, test gauges, and appliance serial numbers for permit submission and warranty validation.
Risks, Common Mistakes, and When to Hire a Professional
Common homeowner errors in purging gas lines include skipping pressure tests, using improper sealing materials, and attempting complex repairs without proper tools or training.
Certain risk factors—such as leaks that cannot be isolated, odorless gas systems, multi-family or commercial connections, or any sign of corrosion or structural damage—warrant assessment and repair by a licensed technician.
When hiring a contractor, the homeowner should verify state licensing, insurance, references, and ask about experience with similar systems, safety procedures, and post-work testing protocols.
Most common homeowner errors and how to avoid them
Recognize that purging a gas line carries significant risks—explosion, fire, asphyxiation, and property damage—so homeowners who lack specialized training or proper equipment frequently make costly and dangerous mistakes.
Common errors and avoidance:
- Incorrect venting locations; plan airflow and shutoffs.
- Skipping leak checks; use proper detectors and soap tests.
- Using wrong tools; use rated fittings only.
- Rushing; follow stepwise patience.
Risk assessment: situations that require licensed technicians
After outlining typical homeowner errors and preventive steps, the next focus is evaluating which purging scenarios exceed ordinary DIY competence and require a licensed technician.
Complex systems, multiple junctions, indoor purges, evidence of leaks or corrosion, unfamiliar regulators or meters, and local code triggers demand professional assessment.
When ignition sources, structural penetrations, or gas odor persist, stop and call a licensed technician immediately.
Questions to ask a gas contractor and what qualifications to look for
Who should a homeowner call when a purge exceeds DIY skills? A licensed gas contractor with certification, bonded insurance, and local code familiarity.
Ask about license number, insurance proof, experience with purges, references, and written estimates.
Verify permits, testing procedures, leak-detection methods, and safety protocols.
Avoid contractors refusing documentation or shortcuts; hire a certified professional for complex or high-risk purges.
Maintenance, Prevention, and Long-Term Safety Tips
Ongoing maintenance and prevention reduce the likelihood of leaks and unsafe conditions after a purge.
A routine inspection schedule for gas lines and appliances, regular checks for the familiar sulfur-like odor, and household gas-safety drills keep occupants prepared.
Upgrading fittings, valves, and detectors provides durable protection and should be part of any long-term safety plan.
Regular inspection schedule for gas lines and appliances
A consistent inspection schedule greatly reduces the risk of leaks and malfunctions by ensuring gas lines and appliances are checked at appropriate intervals.
Homeowners should arrange professional inspections annually, visually check connections and vents quarterly, and document findings.
Replace corroded fittings, tighten loose connections, and service appliances per manufacturer guidance.
Promptly address identified issues to maintain safety and regulatory compliance.
Odor awareness and household gas-safety drills
When residents recognize the distinct sulfur-like smell added to natural gas and respond immediately, many serious incidents can be prevented; consequently, households should train everyone to identify that odor, recognize subtle signs of a leak (hissing sounds, dead vegetation near exterior lines), and understand the steps to take—ventilate, evacuate, avoid using electronics or open flames, and notify the gas utility and emergency services.
Regular drills reinforce roles, timing, and communication.
Upgrading fittings, valves, and detectors for added safety
Recognizing and responding to a gas leak is only the first layer of household protection; upgrading fittings, valves, and detectors provides enduring safeguards that reduce future risk.
Homeowners should replace corroded fittings with approved materials, install excess-flow and automatic shutoff valves, and fit fixed gas detectors with audible and visual alerts.
Periodic professional inspections guarantee components meet codes and function reliably.
Regional Regulations, Codes, and Helpful Resources
Before beginning any purge, readers should check local code requirements and contact the municipal permit office or utility authority to confirm applicable permits and inspection steps.
National standards and equipment manufacturer guidelines also inform safe procedures and must be followed alongside regional rules.
The article will provide links to trusted resources and outline emergency contact protocols for rapid response.
How to find local code requirements and permit offices
Where can a homeowner confirm the specific gas line purging rules that apply to their property?
Contact the local building department or municipal permit office, search the city/county website for plumbing and gas codes, and review local utility company guidance.
Verify required permits, inspection processes, and licensed contractor lists.
Document contacts and reference case numbers before scheduling work to guarantee compliance.
Useful national standards and manufacturer guidelines
After confirming local permit and inspection procedures, homeowners should consult nationally recognized standards and manufacturer instructions that define safe gas-line purging practices.
Refer to ANSI/AGA codes, NFPA 54 (National Fuel Gas Code), and appliance maker manuals for pressure limits, purging media, and required ventilation.
Follow torque, connection, and testing procedures specified by manufacturers; prioritize code-mandated leak testing and documented compliance.
Links to trusted resources and emergency contact protocols
What regional regulations, codes, and emergency contacts should homeowners keep at hand when purging a gas line? Homeowners should reference local building codes, utility company procedures, and emergency services. Keep documented links and phone numbers accessible.
- Local building department code pages
- Gas utility emergency hotline
- National safety standards (e.g., ANSI, CSA)
- Manufacturer support and installation manuals
Conclusion
Like a careful choreographer guiding a delicate dance, the homeowner who purges a gas line with respect, precision, and vigilance turns potential danger into controlled order. Each measured step, from tools to tests, stitches safety into the home’s veins. Yet the air remembers—caution, training, and code are the steady music. When doubts arise, calling a professional keeps harmony intact, transforming risk into reassurance and the household into a reliably safe sanctuary.