How to Fix Cloudy Hot Water: Simple Steps to Diagnose and Clear It Fast
If you’re experiencing cloudy hot water, it’s likely due to trapped air, mineral buildup, or sediment in your water heater. To fix this issue, start by running your hot taps to release any air bubbles. Conduct a cup-and-settle test to differentiate between bubbles and sediment. Flushing your water heater can help eliminate any accumulated sediment. Additionally, adjusting the temperature to 120–125°F, replacing a worn anode rod, and cleaning faucet aerators can improve water clarity. If the problem persists and you notice odors or discoloration, it’s best to consult a professional. Follow these simple steps for a clearer and cleaner hot water experience.
Why Your Hot Water Looks Cloudy Right Now
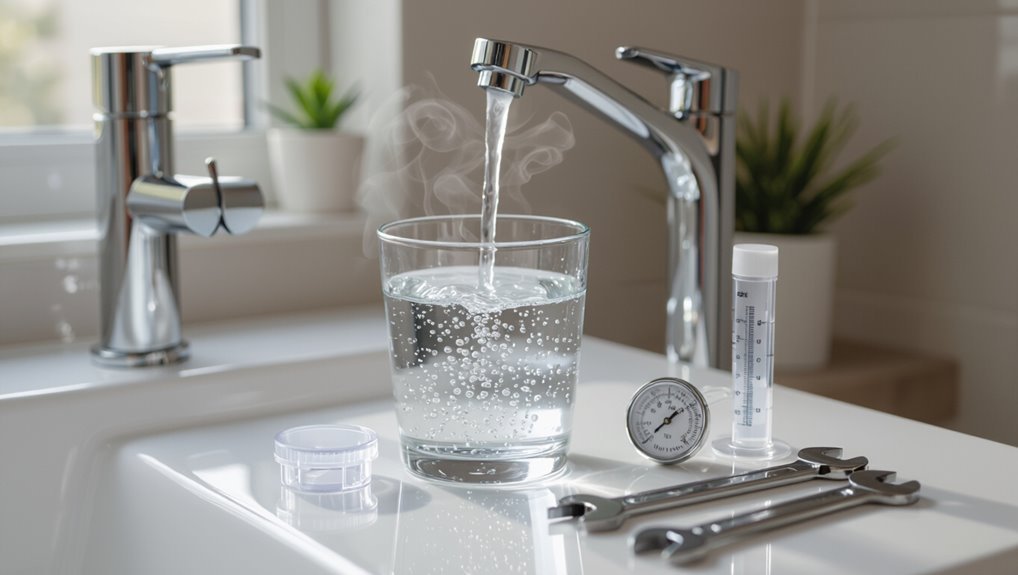
Cloudy hot water often stems from trapped air, mineral buildup in the water heater, or sediment stirred by recent plumbing work.
The cloudiness may appear only in hot taps because higher temperatures release dissolved gases and dislodge deposits more readily than cold water.
While most cases are benign and clear after a moment, persistent discoloration or odd odors can signal corrosion, a failing anode rod, or other serious issues requiring inspection.
Common causes of cloudy hot water
Many homeowners notice a milky or hazy appearance when running hot water, and several predictable causes explain this phenomenon: dissolved air, mineral precipitates from hard water, sediment disturbed in the water heater, or corrosion and bacterial growth in older systems.
Common causes include trapped air from recent plumbing work, calcium carbonate clouding in hard water, tank sediment agitation, and rusty or biofilm-bearing pipes—key to how to fix cloudy hot water.
How cloudiness differs between hot and cold water
Because temperature affects solubility and trapped gases differently, hot water often appears milky while cold water looks clear under the same household conditions.
Heating reduces dissolved gas solubility, releasing microbubbles that scatter light. Mineral precipitates may form in hot lines but remain dissolved in cold.
Observing whether cloudiness clears from bottom up helps distinguish gas from particulate causes without suggesting severe system failure.
When cloudy water indicates a serious problem
A persistent milky appearance in hot taps can signal more than harmless dissolved gases—when cloudiness remains after water stands, emits an odor, or coincides with discoloration and sediment, it often points to underlying issues such as corrosion, bacterial growth, or mineral scale disrupting the water heater or plumbing.
Prompt inspection is advised: check anode integrity, flush tanks, test for bacteria, and consult a plumber to prevent contamination or failure.
Quick Check: How to Identify the Type of Cloudiness
A few quick observations and simple home tests can usually identify whether cloudy hot water is caused by air, sediment, or dissolved minerals.
Visual cues (bubbling that clears from the bottom up, particles that settle, or a persistent milky tint) and tests like the cup test, settle test, and aeration test help narrow the cause.
If results are unclear or contaminants are suspected, a professional water test or plumber inspection is recommended.
Visual cues to distinguish air, sediment, and mineral cloudiness
How can one tell whether cloudy hot water is caused by air, sediment, or dissolved minerals?
Air appears as tiny, fast-rising bubbles that clear from a glass within seconds.
Sediment shows as visible particles that settle to the bottom slowly and may feel gritty.
Mineral cloudiness looks milky and persistent, not settling quickly, often leaving white films or scale on surfaces.
Simple home tests to run (cup test, settle test, aeration test)
When diagnosing cloudy hot water, three simple at-home tests—cup test, settle test, and aeration test—quickly indicate whether air, sediment, or dissolved minerals are responsible.
Fill a clear glass with hot tap water: immediate cloudiness that clears from bottom up after settling suggests air.
Allow a sample to sit; visible particles sinking indicate sediment.
Agitating the water: persistent opacity after aeration points to minerals.
When to call a professional for testing
Why consider professional testing? A plumber or water lab can confirm causes—mineral content, bacterial growth, corrosion, or pressure issues—when DIY tests are inconclusive.
Seek testing if cloudiness persists, appears suddenly, has odor or discoloration, or follows plumbing changes.
Professionals provide accurate analysis, safety guidance, and targeted solutions like filtration, softening, or pipe repair to prevent recurrence.
Step-by-Step Troubleshooting to Diagnose the Source
A systematic approach helps pinpoint why hot water appears cloudy.
Begin by inspecting the water heater and visible plumbing connections, and note any recent work or changes to the supply.
Test water from multiple taps and at different times, using a clear container and flashlight to observe particles.
Inspect the water heater and plumbing connections
Begin by visually and physically examining the water heater and its visible plumbing connections to identify leaks, loose fittings, corrosion, sediment buildup, or signs of recent work that could introduce air.
Check for drips, mineral crusts, rusted valves, and loose unions.
Inspect the anode rod access, drain valve, and pressure-relief valve for deposits or seepage that impair operation or allow air intrusion.
Check recent plumbing work or changes in water supply
After inspecting the heater and nearby fittings, the next step is to check any recent plumbing work or changes in the water supply that might introduce air, dislodge sediment, or alter flow.
Review recent repairs, pipe replacements, municipal maintenance, or pressure changes.
Ask installers about system flushing, valve adjustments, or temporary shutoffs.
Document findings and correlate timing with cloudiness onset to pinpoint cause.
Test water from different taps and times of day
Where did the cloudiness appear and when?
The observer should sample hot water from multiple taps—kitchen, bathroom, utility—at different times: morning, midday, after unused periods and immediately after running other fixtures.
Record which outlets show cloudiness and timing patterns to distinguish localized issues (single fixture or branch) from whole-house or time-dependent supply problems, guiding targeted next steps.
Use a clear container and flashlight to examine particles
A clear glass or plastic container and a bright flashlight are used to inspect cloudy hot water for particles that indicate sediment, corrosion, or biological matter.
Collect a fresh sample, hold it against light, and gently swirl.
Observe particle size, color, and behavior—settling, floating, or suspending.
Note metallic flakes, dark specks, or biofilm strands; photograph findings for comparison and reporting.
How to Fix Cloudy Hot Water Quickly (Do-It-Yourself Steps)
A few straightforward DIY actions can often clear cloudy hot water without calling a professional.
Common fixes include releasing trapped air, flushing the water heater to remove sediment, and adjusting temperature and pressure settings.
If problems persist, replacing aging components like the anode rod and cleaning or swapping aerators and fixtures are practical next steps.
Fixing cloudiness caused by trapped air
Begin by confirming that tiny, fast-rising bubbles cause the cloudy appearance: trapped air is the most common, harmless reason for milky hot water.
Run hot taps briefly; if cloudiness clears from bottom up, air is indicated.
Check recent plumbing work or pressure changes.
Bleed faucets and showerheads, and open aerators to release trapped air.
Repeat until water runs clear.
Flushing the water heater to remove sediment
If cloudy hot water does not clear after airing the lines, sediment buildup in the water heater may be trapping minerals and causing milky discoloration.
Draining and flushing the tank removes accumulated sediment: shut power/gas, close cold inlet, attach hose to drain valve, open hot faucet to vent, open drain and flush until clear, then refill and restore power.
Regular flushing prevents recurrence.
Adjusting water heater temperature and pressure settings
Several simple adjustments to a water heater’s temperature and pressure settings can often stop cloudy hot water caused by dissolved gases or overly aggressive heating.
Lower the thermostat to 120–125°F to reduce boiling and gas release.
Check house water pressure; install or adjust a pressure regulator to keep it below 80 psi.
After changes, run hot taps and observe clarity.
Replacing anode rod and other aging components
Inspecting and replacing a water heater’s anode rod and other worn components can quickly resolve cloudy hot water caused by corrosion, sediment, or failing parts.
Technicians or competent DIYers should shut off power and water, remove the old anode, and install a compatible replacement.
Check dip tubes, heating elements, valves, and tank for deterioration; replace corroded parts and retest for clarity and leaks.
Cleaning or replacing fixtures and aerators
After replacing anode rods and worn internal parts, attention should turn to the fixtures where cloudy water first appears: faucets, showerheads, and aerators often trap mineral deposits, sediment, and biofilm that make hot water look milky at the point of use.
Remove aerators, soak in vinegar, scrub with a brush, flush lines, and replace damaged cartridges or aerators.
Routine cleaning prevents recurrence.
When Cloudiness Is Caused by Hard Water or Minerals
Cloudiness from hard water or dissolved minerals often shows as fine, floating particles or white scale rather than gritty sediment, and simple tests can help distinguish the two.
Solutions range from point-of-entry or point-of-use water softeners—each with installation, maintenance, and space considerations—to chemical or mechanical descaling procedures for water heaters and plumbing.
Guidance on choosing a softener and safely performing descaling helps homeowners address mineral-caused cloudiness effectively.
Identifying mineral deposits vs. sediment
How can one tell whether cloudy hot water comes from dissolved minerals rather than loose sediment?
The observer should note cloudiness that clears from bottom up in a glass—indicating trapped air—or white, filmy scale on fixtures and heater elements—indicating minerals.
Sediment produces visible particles that settle quickly and scratch surfaces.
Simple tests: collect, let stand, and inspect residue color, texture, and settling behavior.
Water softener options and installation considerations
If tests and visual checks point to dissolved minerals rather than suspended sediment, the homeowner should consider water-softening options to reduce scale and cloudiness.
Choices depend on budget, water hardness, space, and maintenance. Consider:
- Salt-based ion exchange systems for whole-house hardness removal
- Salt-free conditioners for scale inhibition, lower maintenance
- Dual-tank units for continuous supply during regeneration
- Professional sizing and permit needs for installation
Descaling treatments for water heaters and pipes
Begin descaling the water heater and connected pipes with a targeted treatment plan when mineral buildup is identified as the cause of cloudy hot water.
Use diluted vinegar or commercial descaler to flush tanks and lines, following manufacturer guidelines.
Consider professional acid flushing for heavy scale.
Replace sacrificial anode rods, inspect heating elements, and retest water clarity.
Schedule periodic maintenance to prevent recurrence.
Plumbing Issues That Can Make Hot Water Cloudy
Plumbing problems are a common cause of cloudy hot water and often stem from corroded pipes shedding metallic particles into the supply.
Cross-connections or backflow can introduce contaminants from other systems, producing discoloration or turbidity.
Recent repairs or nearby municipal work may stir sediment or temporarily alter flow, leading to short-term cloudiness.
Corroded pipes and metallic particles
Several sources of corrosion and loose metallic particles within a home’s water system can turn otherwise clear hot water cloudy or give it a metallic tint.
Aging iron or galvanized pipes shed rust; deteriorating fittings, solder, or heater components release flakes. Mineral buildup accelerates wear.
Testing for iron, copper, and sediment helps identify causes. Replacement, targeted flushing, or filtration removes particles and restores clarity.
Cross-connections and backflow problems
While corroded pipes and loose metallic particles are common internal causes of cloudy hot water, external flow issues can also introduce contaminants.
Cross-connections between potable and nonpotable lines, faulty backflow preventers, or missing air gaps allow contaminated water to enter the hot supply.
Inspect plumbing for improper connections, test backflow devices, and correct installations to prevent reverse flow and recurring cloudiness.
Effects of recent repairs or municipal work
If municipal crews replace mains, repair valves, or flush lines, transient disturbances can introduce air, sediment, and dislodged mineral deposits into a building’s hot-water system, producing cloudy water until the system clears.
Building occupants should run taps until clarity returns, check multiple fixtures, and notify the water utility if turbidity persists.
Professional flushing or filter cleaning may be needed for stubborn deposits.
Safety and Maintenance Checklist
A concise safety and maintenance checklist helps prevent cloudy hot water and extends water heater life.
It should state how often to flush and inspect the tank, recommended temperature and pressure settings for safe operation, and clear criteria for replacing parts versus the entire unit.
Following these items reduces risk and guides timely repairs or replacement.
How often to flush and inspect your water heater
Regular flushing and visual inspections of a water heater should be scheduled at least once a year, with more frequent checks—every six months—recommended for homes with hard water or heavy sediment buildup.
During each service, drain a few gallons to clear sediment, inspect the anode rod, check for leaks or corrosion, verify drain valve operation, and document findings for future comparison.
Safe temperature and pressure settings
Set water heater temperature to a level that balances scald prevention with bacterial control: 120°F (49°C) is recommended for most homes, while 140°F (60°C) may be used in situations requiring Legionella mitigation but only with additional anti-scald devices on fixtures.
Maintain pressure below 80 psi, verify functioning pressure-relief valve, inspect expansion tank, and document settings after any adjustments.
When to replace parts versus the whole water heater
Evaluate the unit’s age, performance history, and failed components to decide whether repairing parts or replacing the entire water heater is safer and more cost-effective.
Prioritize replacement for units older than ten years, repeated failures, extensive corrosion, or compromised tanks.
Repair isolated component failures—elements, thermostats, valves—when warranty, cost, and remaining service life justify it.
Always follow local codes and professional inspection.
Cost, Time, and Tools Needed for DIY vs. Professional Repair
Cost, time, and required tools vary between common DIY fixes and hiring a professional, so comparing them helps homeowners choose the best route. The brief table below summarizes typical costs, time estimates, and essential tools or materials for several common repairs. Further guidance can help decide when professional service is worth the extra expense.
| Repair | Estimated Cost | Time & Tools |
|---|---|---|
| Flush/bleed tank | $0–$50 | 30–60 min; garden hose, bucket |
| Replace anode rod | $100–$300 | 1–2 hours; wrench, replacement rod |
| Fix sediment/clog | $50–$200 | 1–3 hours; flush kit, scraper, plumber’s snake |
Estimated costs for common fixes
Many common causes of cloudy hot water can be addressed with modest expense and time, but repair complexity varies: simple fixes like flushing a tank or replacing anode rods typically require basic tools and an hour or two for a competent DIYer, while sediment removal, pressure issues, or tank replacement often need a professional and can run from a few hundred to several thousand dollars and take a half-day to a day.
Typical costs:
DIY flush $0–50;
anode rod $20–80;
thermostat/element $30–150;
professional flush or repair $150–600;
tank replacement $800–3,500.
Typical time required for each repair
Repair times for cloudy hot water issues vary widely with the task and the skill level of the person performing it: simple fixes like flushing a tank or adjusting temperature take 30–90 minutes for a DIYer, while replacing anode rods or valves often requires 1–3 hours.
Corrosion repairs or tank replacement can span several hours to a full day. Professionals are typically faster.
Essential tools and materials list
A clear inventory of tools and materials helps determine whether a cloudy hot water issue is a short DIY project or requires a professional.
Costs, time, and skill influence choice. Basic homeowner kits differ from plumber setups; estimate parts and labor before starting.
- Adjustable wrench, plumber’s tape
- Bucket, towels, safety gloves
- Water testing strips or TDS meter
- Replacement anode or sediment filter
Signs You Should Hire a Plumber Immediately
Red or brown tints, a foul odor, or cloudiness that does not clear after flushing indicate possible corrosion or bacterial contamination requiring professional attention.
Visible leaks, sudden pressure loss, or unusual banging or hissing from the water heater are further signs a plumber should be called immediately.
Note key details for the technician—when the symptoms started, frequency, recent maintenance, and any error codes or visible damage.
Red or brown tints, foul odor, or persistent cloudiness
Several signs—brownish or reddish discoloration, a persistent metallic or rotten-egg smell, or cloudiness that does not clear—indicate a problem with the water supply or the heater that warrants immediate professional attention.
These symptoms often signal corrosion, sediment buildup, bacterial contamination, or failing anode rods.
A plumber can test water, inspect the tank and piping, and recommend safe corrective actions such as flushing, repair, or replacement.
Leaks, pressure loss, or unusual noises from the heater
Noticeable leaks, sudden drops in water pressure, or new knocking, hissing, or rumbling noises from a hot water heater indicate mechanical failure or unsafe conditions that require immediate professional evaluation.
These signs may reflect leaking tanks, failed relief valves, sediment-induced overheating, or loose components.
Prompt technician intervention prevents water damage, scalding risk, and potential tank rupture; do not delay contacting a licensed plumber.
Diagnostic information to provide to a professional
When signs such as leaks, pressure loss, or new knocking noises appear, homeowners should prepare specific diagnostic details to share with a plumber to speed accurate assessment and repair.
Provide heater make, model, age, recent changes, water temperature settings, visible leaks, timing and frequency of cloudiness, photos or video, water test results if available, and any recent maintenance or disturbances to plumbing.
Preventive Tips to Keep Hot Water Clear Long-Term
Long-term clarity of hot water is best maintained through consistent preventive measures that address both equipment and supply.
Recommended actions include scheduling routine checks, monitoring and treating water quality, and making targeted upgrades to plumbing or the water heater.
Examples to contemplate:
- Annual water heater flushing and inspection
- Regular testing for minerals and sediments with treatment as needed
- Installing anti-corrosion anodes or sediment-reducing filters
- Upgrading to a tankless or higher-quality storage heater
Regular maintenance schedule
A simple, consistent maintenance schedule is the most effective way to prevent cloudy hot water and extend the life of a water heater. Routine tasks should include annual inspections, periodic flushing to remove sediment, regular anode rod checks or replacements, and water quality testing every six to twelve months.
Document dates, actions, and observations; schedule professional service as needed and replace parts promptly to avoid performance decline.
Water quality monitoring and treatment
Monitor water quality regularly and treat issues promptly to prevent cloudiness from recurring. Testing for hardness, pH, dissolved solids, and iron provides the data needed to choose effective treatments such as water softening, filtration, or chemical adjustment.
Implement routine testing schedules, record results, and apply targeted solutions—ion exchange, activated carbon, sediment filters, or sequestrants—based on findings to maintain clear hot water long-term.
Upgrades that reduce future cloudiness
Building on routine testing and targeted treatments, homeowners can install upgrades that proactively reduce the conditions that cause cloudy hot water.
Recommended measures include a whole-house filtration system, water softener for hardness control, and a thermostatic mixing valve to stabilize temperature and prevent aeration.
Upgrading corroded plumbing, insulating hot-water lines, and fitting a larger-capacity, regularly flushed water heater further minimizes sediment and dissolved gas buildup.
Helpful Resources and Next Steps
Homeowners should record clear details—when the cloudiness occurs, water temperature, photos or video, and any unusual odors—to streamline service calls.
They can consult manufacturer manuals and vetted online guides for model-specific troubleshooting and maintenance steps.
After repair or replacement, use a brief checklist to verify water clarity, test temperature/pressure, and confirm warranty and service notes are filed.
How to document the problem for service calls
When preparing for a service call, the homeowner should collect clear, specific information about the cloudy hot water episode to speed diagnosis and repair.
Note dates, times, duration, affected taps, recent plumbing or water heater work, and water temperature.
Take photos or short video showing turbidity, run a cold versus hot comparison, record any odors or sediments, and list household water treatment devices and recent maintenance.
Recommended online guides and manufacturer manuals
After collecting detailed notes and photos for a service call, consult targeted references to determine likely causes and next steps.
Recommended resources include manufacturer owner’s manuals, troubleshooting sections, and official support pages for the specific water heater model.
Supplement with authoritative online guides from plumbing associations, university extension sites, and reputable DIY outlets.
Verify procedures, part numbers, safety warnings, and warranty implications before acting.
Checklist to follow after repair or replacement
A concise post-service checklist guarantees the water heater functions safely and that any corrective actions are complete.
The homeowner or technician should verify system integrity, test water clarity and temperature, confirm pressure relief operation, and document work. Follow-up reminders and spare-part notes aid future maintenance.
- Inspect for leaks and secure fittings
- Run hot water to check clarity
- Test temperature and pressure relief valve
- Record service details and parts used
Conclusion
After investigating the aeration theory, it becomes clear that trapped air often explains sudden cloudiness in hot water—tiny bubbles form when dissolved gases are released by heater temperature changes. While minerals or sediments can also cause persistent haze, the air-bubble explanation underscores the value of simple diagnostics: run a clear glass test and flush lines. If cloudiness persists or particles remain, one should pursue mineral treatment or professional inspection to address underlying causes.