How to Locate the Main Sewer Line: Step-by-Step Guide for Homeowners
To locate the main sewer line, follow the downhill flow from the lowest fixtures in your home toward the street or nearest municipal connection. Look for exterior cleanouts, capped pipes near the foundation, damp or lush soil, and nearby manholes. You can also probe gently with a utility rod, inspect the basement for stacks and exit points, and consult property plans or municipal maps. If you encounter any signs of damage or uncertainty, it’s best to hire a licensed plumber for a camera inspection. Further steps and tools are detailed below.
How to Tell Where Your Main Sewer Line Is Located
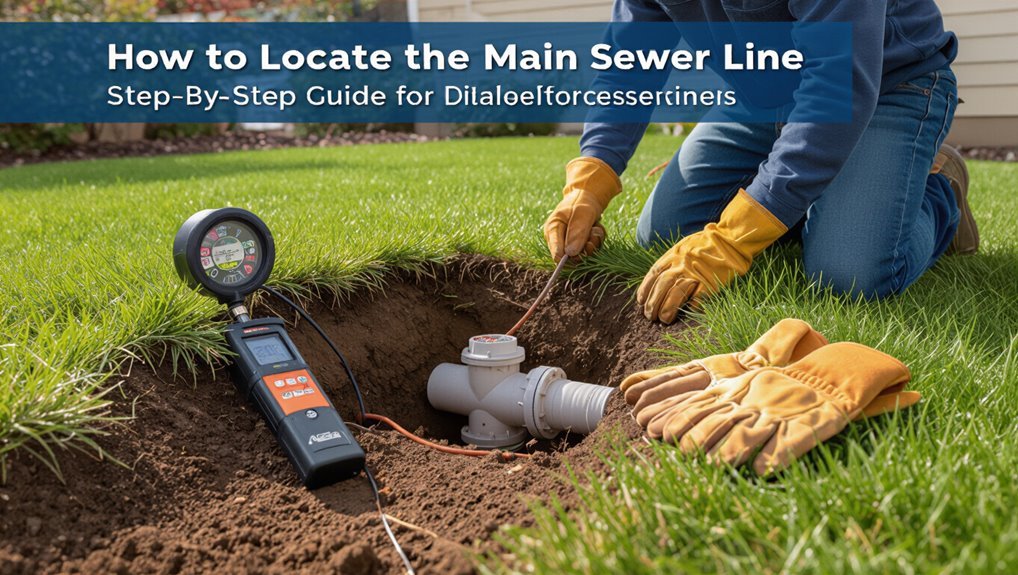
Typical sewer line locations vary by house type and region, often running from the lowest plumbing fixture toward the street or nearest municipal connection.
Property layout—such as slope, foundation type, and utility easements—frequently determines the pipe’s path across a yard.
Indicators like cleanout access, sewer odors, areas of persistent dampness, or patterns of sink and toilet backups can help pinpoint where the main line lies.
Typical sewer line locations for different house types and regions
Because building style, local codes, and terrain determine where sewer mains run, homeowners should expect different patterns depending on house type and region.
Urban rowhouses often tie to rear alleys or street mains; suburban detached homes usually route out front or side to curb mains; rural properties use longer lateral runs to septic or distant mains.
Guidance on how to locate main sewer line varies by locale.
How property layout affects sewer line placement
A property’s layout—lot size, house orientation, slope, and location of outbuildings—directly shapes where the main sewer line runs, since installers minimize excavation, follow natural grades for gravity flow, and avoid obstructions like driveways or tree roots.
Utility easements, property setbacks, and nearby municipal mains further constrain routing.
Landscaping, patios, and planned future structures are considered to reduce conflicts and repair disruption.
Signs your main sewer line is nearby
Knowing how a property’s features guide routing makes it easier to recognize where the main sewer line approaches the structure. Observable signs include a cleanout cap near the foundation, depressions or soggy ground following a straight path from the house, sewer odors outside, unusually lush grass strips, and utility maps or inspection reports indicating pipe alignment.
Neighbors’ sewer locations can also offer clues.
Quick checklist to find the main sewer line on your property
Before attempting to locate the main sewer line, the homeowner should assemble necessary tools and materials such as a tape measure, shovel, probe, and access to building plans.
Basic safety precautions—gloves, eye protection, checking for utility lines, and avoiding confined-space entry—must be observed, with immediate professional help sought for unclear layouts or signs of major damage.
This checklist frames the steps that follow and clarifies when to proceed independently versus when to call a licensed plumber or utility service.
Tools and materials to gather before you start
Several essential tools and a few common materials will make locating the main sewer line efficient and safe: a utility probe or locator, plumber’s snake or sewer camera, adjustable wrench and screwdriver set, tape measure and marking flags, protective gloves and eye protection, a flashlight or headlamp, and access to property plumbing plans or utility maps.
Also gather zip ties, chalk, plastic sheeting, and a notebook for notes.
Safety precautions and when to call a professional
Take basic precautions and prioritize safety when locating the main sewer line: wear gloves, eye protection, and a mask; avoid confined spaces; use non-contact tools first.
Suspend work if gas odors, standing sewage, or unstable ground appear.
Call a licensed plumber or utility locator for suspected leaks, unclear maps, deep excavation, or when local codes require permits.
Prioritize professional assessment for risk.
Step-by-step method to locate the main sewer cleanout
The reader should begin by inspecting the exterior perimeter and following the downhill slope away from the house.
Attention is given to areas near the foundation and the point where the drain exits the structure to spot pipes or capped fittings.
Typical cleanouts, manholes, utility markers, and recorded easements serve as visible landmarks to confirm the main sewer cleanout location.
Inspect the exterior perimeter: follow the downhill slope
Starting at the highest point of the property, an inspector traces the ground’s natural downhill slope around the exterior perimeter to predict where the main sewer line exits the structure; sewer pipes follow gravity, so their path generally aligns with the steepest continuous decline toward the street or a lower easement.
The inspector notes low points, visible depressions, utility markers, and landscape grading changes that suggest buried pipeline alignment.
Check near the foundation and where the drain exits the house
After tracing the downhill grade around the yard, attention turns to the building itself, where the main sewer typically exits near the foundation.
Homeowners should follow the wall line, checking for small soil depressions, pipe stubs, or utility markers where the house drain penetrates.
Note pipe orientation, material, and slope; document locations for mapping and to inform professionals without disturbing landscaping.
Locate the sewer cleanout: typical appearances and placements
A cleanout provides direct access to the main sewer and is usually a capped vertical pipe, an angled plug, or a covered access box set near where the building drain leaves the foundation.
Homes often have it on exterior walls, in garage floors, or in landscaping close to the foundation.
It may be PVC, cast iron, or brass; look for a threaded cap or removable plug.
Using visible landmarks: manholes, utility markers, and easements
One clear way to pinpoint a main sewer cleanout is to work outward from visible public infrastructure—manholes, utility markers, and recorded easements—because these features often align with underground sewer routes and property service connections.
Inspect nearby manholes for flow direction, follow marker lines along streets, consult municipal easement maps, and trace likely service paths toward the property to locate the cleanout efficiently.
Using indoor clues to trace the main sewer line path
Indoor signs often reveal the route of the main sewer line by exposing basement or crawlspace pipes and any accessible cleanouts.
Observers can locate the main stack and note where branch connections join it to map the system.
Multiple simultaneous backups or gurgling sounds help pinpoint blockages and indicate whether the issue is near the house or farther along the main line.
Check basement or crawlspace for pipes and cleanouts
Inspect the basement or crawlspace for visible horizontal or vertical pipes and any capped or threaded fittings that indicate cleanouts.
The observer notes pipe sizes, materials, slope direction, and where lines exit the foundation. Cleanout access will often be near floor level or wall penetrations.
Photograph locations, record distances to fixed features, and mark probable sewer routing for outdoor verification without disturbing plumbing fixtures.
Identifying the main stack and its connection points
Several visual and auditory clues inside the building help locate the main soil stack and where branch lines tie into it.
Inspect wall chases, sewer vent risers, and exposed vertical runs in basements or closets. Note pipe diameter changes, cast-iron joints, and nearby cleanouts.
Trace visible branch angles toward the largest vertical pipe; labels, trap primers, and access panels also indicate connection points.
Interpreting multiple drain backups and gurgling sounds
When multiple fixtures back up or toilets gurgle across separate bathrooms, those symptoms often point to a shared obstruction further down the main sewer line rather than isolated trap or vent issues.
Homeowners should note timing, which fixtures and severity. Simultaneous backups, slow drains, and gurgling when another fixture runs indicate a main-line problem.
These clues guide camera inspection placement and plumber diagnostics.
Tools and techniques for precise locating
A range of tools and techniques can pinpoint a main sewer line with greater accuracy than indoor observations alone.
Professionals often use a plumber’s snake with a locator, camera inspections, and dedicated pipe locators or metal detectors, each with specific strengths and limitations.
Homeowners may try probing rods, dye tests, or water tests for simple checks, but these DIY methods have lower precision and should be used cautiously.
Using a plumber’s snake with a locator
Threading a powered plumber’s snake fitted with an electronic locator into the main sewer allows technicians to trace the pipe’s path and pinpoint blockages or breaks with accuracy.
The sonde emits a signal detected above ground, revealing depth and direction. Operators advance the snake, monitor signal strength, and mark findings.
This method complements surface utility maps and informs targeted repairs without excavation guesswork.
Sewer camera inspection: when and how to use it
Because visual confirmation often yields the clearest diagnosis, sewer camera inspection is deployed to identify blockages, cracks, root intrusion, and joint separations within the main line.
Technicians feed a waterproof camera via cleanout or access point, recording video and noting depth and distance.
Use when symptoms persist, after mechanical clearing, or before excavation.
Interpretation guides repair choice and limits unnecessary digging.
Pipe locators and metal detectors: pros and cons
Employing pipe locators and metal detectors helps pinpoint buried sewer lines and fittings without unnecessary excavation.
Electronic locators detect tracer signals from sondes or conductive pipes, offering accuracy and depth readings but requiring equipment and operator skill.
Metal detectors find ferrous fittings and cast-iron segments cheaply but miss plastic lines.
Both methods complement camera inspections; choice depends on pipe material, site conditions, and budget.
DIY methods: probing rods, dye tests, and water tests
Using simple tools and observational tests, a homeowner can often narrow the location of a main sewer line without heavy equipment.
Probing rods detect shallow pipe bedding; insert gently along expected runs, noting resistance changes.
Dye tests introduce nonstaining colored tracer into drains to confirm flow direction.
Water tests (bucket or hose) check connections and visible outlets for discharge timing and location.
Proceed cautiously to avoid damage.
Reading property plans and municipal records
The article explains how to extract sewer line locations and pipe run details from building plans and as‑built drawings.
It advises requesting sewer maps, permits, and service records from local municipal offices to confirm connections and pipe sizes.
It also highlights checking recorded easements and notes on shared sewer lines that may affect access and responsibility.
How to find sewer line information in building plans
Plans and municipal records hold the most reliable traces of a property’s sewer routing, showing line locations, pipe materials, diameters, invert elevations, and connection points.
Review site plans, as‑built drawings, and plumbing schematics for plan views and profiles. Note offsets from property lines, cleanouts, and manholes.
Cross‑reference legend symbols and scale bars. Photocopy or request certified copies for accurate field verification.
Requesting sewer maps and permits from local authorities
Begin by contacting the municipal public works or building department to request available sewer maps, permit files, and as‑built records for the property.
These documents often include plan sheets, permit applications, inspection reports, and flow or connection records that clarify ownership, pipe locations, and historical modifications.
Review record drawings, permit dates, inspection notes, and utility connection diagrams to pinpoint main line alignment, materials, and past repairs.
Understanding easements and shared sewer lines
When reviewing property plans and municipal records, readers should first identify recorded easements and any notes describing shared sewer branches, as these legal encumbrances determine access, maintenance responsibility, and permissible repairs.
Property plats, title reports, and utility agreements reveal servitudes, lateral connections, and joint-use clauses.
Confirm municipal right-of-way lines and seek clarification from the city engineer or a real estate attorney before intervening.
Common problems when locating the main sewer line and solutions
Locating the main sewer line often encounters obstacles such as missing or buried cleanouts, landscaping or hardscaping that obscures the route, and old or undocumented plumbing that contradicts records.
Professionals typically use a combination of physical probing, camera inspection, and utility maps to uncover buried access points and trace lines beneath patios or driveways.
When records are unreliable, systematic inspection and careful excavation guided by noninvasive locating tools help reconcile undocumented systems with on-site findings.
Missing or buried cleanouts: how to uncover them
Often hidden by soil, landscaping, or pavement, missing or buried cleanouts are a frequent obstacle to finding the main sewer line; uncovering them requires a systematic mix of visual inspection, utility maps, and careful excavation to prevent damage.
Technicians probe likely locations near the foundation and property line, use metal detectors or ground-penetrating radar if needed, and excavate slowly, exposing fittings without disturbing pipes or utilities.
Misleading landscaping, patios, or driveways covering the line
Although attractive landscaping, concrete patios, and paved driveways can blend seamlessly with a property, they frequently obscure or redirect access to the main sewer line, complicating location efforts.
Homeowners should inspect surface features, review as-built plans, probe gently at probable pipe alignments, and use noninvasive tools like ground-penetrating radar or sewer cameras.
Mark findings before any excavation to avoid damaging finished surfaces.
Dealing with old or undocumented plumbing systems
Many older homes contain plumbing layouts that diverge from current standards or lack any documentation, making main sewer line location unpredictable and time-consuming.
Professionals rely on camera inspections, smoke or dye testing, and careful probing to map unknown routes.
Historical records, neighbor comparisons, and cautious exploratory excavations reduce risk.
Patience and phased diagnostics prevent damage and reveal accurate line positions for repair or replacement.
When to hire a professional and what to expect
When persistent backups, foul odors, multiple slow drains, or visible pipe damage appear, a homeowner should stop DIY attempts and contact a licensed plumber.
Before the plumber arrives, asking about licensing and insurance, diagnostic methods (camera, locators), expected timeline, and any permit needs helps set clear expectations.
The homeowner should also request an estimate for locating and inspecting the main line and be prepared for common cost ranges and possible additional repair charges.
Signs you should stop DIY and call a licensed plumber
How can a homeowner tell that a problem has moved beyond do-it-yourself fixes?
Persistent backups, sewage odors, multiple drains clogged simultaneously, sewage surfacing in yard, or visible pipe damage indicate professional intervention.
A licensed plumber brings camera inspection, safe sewage handling, accurate diagnosis, and municipal permitting knowledge.
Homeowners should stop DIY when risks include contamination, structural harm, or when required tools and expertise exceed personal capability.
Questions to ask a plumber before they arrive
After recognizing that a sewer issue exceeds homeowner capabilities, it helps to prepare specific questions for the plumber before arrival.
Ask about licensing and insurance, expected diagnostic steps (camera inspection, locating), estimated response time, required access or permits, prevention recommendations, warranty on repairs, and cleanup responsibilities.
Request written estimates and confirmation of equipment and credentials to guarantee transparency and readiness.
Typical costs for locating and inspecting the main sewer line
Several common factors determine the cost to locate and inspect a main sewer line: property size, access difficulty, chosen diagnostic method (manual probe, electronic locating, or camera inspection), and regional labor rates.
Typical fees range from $100–$400 for simple locating, $300–$800 for camera inspections, and higher for complex access or repairs.
Hire a professional when persistent clogs, property damage risk, or unclear pipe paths occur.
Preventive steps and maintenance after locating the sewer line
Once the main sewer line has been located, the homeowner should mark and document its position on property plans and with durable surface markers.
A routine maintenance schedule—periodic professional cleaning and inspections—helps prevent blockages and identifies early wear.
Measures such as keeping trees and heavy equipment away from the line and addressing erosion can protect the pipe from root intrusion, crushing, or exposure.
Marking and documenting the main sewer line location
Clear, durable marking and thorough documentation of the main sewer line location protect future work and reduce the risk of accidental damage.
Homeowners should record GPS coordinates, measurements from fixed landmarks, and depth.
Install visible markers at property boundaries and note access points.
Store diagrams, photographs, and inspection reports with home records and share copies with contractors and utility services to prevent costly mistakes.
Regular maintenance: cleaning schedules and best practices
Establish a regular cleaning schedule to prevent blockages and extend the service life of the main sewer line.
Homeowners should flush lines annually with professional hydro-jetting or mechanical snaking depending on sediment and usage.
Schedule inspections every 1–3 years using camera surveys to detect buildup or damage.
Keep records of service dates, findings, and corrective actions to guide future maintenance and budgeting.
Protecting the sewer line from roots, heavy loads, and erosion
Protecting a located main sewer line requires targeted measures to prevent root intrusion, avoid excessive surface loads, and minimize erosion around the pipe trench.
Install root barriers, maintain a buffer of noninvasive plants, and schedule periodic inspections with mechanical root cutting or chemical treatments as appropriate.
Reinforce cover with compacted fill, protective plates, or concrete pads where traffic occurs, and stabilize slopes with vegetation or riprap.
Comparison of locating methods and recommended use cases
A concise comparison of common locating methods helps professionals choose the right approach for cost, accuracy, invasiveness, and typical scenarios. The table below summarizes these factors for quick reference and decision-making. Following the table, each method can be matched to recommended use cases based on site conditions and project constraints.
| Method | Key Points |
|---|---|
| Acoustic/Listening | Low cost, moderate accuracy, noninvasive — good for simple blockages in shallow lines |
| Camera Inspection | Moderate cost, high accuracy, minimally invasive — best for internal line condition assessment |
| Ground Penetrating Radar (GPR) | High cost, variable accuracy, noninvasive — suitable for buried pipes under concrete or unknown utility layouts |
| Electromagnetic Locating | Moderate cost, high accuracy, minimally invasive — ideal when a tracer or sonde can be used to mark exact line path |
Quick-reference table: cost, accuracy, invasiveness, and best scenarios
When choosing a sewer-line locating method, homeowners and professionals benefit from a compact comparison that lists typical costs, relative accuracy, invasiveness, and the situations where each technique is most appropriate. The table below summarizes common options and recommended use cases.
| Method | Cost | Best scenarios |
|---|---|---|
| Camera inspection | Medium | Suspected blockage, internal inspection |
| Electronic tracing | Low–Medium | Underground route mapping |
| Ground-penetrating radar | High | Complex sites, deep utilities |
Conclusion
Locating the main sewer line empowers homeowners to prevent costly emergencies. Studies show roughly 40% of older homes experience sewer backups at least once, underscoring the value of knowing pipe locations. By following the checklist, using indoor clues, applying simple tools, and recognizing common pitfalls, most owners can identify the cleanout or pipe route. When uncertainty or complexity arises, engaging a professional guarantees accurate locating and safe maintenance for lasting sewer health.